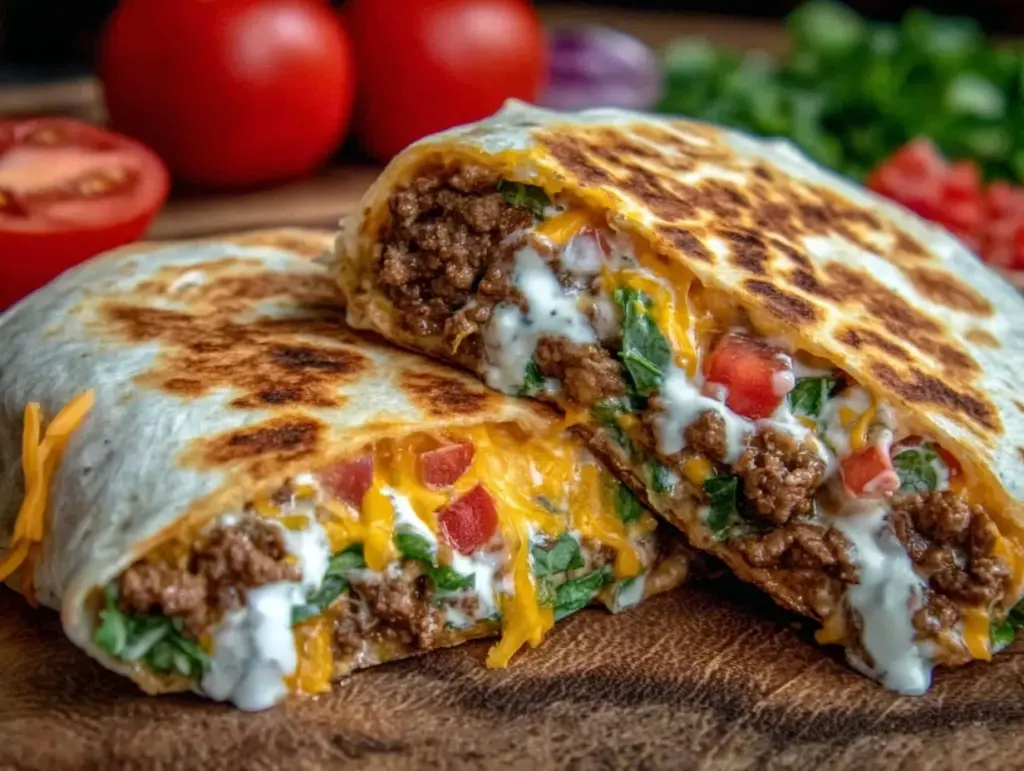
“You sure this isn’t from the taco place down the street?” my roommate asked, eyeing the golden, crunchy layers of my homemade Crunchwrap Supreme. Honestly, I wasn’t convinced myself the first few times I made this crispy better than takeout Crunchwrap Supreme with beef. It all started on one of those evenings when I was too tired to deal with delivery but craving that familiar, satisfying taco joint flavor. I grabbed what was in the fridge and just started layering—beef, cheese, lettuce, the works—then pan-fried the whole thing, expecting a decent dinner at best.
But as I bit into that crispy, warm wrap, something about the crunch combined with the juicy beef filling stopped me mid-chew. It wasn’t just good—it was better than the takeout I’d been ordering for years. That first accidental win turned into a week-long obsession. I made this crunchy beef Crunchwrap nearly every night, tweaking the seasoning and the layering until it felt just right.
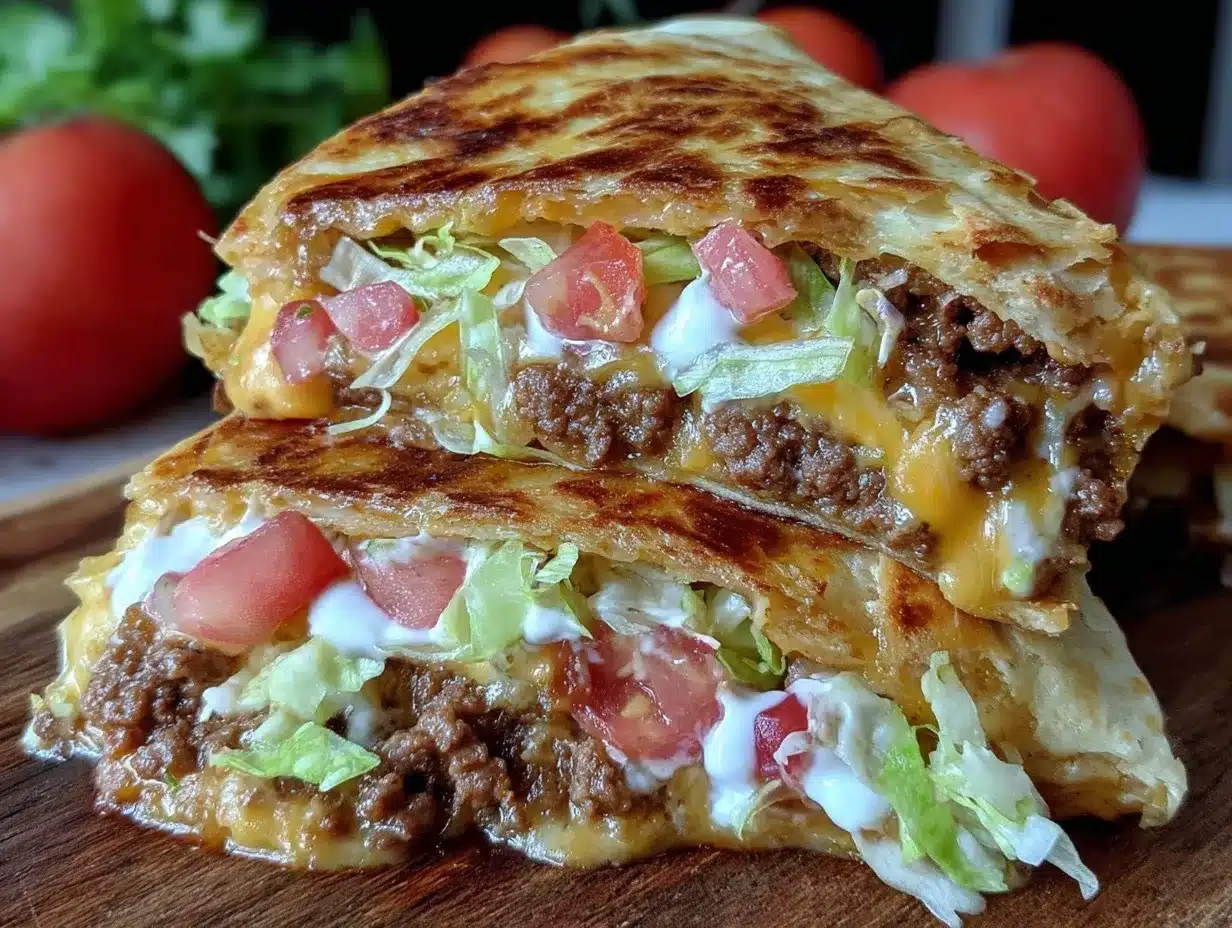
What really stuck with me is how this recipe somehow manages to hit all the right notes: crispy edges, melty cheese, savory beef, and fresh crunch from the lettuce, all wrapped up in a warm, toasty tortilla. It’s the kind of meal that satisfies that fast-food craving but feels homemade and way more satisfying. Plus, it’s quick enough for a busy weeknight, but fancy enough to impress when friends drop by unexpectedly.
So, if you’ve ever found yourself staring at a takeout menu, wondering if you can recreate that perfect Crunchwrap Supreme at home, this recipe might just become your new go-to. It’s a quiet little victory in the kitchen that reminds you homemade can be just as crave-worthy, if not more.
Why You’ll Love This Recipe
This crispy better than takeout Crunchwrap Supreme with beef isn’t just another copycat recipe; it’s a tried-and-true formula that’s been tested more times than I can count. Here’s why it’s worth making:
- Quick & Easy: Ready in under 30 minutes, it fits perfectly into busy weeknights or those spontaneous taco cravings.
- Simple Ingredients: No need for a special trip — you probably have everything in your pantry and fridge already.
- Perfect for Casual Gatherings: Whether it’s game night or an impromptu hangout, it’s a crowd-pleaser that doesn’t stress you out.
- Crowd-Pleaser: Kids, adults, picky eaters — everyone loves the combination of crispy, cheesy, and beefy goodness.
- Unbelievably Delicious: That crispy tortilla with the melty cheese and perfectly seasoned beef? It’s comfort food with a bit of attitude.
What sets this recipe apart is the technique of pan-toasting the Crunchwrap until every edge is perfectly crisp, which locks in the juicy, flavorful beef and keeps the layers from getting soggy. Plus, the seasoning blend I use is balanced so it tastes fresh, not overly spicy or salty, which I’ve learned from many trial runs and tweaks.
Honestly, this isn’t just about making a meal—it’s about transforming a fast-food favorite into something that feels homemade and way more rewarding. You’ll find yourself closing your eyes after the first bite, savoring that satisfying crunch and rich beef flavor that feels like a little win in the kitchen.
What Ingredients You Will Need
This recipe uses simple, wholesome ingredients to deliver bold flavor and satisfying texture without the fuss. Most are pantry staples or easy to find at any grocery store.
- For the Beef Filling:
- 1 pound (450 g) ground beef, preferably 80/20 for juiciness
- 1 tablespoon olive oil
- 1/2 cup (120 ml) water or beef broth (adds moisture)
- 1 packet taco seasoning (or homemade blend: chili powder, cumin, paprika, garlic powder, onion powder, salt, pepper)
- For the Crunchwrap:
- 6 large flour tortillas (10-12 inch diameter)
- 6 tostada shells (store-bought or homemade for extra crunch)
- 1 cup (120 g) shredded cheddar cheese
- 1 cup (120 g) shredded Monterey Jack cheese
- 1 cup (120 g) shredded iceberg lettuce
- 1/2 cup (120 g) diced tomatoes or pico de gallo
- 1/2 cup (120 ml) sour cream or Greek yogurt (for topping)
- Optional: sliced jalapeños for a spicy kick
Ingredient Tips: I recommend using fresh, high-quality shredded cheese for melty goodness — brands like Tillamook or Sargento work great. For the beef, leaner blends can dry out, so the 80/20 ratio helps keep it juicy. If you want a gluten-free option, swap the flour tortillas with gluten-free wraps or large corn tortillas, though the texture will differ. You can also swap sour cream with a dairy-free alternative if needed.
Fresh iceberg lettuce adds the perfect crunch contrast to the crispy tortilla and warm beef. If in season, adding fresh pico de gallo instead of plain diced tomatoes amps up the flavor.
Equipment Needed
- Large non-stick skillet or cast-iron pan (for crisping the Crunchwrap)
- Medium sauté pan (for cooking the beef)
- Spatula or wooden spoon (to break up the beef)
- Cheese grater (if shredding cheese yourself)
- Measuring cups and spoons
For crisping, I prefer a cast-iron skillet because it holds heat evenly and produces that beautiful golden crunch. However, a good non-stick skillet works just fine and makes flipping easier. If you don’t have tostada shells, you can crisp your own by baking corn tortillas in the oven until crunchy.
Maintenance tip: If using cast iron, remember to season it regularly to keep it non-stick and rust-free. A well-seasoned pan will make cooking and cleanup a breeze.
Preparation Method
- Prepare the Beef Filling (10-12 minutes): Heat 1 tablespoon olive oil in a medium sauté pan over medium-high heat. Add the ground beef and cook, breaking it up with a spatula, until browned and no longer pink—about 6-8 minutes. Drain excess grease if needed.
- Add 1/2 cup water or beef broth along with the taco seasoning packet (or your blend). Stir well to combine. Simmer for 3-4 minutes until the liquid reduces and the beef is well coated with seasoning. Remove from heat and set aside.
- Assemble the Crunchwrap (5 minutes per wrap): Lay a large flour tortilla flat. In the center, spread about 1/4 cup (60 ml) sour cream or Greek yogurt in a circular shape (this helps seal the layers).
- Add 1/3 cup seasoned beef on top of the sour cream.
- Sprinkle a mix of shredded cheddar and Monterey Jack cheese (about 1/4 cup or 30 g of each) on the beef.
- Place a tostada shell (or crunchy corn tortilla) right over the cheese layer.
- Add a handful of shredded lettuce and diced tomatoes on the tostada shell.
- Bring the edges of the flour tortilla up and over the filling, folding them toward the center to create pleats, forming a circular sealed wrap. It’s okay if it looks a bit rustic—press gently to secure.
- Cook the Crunchwrap (4-6 minutes per side): Heat your skillet over medium heat and lightly grease with a small amount of oil or non-stick spray.
- Place the assembled Crunchwrap seam-side down in the skillet. Cook for 4-6 minutes until the bottom is crispy and golden brown. Carefully flip and cook the other side another 4-6 minutes until crisp and cheese is melted inside.
- Remove from heat and let rest for a minute before slicing in half. Serve warm with extra sour cream or salsa on the side.
Pro tip: If your tortilla cracks while folding, warm it slightly in the microwave for 10 seconds to make it more pliable. The key is moderate heat on the skillet—too hot and it burns before melting the cheese.
Cooking Tips & Techniques
For the crispiest Crunchwrap, a cast-iron skillet is your best friend, but any heavy-bottom pan will do. Make sure to preheat the pan fully before adding your wrap; this helps form that golden crust right away. I like to use just a light spray of oil—too much can make the wrap greasy.
One mistake I made the first few times was overstuffing the wrap, which made folding tricky and sometimes caused tearing. Keep the fillings balanced—too much beef or cheese can spill out and make crisping messy.
Another tip: don’t rush flipping. Use a large spatula and go slow to keep the Crunchwrap intact. If you have trouble flipping, you can press it gently with a spatula to help seal and crisp the edges.
Timing matters too—multitask by cooking the beef while prepping toppings so you can assemble quickly. The cheese inside melts best if the wrap spends enough time on the heat, so resist the urge to turn up the flame and instead cook a bit slower for even melting.
Variations & Adaptations
- Vegetarian Version: Swap the beef for seasoned black beans or sautéed mushrooms with taco seasoning for a meatless but still hearty option.
- Spicy Kick: Add pickled jalapeños inside or mix hot sauce into the beef filling. You can also sprinkle some cayenne pepper into the seasoning blend.
- Low-Carb Option: Use large low-carb tortillas or lettuce wraps (though lettuce won’t crisp the same way). For crunch, bake pork rinds and crumble them inside.
- Cheese Variations: Try pepper jack or a smoky smoked gouda for a different flavor profile. Adding a little cream cheese in the mix creates extra richness.
- Cooking Method: Instead of pan-frying, assemble and bake in a preheated oven at 375°F (190°C) on a baking sheet for 12-15 minutes, flipping halfway for even crisping.
Once, I added some caramelized onions to the beef mix, and that sweet-savory combo was surprisingly addictive. Feel free to experiment with your favorite taco toppings or seasonings!
Serving & Storage Suggestions
Serve your Crunchwraps hot and crispy right off the skillet, paired with extra sour cream, salsa, or guacamole. They’re perfect for a casual dinner or game day spread, and go great with a side of savory jalapeño popper cheesy cornbread casserole to round out the meal.
If you have leftovers, wrap them tightly in foil or plastic wrap and refrigerate up to 2 days. To reheat, toast them in a skillet over medium heat for a few minutes on each side to bring back that crispiness. Avoid microwaving unless you want a soggy wrap!
Crunchwraps also freeze well—wrap individually and freeze for up to a month. Reheat in a toaster oven or skillet for best texture. Flavors meld nicely overnight, so prepping ahead can be a lifesaver for busy nights.
Nutritional Information & Benefits
Each Crunchwrap contains approximately:
| Calories | 550–600 kcal |
|---|---|
| Protein | 30 g |
| Carbohydrates | 40 g |
| Fat | 30 g |
| Fiber | 4 g |
The ground beef provides a good dose of protein and iron, while the lettuce and tomatoes add fresh fiber and vitamins. Using Greek yogurt as a sour cream substitute adds a protein boost with less fat. You can easily modify the recipe to fit gluten-free or low-carb diets by swapping tortillas and adjusting fillings.
From a wellness perspective, making this at home lets you control salt and fat levels, avoiding the preservatives and additives often found in takeout versions. Plus, cooking your own dinners like this helps break the cycle of fast-food reliance while still satisfying those crave-worthy flavors.
Conclusion
This crispy better than takeout Crunchwrap Supreme with beef is proof that you don’t need to sacrifice flavor or crunch when making your favorites at home. Between the crispy tortilla, juicy well-seasoned beef, and fresh toppings, it hits that perfect balance every time.
Feel free to make it your own—add spice, swap cheeses, or try a vegetarian twist. It’s forgiving and fun, a recipe that’s as much about the process as the delicious result.
I love this recipe because it turns a fast-food craving into a kitchen win without any stress. If you’ve enjoyed this, you might appreciate pairing it with my creamy peanut butter French silk pie for dessert—nothing like homemade comfort food all around.
Give it a try, and let me know how your Crunchwrap turns out—I’m always curious to hear your spin on this classic.
Frequently Asked Questions
Can I make Crunchwraps ahead of time?
Yes! You can assemble them, wrap tightly, and refrigerate for up to 24 hours before cooking. Just crisp them fresh in the skillet to keep that crunch.
What if I don’t have tostada shells?
No worries! You can bake corn tortillas in the oven at 400°F (200°C) for 5-7 minutes until crisp or substitute with crunchy lettuce for a lighter option.
Can I freeze assembled Crunchwraps?
Absolutely. Wrap each tightly in foil and freeze for up to a month. Reheat in a skillet or toaster oven for best texture.
How do I keep the tortilla from tearing when folding?
Warm the tortillas briefly in the microwave (about 10 seconds) to make them more flexible. Also, don’t overfill—less is more for easy folding.
Is there a vegetarian version of this recipe?
Definitely. Use seasoned black beans, lentils, or sautéed mushrooms instead of beef. Add your favorite veggies and cheese for a tasty meatless Crunchwrap.
Pin This Recipe!
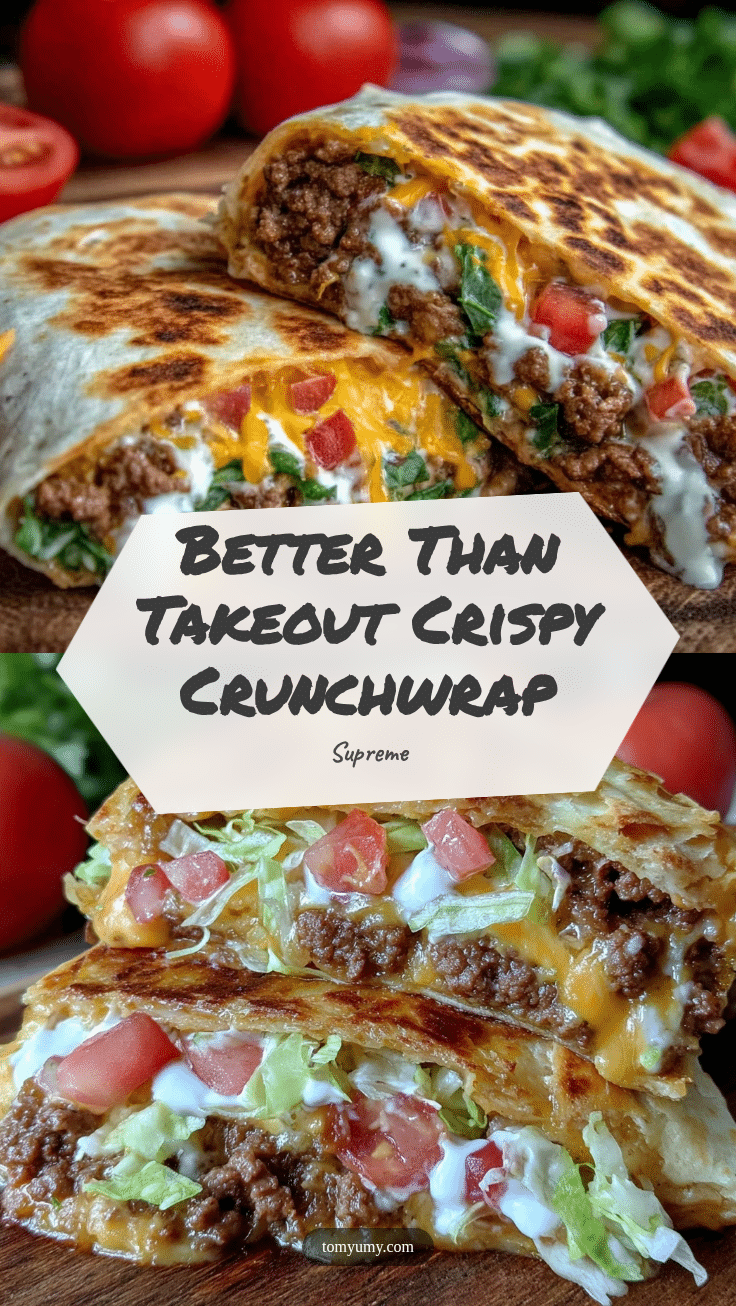
Crispy Better Than Takeout Crunchwrap Supreme with Beef

A homemade version of the classic Crunchwrap Supreme featuring crispy edges, melty cheese, savory beef, and fresh lettuce wrapped in a warm tortilla. Quick and easy to make, perfect for busy weeknights or casual gatherings.
- Prep Time: 15 minutes
- Cook Time: 15 minutes
- Total Time: 30 minutes
- Yield: 6 servings 1x
- Category: Main Course
- Cuisine: Mexican-inspired
Ingredients
- 1 pound ground beef (80/20 blend preferred)
- 1 tablespoon olive oil
- 1/2 cup water or beef broth
- 1 packet taco seasoning (or homemade blend: chili powder, cumin, paprika, garlic powder, onion powder, salt, pepper)
- 6 large flour tortillas (10–12 inch diameter)
- 6 tostada shells (store-bought or homemade)
- 1 cup shredded cheddar cheese
- 1 cup shredded Monterey Jack cheese
- 1 cup shredded iceberg lettuce
- 1/2 cup diced tomatoes or pico de gallo
- 1/2 cup sour cream or Greek yogurt
- Optional: sliced jalapeños
Instructions
- Heat olive oil in a medium sauté pan over medium-high heat. Add ground beef and cook, breaking it up with a spatula, until browned and no longer pink, about 6-8 minutes. Drain excess grease if needed.
- Add water or beef broth and taco seasoning. Stir well and simmer for 3-4 minutes until liquid reduces and beef is well coated. Remove from heat and set aside.
- Lay a large flour tortilla flat. Spread about 1/4 cup sour cream or Greek yogurt in a circular shape in the center.
- Add 1/3 cup seasoned beef on top of the sour cream.
- Sprinkle a mix of shredded cheddar and Monterey Jack cheese (about 1/4 cup of each) over the beef.
- Place a tostada shell over the cheese layer.
- Add shredded lettuce and diced tomatoes on top of the tostada shell.
- Bring the edges of the flour tortilla up and over the filling, folding toward the center to create pleats and form a sealed wrap. Press gently to secure.
- Heat a skillet over medium heat and lightly grease with oil or non-stick spray.
- Place the assembled Crunchwrap seam-side down in the skillet. Cook for 4-6 minutes until the bottom is crispy and golden brown.
- Carefully flip and cook the other side for another 4-6 minutes until crisp and cheese is melted inside.
- Remove from heat and let rest for a minute before slicing in half. Serve warm with extra sour cream or salsa.
Notes
Warm tortillas briefly in the microwave if they crack while folding. Use moderate heat to avoid burning before cheese melts. Avoid overfilling to prevent tearing. Cast-iron skillet preferred for best crispiness. Crunchwraps can be assembled ahead and refrigerated or frozen for later use.
Nutrition
- Serving Size: 1 Crunchwrap Supreme
- Calories: 575
- Sugar: 3
- Sodium: 700
- Fat: 30
- Saturated Fat: 12
- Carbohydrates: 40
- Fiber: 4
- Protein: 30
Keywords: Crunchwrap Supreme, beef, crispy, homemade, taco, easy dinner, weeknight meal, Mexican, pan-fried, cheesy


