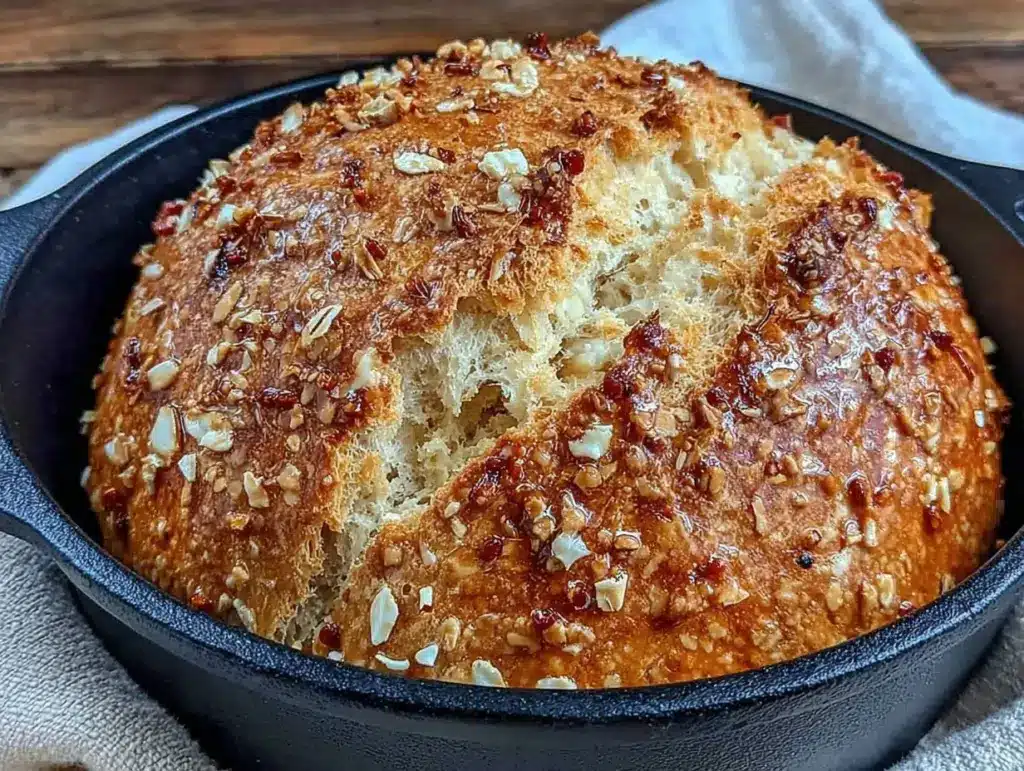
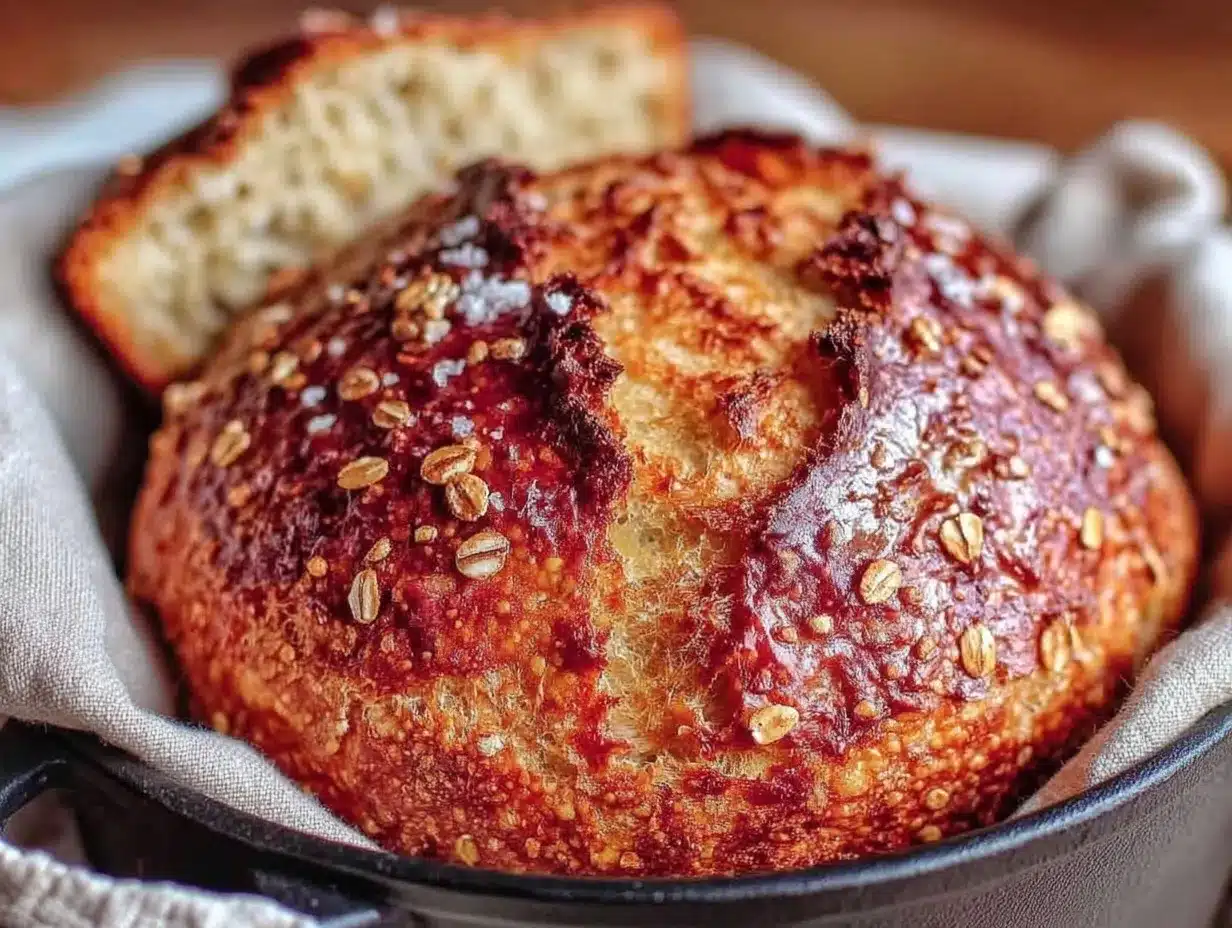
The first time I pulled this homemade wildflower honey oat Dutch oven bread from the oven, the aroma wrapped around me like a cozy blanket on a chilly morning. Honestly, I wasn’t expecting much—just a quick weekend experiment because my usual bread routine felt a bit stale. But as soon as I sliced into that golden crust and tasted the subtle sweetness from the wildflower honey, I thought, “How did I ever live without this?” The oats sprinkled on top added a rustic charm and a gentle chew that made every bite feel like a little celebration.
That day, the kitchen was quiet except for the crackling bread and the faint hum of the morning light slipping through the window. I remember thinking how this bread could quietly transform a rushed breakfast or a simple dinner into something unexpectedly comforting. It’s one of those recipes that sneaks up on you, becoming a favorite before you even realize it.
What’s special about this Dutch oven bread isn’t just the honey’s floral notes or the oats’ texture, but the way the Dutch oven creates this perfect crust—soft yet with just enough crunch to know it’s homemade. Plus, the whole process feels grounding, like a gentle reset after a busy day. This bread stuck with me, not because it’s fancy or complicated, but because it feels like a warm hug from the inside out.
Why You’ll Love This Recipe
After testing loads of bread recipes (some flops, some keepers), this homemade wildflower honey oat Dutch oven bread quickly became my go-to. It’s got that perfect balance of sweet and hearty, and the texture? Honestly, it’s like biting into a cloud wrapped in a cozy oat blanket.
- Quick & Easy: Thanks to the Dutch oven method, you get a bakery-quality crust and crumb in about 3 hours total, with plenty of hands-off time.
- Simple Ingredients: No need for fancy or hard-to-find items — just pantry staples and that lovely wildflower honey that brings a unique aroma and flavor.
- Perfect for Any Occasion: Whether it’s a lazy weekend brunch, a comforting dinner side, or a gift to a friend, this bread fits the bill.
- Crowd-Pleaser: Kids, adults, even the “not really a bread person” types tend to ask for seconds.
- Unbelievably Delicious: The soft crust and tender crumb, combined with the oat topping’s gentle chew, make it anything but ordinary.
This isn’t just your average homemade bread. The trick lies in the wildflower honey which adds a subtle floral sweetness that won’t overpower, paired with the oats that provide a rustic texture. Baking it in a Dutch oven traps steam perfectly, giving you that soft crust without the usual toughness. I’ve even swapped in honey in other recipes, like the creamy Greek honey cheesecake pie, and it never disappoints.
At the end of the day, this bread feels like a quiet little luxury—simple yet special enough to make you pause and savor. It’s the kind of recipe you’ll find yourself returning to on both hectic weeknights and relaxed Sundays.
What Ingredients You Will Need
This recipe uses simple, wholesome ingredients to deliver bold flavor and satisfying texture without the fuss. Most of these are pantry staples, and the wildflower honey is the star that lifts it all. Feel free to swap or tweak a few based on what you have.
- All-purpose flour – 3 ½ cups (420g), the foundation for a tender crumb.
- Rolled oats – ½ cup (45g), plus extra for sprinkling on top; adds rustic texture and nuttiness.
- Active dry yeast – 2 ¼ teaspoons (1 packet); activates the rise.
- Warm water – 1 ¾ cups (415ml), about 110°F (43°C), to wake up the yeast without killing it.
- Wildflower honey – 3 tablespoons; I recommend local varieties for the best aroma, but any wildflower honey works.
- Salt – 2 teaspoons; balances flavor and strengthens gluten.
- Olive oil – 2 tablespoons; keeps the crumb moist and adds subtle richness.
If you’re looking to customize, you might swap the all-purpose flour for bread flour for a chewier texture or use almond flour for a gluten-free twist (though it will change the rise). And if wildflower honey isn’t on hand, a mild clover honey can work, but it won’t have quite the same floral depth.
For the oats on top, I always prefer rolled oats over instant—they hold up better during baking and add a nice chew. Bonus tip: Toast your oats lightly before sprinkling for an extra nutty flavor (a trick I learned from my pumpkin spice molasses crinkle scones baking days).
Equipment Needed
To get that perfect crust and soft crumb, a few key tools make this recipe a breeze. Here’s what you’ll want:
- Dutch oven (at least 5-quart capacity) – This is the magic pot that traps steam, creating the ideal baking environment. If you don’t have one, a heavy oven-safe pot with a lid works too.
- Mixing bowls – For combining your dough ingredients comfortably.
- Wooden spoon or dough whisk – Great for stirring sticky dough without overworking it.
- Kitchen scale (optional but recommended) – For measuring flour and oats more precisely.
- Clean kitchen towel or plastic wrap – To cover the dough during rising.
- Bench scraper or spatula – Helpful for shaping and transferring dough.
If you’re on a budget, a heavy cast-iron skillet with a lid can substitute for a Dutch oven. Just watch your baking times closely. I’ve also found that a kitchen towel makes a surprisingly effective cover during the initial rise—keeps the dough cozy without sweating it.
Keep your Dutch oven well-seasoned and clean to avoid sticking. The one I use has been with me for years and still performs like a champ with minimal fuss.
Preparation Method
- Activate the yeast: In a large bowl, whisk together the warm water (1 ¾ cups / 415ml), wildflower honey (3 tablespoons), and active dry yeast (2 ¼ teaspoons). Let it sit for 5-7 minutes until the mixture is foamy and bubbly — this means the yeast is alive and ready.
- Mix dry ingredients: In a separate bowl, combine all-purpose flour (3 ½ cups / 420g), rolled oats (½ cup / 45g), and salt (2 teaspoons). Stir well to distribute evenly.
- Combine wet and dry: Pour the yeast mixture and olive oil (2 tablespoons) into the dry ingredients. Stir with a wooden spoon or dough whisk until a sticky, shaggy dough forms. It will be tacky but hold together.
- First rise: Cover the bowl with a clean kitchen towel or plastic wrap. Let the dough rise in a warm spot for about 1 ½ to 2 hours, or until doubled in size. You can test this by gently pressing your finger into the dough; if the indentation remains, it’s ready.
- Shape the dough: Lightly flour your work surface and hands. Turn the dough onto the surface, sprinkle a few oats on top, and gently shape it into a round loaf. Avoid overworking it; the goal is to keep the air bubbles intact for a tender crumb.
- Prepare the Dutch oven: Place your Dutch oven (lid on) in the oven and preheat to 450°F (232°C) for at least 30 minutes. This step is critical for the perfect crust.
- Bake the bread: Carefully remove the hot Dutch oven from the oven. Transfer the shaped dough into the pot — you can place it on a piece of parchment paper to make this easy. Sprinkle extra oats on top for a rustic look. Cover with the lid and bake for 30 minutes.
- Finish baking: After 30 minutes, remove the lid and bake for another 15-20 minutes, or until the crust is deeply golden and crisp. The internal temperature should read about 200°F (93°C) when done.
- Cool before slicing: Transfer the bread to a wire rack and let cool for at least an hour. This rest time lets the crumb set and flavors develop.
Pro tip: If your dough feels too sticky to handle during shaping, wet your hands slightly instead of adding more flour — this keeps the bread tender. Also, I like to double-check the oven temperature with an oven thermometer because every oven’s a little different.
Cooking Tips & Techniques
Making bread in a Dutch oven is a game-changer, but there are a few things I’ve learned the hard way that might save you some trouble.
- Don’t rush the rise: Patience is key. If your kitchen is chilly, find a warmer spot or let the dough rise longer. Underproofed dough won’t develop that lovely open crumb.
- Use parchment paper: It’s a life-saver when transferring dough to the hot Dutch oven, preventing any sticking or awkward handling.
- Handle hot equipment carefully: The Dutch oven is scorching hot when it comes out of the oven. Use thick oven mitts and place it on a heat-safe surface.
- Watch your bake times: Every oven bakes differently. If your crust is browning too fast, tent it with foil during the uncovered phase.
- Don’t skip the cooling step: I know it’s tempting to cut into warm bread, but letting it cool fully keeps the crumb from being gummy.
One time, I forgot to preheat the Dutch oven and ended up with a dense loaf. Lesson learned! Also, I keep a spray bottle handy to mist water inside the oven before baking if my Dutch oven isn’t sealed tightly — it helps with steam and crust development.
Variations & Adaptations
This recipe is a great base for experimenting. Here are some ways I’ve played around with it:
- Gluten-Free Version: Swap all-purpose flour for a gluten-free blend like Bob’s Red Mill 1-to-1, but add an extra egg or flax egg for structure.
- Seeded Oat Bread: Mix in sunflower seeds, flaxseeds, or chia seeds for extra crunch and nutrition—great for hearty sandwiches.
- Herb & Garlic Twist: Add 1-2 teaspoons of dried rosemary or thyme and a clove of minced garlic to the dough for a savory touch.
- Sweet Variation: Stir in ½ cup raisins or dried cranberries and a pinch of cinnamon for a slightly sweet loaf, perfect for breakfast.
I once added a swirl of cinnamon and honey before shaping, inspired by the warm spices in my pumpkin spice molasses crinkle scones. It was a hit with the family on a lazy Sunday morning.
Serving & Storage Suggestions
This wildflower honey oat Dutch oven bread shines best when served fresh and slightly warm. Try slicing it and spreading a little butter or cream cheese — the honey’s floral notes come alive that way. It also pairs wonderfully with soups, stews, or even alongside dishes like savory jalapeño popper cheesy cornbread casserole for a comforting meal.
To store, wrap the cooled bread tightly in plastic wrap or place it in an airtight container. It stays fresh for 2-3 days at room temperature. For longer storage, slice and freeze it in a sealed bag — toast slices straight from the freezer for best results.
When reheating, avoid the microwave if possible; instead, pop slices in the oven or toaster to revive the crust’s texture. Over time, the flavors mellow and meld, making the bread even more enjoyable the day after baking.
Nutritional Information & Benefits
One slice of this bread (about 60g) contains roughly:
| Calories | 150 |
|---|---|
| Carbohydrates | 28g |
| Protein | 4g |
| Fat | 2g |
| Fiber | 3g |
Wildflower honey offers antioxidants and trace minerals, while oats provide soluble fiber that’s great for heart health. This bread is naturally free from added sugars (besides honey) and can be adapted for gluten-free diets. Just watch for potential allergens like wheat and oats if you have sensitivities.
From my standpoint, having a wholesome, homemade bread option like this makes it easier to enjoy carbs guilt-free, especially compared to store-bought loaves full of preservatives.
Conclusion
This homemade wildflower honey oat Dutch oven bread isn’t just a loaf; it’s a little ritual, a slice of calm in a hectic day. Its soft crust, tender crumb, and gentle sweetness make it an easy choice when you want something comforting yet uncomplicated. I love how versatile it is, fitting seamlessly into breakfasts, dinners, or even simple snacks. Feel free to tweak the oats, honey, or add seeds to suit your taste — that’s the beauty of homemade bread.
Give this recipe a try, and I bet you’ll find yourself reaching for your Dutch oven more often. If you enjoy experimenting with flavors, you might also appreciate the balance of sweet and hearty in my creamy peanut butter French silk pie, which shares that same satisfying homemade vibe.
Let me know how your bread turns out — sharing stories and tweaks is part of the fun. Here’s to many cozy mornings and fragrant kitchens ahead!
FAQs
Can I use instant yeast instead of active dry yeast?
Yes, you can substitute instant yeast in the same amount. Just mix it directly with the dry ingredients without proofing in warm water.
What if I don’t have a Dutch oven?
A heavy oven-safe pot or cast-iron skillet with a tight lid can work. Make sure it’s preheated and traps steam well for best crust.
How do I know when the bread is fully baked?
Look for a deep golden crust and check the internal temperature with a thermometer — it should read around 200°F (93°C).
Can I make the dough ahead of time?
Absolutely. After the first rise, you can refrigerate the dough overnight, then shape and bake the next day. Just allow extra time for it to come to room temperature before baking.
Is it possible to make this bread dairy-free?
This recipe is naturally dairy-free as written, using olive oil instead of butter. Just be sure your honey and other ingredients fit your dietary needs.
Pin This Recipe!
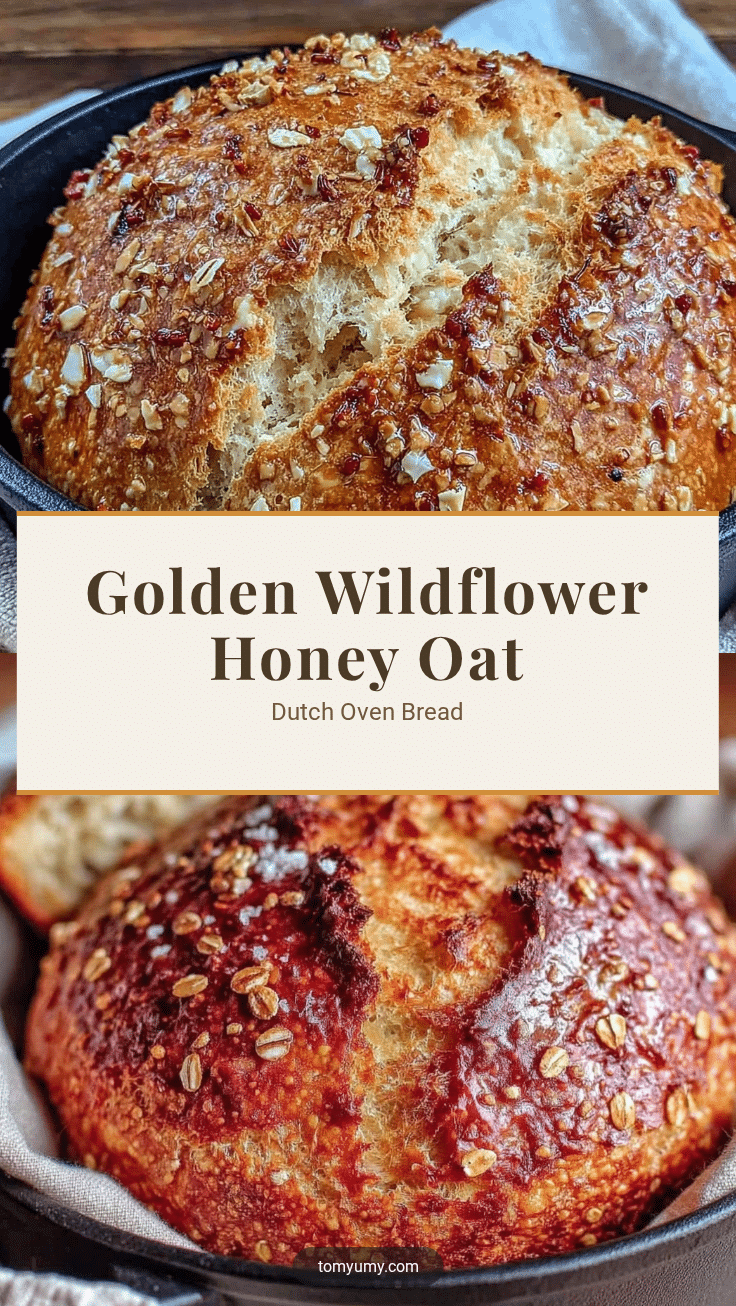
Homemade Wildflower Honey Oat Dutch Oven Bread
A soft crust, tender crumb bread with subtle floral sweetness from wildflower honey and rustic oats, baked in a Dutch oven for a perfect bakery-quality loaf.
- Prep Time: 15 minutes
- Cook Time: 50 minutes
- Total Time: 3 hours 15 minutes
- Yield: 1 loaf (about 8 servings) 1x
- Category: Bread
- Cuisine: American
Ingredients
- 3 ½ cups (420g) all-purpose flour
- ½ cup (45g) rolled oats, plus extra for sprinkling on top
- 2 ¼ teaspoons (1 packet) active dry yeast
- 1 ¾ cups (415ml) warm water (about 110°F / 43°C)
- 3 tablespoons wildflower honey
- 2 teaspoons salt
- 2 tablespoons olive oil
Instructions
- Activate the yeast: In a large bowl, whisk together the warm water, wildflower honey, and active dry yeast. Let sit for 5-7 minutes until foamy and bubbly.
- Mix dry ingredients: In a separate bowl, combine all-purpose flour, rolled oats, and salt. Stir well.
- Combine wet and dry: Pour the yeast mixture and olive oil into the dry ingredients. Stir with a wooden spoon or dough whisk until a sticky, shaggy dough forms.
- First rise: Cover the bowl with a clean kitchen towel or plastic wrap. Let the dough rise in a warm spot for 1 ½ to 2 hours, or until doubled in size.
- Shape the dough: Lightly flour your work surface and hands. Turn the dough onto the surface, sprinkle a few oats on top, and gently shape into a round loaf.
- Prepare the Dutch oven: Place the Dutch oven (lid on) in the oven and preheat to 450°F (232°C) for at least 30 minutes.
- Bake the bread: Remove the hot Dutch oven from the oven. Transfer the shaped dough into the pot (using parchment paper if desired). Sprinkle extra oats on top. Cover with the lid and bake for 30 minutes.
- Finish baking: Remove the lid and bake for another 15-20 minutes until the crust is deeply golden and crisp. Internal temperature should be about 200°F (93°C).
- Cool before slicing: Transfer the bread to a wire rack and let cool for at least an hour before slicing.
Notes
Use parchment paper to transfer dough to the hot Dutch oven to prevent sticking. Wet hands slightly when shaping dough if sticky instead of adding more flour. Preheat Dutch oven thoroughly for best crust. Let bread cool fully before slicing to avoid gummy crumb. If crust browns too fast, tent with foil during uncovered baking phase.
Nutrition
- Serving Size: 1 slice (about 60g)
- Calories: 150
- Fat: 2
- Carbohydrates: 28
- Fiber: 3
- Protein: 4
Keywords: wildflower honey bread, oat bread, Dutch oven bread, homemade bread, soft crust bread, easy bread recipe, rustic bread


