“You sure you want to use that old copper pot?” my sister asked, eyeing the slightly tarnished heirloom hanging above my stove. Honestly, I wasn’t convinced either when I first tried making strawberry preserves in it. But there was something about that pot—its weight, the way it conducted heat—that promised a different kind of magic. That afternoon, with the scent of fresh strawberries filling the kitchen and a single vanilla bean split open next to the stove, I found myself stirring slowly, watching the fruit transform.
The first batch was an accidental win—halfway through, I almost gave up because the sugar seemed too much, the simmer too slow. But the aroma, that warm vanilla whisper mingling with ripe berries, kept pulling me back. By the time the preserves thickened to that perfect jammy texture, I realized this wasn’t just any strawberry preserve recipe; it was the kind that made you pause, savor, and store away jars like little treasures.
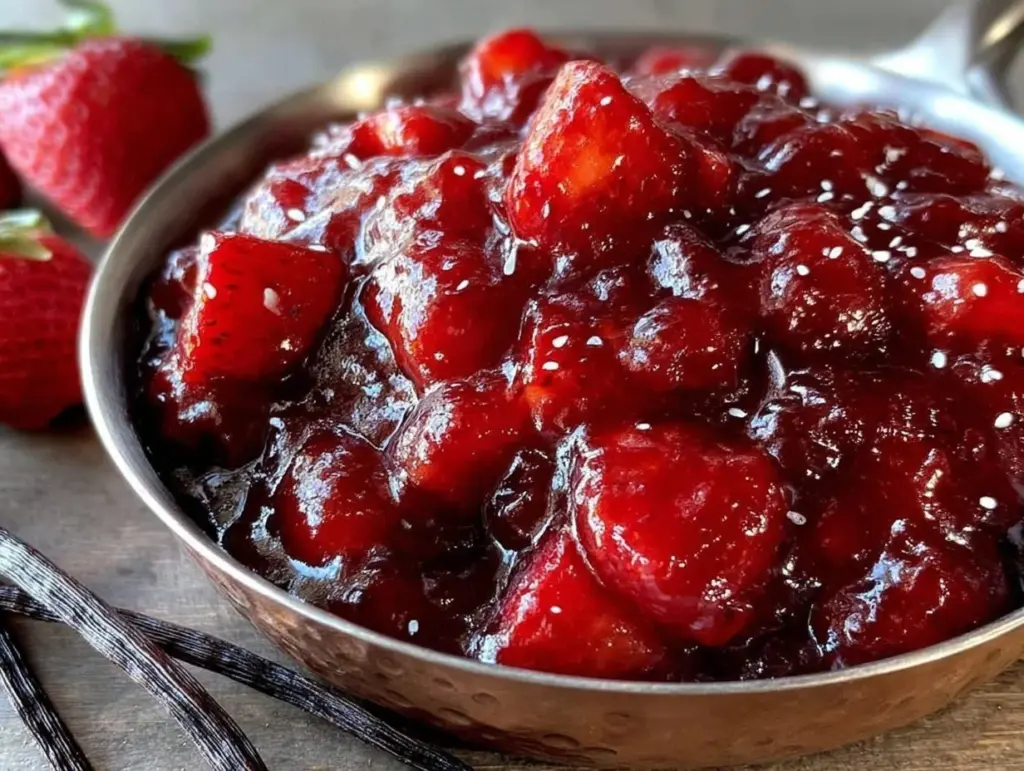
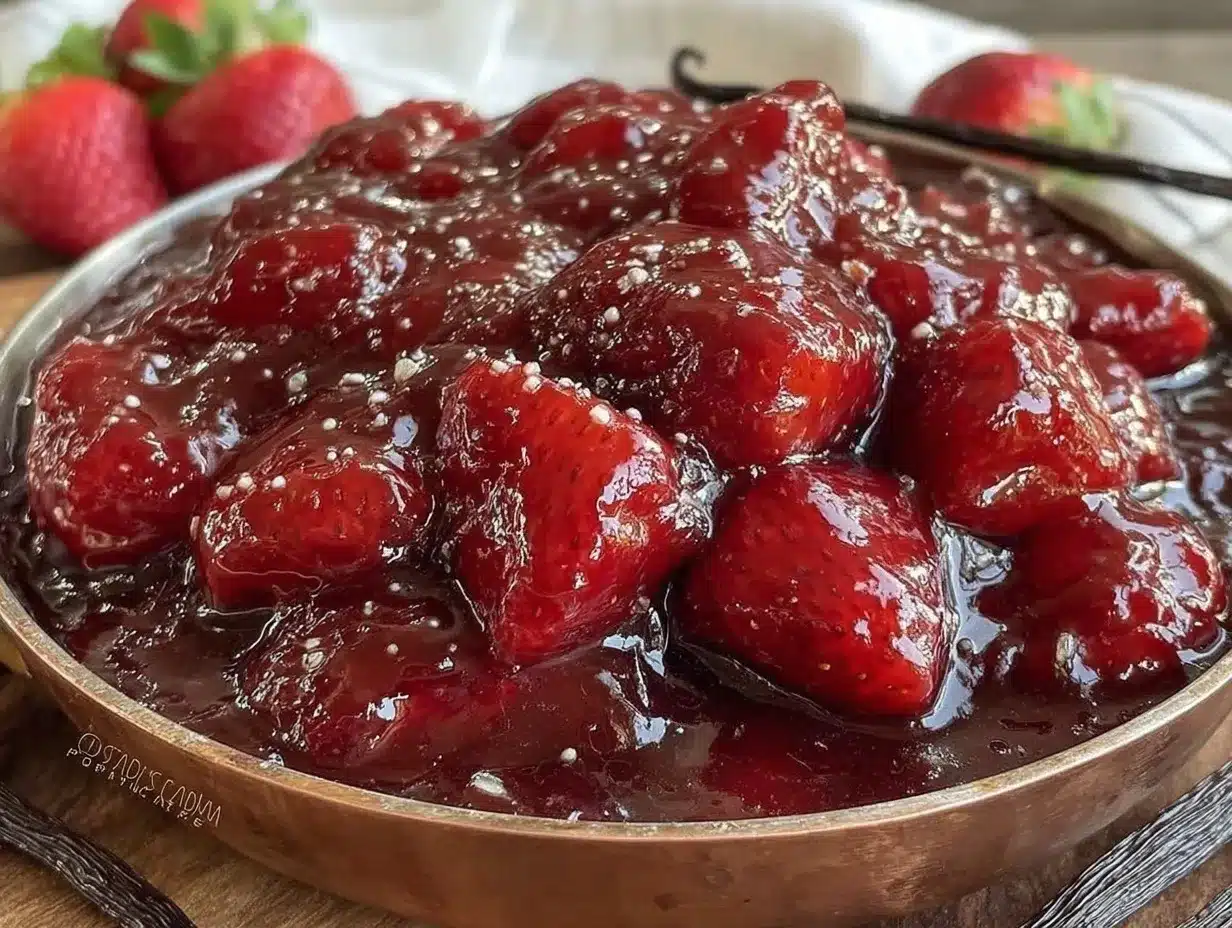
That copper pot has stayed on my stove since. It’s become the heart of this recipe, coaxing out the best from simple ingredients. The vanilla isn’t just a flavor—it’s a calm note among the fruity chorus, simmered gently alongside those sun-kissed strawberries. This recipe stuck because, well, it reminds me that sometimes great things come from slow moments and a bit of trust in old tools. So here’s how I make my perfect strawberry preserves simmered with vanilla in my cherished copper pot—no rush, just love and the sweet promise of summer kept year-round.
Why You’ll Love This Recipe
This perfect strawberry preserves recipe simmered with vanilla is a keeper for so many reasons. I’ve tested it over and over in my kitchen, tweaking the simmer times and sugar balance until it felt just right—trust me, it’s worth the patience.
- Quick & Easy: While it simmers for about 45 minutes, the hands-on time is minimal, making it doable even on a busy weekend afternoon.
- Simple Ingredients: You don’t need anything fancy—just fresh strawberries, vanilla, sugar, and a splash of lemon juice. I always go for organic berries when possible, but even store-bought work great.
- Perfect for Gifting or Breakfast: Whether it’s spread on toast, dolloped on yogurt, or jarred up for neighbors, it shines in cozy morning routines or casual gatherings.
- Crowd-Pleaser: Kids love the sweet-but-not-too-sweet taste, and adults appreciate the subtle vanilla depth—making it a hit at family brunches.
- Unbelievably Delicious: The copper pot trick isn’t just flair; it simmers the preserves evenly, giving that smooth, luscious texture that’s hard to beat.
This isn’t just another strawberry preserve recipe floating around. The slow simmer in copper allows the flavors to marry perfectly without scorching the fruit, and the vanilla bean adds a soft, fragrant layer that keeps everyone reaching for more. If you’ve enjoyed my brown butter strawberry peach pie, you’ll find this preserve the perfect companion or even a stellar topping.
What Ingredients You Will Need
This recipe uses simple, wholesome ingredients to deliver bold flavor and satisfying texture without the fuss. Most of these are pantry staples or easy to find at local markets, and a few tips on picking vanilla and strawberries can make a big difference.
- Fresh Strawberries – about 4 cups (800 g), hulled and halved or quartered depending on size (ripe, firm berries work best for a balanced texture)
- Granulated Sugar – 2 cups (400 g), adjust slightly for your sweetness preference
- Fresh Lemon Juice – 2 tablespoons (30 ml), to brighten flavor and help set the preserves
- Vanilla Bean – 1 whole bean, split and seeds scraped out (or 1 teaspoon pure vanilla extract as a last resort, but fresh bean is worth the extra step)
- Water – 1/4 cup (60 ml), just a splash to help start the simmer
I like to source my vanilla beans from Madagascar for that rich, floral aroma, but Mexican vanilla beans also add a lovely character. If you’re lucky enough to find small-curd strawberries locally, use those for a more tender preserve. For a less sweet option, reduce sugar by up to 1/4 cup and increase lemon juice by a teaspoon.
If you want to experiment, try swapping half the sugar for honey or coconut sugar—though the texture will shift a bit. And yes, you can use frozen strawberries in a pinch, but fresh is really what makes this recipe sing.
Equipment Needed
- Copper Pot: Ideally 2 to 3 quarts (2-3 liters); it promotes even heat distribution and prevents hotspots that burn preserves.
- Wooden Spoon or Heat-Resistant Silicone Spatula: For gentle stirring without scratching your pot.
- Sharp Knife: To hull and quarter strawberries and split the vanilla bean.
- Measuring Cups and Spoons: For precise ingredient amounts.
- Heatproof Bowls or Sterilized Jars: For storing your preserves after cooking.
- Optional: Candy Thermometer: Helpful if you want to check the jam’s setting point (around 220°F / 104°C), but not essential.
If you don’t have a copper pot, a heavy-bottomed stainless steel saucepan will do—just keep the heat moderate and stir often to prevent scorching. A wooden spoon has always been my favorite for stirring preserves; it feels sturdier and less prone to melting than silicone.
Preparation Method
- Prep the Strawberries (10 minutes): Rinse strawberries under cold water, hull them by cutting off the green tops, then halve or quarter depending on size. Set aside.
- Prepare the Vanilla Bean (5 minutes): Using a sharp knife, carefully split the vanilla bean lengthwise and scrape out the tiny seeds with the back of the knife. Set seeds and pod aside.
- Combine Ingredients in Copper Pot (5 minutes): Place strawberries, sugar, lemon juice, vanilla seeds, and the scraped pod into your copper pot. Add water to help start the cooking process.
- Initial Soak (15 minutes): Let the mixture sit at room temperature for about 15 minutes. This macerates the berries, drawing out juices and starting sugar dissolution—key for even simmering later.
- Simmer the Preserves (35-45 minutes): Set the pot over medium heat. Stir gently and frequently to prevent sticking or burning. You’ll notice the mixture bubbling and thickening; the aroma of vanilla will become more pronounced.
- Check for Setting Point: To test, place a small spoonful of preserves on a chilled plate. After a minute, push it with your finger—if it wrinkles and doesn’t flood back, it’s ready. If not, continue simmering, checking every 5 minutes.
- Remove Vanilla Pod and Jar (5 minutes): Once thickened, carefully remove the vanilla pod. Ladle the hot preserves into sterilized jars, leaving about 1/4 inch headspace. Wipe rims clean and seal.
- Cool and Store: Let jars cool completely at room temperature, then refrigerate or process in a water bath for longer storage.
During simmering, patience is key. The preserves will go from foamy and loose to thick and glossy. If you see any foam, skim it off—it keeps your preserves clearer. And don’t rush the stirring; gentle, consistent movement keeps the fruit whole but soft enough to spread.
Cooking Tips & Techniques
Cooking preserves can feel a bit intimidating, but a few tricks make all the difference. First, the copper pot is a game-changer for even heat—no scorched spots, just steady simmering. If you use stainless steel, keep the heat lower and stir more often.
One mistake I made early on was cranking the heat to speed things up. That just led to burnt sugar edges and bitter notes. Slow and steady is definitely the way to go.
Another tip: don’t skip the lemon juice. Besides brightening flavor, it helps the natural pectin in strawberries set the preserves better. You can even add a tiny pinch of commercial pectin if you want a firmer set, but I find the lemon juice enough.
When stirring, use a wooden spoon as it won’t conduct heat like metal, so your hand stays comfy longer. And if foam builds, skim it gently—this keeps the preserves clear and prettier in the jar.
Lastly, I like to sterilize jars by boiling them for 10 minutes beforehand. It’s a little extra work but worth it for safe, lasting preserves. This recipe pairs wonderfully with my creamy strawberry pretzel salad bars, where this preserve adds a fresh burst of flavor.
Variations & Adaptations
Once you’ve mastered the base, there’s room for some fun twists:
- Herbal Infusion: Add a sprig of fresh thyme or basil during simmering for subtle herbal notes. Remove before jarring.
- Low-Sugar Version: Cut sugar by one-third and add a pectin substitute to help with setting. The flavor will be less sweet but still vibrant.
- Spiced Strawberry Preserves: Toss in a cinnamon stick or a tiny pinch of ground ginger with the vanilla bean for cozy warmth—perfect for fall mornings.
- Different Fruit Blends: Mix in fresh peaches or raspberries for a seasonal twist. I’ve done this often with great success using equal parts fruit.
- Vegan-Friendly: This recipe is naturally vegan, but if you want to thicken without pectin, a small amount of agar powder works well.
I once tried stirring in a splash of balsamic vinegar at the end—it added an unexpected depth that paired amazingly with sharp cheeses. For a holiday twist, check out my salted caramel apple butter thumbprint cookies where preserves and caramel meet beautifully.
Serving & Storage Suggestions
Serve your strawberry preserves slightly chilled or at room temperature—spread thickly on warm toast, swirled into plain yogurt, or as a topping for pancakes and waffles. It’s also fantastic spooned over ice cream or dolloped on a slice of pound cake.
Store homemade preserves in sterilized, airtight jars. Refrigerate after opening and use within 3 to 4 weeks. Unopened jars can last up to a year in a cool, dark place, but always check for signs of spoilage before use.
To reheat, warm gently in a small pot on low heat, stirring to restore that pourable texture. Flavors often deepen a bit after a few days, so if you can wait, it’s worth it.
Pair your strawberry preserves with buttery biscuits or alongside a savory cheese plate for contrast. If you’re planning a brunch, these preserves add a perfect note, complementing dishes like a creamy lemon pie or spiced scones.
Nutritional Information & Benefits
This strawberry preserves recipe is naturally low in fat and packed with vitamin C from fresh strawberries. One tablespoon (about 20 grams) contains roughly 50 calories, mostly from natural sugars. The addition of lemon juice adds a touch of antioxidants and helps preserve freshness.
Since it’s homemade, you control the sugar level and avoid preservatives common in store-bought jams. It’s gluten-free, vegan, and can be adjusted for lower sugar diets.
The vanilla bean adds not only flavor but also trace amounts of antioxidants, supporting overall wellness. For those mindful of allergens, this recipe is free from nuts, dairy, and gluten, making it a friendly option for many.
Conclusion
Making perfect strawberry preserves simmered with vanilla in a copper pot is a rewarding ritual that turns simple fruit into a jar full of sunshine. It’s a recipe that invites patience but rewards you with rich flavor, beautiful texture, and a warm kitchen memory.
Feel free to tweak the sweetness or add your favorite spices—this preserve is as flexible as your taste buds allow. Personally, I love keeping a few jars on hand for spontaneous breakfasts or a sweet touch on desserts.
Let me know how your batch turns out, or if you try a new twist on this recipe. Sharing these moments of homemade goodness always makes the kitchen feel a little cozier.
FAQs
Can I use frozen strawberries for the preserves?
Yes, but fresh strawberries yield the best texture and flavor. If using frozen, thaw and drain excess liquid before cooking to avoid overly watery preserves.
Why is the vanilla bean important in this recipe?
The vanilla bean adds a natural, fragrant sweetness and complexity that vanilla extract can’t quite match. It makes the preserves feel more gourmet and layered.
How can I tell when the preserves are ready?
Use the chilled plate test: place a spoonful on a cold plate and push gently after a minute. If it wrinkles and doesn’t run, it’s set. Alternatively, a candy thermometer should read about 220°F (104°C).
Do I need to sterilize jars before storing preserves?
Yes, sterilizing jars by boiling them or running through a hot dishwasher cycle reduces spoilage and helps seals form properly, keeping your preserves safe longer.
Can I make this recipe without sugar?
Sugar helps with preservation and texture, but you can reduce it or substitute with natural sweeteners. Just note that the preserves may have a softer set and shorter shelf life.
Pin This Recipe!
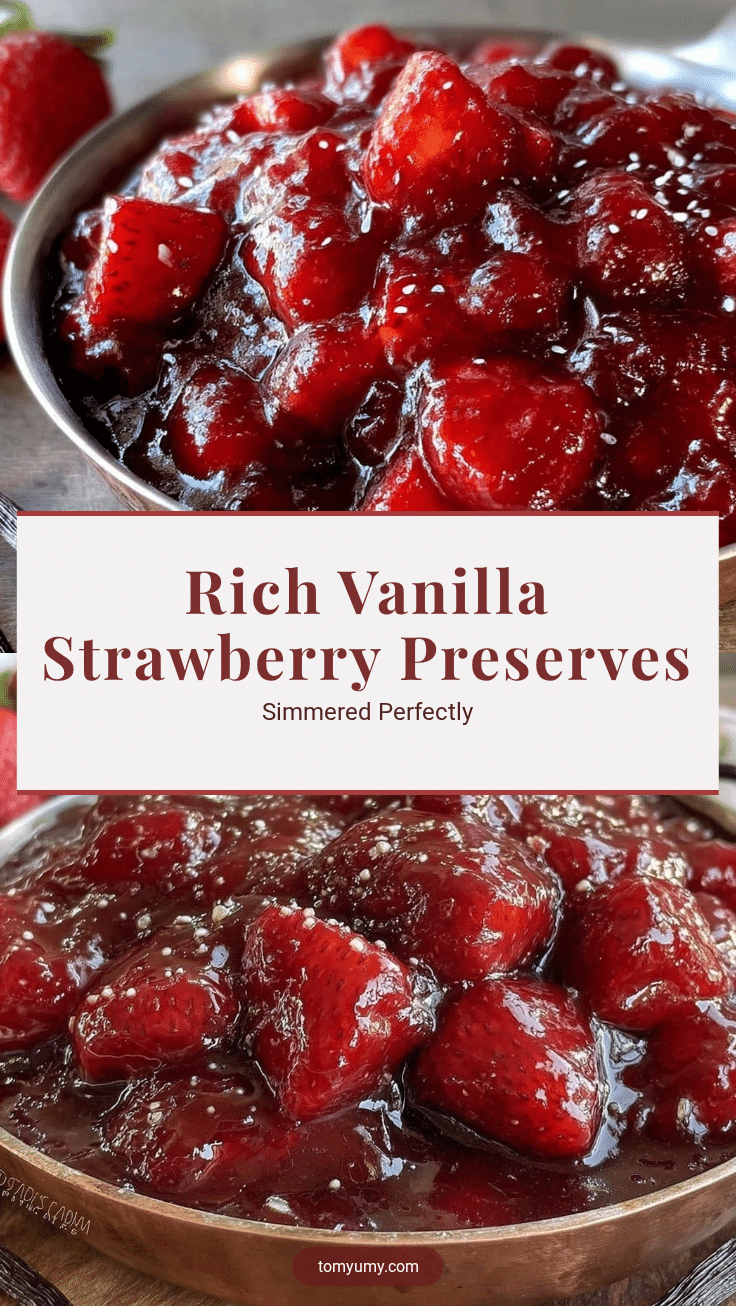
Perfect Strawberry Preserves Recipe Simmered with Vanilla in Copper Pot
A slow-simmered strawberry preserves recipe enhanced with vanilla bean, made in a copper pot for even heat and perfect texture. Ideal for spreading on toast, gifting, or adding to desserts.
- Prep Time: 20 minutes
- Cook Time: 45 minutes
- Total Time: 1 hour 5 minutes
- Yield: About 4 cups (approximately 8 servings) 1x
- Category: Preserves
- Cuisine: American
Ingredients
- 4 cups fresh strawberries (about 800 g), hulled and halved or quartered
- 2 cups granulated sugar (400 g), adjust to taste
- 2 tablespoons fresh lemon juice (30 ml)
- 1 whole vanilla bean, split and seeds scraped out (or 1 teaspoon pure vanilla extract)
- 1/4 cup water (60 ml)
Instructions
- Rinse strawberries under cold water, hull them by cutting off the green tops, then halve or quarter depending on size. Set aside.
- Using a sharp knife, carefully split the vanilla bean lengthwise and scrape out the tiny seeds with the back of the knife. Set seeds and pod aside.
- Place strawberries, sugar, lemon juice, vanilla seeds, and the scraped pod into your copper pot. Add water to help start the cooking process.
- Let the mixture sit at room temperature for about 15 minutes to macerate the berries and start sugar dissolution.
- Set the pot over medium heat. Stir gently and frequently to prevent sticking or burning. Simmer for 35 to 45 minutes until thickened and jammy, with a pronounced vanilla aroma.
- Test the setting point by placing a small spoonful of preserves on a chilled plate. After a minute, push it with your finger—if it wrinkles and doesn’t flood back, it’s ready. If not, continue simmering and checking every 5 minutes.
- Once thickened, carefully remove the vanilla pod. Ladle the hot preserves into sterilized jars, leaving about 1/4 inch headspace. Wipe rims clean and seal.
- Let jars cool completely at room temperature, then refrigerate or process in a water bath for longer storage.
Notes
Use fresh strawberries for best texture and flavor; frozen can be used if thawed and drained. Skim foam during simmering for clearer preserves. Slow and steady simmering prevents burning and bitterness. Lemon juice helps natural pectin set the preserves. Sterilize jars before filling for safe storage. Vanilla bean adds superior flavor compared to extract. Adjust sugar to taste or substitute with honey or coconut sugar, noting texture changes.
Nutrition
- Serving Size: 1 tablespoon (about
- Calories: 50
- Sugar: 12
- Carbohydrates: 13
- Fiber: 1
Keywords: strawberry preserves, homemade jam, vanilla bean, copper pot, easy preserves, fruit preserves, strawberry jam, slow simmer, breakfast spread


