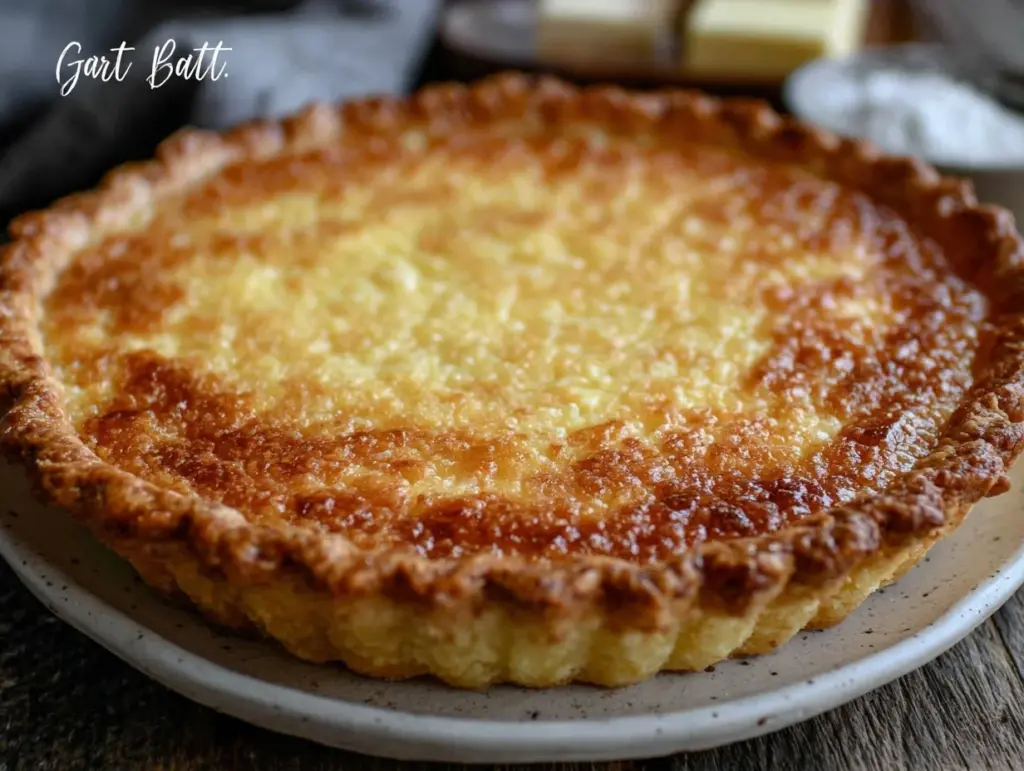
“You really think just butter will work for a crust?” my sister chuckled over the phone, skeptical as always. Honestly, I wasn’t sure myself when I first tried this tender butter-only pie crust. I’d been fiddling with pie dough recipes for years, usually juggling butter and shortening or other fats, chasing that perfect flaky-but-tender balance. But one evening, running low on pantry supplies and feeling a bit lazy, I tossed just butter, flour, a bit of salt, and a splash of ice water together. To my surprise, this simple combo actually came out better than I expected—light, buttery, and melt-in-your-mouth tender.
There’s something honest and straightforward about a pie crust made with only butter. No mystery ingredients, no complicated steps. It’s that comforting, golden base that holds everything together without stealing the spotlight. The first time I took it out of the oven, the smell alone made me pause—a warm, buttery aroma that filled the kitchen and reminded me of those quiet afternoons spent baking with my grandma, even if this crust was a modern shortcut compared to her flawless recipes.
Since then, I’ve made this crust multiple times a week, sometimes for quick fruit pies or for the decadent brown butter strawberry peach pie that everyone in the family raves about. It’s become my go-to when I want a reliable, tender crust without fussing over weird fats or fancy techniques. Plus, it’s surprisingly forgiving—if you mess up a little, it still bakes up beautifully.
This recipe quietly won me over with its simplicity and dependable results. If you’re like me, chasing that perfect homemade pie dough that actually works every time, this tender butter-only pie crust might just become your new favorite. No need to complicate things when buttery goodness does all the work.
Why You’ll Love This Recipe
This tender butter-only pie crust recipe is something I’ve tested and tweaked until it felt just right for home bakers and dessert lovers alike. It’s not just another pie crust recipe—it’s one that honestly works and tastes like a dream.
- Quick & Easy: Comes together in about 15 minutes, perfect for those busy weeknights or spontaneous baking urges.
- Simple Ingredients: Butter, flour, a pinch of salt, and ice water—no need to hunt down specialty fats or additives.
- Perfect for Any Pie: Whether you’re making a fresh fruit pie or a creamy filling like in the peanut butter French silk pie, this crust holds up beautifully.
- Crowd-Pleaser: It’s buttery and tender but with just enough structure to impress guests without overwhelming the fillings.
- Unbelievably Delicious: The pure butter flavor shines through, creating that flaky, tender texture you crave in a pie crust.
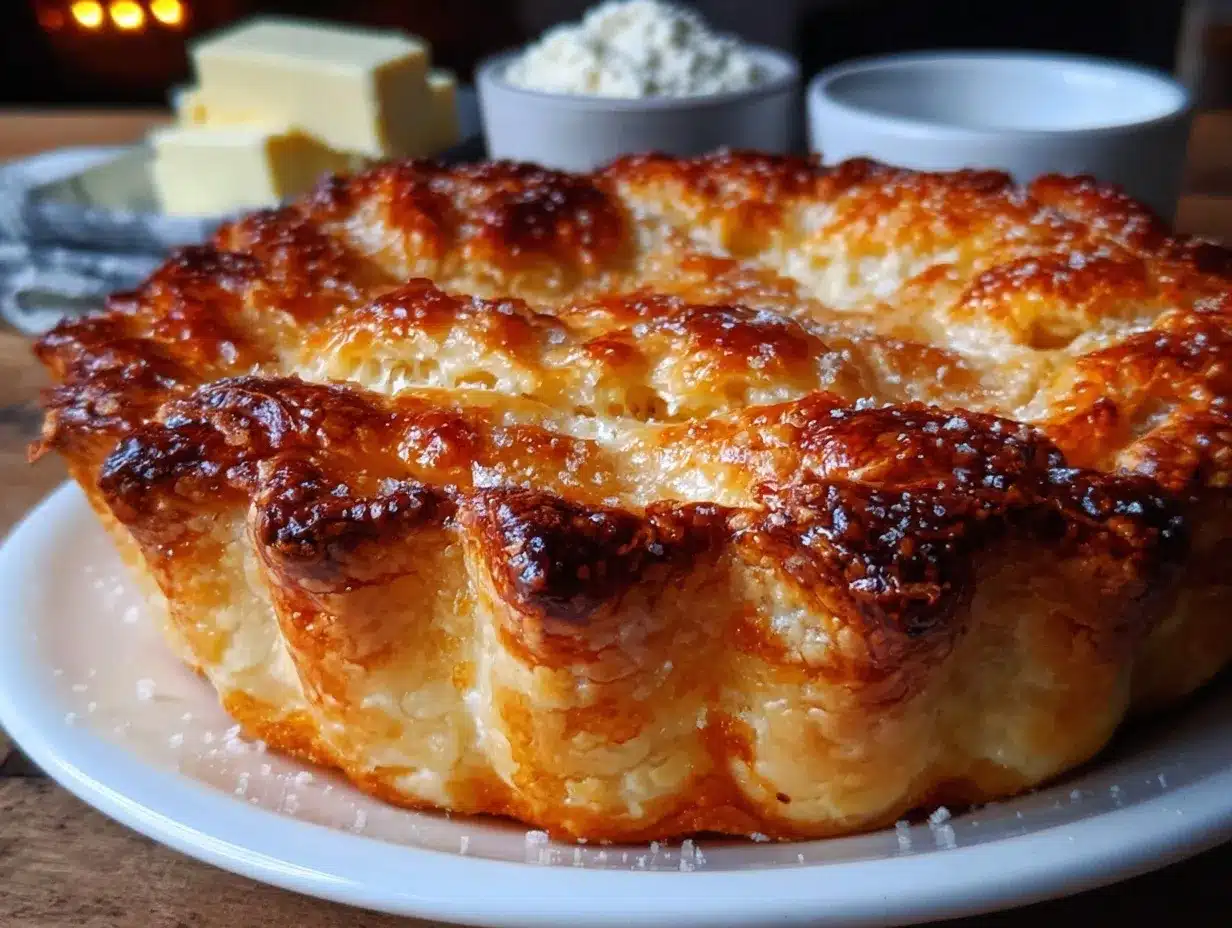
What sets this recipe apart is the exclusive use of butter, which gives it a rich, clean flavor and delicate crumb. The secret is in the cold ingredients and gentle handling, which keeps everything tender without turning tough. Plus, it’s flexible enough to work for hand pies, tarts, or even savory quiches.
I love that this crust isn’t just a base but a key player in the pie’s success. It’s the kind of crust that makes you close your eyes and savor every bite, whether it’s filled with classic apple, a luscious pumpkin, or even a lighter cream filling.
What Ingredients You Will Need
This recipe sticks to the essentials to keep things simple and reliable. Each ingredient plays a crucial role in crafting that tender, buttery texture without fuss.
- All-Purpose Flour (2 ½ cups / 315g): The foundation of your crust. Look for a trusted brand like King Arthur for consistent results. You can substitute with pastry flour for an even more delicate crumb.
- Unsalted Butter (1 cup / 225g), cold and cubed: The star of the show. Using unsalted butter lets you control the salt level. I always use good quality butter like Plugrá or Kerrygold for that deep, creamy flavor.
- Fine Sea Salt (1 tsp): Just enough to enhance the butter’s flavor without overpowering. If using salted butter, reduce this slightly.
- Ice-Cold Water (6-8 tbsp / 90-120ml): Keeps the dough cold and helps bind it together. Add gradually until the dough just holds.
All these ingredients are pantry staples, so you won’t need to run out for anything special. The cold butter and water are key to preventing the crust from becoming tough, so keep them chilled before mixing.
If you want to try a gluten-free twist, I’ve had success swapping a portion of the flour with almond flour, though the texture will be slightly different. For dairy-free, use a high-quality vegan butter substitute, but the flavor won’t be quite the same.
Equipment Needed
- Mixing Bowl: A large one to comfortably toss the flour and butter together.
- Pastry Cutter or Food Processor (optional): A pastry cutter works great for hand-mixing butter into flour, but a food processor speeds things up if you’re in a hurry. I personally prefer the tactile feel of a cutter for better control.
- Measuring Cups and Spoons: For precise ingredient amounts.
- Plastic Wrap or Parchment Paper: For wrapping the dough before chilling.
- Rolling Pin: Essential for rolling out the dough evenly. I recommend a classic wooden pin, but silicone ones work too.
- Pie Dish: Use your favorite 9-inch (23cm) pie plate. Glass or ceramic works best for even baking.
If you don’t have a pastry cutter, two butter knives crossed work okay in a pinch. For rolling, chilling the dough in the refrigerator for at least 1 hour makes it easier to handle and prevents sticking.
Preparation Method
- Chill Your Butter & Water: Cut the unsalted butter into ½-inch cubes and place in the fridge. Keep your water in a small bowl over ice to stay very cold. This coldness is the secret to a tender crust.
- Mix Dry Ingredients: In a large bowl, combine 2 ½ cups (315g) all-purpose flour and 1 teaspoon fine sea salt. Stir briefly to distribute the salt evenly.
- Cut in Butter: Add the cold butter cubes to the flour mixture. Using a pastry cutter or your fingertips, quickly cut the butter into the flour until the mixture resembles coarse crumbs with some pea-sized pieces. Avoid overworking; you want visible butter lumps for flakiness.
- Add Ice Water Gradually: Drizzle 6 tablespoons (90ml) of ice water over the mixture. Gently mix with a fork or your hands until the dough begins to clump. If it feels dry, add more water, 1 tablespoon at a time, until the dough just holds together when pressed.
- Form the Dough: Gather the dough into a ball, then divide it in half. Flatten each half into a disk about 1-inch thick. Wrap each in plastic wrap and chill in the fridge for at least 1 hour, or up to 2 days. This resting time lets the gluten relax and the butter firm up.
- Roll Out the Crust: Lightly flour your work surface and rolling pin. Take one dough disk and roll it out into a 12-inch (30cm) circle, turning occasionally to prevent sticking. If the dough cracks, let it rest a few minutes to warm slightly, then continue rolling.
- Fit into Pie Dish: Carefully transfer the rolled dough to a 9-inch (23cm) pie plate. Press gently into place without stretching. Trim excess dough, leaving about a 1-inch overhang. Fold under the edges and flute or crimp as desired.
- Chill Before Baking: Pop the crust back in the fridge for 30 minutes to prevent shrinking during baking.
- Bake as Needed: For pre-baking (blind baking), line the crust with parchment and fill with pie weights or dried beans. Bake at 375°F (190°C) for 20 minutes, remove weights, then bake another 10 minutes until golden. For filled pies, follow your specific baking times.
Pro tip: When rolling, I like to keep a small bowl of flour nearby to dust the edges, preventing sticking and tearing. If the edges brown too fast, cover with foil halfway through baking.
Cooking Tips & Techniques
Getting a tender, buttery pie crust can be tricky, but these tips have saved me from many a crumbly disaster:
- Keep Everything Cold: Butter should be cold and water icy. Warm ingredients lead to greasy, tough dough.
- Don’t Overwork the Dough: Handling too much develops gluten, resulting in a chewy crust. Mix just until it comes together.
- Rest the Dough: Chilling prevents shrinkage and helps the butter solidify, creating those flaky layers.
- Use the Right Flour: All-purpose works well, but pastry flour can give a softer texture if you want extra tenderness.
- Roll with Care: Roll from the center outwards, turning the dough often to keep it even and prevent sticking.
- Blind Bake for Wet Fillings: Prevent sogginess by pre-baking the crust when using juicy fruit or custard fillings.
I’ve learned the hard way that rushing or skipping steps leads to a crust that tears or bakes unevenly. Patience in chilling and gentle hands make all the difference. Also, the first time I tried blind baking without pie weights, the crust puffed up like a balloon—lesson learned!
Variations & Adaptations
This butter-only pie crust lends itself to many fun twists, whether for sweet or savory pies:
- Herb-Infused Savory Crust: Add 1 tablespoon finely chopped fresh herbs like rosemary or thyme to the flour for a fragrant crust perfect for quiches or pot pies.
- Whole Wheat Blend: Substitute half the all-purpose flour with whole wheat for a nuttier flavor and more fiber. The crust will be slightly denser but still tender.
- Gluten-Free Version: Use a gluten-free all-purpose flour blend and add ½ teaspoon xanthan gum to mimic elasticity. Keep an eye on water amounts as gluten-free flours absorb differently.
- Spiced Sweet Crust: Stir in 1 tablespoon sugar and ½ teaspoon cinnamon or nutmeg for pies like pumpkin or apple, adding warmth and depth.
I once tried a brown butter spin on this crust, similar to the one in my brown butter strawberry peach pie, which added a rich, toasted note but required cooling the butter before mixing. It’s a fun variation for when you want to impress!
Serving & Storage Suggestions
This tender butter-only pie crust works beautifully warm or at room temperature. For serving, pair it with fresh whipped cream or a scoop of vanilla ice cream to complement the buttery crust and filling flavors.
If you have leftover crust dough, wrap it tightly and freeze for up to 3 months. Thaw in the fridge overnight before rolling out. Baked pies keep well covered at room temperature for 1 day, then refrigerated for up to 3 days.
To reheat slices, warm gently in a 325°F (160°C) oven for 10-15 minutes to bring back crispness—microwaving tends to soften the crust too much.
Flavors tend to meld and deepen if you make the pie a few hours ahead, especially with fruit fillings. The crust stays tender but firm, holding its shape without becoming soggy.
Nutritional Information & Benefits
Estimated per serving (1/8th of pie): approximately 250 calories, 15g fat, 25g carbohydrates, and 2g protein.
This pie crust’s main ingredient, butter, provides fat-soluble vitamins like A and E, and the all-purpose flour offers energy-giving carbohydrates. While it’s not low-calorie, using just butter without additional fats keeps the recipe straightforward and natural.
Because it contains gluten and dairy, it’s not suitable for those with allergies or intolerances, but the simple ingredient list makes substitutions easier than most mixed-fat crusts.
From a wellness perspective, I appreciate this crust for being made from recognizable ingredients—no preservatives or weird additives—and it pairs well with homemade fillings that can be packed with seasonal produce.
Conclusion
This tender butter-only pie crust recipe has won me over with its simplicity and reliable results. It’s a humble, buttery foundation that supports a wide range of pies, from fresh fruit to creamy classics, without fuss or fail.
Feel free to make it your own by adding herbs, spices, or swapping flours. I love how it consistently turns out tender and flaky, no matter the filling or occasion. Plus, it’s a joy to make when you want a pie dough that “actually works” without confusing steps.
If you’re curious about pairing this crust with luscious fillings, you might enjoy my take on the creamy peanut butter French silk pie or the seasonal charm of my pumpkin spice molasses crinkle scones.
Give this crust a try, and I’d love to hear about your pie adventures—share your adaptations, questions, or favorite fillings in the comments. Baking is better when we learn from each other!
FAQs About Tender Butter-Only Pie Crust
Can I make this pie crust ahead of time?
Yes! You can prepare the dough up to 2 days in advance and keep it wrapped in the fridge. For longer storage, freeze the dough for up to 3 months.
Why is my pie crust tough or crumbly?
Usually, toughness comes from overworking the dough or using warm butter. Crumbliness can happen if there’s not enough water or the dough wasn’t chilled properly.
Can I use salted butter instead of unsalted?
You can, but reduce the added salt in the recipe to about ½ teaspoon to avoid an overly salty crust.
How do I prevent the crust from shrinking during baking?
Chilling the dough before baking, avoiding stretching it when fitting into the pan, and blind baking with weights help prevent shrinkage.
Is this crust suitable for savory pies?
Absolutely! Just skip any added sugar and consider adding fresh herbs or spices to complement your savory fillings.
Pin This Recipe!

Tender Butter-Only Pie Crust Recipe Easy Perfect Homemade Pie Dough That Actually Works

A simple and reliable pie crust made exclusively with butter, flour, salt, and ice water, delivering a tender, flaky, and buttery crust perfect for sweet or savory pies.
- Prep Time: 15 minutes
- Cook Time: 30 minutes (for blind baking)
- Total Time: 1 hour 45 minutes (including chilling time)
- Yield: 1 9-inch pie crust (8 servings) 1x
- Category: Dessert
- Cuisine: American
Ingredients
- 2 ½ cups (315g) all-purpose flour
- 1 cup (225g) unsalted butter, cold and cubed
- 1 teaspoon fine sea salt
- 6–8 tablespoons (90-120ml) ice-cold water
Instructions
- Chill your butter and water: Cut the unsalted butter into ½-inch cubes and place in the fridge. Keep your water in a small bowl over ice to stay very cold.
- Mix dry ingredients: In a large bowl, combine 2 ½ cups (315g) all-purpose flour and 1 teaspoon fine sea salt. Stir briefly to distribute the salt evenly.
- Cut in butter: Add the cold butter cubes to the flour mixture. Using a pastry cutter or your fingertips, quickly cut the butter into the flour until the mixture resembles coarse crumbs with some pea-sized pieces.
- Add ice water gradually: Drizzle 6 tablespoons (90ml) of ice water over the mixture. Gently mix with a fork or your hands until the dough begins to clump. Add more water, 1 tablespoon at a time, if needed, until the dough just holds together when pressed.
- Form the dough: Gather the dough into a ball, then divide it in half. Flatten each half into a disk about 1-inch thick. Wrap each in plastic wrap and chill in the fridge for at least 1 hour, or up to 2 days.
- Roll out the crust: Lightly flour your work surface and rolling pin. Roll one dough disk into a 12-inch (30cm) circle, turning occasionally to prevent sticking. Let rest if cracks appear.
- Fit into pie dish: Transfer the rolled dough to a 9-inch (23cm) pie plate. Press gently without stretching. Trim excess dough leaving about a 1-inch overhang. Fold under edges and flute or crimp as desired.
- Chill before baking: Refrigerate the crust for 30 minutes to prevent shrinking during baking.
- Bake as needed: For blind baking, line crust with parchment and fill with pie weights or dried beans. Bake at 375°F (190°C) for 20 minutes, remove weights, then bake another 10 minutes until golden. For filled pies, follow specific baking times.
Notes
Keep butter and water very cold to ensure a tender crust. Do not overwork the dough to avoid toughness. Chill dough for at least 1 hour before rolling. Blind bake crust for wet fillings to prevent sogginess. Use a small bowl of flour to dust rolling surface to prevent sticking. Cover edges with foil if browning too fast.
Nutrition
- Serving Size: 1/8th of a 9-inch pi
- Calories: 250
- Fat: 15
- Carbohydrates: 25
- Protein: 2
Keywords: butter pie crust, homemade pie dough, tender pie crust, easy pie crust, flaky pie crust, butter-only crust, pie dough recipe


