The Soft, Almost Melted Center is What I Made This For — Everything Else is Secondary.
It wasn’t about the aroma filling the kitchen, though that cinnamon scent did drift under the door and make the dog look up from his nap. It wasn’t even about the color, even though the way the butter browned around the edges was pretty enough to post online. No, the reason I stood there with a spoon hovering over the bowl was the texture. I needed that specific, yielding softness that happens when a fruit stops fighting back against the heat.
You know how some desserts feel like work? Like you have to prove you spent hours in the kitchen to get credit for a single bite? I hate that. I wanted something that surrendered immediately. The first time I made these, I was rushing. I had guests arriving in twenty minutes and the oven was too slow to preheat properly. So I skipped the baking entirely and just hit the skillet. I expected firm chunks. I got something that collapsed gently under the weight of a fork.
That’s the whole point of this recipe. It’s not about structural integrity. It’s about that moment when the pear’s natural sugars caramelize just enough to stick to the roof of your mouth, but the flesh is so tender it feels like you’re eating a cloud infused with spice. I’ve tried baking them until they held their shape, and sure, they look nice on a plate. But they lack soul. They lack that cozy, surrendering quality that makes you close your eyes and sigh.
I remember eating the first batch straight from the pan, burning my fingers on the hot ceramic. The vanilla bean paste I used had left little black specks in the butter, and the cinnamon had formed a thin, crisp crust on top before melting into the soft fruit underneath. It wasn’t elegant. It wasn’t fancy. But it was perfect. That’s the kind of dessert that sticks with you. Not because it’s complicated, but because it feels like a hug.
Now, whenever autumn hits and the air turns crisp, I find myself craving that exact mouthfeel. It’s a physical memory. I don’t need a whole table setting or a fancy garnish. I just need warm, spiced pears that give way when I touch them. That’s why I keep these in my rotation. It’s the texture that brings me back, again and again, to the stove and the simple joy of cooking something fast and real.
Why You’ll Love This Recipe
I’ve spent years testing fruit desserts, from slow-roasted apples to quick sautéed stone fruits, and this method keeps coming back to the top of my list. There is a specific reliability to it that comes from experience. When you cook pears this way, you aren’t gambling on whether they will turn to mush or stay too hard. You are controlling the heat, the sugar, and the time. It’s a technique that feels professional but requires almost zero skill.
Here is why this recipe earns its spot in your weekly rotation:
- Quick & Easy: This comes together in under 15 minutes, perfect for busy weeknights or last-minute cravings when you need a sweet fix but don’t want to turn the oven on. It’s the fastest way to get from pantry to plate.
- Simple Ingredients: No fancy grocery trips needed; you likely already have everything in your kitchen. Butter, sugar, cinnamon, vanilla, and pears. If you have those, you’re already halfway done. It’s comforting in its simplicity.
- Perfect for Cozy Nights: Great for rainy Sunday afternoons or windy evenings when you just want to sit on the couch with a bowl of warm comfort. It pairs perfectly with a good book or a quiet movie.
- Crowd-Pleaser: Always gets rave reviews from kids and adults alike. Kids love the sweetness, and adults appreciate the lack of heavy cream or complicated pastry work. It’s universally liked.
- Unbelievably Delicious: The texture and flavor combo is next-level comfort food. The contrast between the warm, soft fruit and the cool, creamy topping (if you add one) creates a sensory experience that feels indulgent without the guilt.
What makes this recipe different from the rest is the speed combined with the depth of flavor. Most people boil or bake pears for an hour. By using a high-heat sauté method, you caramelize the natural sugars in minutes. This isn’t just another version of poached pears—it’s your best version because it respects your time while delivering maximum flavor. It’s the kind of recipe that makes you close your eyes after the first bite because the warmth spreads through your whole body. It’s comfort food reimagined—faster, but with the same soul-soothing satisfaction.
What Ingredients You Will Need
This recipe uses simple, wholesome ingredients to deliver bold flavor and satisfying texture without the fuss. The beauty of this dish lies in how few components you actually need. Each one plays a specific role in creating that tender, spiced, caramelized result. You don’t need specialty stores or obscure spices. Just good quality basics.
- Pears: You will need 4 medium-sized ripe pears. I prefer Bosc or Anjou pears because they hold their shape slightly better during cooking but still soften beautifully. Avoid red pears, as their color can bleed and look muddy in the pan. Look for pears that yield slightly to pressure at the neck—this indicates perfect ripeness.
- Unsalted Butter: Use 2 tablespoons of high-quality unsalted butter. I recommend brands like Plugra or Kerrygold for their higher fat content, which helps with browning. The butter provides the rich mouthfeel and helps conduct the heat evenly to the fruit.
- Brown Sugar: 1/4 cup of packed light or dark brown sugar. Brown sugar contains molasses, which adds a deeper, more complex sweetness than white sugar. It also helps create that sticky, glossy glaze that coats the pears. Dark brown sugar is better if you want a more robust, almost toffee-like flavor.
- Cinnamon: 1 teaspoon of ground cinnamon. This is the primary flavor driver. Use a fresh jar if possible, as old cinnamon loses its potency quickly. If you have Ceylon cinnamon, it has a more delicate, floral note, but regular Cassia cinnamon provides that classic, spicy punch most people expect.
- Vanilla Extract or Paste: 1 teaspoon of pure vanilla extract or paste. Vanilla paste is superior because it contains real vanilla seeds, which look beautiful in the final dish. If you use extract, make sure it’s pure, not imitation. The vanilla rounds out the sharpness of the cinnamon and adds a creamy aromatic note.
- Lemon Juice: 1 tablespoon of fresh lemon juice. This seems counterintuitive in a sweet dish, but the acid balances the richness of the butter and sugar. It also prevents the pears from browning too quickly if you prep them ahead of time. It adds a bright finish that keeps the dessert from feeling cloying.
- Salt: A pinch of flaky sea salt. Salt is essential to bring out the sweetness. It suppresses bitterness and enhances the overall flavor profile. Don’t skip this step; it makes the cinnamon taste more like cinnamon and the pear taste more like pear.
- Optional Toppings: While not required for the base recipe, having vanilla ice cream, whipped cream, or crushed pecans on hand is highly recommended. These add texture and temperature contrast, turning a simple side dish into a full dessert experience.
Substitution guidance is straightforward here. If you are dairy-free, you can swap the butter for a high-quality plant-based butter stick. Coconut oil works too, but it will impart a slight coconut flavor that may clash with the cinnamon. For the sugar, you can use coconut sugar, though it will make the dish darker and slightly chewier. If you can’t find pears, firm peaches or nectarines can be used in late summer, but you will need to reduce the cooking time slightly as they are softer.
Equipment Needed
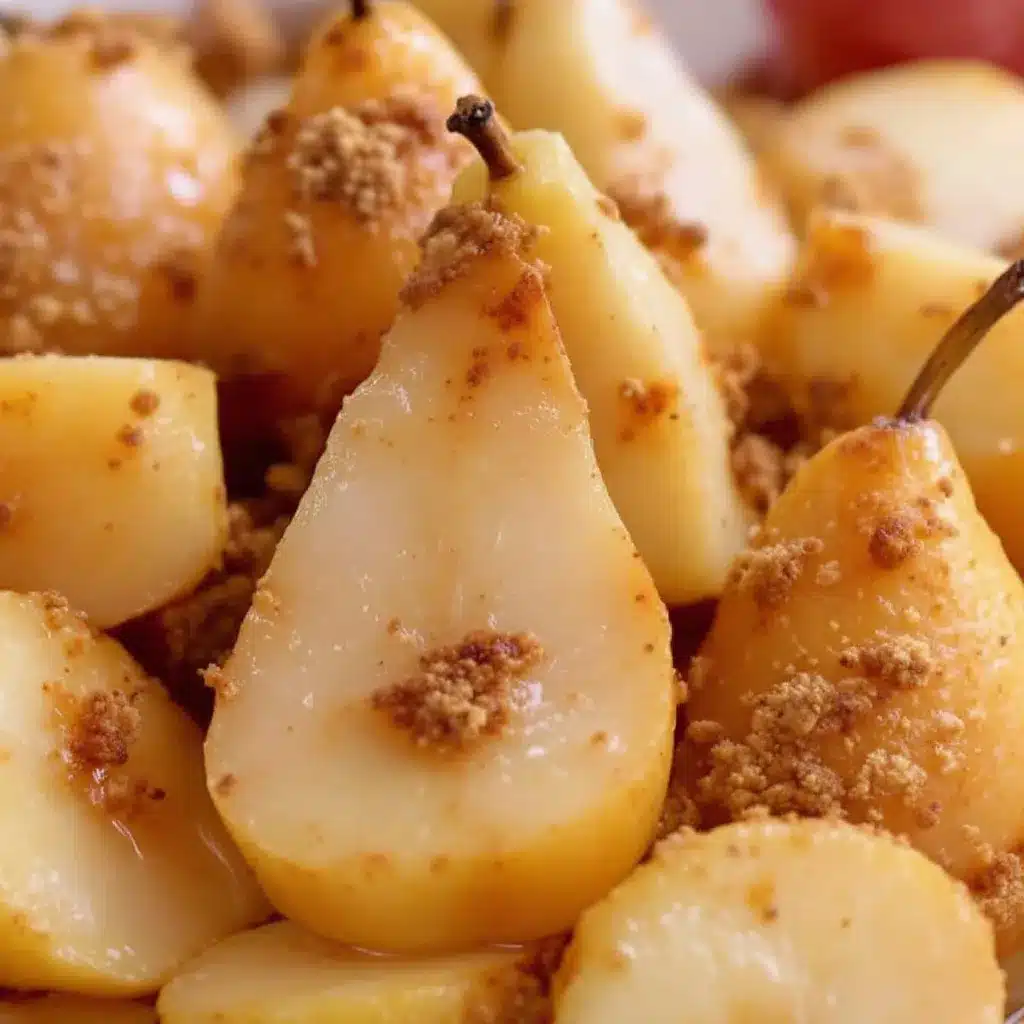
You don’t need a lot of fancy gear for this. A medium-sized skillet is the star of the show. I use a 10-inch non-stick skillet because it heats evenly and makes cleanup a breeze. If you don’t have non-stick, a well-seasoned cast iron skillet works beautifully and adds a nice rustic crust to the fruit. Just be sure it’s large enough to hold the pear slices in a single layer without overcrowding. Overcrowding leads to steaming instead of searing, which is the enemy of good texture.
A sharp chef’s knife is necessary for slicing the pears uniformly. Uniform slices ensure they cook at the same rate. If you have a mandoline, you can use it for paper-thin slices, but be careful—it’s easy to cut too thin and lose the structural integrity. A simple spatula with a thin edge is helpful for flipping the pears without breaking them. I prefer a flexible silicone spatula because it conforms to the curve of the pan.
A small measuring spoon set is useful for the spices and sugar. I also recommend having a small bowl for mixing the dry ingredients before adding them to the pan. This ensures the cinnamon is distributed evenly and doesn’t clump in one spot. Finally, a whisk is handy for melting the butter and sugar together smoothly before adding the fruit. These are standard kitchen tools, so you likely already have them all. No special maintenance is required beyond keeping your skillet clean and dry.
Preparation Method
Start by prepping your pears. Wash them thoroughly under cold water. You can peel them or leave the skin on, depending on your preference. I leave the skin on for added fiber and color, but if your pears have a particularly thick or tough skin, peeling them will result in a softer final texture. Cut the pears in half, remove the core, and slice them into wedges about 1/2-inch thick. Try to keep the slices uniform so they cook evenly. This prep step takes about 5 minutes.
Heat your skillet over medium-high heat. Add the butter and let it melt completely. This takes about 2 minutes. Watch carefully so it doesn’t burn. Once the butter is foaming and just starting to turn golden, add the brown sugar and cinnamon. Whisk them together in the pan for about 30 seconds until the sugar dissolves into the butter and creates a bubbling, fragrant paste. This step is crucial for building the flavor base. Do not rush it.
Once the sugar mixture is bubbling, gently add the pear slices to the pan. Arrange them in a single layer if possible. If you have to overlap them slightly, that’s okay, but try to minimize it. Sprinkle the lemon juice and salt over the pears. Let them cook undisturbed for 2 minutes. You want to see the edges of the pears start to turn translucent and golden. This is where the caramelization begins.
After 2 minutes, gently flip the pears. Use your spatula to turn each slice over. Cook for another 2-3 minutes on the second side. The pears should be tender but not falling apart. You should be able to pierce them easily with a fork, but they should still have a slight resistance. If they are too hard, cook for another minute. If they are too soft, you’ve gone a bit too far, but it will still taste good.
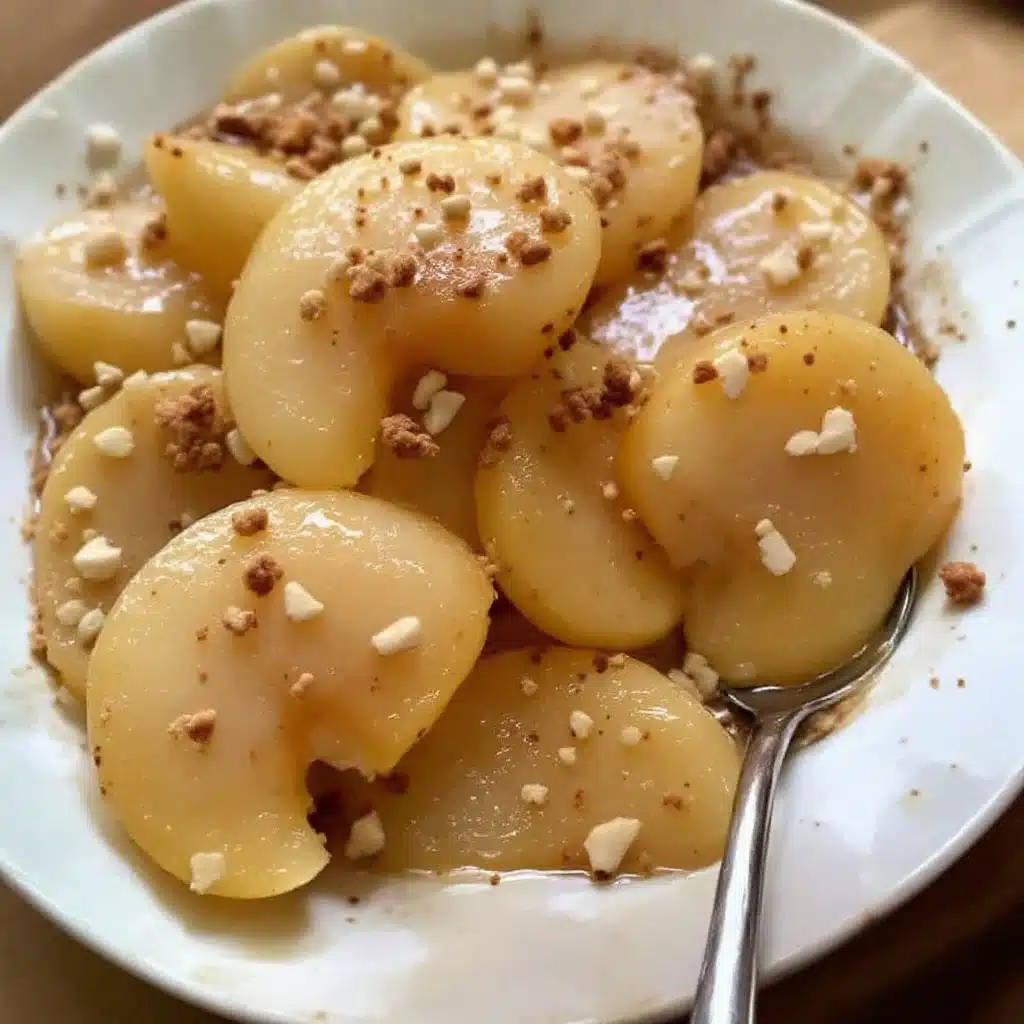
Remove the pan from the heat. Transfer the pears and the sauce to a serving bowl. Spoon any remaining sauce from the pan over the top. Serve immediately while warm. The residual heat will continue to soften them slightly, so keep that in mind. This entire process takes about 10-12 minutes from start to finish. It’s fast, efficient, and rewarding.
How do I know when the pears are done?
The best test is the fork test. Insert a fork into the thickest part of a slice. It should slide in with little to no resistance, but the pear should not collapse or turn to mush. It should feel yielding but intact.
Can I make this ahead of time?
It’s best served fresh, but you can prep the pears and store them in an airtight container in the fridge for up to 24 hours. Reheat them in the skillet over low heat with a splash of water to loosen the sauce before serving.
Cooking Tips & Techniques
One common mistake people make is using pears that are too underripe. Underripe pears will remain hard no matter how long you cook them. Always check for ripeness before you start. If your pears are firm, let them sit on the counter for a day or two until they yield slightly to pressure. Overripe pears, on the other hand, will turn to mush very quickly. You want that sweet spot.
Another tip is to not overcrowd the pan. If you put too many pears in at once, the temperature of the pan drops, and the pears release water. This steams them instead of searing them. Steamed pears are soggy and lack flavor. If you have a lot of pears, cook them in batches. It’s worth the extra five minutes.
I also recommend toasting your spices slightly before adding them if you have time. Heat the cinnamon in the dry pan for 30 seconds before adding the butter. This releases the essential oils and makes the flavor more aromatic. It’s a small step that makes a big difference. Also, taste your butter. If it’s rancid, it will ruin the dish. Always use fresh butter for desserts.
Multitasking is key here. While the pears are cooking, you can prepare your toppings. Get the ice cream out of the freezer. Chop the nuts. Set out the bowls. By the time the pears are done, everything will be ready to go. This prevents that stressful moment where the food is ready but you’re scrambling to find plates.
Finally, don’t be afraid of the heat. Medium-high heat is necessary to get that caramelization. If you cook on low, you’ll just get soft pears in syrup. You want some crisp edges. The contrast between the crisp edge and the soft center is what makes this dish special. Trust the process and let the heat do its work.
Variations & Adaptations
While the classic cinnamon vanilla version is my favorite, there are many ways to tweak this recipe to suit different tastes or dietary needs. You can easily adapt it to be gluten-free by ensuring your vanilla extract and spices are certified gluten-free, though naturally, the dish is gluten-free. For a dairy-free version, swap the butter for coconut oil or a vegan butter alternative. The flavor will be slightly different, but still delicious.
If you want to change the flavor profile, try swapping cinnamon for pumpkin pie spice. This adds warmth with notes of nutmeg and cloves, which pairs beautifully with fall flavors. You could also add a pinch of cardamom for a floral, citrusy note that complements the vanilla. For a spicy kick, add a tiny pinch of cayenne pepper. It sounds strange, but it enhances the sweetness and adds a subtle heat that lingers.
You can also experiment with different fruits. Apples work well, but they take longer to cook. You might need to add a splash of water and cover the pan to steam them slightly before searing. Plums are another excellent option, especially in late summer. They have a tartness that balances the sugar well. Just be sure to adjust the cooking time based on the firmness of the fruit.
For a richer dessert, add a tablespoon of bourbon or rum to the pan after removing it from the heat. The alcohol will evaporate, leaving behind a deep, complex flavor. This is great for holiday gatherings. You can also add a dollop of mascarpone cheese instead of ice cream for a tangier, creamier topping. These variations keep the recipe fresh and exciting.
Serving & Storage Suggestions
These pears are best served warm, straight from the pan. I like to pile them high in a shallow bowl or a wide-rimmed plate. The warmth is essential for the full flavor experience. If you are serving guests, consider adding a scoop of vanilla ice cream on the side or on top. The contrast between the hot pears and the cold ice cream is magical. You could also add a dollop of whipped cream and a sprinkle of toasted pecans for extra crunch and elegance.
For beverages, this dessert pairs well with a hot cup of coffee or tea. A strong espresso cuts through the sweetness nicely. Chai tea is also a great match, as the spices in the tea complement the cinnamon in the pears. If you prefer wine, a dessert wine like Moscato or a late-harvest Riesling would work well. The acidity in the wine balances the sugar.
Leftovers can be stored in an airtight container in the refrigerator for up to 3 days. The pears will continue to soften in the fridge, so they may become quite tender. To reheat, place them in a skillet over low heat with a splash of water. Microwave heating is not recommended as it can make the pears mushy. Reheating in the skillet restores the texture and warms the sauce evenly.
The flavors actually develop over time, so the leftovers might taste even better on day two. The cinnamon and vanilla have more time to infuse into the fruit. However, the texture will change, so keep that in mind. If you want to freeze them, you can, but the texture will be very soft upon thawing. They are best used in smoothies or oatmeal after freezing rather than eaten as a dessert.
Nutritional Information & Benefits
This recipe is relatively light compared to many desserts. Pears are a good source of fiber, which aids in digestion and helps keep you feeling full. They also contain vitamin C and potassium. The butter and sugar add calories and fat, so enjoy in moderation. A typical serving of this recipe contains approximately 150-200 calories per pear half, depending on the size and amount of sugar used. It’s a guilt-free treat if you control the sugar.
The cinnamon has anti-inflammatory properties and may help regulate blood sugar levels. The vanilla extract contains antioxidants. While this isn’t a health food, it’s a better option than many heavy, cream-laden desserts. It satisfies a sweet tooth without leaving you feeling weighed down. I enjoy this as a post-dinner digestif because it’s light and soothing.
For those watching their sugar intake, you can reduce the brown sugar by half or use a natural sweetener like stevia or monk fruit. The natural sweetness of ripe pears is often enough. Just be aware that the caramelization effect will be less pronounced without the sugar. It’s a trade-off, but still delicious.
Conclusion
Cozy Cinnamon Vanilla Pears are the perfect example of how simple ingredients can create a memorable dessert. They are quick, easy, and incredibly satisfying. I love this recipe because it requires minimal effort but delivers maximum comfort. It’s the kind of dish that reminds you to slow down and enjoy the little things. The warm spices, the soft fruit, and the rich butter create a harmony that is hard to beat.
I encourage you to try this recipe and customize it to your liking. Add your favorite nuts, swap the spices, or serve it with your preferred topping. Make it your own. I’d love to hear how you adapt it or what toppings you choose. Share your creations in the comments below, or tag me on social media. I always enjoy seeing how you make this recipe yours.
This dish has become a staple in my home, especially during the colder months. It brings a sense of warmth and nostalgia to every meal. I hope it does the same for you. Thank you for trying this recipe, and happy cooking!
FAQs
What type of pears are best for this recipe?
Bosc and Anjou pears are the best choices because they hold their shape well while becoming tender. Avoid red pears as they can discolor the dish.
Can I use frozen pears?
It is not recommended. Frozen pears release too much water and will become mushy. Fresh pears provide the best texture and flavor.
How do I prevent the pears from sticking to the pan?
Ensure your pan is properly heated before adding the butter and sugar. Use a non-stick skillet or well-seasoned cast iron, and don’t move the pears too early.
Can I make this recipe vegan?
Yes, simply substitute the butter with a vegan butter alternative or coconut oil. The rest of the ingredients are naturally vegan.
How long do the leftovers last?
Leftovers can be stored in the refrigerator for up to 3 days. Reheat gently in a skillet to maintain the best texture.
Pin This Recipe!
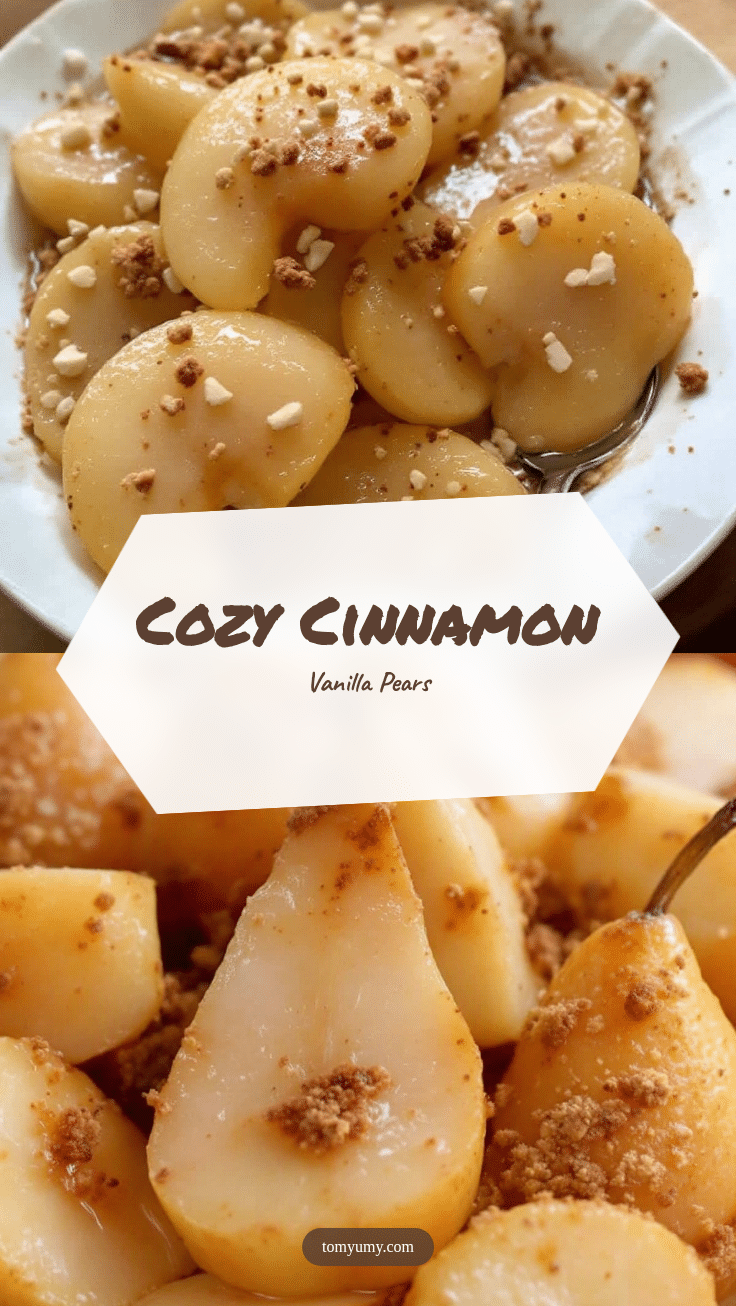
Cozy Cinnamon Vanilla Pears: Easy 15-Minute Fall Dessert
A quick, 15-minute skillet dessert featuring tender, caramelized pears with cinnamon and vanilla. This simple recipe delivers maximum comfort with minimal effort, perfect for busy weeknights or cozy evenings.
- Prep Time: 5 minutes
- Cook Time: 10 minutes
- Total Time: 15 minutes
- Yield: 4 servings 1x
- Category: Dessert
- Cuisine: American
Ingredients
- 4 medium ripe pears (Bosc or Anjou preferred), cored and sliced into 1/2-inch wedges
- 2 tablespoons unsalted butter
- 1/4 cup packed light or dark brown sugar
- 1 teaspoon ground cinnamon
- 1 teaspoon pure vanilla extract or vanilla bean paste
- 1 tablespoon fresh lemon juice
- 1 pinch flaky sea salt
- Optional toppings: vanilla ice cream, whipped cream, or crushed pecans
Instructions
- Wash pears and slice them into 1/2-inch thick wedges, removing the core. Keep slices uniform for even cooking.
- Heat a 10-inch skillet over medium-high heat. Add butter and melt completely until foaming and just starting to turn golden (about 2 minutes).
- Add brown sugar and cinnamon to the melted butter. Whisk together for 30 seconds until the sugar dissolves and creates a bubbling paste.
- Gently add pear slices to the pan in a single layer. Sprinkle with lemon juice and salt.
- Cook undisturbed for 2 minutes until edges turn translucent and golden.
- Flip pears gently and cook for another 2-3 minutes until tender but not mushy.
- Remove from heat and transfer to a serving bowl, spooning remaining sauce over the top.
- Serve immediately while warm.
Notes
Ensure pears are ripe but firm; underripe pears will stay hard, while overripe ones may turn to mush. Do not overcrowd the pan to avoid steaming. For best results, serve immediately while warm. Leftovers can be stored in the refrigerator for up to 3 days and reheated gently in a skillet.
Nutrition
- Serving Size: 1 pear half with sau
- Calories: 175
- Sugar: 22
- Sodium: 50
- Fat: 8
- Saturated Fat: 5
- Carbohydrates: 26
- Fiber: 3
- Protein: 1
Keywords: cinnamon pears, vanilla pears, quick dessert, fall dessert, skillet dessert, easy recipe, gluten-free dessert, comfort food