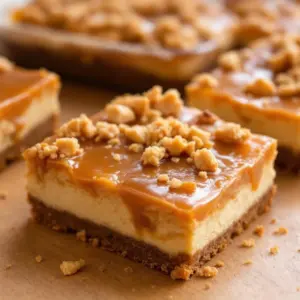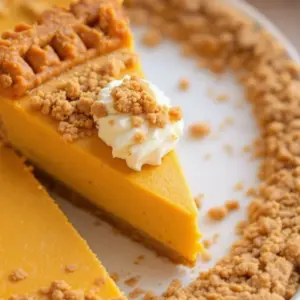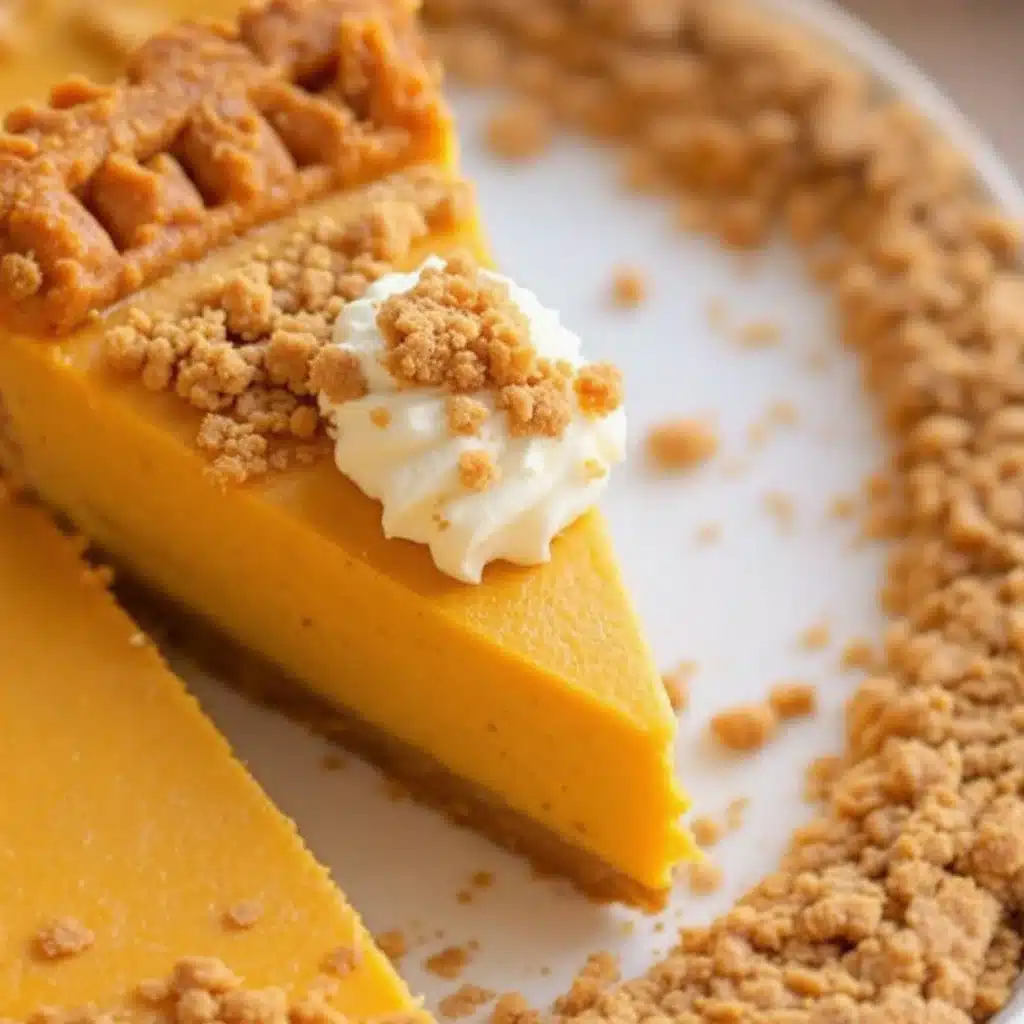
I want a slice of pumpkin pie right now, but I absolutely do not want to turn on the oven. The kitchen is already warm enough without adding the radiant heat of a baking oven, and honestly, the idea of waiting an hour for a crust to brown feels like a chore I didn’t sign up for today. My brain is looping through the usual suspects—maybe those brown butter maple pumpkin cookies if I’m feeling lazy, or perhaps something with a bit more structure—but my hands are already reaching for the blender. There is a specific kind of craving that hits in late October where you want all the spices of fall but none of the hassle. You know that feeling? Where you want the comfort but not the cleanup.
This is why I keep coming back to the no-bake route. It’s not just about saving time, though that’s a huge bonus when you’re juggling dinner prep and holiday guest lists. It’s about the texture. I remember the first time I made this creamy no-bake pumpkin pie with gingersnap crust. I was skeptical. I thought it would be too loose, or that the gingersnaps would stay too hard. But I was wrong. The contrast between the crisp, spicy cookie base and the silken, spiced filling is actually better than any baked version I’ve ever had. It’s lighter, less dense, and doesn’t leave you feeling like you need a nap immediately after eating it.
I’m not going to lie, I did mess up the first batch. I used whipped cream cheese that was too cold and ended up with lumps that ruined the smooth mouthfeel. Lesson learned. Now, I let everything sit out for twenty minutes before blending. It’s a small step, but it changes everything. The spice blend is also key here. I don’t just dump in pumpkin pie spice; I toast my own cinnamon and add a pinch of nutmeg because I like it to have a bit of heat. This pie isn’t just dessert; it’s a mood. It’s cozy without being heavy. It’s the kind of thing you serve on a Tuesday night when you just want something sweet but not indulgent to the point of regret.
The smell of ginger and molasses filling the kitchen is enough to make anyone happy. It’s nostalgic but fresh. And the best part? You can make it the day before. You know how stressful it is to bake on Thanksgiving morning? This solves that problem entirely. You just whip it up, chill it, and let it do its thing while you focus on the savory stuff. It’s practical magic.
Why You’ll Love This Recipe
Let’s be honest for a second. Not everyone has the patience for a traditional baked pie. The waiting, the potential for a soggy bottom, the risk of cracking—baking pies can be stressful. This creamy no-bake pumpkin pie with gingersnap crust removes all of that anxiety. It is designed for real life. Here is why this specific recipe has become a staple in my kitchen rotation, especially as the weather turns cooler:
- Quick & Easy: You can have this entire pie assembled in under 30 minutes. No standing over a hot stove, no checking temperatures with a thermometer. Just blend, press, and chill. It is perfect for busy weeknights or when you have unexpected guests showing up.
- Simple Ingredients: You likely already have most of these items in your pantry. Gingersnap cookies, cream cheese, pumpkin puree, and spices are standard fare. There is no need for a special grocery trip or exotic ingredients that will sit unused for months.
- Perfect for Holiday Prep: This is the ultimate make-ahead dessert. Since it requires chilling time, you can prepare it two days in advance. This frees up your valuable oven space for casseroles and roasted meats, which is a game-changer during busy holiday weekends.
- Crowd-Pleaser: I have served this at potlucks and family gatherings, and it always disappears fast. Kids love the sweet, cookie-like flavor, and adults appreciate the sophisticated spice profile. It appeals to a wide range of palates.
- Unbelievably Delicious: The texture is what really sets this apart. The gingersnap crust provides a sturdy, crunchy foundation that contrasts beautifully with the velvety, airy filling. It feels luxurious but tastes light.
What makes this recipe different from the rest? It’s the balance. Many no-bake pumpkin recipes rely too heavily on whipped topping, which can taste artificial or too sweet. This version uses cream cheese and a touch of heavy cream to create a rich, stable filling that holds its shape perfectly. The gingersnap crust isn’t just a garnish; it’s integral to the flavor profile, adding a molasses depth that plain graham crackers just can’t match.
This recipe isn’t just good—it is the kind that makes you close your eyes after the first bite. It’s comfort food reimagined for the modern cook. It’s faster, but with the same soul-soothing satisfaction. It’s perfect for impressing guests without stress, or turning a simple meal into something memorable. I’ve tried other versions, like the creamy peanut butter French silk pie, but nothing quite hits the spot like this pumpkin version in the fall. It’s reliable, delicious, and utterly satisfying.
What Ingredients You Will Need
This recipe uses simple, wholesome ingredients to deliver bold flavor and satisfying texture without the fuss. The beauty of a no-bake pie lies in the quality of its components. Since there are no complex chemical reactions from baking, each ingredient needs to shine on its own. I like to use fresh spices when possible, as pre-ground spices can lose their potency over time. You can find these items at any standard grocery store, and they are generally affordable pantry staples.
Here is what you will need to gather:
- For the Gingersnap Crust:
- 2 cups gingersnap cookies, finely crushed. I recommend using a food processor for the most consistent texture. If you don’t have one, put them in a zip-top bag and crush them with a rolling pin. It takes a bit of elbow grease, but it works.
- 1/3 cup unsalted butter, melted. Using melted butter helps the crust bind together. You want it to hold its shape when pressed into the pan.
- 2 tablespoons granulated sugar. This helps sweeten the crust slightly and aids in browning if you were to bake it, but here it just adds a nice crunch.
- 1/4 teaspoon ground cinnamon. A pinch of cinnamon in the crust adds depth without overwhelming the ginger flavor.
- For the Pumpkin Filling:
- 8 ounces cream cheese, softened to room temperature. This is crucial. Cold cream cheese will result in a lumpy filling. Let it sit on the counter for at least 30 minutes before you start.
- 1 can (15 ounces) pure pumpkin puree. Make sure it is pure pumpkin, not pumpkin pie filling. Pie filling already has sugar and spices added, which would make this recipe too sweet.
- 1/2 cup granulated sugar. Adjust this to your taste. If you prefer less sweet, you can reduce it to 1/3 cup.
- 1 teaspoon ground cinnamon. I like a good amount of cinnamon in this pie.
- 1/2 teaspoon ground ginger. Freshly grated ginger is too strong for this; ground ginger provides that classic warm flavor.
- 1/2 teaspoon ground nutmeg. Nutmeg adds a warm, nutty undertone that complements the pumpkin perfectly.
- 1/4 teaspoon ground cloves. Use sparingly. Cloves are potent and can easily overpower the other spices.
- 1/4 teaspoon salt. Salt is essential to balance the sweetness of the sugar and the richness of the cream cheese.
- 1 teaspoon vanilla extract. Use real vanilla extract, not imitation. It makes a noticeable difference in the flavor profile.
- For the Whipped Cream Topping:
- 1 cup heavy whipping cream, cold. This will be whipped to soft peaks.
- 2 tablespoons powdered sugar. Adds a subtle sweetness to the topping.
- 1/2 teaspoon vanilla extract. Matches the filling for consistency.
I personally prefer using pumpkin spice molasses crinkle scones as a flavor reference point, which is why I lean heavily on the ginger and molasses notes in the crust. For the cookies, I always look for gingersnaps that are crisp and have a visible sugar coating. Brands like Keebler or store-brand generic versions work well, but avoid the soft-baked varieties as they won’t create the right crust texture.
If you are looking for substitutions, you can use gluten-free gingersnaps for the crust if needed. For the dairy-free crowd, there are excellent plant-based cream cheeses available now, though the texture might be slightly different. Also, if you can’t find ground cloves, you can omit them, but the flavor won’t be quite as complex.
Equipment Needed
You don’t need a lot of fancy tools to make this pie. In fact, the beauty of this recipe is its simplicity. Here is what you will need:
- Food Processor: This is the best tool for crushing the gingersnap cookies evenly. If you don’t have one, a heavy-duty blender or a zip-top bag with a rolling pin will work, but it takes more effort.
- 9-inch Pie Dish: A standard glass or ceramic pie dish works best. Glass allows you to see the bottom of the crust to ensure it’s set. If you don’t have a pie dish, a 9-inch springform pan is a good alternative, especially if you want to remove the pie for easier slicing.
- Mixer: An electric hand mixer or a stand mixer with a paddle attachment is helpful for beating the cream cheese and sugar until smooth. You can do this by hand with a sturdy whisk, but it will take more arm strength.
- Whisk: For mixing the spices and pumpkin puree if you aren’t using a mixer.
- Measuring Cups and Spoons: Standard baking tools. Precision matters here, especially with the spices.
If you don’t have a food processor, I recommend buying pre-crushed cookies from the store. It saves time and effort. For the crust, pressing it into the pie dish can be done with the bottom of a measuring cup or a flat-bottomed glass. Just make sure to press firmly to create an even layer. I once used a plastic bag filled with rice to press the crust, which worked surprisingly well.
Maintenance tips: Make sure your cream cheese is properly softened. If it’s still cold, microwave it in 5-second bursts until it yields to gentle pressure. This prevents lumps in your filling. Also, ensure your mixing bowls are clean and dry, especially if you are whipping the cream. Any fat or water can prevent the cream from whipping properly.
Preparation Method
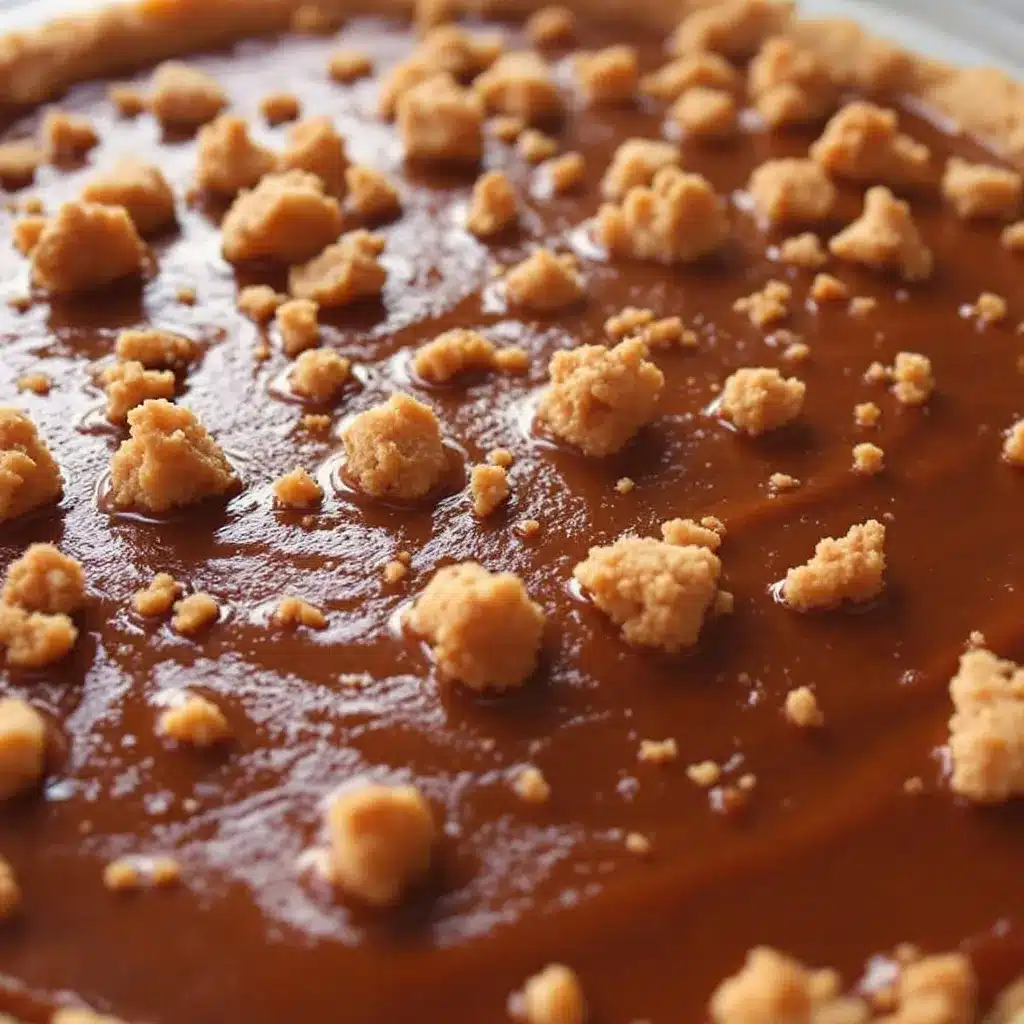
Making this creamy no-bake pumpkin pie with gingersnap crust is straightforward, but attention to detail ensures the best results. Follow these steps carefully.
- Prepare the Crust (5 minutes): Start by crushing the gingersnap cookies. If using a food processor, pulse the cookies until they are fine crumbs. Be careful not to over-process them into a powder; you still want some texture. In a medium bowl, combine the cookie crumbs, melted butter, sugar, and cinnamon. Stir until the mixture resembles wet sand. Press this mixture firmly into the bottom and up the sides of your 9-inch pie dish. Use the bottom of a glass to smooth it out. Place the crust in the refrigerator while you make the filling. This helps it set quickly.
- Troubleshooting Tip: If the crust feels too dry and won’t stick, add another tablespoon of melted butter. If it’s too greasy, add a few more crumbs.
- Soften the Cream Cheese (10 minutes prep, 30 minutes resting): Cut the cream cheese into cubes and let it sit at room temperature for at least 30 minutes. This is the most important step for a smooth filling. If you skip this, you will end up with lumps that are hard to whisk out.
- Sensory Cue: The cream cheese should feel soft to the touch, like a firm banana.
- Beat the Cream Cheese (3 minutes): In a large mixing bowl, beat the softened cream cheese with an electric mixer on medium speed until smooth and creamy. Scrape down the sides of the bowl with a spatula to ensure everything is incorporated.
- Personal Tip: I always take a moment to check for unmixed bits of cream cheese. It’s easy to miss them if you’re rushing.
- Add Sugar and Spices (2 minutes): Add the granulated sugar, cinnamon, ginger, nutmeg, cloves, and salt to the cream cheese. Beat on low speed until the sugar is dissolved and the mixture is smooth.
- Note: Do not overmix at this stage. You just want to combine the ingredients.
- Combine Pumpkin and Vanilla (2 minutes): Add the pure pumpkin puree and vanilla extract to the bowl. Beat on medium-low speed until the mixture is uniform in color and texture. It should be a smooth, orange paste.
- Sensory Cue: The mixture should smell strongly of pumpkin and warm spices.
- Whip the Cream (5 minutes): In a separate cold bowl, whip the heavy cream, powdered sugar, and vanilla extract until soft peaks form. You want the cream to be fluffy but still pourable. Do not over-whip it into stiff peaks, or it might become grainy when folded in.
- Technique: Stop whipping when the beaters leave trails that hold their shape for a few seconds but still droop slightly.
- Fold the Cream into the Pumpkin Mixture (3 minutes): Gently fold the whipped cream into the pumpkin mixture using a large spatula. Use a cutting motion, lifting from the bottom and folding over the top. Do this in two or three additions. You want to retain as much air as possible to keep the pie light.
- Warning: Over-mixing at this stage will deflate the cream and make the pie dense.
- Assemble the Pie (2 minutes): Pour the filling into the prepared gingersnap crust. Smooth the top with the spatula.
- Visual Cue: The filling should be level with the top of the crust.
- Chill the Pie (4 hours or overnight): Cover the pie with plastic wrap or foil and refrigerate for at least 4 hours, preferably overnight. This allows the flavors to meld and the filling to set firmly.
- Patience is Key: I know it’s hard to wait, but rushing this step will result in a runny pie.
- Top and Serve: Before serving, whip a little more cream for topping if desired. Slice with a sharp knife dipped in hot water for clean cuts.
Cooking Tips & Techniques
Getting the texture right is the main challenge with no-bake pies. Here are some professional techniques and personal lessons I’ve learned to help you succeed.
First, temperature control is everything. Your cream cheese must be room temperature, and your heavy cream must be cold. These opposite temperatures serve different purposes. The warm cream cheese blends smoothly, while the cold cream whips up airy. If your kitchen is very warm, chill your mixing bowl in the freezer for 10 minutes before whipping the cream.
Second, avoid over-mixing. Once you add the whipped cream to the pumpkin mixture, stop as soon as it is combined. Over-mixing incorporates too much air initially but then deflates it, leading to a dense filling. Think of it like folding egg whites into a batter; gentle hands are key.
Third, don’t skimp on the spices. Pumpkin puree is mild. You need enough spice to give the pie character. If you taste the filling before chilling and it tastes bland, add a pinch more cinnamon or nutmeg. The flavors will mellow slightly after chilling, so it’s okay to season it a bit boldly.
Fourth, use a sharp knife for slicing. No-bake pies can be sticky. Dip your knife in hot water and wipe it dry between each cut. This ensures clean, beautiful slices that hold their shape.
Finally, be patient with the chilling time. While 4 hours is the minimum, overnight is best. The longer it chills, the better the flavor develops. I usually make this pie the day before I need it, and the results are always superior.
Variations & Adaptations
This recipe is versatile and can be adapted to suit different dietary needs and taste preferences. Here are a few variations I have tried and enjoyed.
- Dairy-Free Option: You can substitute the cream cheese with a high-quality plant-based alternative, such as Kite Hill or Forager Project. Use coconut cream instead of heavy cream for whipping. Note that the texture may be slightly denser, but the flavor will still be delicious.
- Gluten-Free Crust: Use gluten-free gingersnap cookies for the crust. Ensure they are certified gluten-free if you have celiac disease. The rest of the ingredients are naturally gluten-free.
- Lighter Version: Reduce the sugar in the filling by half and use light cream cheese. You can also use half-and-half instead of heavy cream for the topping. This reduces the calorie count but still maintains a creamy texture.
- Flavor Twist: Add a layer of caramel sauce or dulce de leche between the crust and the filling. This pairs beautifully with the ginger and pumpkin. You can also add a swirl of orange zest into the filling for a citrusy brightness.
- Seasonal Variation: In the spring, swap the pumpkin puree for sweet potato puree. It has a similar texture and works well with the same spices. This is a great way to use up leftover sweet potatoes.
I once tried adding a layer of crushed pecans between the crust and the filling for extra crunch. It was a hit with my family. You can also add a tablespoon of bourbon to the filling for an adult twist. The alcohol evaporates slightly, leaving a rich flavor.
Serving & Storage Suggestions
This pie is best served chilled. It can stay in the refrigerator for up to 5 days. Cover it tightly with plastic wrap or transfer it to an airtight container to prevent it from absorbing other odors from your fridge.
For serving, I recommend topping each slice with a dollop of freshly whipped cream and a sprinkle of crushed gingersnaps. This adds extra texture and visual appeal. It pairs well with a cup of hot coffee or tea, especially in the fall. You can also serve it with a side of toasted coconut and pecan whipped cream for a more decadent treat.
To freeze, you can freeze the assembled pie (without the whipped cream topping) for up to 2 months. Wrap it tightly in plastic wrap and then in aluminum foil. Thaw it in the refrigerator overnight before serving. Do not refreeze once thawed.
The flavors of this pie actually improve after a day or two. The spices have time to meld with the pumpkin and cream cheese, creating a deeper, more complex taste. If you make it ahead, let it sit in the fridge for 24-48 hours for the best results.
Nutritional Information & Benefits
This pie is a moderate-calorie dessert, but it is also rich in nutrients. Pumpkin puree is high in vitamin A, fiber, and potassium. It adds a healthy boost to the dessert without adding too many calories. The gingersnap crust provides some iron and calcium, depending on the brand.
However, keep in mind that the cream cheese and sugar add calories and saturated fat. Enjoy this pie in moderation as part of a balanced diet. For those with dietary restrictions, the dairy-free and gluten-free adaptations make it accessible to more people.
I also appreciate that this recipe uses real food ingredients. There are no artificial colors or flavors. The vibrant orange color comes from the pumpkin itself. This makes it a cleaner option compared to many store-bought pies.
Conclusion
This creamy no-bake pumpkin pie with gingersnap crust is a must-try for anyone who loves fall flavors but hates the hassle of baking. It is easy to make, delicious to eat, and perfect for making ahead. I hope you enjoy making it as much as I do.
Feel free to customize it with your favorite spices or toppings. I love adding a drizzle of caramel, but a simple whipped cream topping is also wonderful. Let me know in the comments how you like to enjoy your pumpkin pie. Do you prefer it with whipped cream or without? Have you tried any variations?
Share this recipe with your friends and family. It’s a great dish to bring to potlucks or holiday gatherings. And don’t forget to leave a review if you try it. Your feedback helps me create more recipes like this one.
Enjoy every bite of this cozy, creamy delight. It’s the perfect way to celebrate the season.
FAQs
Can I use pumpkin pie filling instead of pure pumpkin puree?
No, you should not use pumpkin pie filling. Pumpkin pie filling already contains sugar and spices, which will make this recipe too sweet and alter the texture. Always use 100% pure pumpkin puree.
How long does the pie need to chill?
The pie needs to chill for at least 4 hours to set properly. For the best results, chill it overnight. This allows the flavors to meld and the filling to firm up.
Can I make this pie gluten-free?
Yes, simply use gluten-free gingersnap cookies for the crust. Ensure all other ingredients are certified gluten-free if you have celiac disease.
Can I freeze this pie?
Yes, you can freeze the assembled pie (without the whipped cream topping) for up to 2 months. Wrap it tightly in plastic wrap and aluminum foil. Thaw it in the refrigerator overnight before serving.
What can I use instead of gingersnap cookies?
You can use graham crackers, vanilla wafers, or even shortbread cookies for the crust. However, gingersnaps provide the best flavor contrast to the pumpkin filling. If you use a milder cookie, you may want to add more cinnamon or ginger to the crust.
Pin This Recipe!
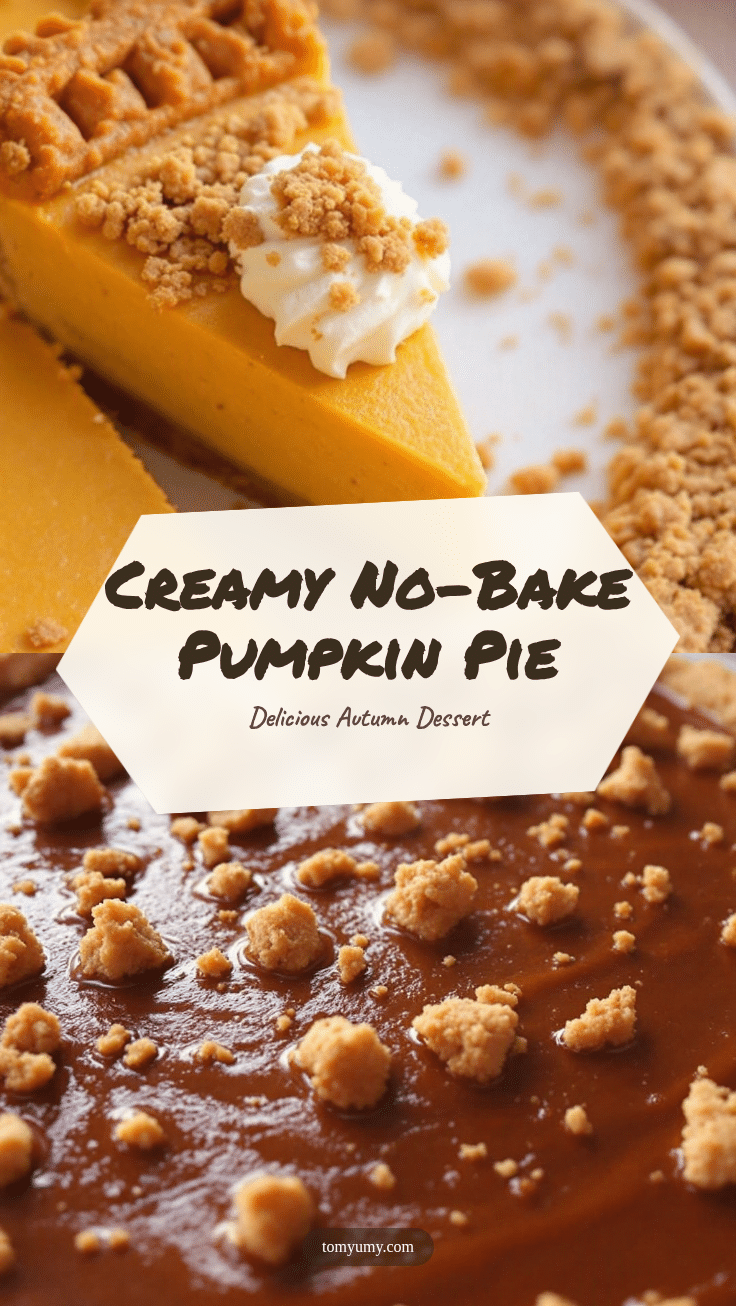
Creamy No-Bake Pumpkin Pie with Gingersnap Crust

A rich, creamy no-bake pumpkin pie featuring a crunchy gingersnap crust and a spiced pumpkin filling. This easy dessert requires no oven and is perfect for making ahead of time.
- Prep Time: 30 minutes
- Cook Time: 0 minutes
- Total Time: 4 hours 30 minutes
- Yield: 8 servings 1x
- Category: Dessert
- Cuisine: American
Ingredients
- For the Gingersnap Crust:
- 2 cups gingersnap cookies, finely crushed
- 1/3 cup unsalted butter, melted
- 2 tablespoons granulated sugar
- 1/4 teaspoon ground cinnamon
- For the Pumpkin Filling:
- 8 ounces cream cheese, softened to room temperature
- 1 can (15 ounces) pure pumpkin puree
- 1/2 cup granulated sugar
- 1 teaspoon ground cinnamon
- 1/2 teaspoon ground ginger
- 1/2 teaspoon ground nutmeg
- 1/4 teaspoon ground cloves
- 1/4 teaspoon salt
- 1 teaspoon vanilla extract
- For the Whipped Cream Topping:
- 1 cup heavy whipping cream, cold
- 2 tablespoons powdered sugar
- 1/2 teaspoon vanilla extract
Instructions
- Crush the gingersnap cookies into fine crumbs using a food processor. In a medium bowl, combine the crumbs, melted butter, sugar, and cinnamon. Stir until the mixture resembles wet sand.
- Press the crust mixture firmly into the bottom and up the sides of a 9-inch pie dish. Place in the refrigerator to set while making the filling.
- Cut the cream cheese into cubes and let it sit at room temperature for at least 30 minutes to ensure it is fully softened.
- In a large mixing bowl, beat the softened cream cheese with an electric mixer on medium speed until smooth and creamy. Scrape down the sides of the bowl.
- Add the granulated sugar, cinnamon, ginger, nutmeg, cloves, and salt to the cream cheese. Beat on low speed until the sugar is dissolved and the mixture is smooth.
- Add the pure pumpkin puree and vanilla extract to the bowl. Beat on medium-low speed until the mixture is uniform in color and texture.
- In a separate cold bowl, whip the heavy cream, powdered sugar, and vanilla extract until soft peaks form.
- Gently fold the whipped cream into the pumpkin mixture in two or three additions, using a cutting motion to retain air.
- Pour the filling into the prepared gingersnap crust and smooth the top.
- Cover the pie with plastic wrap or foil and refrigerate for at least 4 hours, preferably overnight, to allow the filling to set.
- Before serving, top with additional whipped cream and crushed gingersnaps if desired. Slice with a sharp knife dipped in hot water for clean cuts.
Notes
Ensure cream cheese is fully softened to room temperature to avoid lumps. Use pure pumpkin puree, not pumpkin pie filling. For best results, chill the pie overnight to allow flavors to meld. If the crust is too dry, add more butter; if too greasy, add more crumbs. Use a sharp knife dipped in hot water for clean slices.
Nutrition
- Serving Size: 1 slice
- Calories: 350
- Sugar: 24
- Sodium: 250
- Fat: 22
- Saturated Fat: 13
- Carbohydrates: 35
- Fiber: 2
- Protein: 4
Keywords: no-bake pumpkin pie, gingersnap crust, fall dessert, easy pumpkin recipe, holiday dessert, make-ahead dessert, creamy pumpkin pie