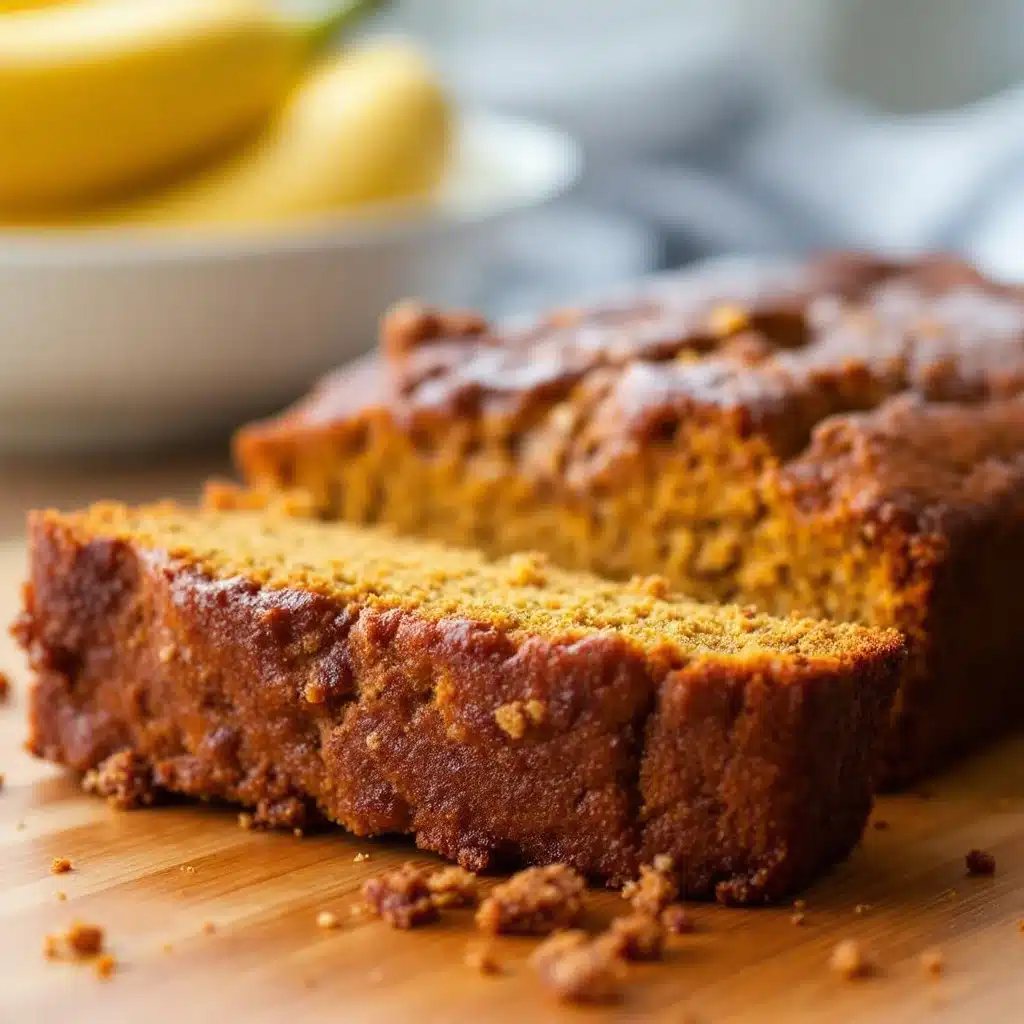
I had been looking for a pumpkin bread that actually held together without crumbling into a pile of sweet dust on the counter. For a while, I just accepted that fall baking was going to taste like dry cardboard with a hint of cinnamon. You know the type. You slice it, it cracks, you sigh, and then you try to salvage it with a thick layer of cream cheese frosting just to hide the texture. It’s frustrating. Honestly, it feels like the recipe books from the nineties were written by people who didn’t care if we enjoyed our breakfast.
The problem wasn’t the spices. I had plenty of pumpkin pie spice gathering dust in the back of the cupboard. The issue was the balance. Most recipes lean too hard on the pumpkin puree, turning the loaf into a dense, wet brick that never really cooks through. Or they skip the bananas entirely, losing that natural sweetness and moisture that makes bread feel like a hug. I wanted something that felt substantial but light, sweet but not cloying. Something that smelled like autumn without making my kitchen feel like a spice factory explosion.
It took a few attempts before I stopped treating it like a science experiment and just started cooking. I realized that the key wasn’t adding more flour to fix the wetness. It was about trusting the bananas. Two very ripe ones, mashed until they were almost liquid, plus a cup of pumpkin puree. That moisture is necessary. The trick is letting it rest. I remember standing in my kitchen, waiting for the batter to sit for ten minutes, watching the flour hydrate. It sounded like a waste of time, but when I finally pulled the loaf from the oven, the crumb was uniform. No tunnels. No dry edges.
It’s just bread. Really, it is. But it’s the kind of bread that makes you pause before you take the first slice. You don’t need fancy equipment or a trip to a specialty bakery for ingredients. Just one bowl, a whisk, and some patience. Once you taste it, you’ll probably stop looking for the next big thing. This is the one. It stays moist for days. It freezes well. And honestly, it’s just easier than the others.
Why You’ll Love This Recipe
This isn’t just another pumpkin bread recipe scraped from a magazine. It’s the result of years of trial and error, testing dozens of variations until I found the one that actually works for a busy home cook. I’ve tested this with different flours, different pumpkins, and even different bananas, and this specific combination is the winner every single time. It’s designed to be foolproof, so you don’t have to worry about over-mixing or under-baking.
- Quick & Easy: This recipe comes together in under fifteen minutes. You don’t need a stand mixer or a dozen bowls. Just one large mixing bowl and a whisk. It’s perfect for those busy weeknights when you want something homemade but don’t have hours to spend in the kitchen.
- Simple Ingredients: You likely already have everything you need in your pantry and fridge. Flour, sugar, eggs, oil, pumpkin puree, and bananas. No weird specialty items that you’ll only use once a year. It’s wholesome, simple baking.
- Perfect for Fall Gifting: This loaf travels well and stays moist for days. It’s an ideal gift for neighbors, teachers, or coworkers. Wrap it up in foil and cellophane, and it looks as good as it tastes. I’ve used this recipe for holiday cookies swaps with great success.
- Crowd-Pleaser: Kids who usually turn their noses up at “vegetable” breads love this. The banana sweetness masks the pumpkin flavor just enough, while adults appreciate the subtle spice notes. It’s a safe bet for potlucks and brunches.
- Unbelievably Delicious: The texture is the star here. It’s dense enough to feel satisfying but tender enough to melt in your mouth. The combination of pumpkin and banana creates a flavor profile that is deeper and more complex than using pumpkin alone.
What makes this recipe different is the inclusion of the bananas. Many pumpkin bread recipes rely solely on oil and eggs for moisture, which can lead to a dry crumb. The bananas add natural pectin and sugars that keep this loaf soft for up to five days. I also use a simple one-bowl method to minimize cleanup, because let’s face it, we all hate doing dishes after baking. This recipe respects your time and your effort.
It’s comfort food reimagined for the modern kitchen. It’s faster, easier, but with the same soul-soothing satisfaction as a loaf baked by your grandmother. Whether you’re trying to impress guests or just want a cozy treat on a rainy Sunday, this loaf delivers. It’s the kind of recipe that makes you feel like a pro baker without the stress.
What Ingredients You Will Need
This recipe relies on simple, wholesome ingredients to deliver bold flavor and satisfying texture without the fuss. The beauty of this one-bowl method is that the ingredients do the heavy lifting. You don’t need to cream butter or fold in egg whites. The moisture comes from the natural content of the pumpkin and bananas, while the oil keeps the crumb tender. Here is what you need to get started.
For the Wet Ingredients
- Ripe Bananas: Use two medium-sized bananas that are very ripe, with brown spots on the peel. The riper they are, the sweeter they will be, and the easier they will mash. (adds natural sweetness and moisture)
- Pumpkin Puree: One cup of pure pumpkin puree. Do not use pumpkin pie filling, which has added sugar and spices. I recommend Libby’s brand for consistency, but any plain puree works fine. (provides earthy flavor and moisture)
- Vegetable Oil: Half a cup of neutral oil. Vegetable oil, canola oil, or light olive oil all work well. Oil keeps the bread moister than butter does over time. (ensures a tender crumb)
- Eggs: Two large eggs, room temperature. This helps them incorporate smoothly into the batter without seizing the oil. (binds the ingredients together)
- Vanilla Extract: One teaspoon of pure vanilla extract. It enhances the warm spices and adds depth. (adds aromatic flavor)
For the Dry Ingredients
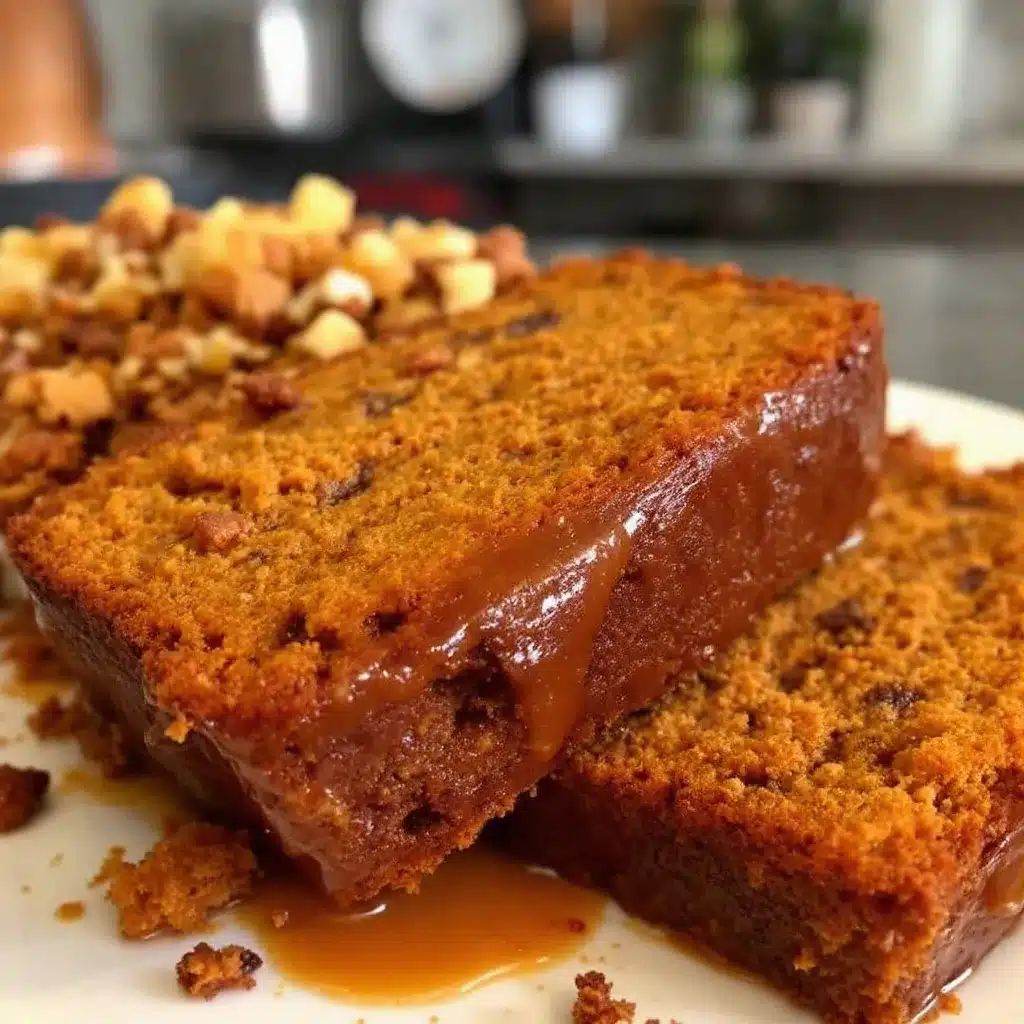
- All-Purpose Flour: Two cups of all-purpose flour. This is the standard for quick breads. If you need a gluten-free option, use a 1:1 gluten-free baking blend. (forms the structure of the bread)
- Baking Soda: One teaspoon. This reacts with the acidic pumpkin and bananas to help the bread rise. (leavening agent)
- Baking Powder: Half a teaspoon. This provides an extra lift to ensure the loaf isn’t too dense. (additional leavening)
- Salt: One teaspoon. Salt is crucial for balancing the sweetness. Don’t skip it. (balances flavor)
- Cinnamon: One teaspoon. Ground cinnamon is the backbone of the spice profile. (adds warmth)
- Pumpkin Pie Spice: One teaspoon. If you don’t have this, you can make your own mix with cinnamon, nutmeg, ginger, and cloves. (adds complex autumn flavor)
For the Topping (Optional)
- Walnuts or Pecans: Half a cup of chopped nuts. Toast them lightly in a dry pan for extra flavor. (adds crunch and richness)
- Granulated Sugar: One tablespoon. Sprinkle this on top before baking for a crispy, sweet crust. (adds texture and visual appeal)
When selecting your ingredients, look for bananas that are spotty and soft. If they are green or yellow, they won’t add enough sweetness. For the pumpkin puree, check the label to ensure it’s 100% pure pumpkin. Some brands add fillers that can alter the texture. If you are making this in summer, you can swap the pumpkin for mashed sweet potatoes, though the flavor will be slightly different.
Equipment Needed
You don’t need a lot of fancy gear to make this bread. In fact, keeping the equipment minimal is part of why this recipe is so easy. Here is what you’ll need on your counter.
- One Large Mixing Bowl: A glass or stainless steel bowl about 4-5 quarts in size is ideal. It needs to be large enough to hold all the ingredients without spilling when you whisk. I use a simple glass bowl because I can see the consistency of the batter easily.
- Whisk: A standard wire whisk is perfect for combining the wet and dry ingredients. Avoid using a spoon, as it won’t incorporate the air as well, but don’t use an electric mixer either, as that can overwork the flour.
- Loaf Pan: A standard 9×5-inch loaf pan. Non-stick pans are best for easy removal. If you only have a metal pan, grease it well. Glass or ceramic pans may require a slightly longer baking time, so check for doneness a few minutes later.
- Parchment Paper: While not strictly necessary, lining your pan with parchment paper makes cleanup a breeze and ensures the bread doesn’t stick. I always use this because I hate scrubbing pans.
- Cooling Rack: A wire cooling rack allows air to circulate under the loaf, preventing the bottom from getting soggy. If you don’t have one, you can rest the pan on an upside-down baking sheet.
If you don’t have a whisk, a fork works in a pinch, but it takes longer. For the loaf pan, if you want a more rustic look, you can use a round cake pan, but the baking time will change. Stick to the 9×5 pan for the best results. These tools are basic kitchen staples, so you probably already have them all ready to go.
Preparation Method
Making this bread is straightforward. The key is to mix it gently and not overwork the batter. Here is how to do it step by step.
- Preheat and Prep (5 minutes): Preheat your oven to 350°F (175°C). Grease your 9×5-inch loaf pan with non-stick spray or butter. If you are using parchment paper, cut a strip to fit the bottom and sides, leaving a little overhang on the long sides for easy removal. This step is crucial for getting the loaf out intact.
- Mash the Bananas (2 minutes): In your large mixing bowl, peel the two ripe bananas and mash them with a fork until they are almost smooth. There can be a few small lumps, but try to get them as fine as possible. This ensures even distribution of flavor and moisture throughout the loaf.
- Combine Wet Ingredients (2 minutes): To the mashed bananas, add the pumpkin puree, vegetable oil, eggs, and vanilla extract. Whisk everything together until the mixture is smooth and well combined. The batter should look slightly curdled at first, but keep whisking until it’s uniform. This usually takes about a minute.
- Mix Dry Ingredients (1 minute): Add the all-purpose flour, baking soda, baking powder, salt, cinnamon, and pumpkin pie spice to the wet mixture. Do not stir yet. Just dump them in. This helps ensure you don’t miss any pockets of baking soda or salt.
- Combine Batter (2 minutes): Using your whisk, gently fold the dry ingredients into the wet ingredients. Mix only until the flour disappears. The batter will be thick and sticky. Do not overmix. If you see streaks of flour, that’s okay; a few more stirs will finish it. Overmixing develops gluten, which makes the bread tough instead of tender.
- Add Nuts (Optional) (1 minute): If you are using walnuts or pecans, fold them in gently now. Be careful not to crush them. You want distinct pieces of nut in every bite.
- Rest the Batter (10 minutes): Let the batter sit in the bowl for ten minutes. This allows the flour to fully hydrate and the baking soda to start activating. It sounds like a wait, but it makes a huge difference in the final texture. The batter will thicken slightly.
- Prepare Topping (1 minute): If using nuts and sugar for the topping, mix them together in a small bowl. Sprinkle this evenly over the batter in the loaf pan. Press it down gently so it sticks.
- Bake (55-65 minutes): Place the loaf in the preheated oven. Bake for 55 to 65 minutes. The top should be golden brown, and a toothpick inserted into the center should come out clean or with just a few moist crumbs. If the top is browning too quickly, tent it with aluminum foil after the first 30 minutes.
- Cool (30 minutes): Let the bread cool in the pan for 10 minutes, then transfer it to a wire rack to cool completely. Cutting into hot bread can make it gummy. Patience is key here.
Keep an eye on the bread around the 50-minute mark. Ovens vary, so your loaf might be done sooner or later. The smell of cinnamon and pumpkin should fill your kitchen when it’s ready. If the toothpick comes out with wet batter, give it another 5 minutes. If it comes out clean, it’s done.
Cooking Tips & Techniques
I’ve made this bread enough times to know where things can go wrong, and I’ve learned a few tricks to avoid them. Here are some professional tips to ensure your loaf turns out perfectly every time.
Don’t Skimp on Ripe Bananas: The ripeness of the bananas is the most important factor. Green bananas add starch, not sweetness. Look for bananas that are mostly brown. If you can’t wait for them to ripen naturally, you can bake them in their peels at 300°F for 15-20 minutes until the peels turn black. Peel them when cool, and you’ll have soft, sweet bananas ready to use.
Measure Flour Correctly: Too much flour is the number one reason quick breads turn out dry. Don’t scoop the flour directly from the bag with your measuring cup. Instead, spoon the flour into the cup and level it off with a knife. This aerates the flour and prevents packing. One cup of packed flour can add dozens of extra grams, which throws off the balance of wet to dry ingredients.
Check Your Leaveners: Baking soda and baking powder lose their potency over time. If your bread doesn’t rise well, your leaveners might be old. Test them by adding a little vinegar to the baking soda (it should fizz) or hot water to the baking powder. If they don’t react, replace them. Fresh leaveners make a noticeable difference in the rise and texture.
Resting the Batter: I know it’s tempting to bake it right away, but letting the batter rest for ten minutes allows the flour to absorb the liquid. This results in a more tender crumb and prevents a gritty texture. It’s a small step that pays off in the final product.
Don’t Overmix: I cannot stress this enough. Mix until the flour is just incorporated. A few lumps are fine. Overmixing develops gluten, which leads to a dense, chewy loaf instead of a tender, cake-like bread. Think of it as folding, not beating.
Use a Thermometer: If you’re unsure if the bread is done, use an instant-read thermometer. The internal temperature should reach 200-205°F (93-96°C). This is the most accurate way to check for doneness, especially with moist batters like pumpkin bread.
Variations & Adaptations
While this recipe is great as is, there are plenty of ways to customize it to suit your taste or dietary needs. Here are a few variations I’ve tried and loved.
- Gluten-Free Option: Swap the all-purpose flour for a 1:1 gluten-free baking blend. Brands like King Arthur or Bob’s Red Mill work well. The texture might be slightly more delicate, so be careful not to overmix. Add a teaspoon of xanthan gum if your blend doesn’t include it.
- Dairy-Free: This recipe is already dairy-free if you use vegetable oil and skip any butter-based toppings. Just ensure your vanilla extract is dairy-free, which most are.
- Lower Sugar: Reduce the granulated sugar in the topping to half a teaspoon, or omit it entirely. The bananas and pumpkin provide enough natural sweetness. You can also reduce the sugar in the batter by one-quarter cup without affecting the texture significantly.
- Spice It Up: Add a half-teaspoon of ground ginger or nutmeg for extra warmth. If you like a kick, add a pinch of cayenne pepper. It sounds strange, but it enhances the chocolate and spice notes beautifully.
- Chocolate Chip: Fold in half a cup of semi-sweet chocolate chips along with the nuts. The combination of pumpkin, banana, and chocolate is rich and indulgent. Use dark chocolate for a less sweet version.
- Maple Glaze: Drizzle a simple glaze over the cooled bread. Mix two cups of powdered sugar with two tablespoons of maple syrup and a splash of milk. This adds a sweet finish that pairs well with the earthy pumpkin.
I once tried adding shredded zucchini to this recipe, and it worked surprisingly well. It added extra moisture and made the bread even softer. If you have a garden surplus, give it a try. Just squeeze out the excess water from the zucchini before adding it.
Serving & Storage Suggestions
This bread is best served at room temperature, where the flavors are most pronounced. It pairs wonderfully with a cup of hot coffee or tea. For a treat, warm a slice in the microwave for 20 seconds and top it with a pat of butter or a dollop of cream cheese.
Storage: Store the cooled bread in an airtight container or wrap it tightly in plastic wrap at room temperature for up to three days. It stays moist and fresh. If you live in a humid climate, refrigerate it to prevent mold.
Refrigerator: The bread can be stored in the refrigerator for up to five days. Let it come to room temperature before serving for the best texture.
Freezer: This bread freezes exceptionally well. Wrap the whole loaf or individual slices in plastic wrap, then place them in a freezer-safe bag. It will keep for up to three months. Thaw overnight in the refrigerator or at room temperature.
Reheating: To refresh stale bread, wrap it in foil and warm it in a 300°F oven for 10-15 minutes. This restores the moisture and softness.
The flavors actually deepen after a day or two. The spices meld together, and the bread becomes more cohesive. It’s often better on day two than day one. If you’re making it for a gathering, plan to bake it a day ahead.
Nutritional Information & Benefits
This bread is a moderate treat, but it does offer some nutritional benefits compared to traditional sweet breads. The bananas provide potassium and vitamin B6, while the pumpkin puree adds vitamin A and fiber. The nuts (if used) contribute healthy fats and protein.
Each slice contains approximately 250-300 calories, depending on the size and toppings. It is not low-calorie, but it is nutrient-dense. The use of oil instead of butter keeps it dairy-free, which is a plus for some diets. However, it is still high in carbohydrates due to the flour and fruit.
For those watching their sugar intake, the natural sweetness from the bananas reduces the need for added sugar. You can further reduce the sugar by using unsweetened applesauce in place of half the oil, though the texture will be denser.
I consider this a wholesome breakfast option or a healthy-ish snack. It’s better for you than a donut or a cookie. The fiber from the pumpkin and bananas helps slow down the absorption of sugar, providing a more steady energy release. Just enjoy it in moderation as part of a balanced diet.
Conclusion
This Easy One-Bowl Moist Pumpkin Banana Bread is the perfect fall recipe. It’s simple, delicious, and incredibly moist. I love that it uses ingredients I always have on hand and requires minimal cleanup. It’s the kind of recipe that brings comfort and joy to the kitchen. Whether you’re a seasoned baker or a beginner, this loaf is sure to become a staple in your rotation.
I encourage you to try it and see how easy it is. Feel free to customize it with your favorite nuts, spices, or add-ins. Share your variations with me in the comments below. I’d love to hear how it turned out for you. If you make this, tag me on social media so I can see your creations.
Happy baking! Let’s make some bread.
FAQs
Can I use fresh pumpkin instead of canned puree?
Yes, you can use fresh pumpkin. Roast a sugar pumpkin (also called pie pumpkin) until tender, scoop out the flesh, and mash it. You’ll need about one cup of mashed fresh pumpkin. Note that fresh pumpkin has more water, so you may need to reduce the oil slightly or add a tablespoon more flour to compensate.
Why is my pumpkin bread dense?
Dense bread is usually caused by overmixing the batter or using too much flour. Make sure to mix only until the flour is incorporated. Also, measure your flour correctly by spooning it into the cup and leveling it off. Avoid scooping directly from the bag.
Can I freeze the batter?
It’s not recommended to freeze the batter because the leavening agents will start to lose their potency, resulting in a flat loaf. It’s better to bake the bread and then freeze the finished product. The baked bread freezes very well.
What is the best way to store pumpkin banana bread?
Store it in an airtight container at room temperature for up to three days. For longer storage, refrigerate for up to five days or freeze for up to three months. Always wrap it tightly in plastic wrap to prevent drying out.
Can I use butter instead of oil?
You can use melted butter instead of oil, but the bread will be slightly less moist and may dry out faster. Oil is preferred for quick breads because it stays liquid at room temperature, keeping the crumb tender. If you use butter, let it cool slightly before adding it to the batter.
Pin This Recipe!
Easy One-Bowl Moist Pumpkin Banana Bread
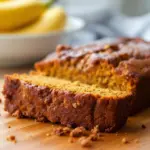
A foolproof, moist pumpkin banana bread made in a single bowl. This recipe balances the earthiness of pumpkin with the natural sweetness of ripe bananas for a tender, flavorful loaf that stays fresh for days.
- Prep Time: 15 minutes
- Cook Time: 55-65 minutes
- Total Time: 70-80 minutes
- Yield: 1 loaf (8-10 servings) 1x
- Category: Breakfast
- Cuisine: American
Ingredients
- 2 medium ripe bananas, mashed
- 1 cup pumpkin puree (not pie filling)
- 1/2 cup vegetable oil (or canola/light olive oil)
- 2 large eggs, room temperature
- 1 teaspoon vanilla extract
- 2 cups all-purpose flour
- 1 teaspoon baking soda
- 1/2 teaspoon baking powder
- 1 teaspoon salt
- 1 teaspoon ground cinnamon
- 1 teaspoon pumpkin pie spice
- 1/2 cup chopped walnuts or pecans (optional)
- 1 tablespoon granulated sugar (optional, for topping)
Instructions
- Preheat oven to 350°F (175°C). Grease a 9×5-inch loaf pan and line with parchment paper if desired.
- In a large mixing bowl, mash the ripe bananas with a fork until almost smooth.
- Add the pumpkin puree, vegetable oil, eggs, and vanilla extract to the bananas. Whisk until the mixture is smooth and uniform.
- Add the flour, baking soda, baking powder, salt, cinnamon, and pumpkin pie spice to the wet ingredients. Do not stir yet.
- Using a whisk, gently fold the dry ingredients into the wet ingredients until just combined. Do not overmix; a few lumps are okay.
- If using nuts, gently fold them into the batter.
- Let the batter rest in the bowl for 10 minutes to allow the flour to hydrate.
- Pour the batter into the prepared loaf pan. If using the sugar topping, sprinkle it evenly over the batter and press gently.
- Bake for 55-65 minutes, or until a toothpick inserted into the center comes out clean or with moist crumbs. Tent with foil if the top browns too quickly.
- Cool in the pan for 10 minutes, then transfer to a wire rack to cool completely before slicing.
Notes
[‘Use very ripe bananas with brown spots for maximum sweetness and moisture.’, ‘Do not scoop flour directly from the bag; spoon it into the measuring cup and level it off to avoid dry bread.’, ‘Letting the batter rest for 10 minutes helps the flour hydrate, resulting in a more tender crumb.’, ‘Do not overmix the batter, as this develops gluten and makes the bread tough.’, ‘Internal temperature should reach 200-205°F for best doneness.’, ‘Store at room temperature for up to 3 days, refrigerate for 5 days, or freeze for 3 months.’]
Nutrition
- Serving Size: 1 slice
- Calories: 275
- Sugar: 18
- Sodium: 350
- Fat: 12
- Saturated Fat: 1
- Carbohydrates: 38
- Fiber: 2
- Protein: 4
Keywords: pumpkin bread, banana bread, fall baking, one bowl recipe, moist bread, gluten-free option, dairy-free, easy baking