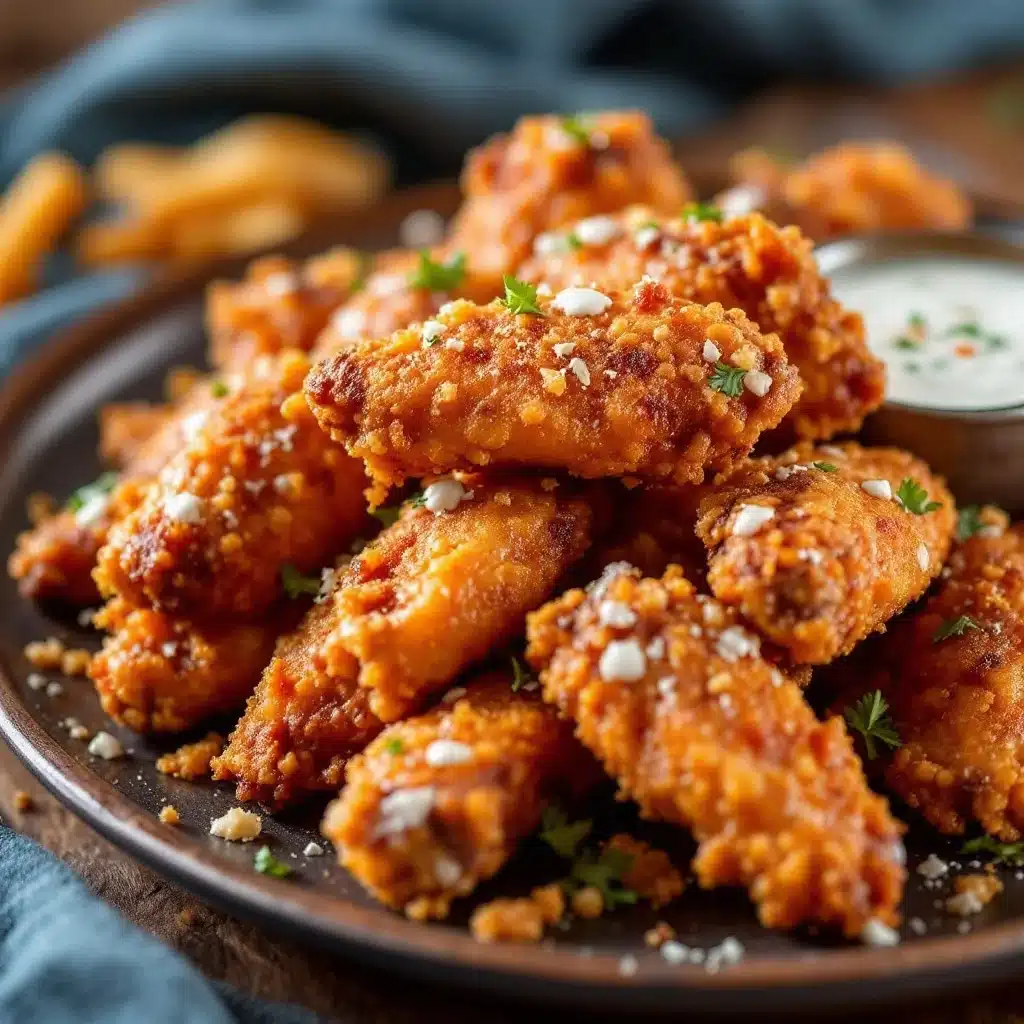
It is 2:00 PM on a gray Sunday in November, and the only thing I want is crispy oven-baked football wings with ranch. The house is quiet, save for the low hum of the refrigerator and the distant roar of a crowd coming through the television speakers. I am alone in the kitchen, but it doesn’t feel lonely. It feels like a pause button on the rest of the world. The air smells faintly of old wool blankets and the sharp, tangy promise of blue cheese.
I have spent years trying to perfect these wings. You know how it goes—too many late nights standing over a deep fryer that splatters grease everywhere, or worse, the microwave “crispy” attempts that leave you with rubbery, sad chicken. I wanted something better. Something that actually tastes like it was made with care, even if you are just eating it in your pajamas while waiting for the kickoff.
There is a specific kind of peace in the oven-baking method. It doesn’t require constant babysitting. You don’t need to hover over hot oil. You just arrange them, bake them, and wait. And while they bake, you can actually sit down. You can read a few pages of a book. You can breathe.
The key, honestly, is the dry brine. I learned that the hard way, after years of soggy skin. By letting the wings sit in the salt and baking powder mixture for a few hours, the skin dries out. And when the skin dries out, it crisps up like crazy in the oven. No deep frying required. Just hot, dry air and patience.
I remember the first time I served these to my partner. He took one bite, chewed slowly, and then looked at me with that half-smile he gets when he knows he can’t have just one. “These are weirdly good,” he said. They weren’t just good. They were the kind of snack that makes you forget you are supposed to be watching the game.
This recipe belongs to those slow afternoons before the big match. It belongs to the quiet moments of anticipation. It is for the solitary cook who finds comfort in the ritual of preparation, not the performance of hosting. So, put on some comfortable shoes, turn on the oven, and let’s make something that tastes like victory.
Why You’ll Love This Recipe
Let’s be real for a second. We’ve all been there—standing in front of the open fridge at 3 PM, wondering what to eat while the game starts in an hour. You don’t want heavy food. You don’t want to cook for twenty minutes. You want something crunchy, salty, and satisfying without the guilt of a deep-fried mess. These wings hit that sweet spot perfectly.
Here is why this recipe has become a staple in my kitchen, and why I think it will become one in yours too:
* **Quick & Easy**: While the prep requires a little planning (the dry brine part), the actual active cooking time is minimal. Once they are in the oven, you are free. It is perfect for busy weeknights or last-minute cravings when you need comfort fast.
* **Simple Ingredients**: You don’t need a specialty grocery store trip. You likely already have baking powder, salt, garlic powder, and buttermilk in your kitchen. It relies on pantry staples to deliver bold flavor without the fuss.
* **Perfect for Game Day**: Whether it is the Super Bowl, the playoffs, or just a casual Sunday with friends, these wings are the ultimate crowd-pleaser. They are easy to eat while holding a drink or scrolling through your phone.
* **Crowd-Pleaser**: I have served these to picky eaters and seasoned foodies alike. The texture is universally loved. Kids love the crunch, and adults appreciate the depth of flavor from the spices.
* **Unbelievably Delicious**: The texture and flavor combo is next-level comfort food. The skin gets shatteringly crisp, while the meat underneath stays juicy and tender. It’s the kind of bite that makes you close your eyes.
* **Healthier Than Frying**: Let’s face it, deep frying is a hassle and adds a lot of unnecessary calories. Baking them allows the fat to render out naturally, giving you that fried taste with a fraction of the oil.
What makes this recipe different from the rest? It’s the baking powder secret. Most people use just salt, but adding a small amount of baking powder raises the pH level of the chicken skin. This breaks down the proteins faster, leading to a darker, crispier crust without needing an fryer. It is a small tweak that makes a huge difference.
It’s not just about the wings, though. It’s about the ranch. Making a quick, creamy ranch dip from scratch (using sour cream, mayo, and dried herbs) takes five minutes but elevates the whole dish. Store-bought ranch is fine, but homemade adds that fresh, herby kick that pairs so well with the savory chicken.
This recipe is for the person who wants to impress without stressing. It’s for the quiet ritual of cooking for yourself or for loved ones. It’s comfort food reimagined—simpler, faster, but with the same soul-soothing satisfaction.
What Ingredients You Will Need
This recipe uses simple, wholesome ingredients to deliver bold flavor and satisfying texture. The beauty of this dish lies in its accessibility. You don’t need exotic spices or hard-to-find cuts of meat. Everything you need is likely already in your pantry or fridge.
Here is what you will need to get started:
* **Chicken Wings**: I recommend using a mix of drumettes and wingettes for the best variety of textures. If you can find local, organic wings, even better, but standard grocery store wings work perfectly. About 3 to 4 pounds should feed a small crowd.
* **Buttermilk**: This is crucial for the marinade. The acidity in the buttermilk helps tenderize the chicken and adds a subtle tang. If you don’t have buttermilk, you can make a substitute by adding 1 tablespoon of lemon juice or white vinegar to 1 cup of regular milk and letting it sit for 10 minutes.
* **Baking Powder**: Not baking soda! Make sure you use aluminum-free baking powder. This is the secret weapon for crispiness. It helps dry out the skin and promotes browning. Use about 1 tablespoon.
* **Salt**: Kosher salt is my go-to because it has larger flakes and is easier to control. Use about 1 teaspoon. It enhances the natural flavor of the chicken.
* **Garlic Powder**: Adds a savory, aromatic depth. Use 1 teaspoon.
* **Onion Powder**: Complements the garlic and adds a subtle sweetness. Use 1 teaspoon.
* **Paprika**: Smoked paprika adds a nice hint of smokiness, but regular paprika works fine too. Use 1 teaspoon.
* **Black Pepper**: Freshly cracked black pepper adds a bit of heat and visual appeal. Use 1/2 teaspoon.
* **For the Ranch Dip**:
* **Sour Cream**: Full-fat sour cream gives the best creamy texture. Greek yogurt can be used for a lighter option, but it might be tangier.
* **Mayonnaise**: Adds richness and body. Use about 2 tablespoons.
* **Dried Parsley**: Fresh parsley is nice, but dried integrates better into a dip. Use 1 tablespoon.
* **Dried Dill**: Adds a fresh, herbal note. Use 1 teaspoon.
* **Garlic Cloves**: Fresh minced garlic adds a punch of flavor. Use 1 small clove.
* **Lemon Juice**: A splash of fresh lemon juice brightens up the dip. Use 1 teaspoon.
* **Salt and Pepper**: To taste.
I personally prefer using a wire rack for baking. It allows air to circulate under the wings, ensuring they cook evenly and don’t get soggy on the bottom. If you don’t have one, a rimmed baking sheet lined with parchment paper works, but you’ll need to flip them halfway through.
For the ranch, I like to let it sit in the fridge for at least 30 minutes before serving. This allows the dried herbs to rehydrate and the flavors to meld together. It’s a small step that makes a big difference in taste.
Equipment Needed
You don’t need a lot of fancy gear to make these wings, but having the right tools makes the process much smoother.
* **Large Bowl**: For mixing the buttermilk marinade and coating the wings. A glass or stainless steel bowl works best.
* **Wire Rack**: This is my favorite piece of equipment for baking wings. It elevates the chicken, allowing hot air to circulate all around. It ensures even cooking and prevents the bottoms from steaming in their own juices. If you don’t have one, a rimmed baking sheet is fine.
* **Rimmed Baking Sheet**: If you skip the rack, use a heavy-duty baking sheet. Line it with aluminum foil for easy cleanup. The foil catches the drippings and prevents burning.
* **Parchment Paper**: Optional, but helpful if you are using a baking sheet without foil. It prevents sticking and makes cleanup a breeze.
* **Small Mixing Bowl**: For preparing the ranch dip.
* **Whisk**: To blend the ranch ingredients until smooth.
* **Tongs**: For handling the raw chicken safely and flipping the wings in the oven.
* **Meat Thermometer**: While not strictly necessary for wings, it’s good to know the internal temperature should reach 165°F (74°C) for food safety.
I’ve tried using silicone mats, but they don’t promote crisping as well as a bare wire rack or foil. The direct contact with the hot metal (or air circulation) is key.
If you are baking a large batch, you might need two sheets. Don’t overcrowd the pan! Space is your friend here. If the wings are touching, they will steam instead of bake. Give them room to breathe.
Preparation Method
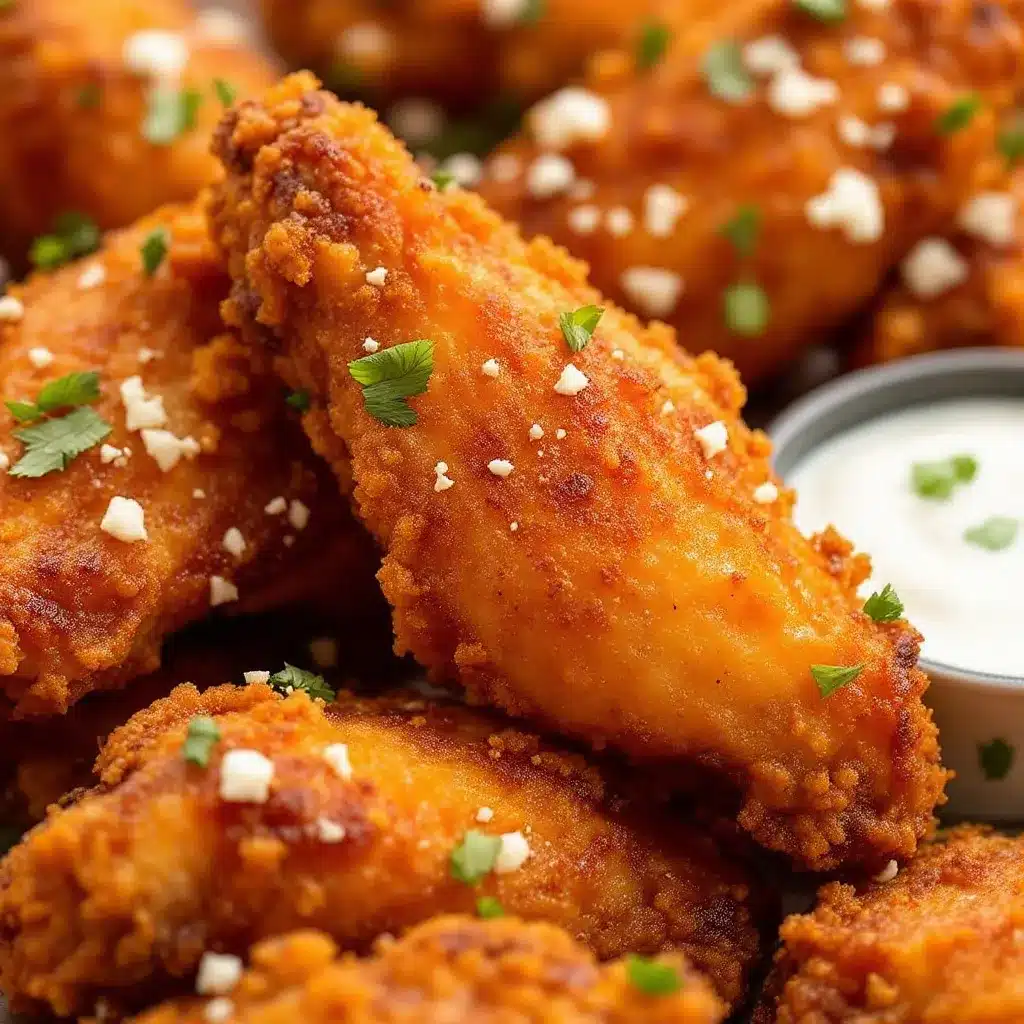
Making these wings is straightforward, but taking your time with the steps ensures the best results. Here is how to do it:
1. **Prepare the Chicken**: Pat the chicken wings completely dry with paper towels. This is the most important step. Moisture is the enemy of crispiness. If the skin is wet, it will steam. Remove any loose skin or excess fat if you prefer.
2. **Make the Dry Rub**: In a large bowl, whisk together the baking powder, salt, garlic powder, onion powder, paprika, and black pepper. Make sure there are no clumps of baking powder.
3. **Coat the Wings**: Add the dried wings to the bowl. Toss them thoroughly until every wing is evenly coated with the spice mixture. The baking powder should be visible on the skin.
4. **The Dry Brine (Optional but Recommended)**: Place the coated wings on a wire rack set over a baking sheet. Let them sit in the refrigerator, uncovered, for at least 4 hours, or overnight. This dries out the skin further. If you are short on time, you can skip this, but the crispiness will be slightly less intense.
5. **Preheat the Oven**: Preheat your oven to 400°F (200°C). If you have a convection setting, use it! It circulates air and helps crisp the skin even more. If not, a regular bake setting works fine.
6. **Arrange the Wings**: Place the wings on the wire rack or baking sheet. Ensure they are not touching. If you are using a baking sheet without a rack, you will need to flip them halfway through.
7. **Bake**: Place the wings in the oven. Bake for 40-45 minutes. Halfway through (around the 20-minute mark), flip the wings if you are not using a rack. You want the skin to turn golden brown and crispy.
8. **Check for Doneness**: The wings are done when the skin is crisp and the internal temperature reaches 165°F (74°C). The juices should run clear. If they aren’t crispy enough, you can broil them for 1-2 minutes at the end, but watch them closely so they don’t burn.
9. **Make the Ranch**: While the wings bake, mix the sour cream, mayonnaise, dried parsley, dill, minced garlic, lemon juice, salt, and pepper in a small bowl. Stir until smooth. Taste and adjust seasoning as needed.
10. **Rest and Serve**: Let the wings rest for 5 minutes after taking them out of the oven. This allows the juices to redistribute. Serve immediately with the ranch dip on the side.
The sensory cues here are key. You’ll know they are ready when you hear that slight sizzle when they come out of the oven, and the smell of roasted chicken and spices fills the kitchen. The skin should look matte and textured, not shiny or wet.
Cooking Tips & Techniques
I have made my fair share of mistakes in the kitchen, and some of them involved soggy wings. Here are some tips to help you avoid common pitfalls and get the best results.
* **Dry is Key**: I cannot stress this enough. Pat the wings dry before adding the dry rub. If they are wet, the rub won’t stick, and the skin won’t crisp.
* **Don’t Skip the Baking Powder**: This is the secret ingredient. It changes the pH of the skin, breaking down proteins and allowing the skin to crisp up in the oven. Just make sure it’s baking powder, not baking soda.
* **Use a Wire Rack**: If you can, use a wire rack. It promotes even air circulation. If you don’t have one, flip the wings halfway through baking to ensure both sides get crispy.
* **Don’t Overcrowd the Pan**: Wings need space. If they are touching, they will steam. Use two baking sheets if necessary.
* **Temperature Control**: 400°F is the sweet spot. Too low, and the fat won’t render out. Too high, and the spices might burn before the skin crisps.
* **The Broil Finish**: If the wings are cooked through but the skin isn’t as crispy as you like, turn on the broiler for the last 1-2 minutes. Watch them like a hawk—they can go from golden to burnt in seconds.
* **Rest the Wings**: Letting them rest for 5 minutes after baking helps the juices settle. It also gives you a moment to prepare the dip and set the table.
I once tried to speed things up by increasing the temperature to 450°F. The result? Burnt garlic powder and raw chicken in the middle. Lesson learned. Slow and steady wins the race here.
Another tip: If you are making these for a party, you can bake them ahead of time. Let them cool completely, then store them in the refrigerator. Reheat them in a 400°F oven for 10-15 minutes to restore crispiness. They won’t be as good as fresh-out-of-the-oven, but they are still delicious.
Variations & Adaptations
While the classic ranch pairing is my favorite, there are plenty of ways to switch things up. Here are a few variations you can try:
* **Buffalo Style**: Toss the baked wings in your favorite hot sauce after they come out of the oven. Add a tablespoon of melted butter to the sauce for a classic buffalo wing experience. Serve with celery sticks and blue cheese dip instead of ranch.
* **Asian Glazed**: Mix soy sauce, ginger, garlic, and a touch of honey. Brush this over the wings during the last 10 minutes of baking. Garnish with sesame seeds and green onions.
* **Lemon Herb**: Add dried thyme and rosemary to the dry rub. Serve with a lemon-yogurt dipping sauce instead of ranch. This is a lighter option that pairs well with spring vegetables.
* **Spicy Cajun**: Add cayenne pepper and extra garlic powder to the dry rub. Serve with a spicy ranch dip by adding a dash of hot sauce to the dip mixture.
* **Gluten-Free**: This recipe is naturally gluten-free, but double-check your baking powder and spices to ensure they are certified gluten-free.
I once tried making these with drumsticks instead of wings. The cooking time increased by about 10-15 minutes, but the result was just as good. The meat was even juicier.
If you are serving guests with allergies, make sure to label the dips clearly. The ranch contains dairy, so a dairy-free alternative using coconut yogurt and olive oil could be a good option.
Serving & Storage Suggestions
These wings are best served immediately after baking, while the skin is still crisp. Pair them with celery sticks, carrot sticks, and cucumber slices for a refreshing crunch. A cold beer or a light lager is the traditional beverage choice, but a crisp white wine or even a sparkling water with lime works well too.
If you have leftovers (which is rare, but let’s say they happen), store them in an airtight container in the refrigerator for up to 3 days. To reheat, place them on a wire rack in a 400°F oven for 10-15 minutes. This restores the crispiness. Avoid the microwave, as it will make the skin soggy.
The ranch dip can be stored in the refrigerator for up to 5 days. The flavors actually get better after a day or two as the herbs have time to infuse.
I like to serve these wings on a large platter, garnished with fresh parsley and a wedge of lemon. It looks festive and invites everyone to dig in.
Nutritional Information & Benefits
While these wings are a treat, they are not without their benefits. Chicken wings are a good source of protein, which helps with muscle repair and satiety. The skin contains healthy fats, although it is calorie-dense.
One serving (about 4 wings with 2 tablespoons of ranch) contains approximately 350-400 calories. The ranch dip adds about 100-150 calories per tablespoon, depending on the ingredients used.
For those watching their sodium intake, keep in mind that the dry rub and ranch dip both contain salt. You can reduce the sodium by using less salt in the rub and opting for low-fat sour cream and mayo in the dip.
This recipe is naturally gluten-free, making it a safe option for those with celiac disease or gluten sensitivity. Just ensure your spices and baking powder are certified gluten-free.
I enjoy these wings as an occasional treat. They are satisfying and delicious, but balance is key. Pair them with a side salad or roasted vegetables to add fiber and nutrients to your meal.
Conclusion
These crispy oven-baked football wings with ranch are more than just a snack. They are a ritual, a comfort, and a celebration of simple, good food. Whether you are eating them alone on a quiet Sunday or sharing them with friends during a big game, they bring a sense of joy and satisfaction.
I hope you try this recipe and find your own quiet moments in the kitchen. Feel free to adjust the spices to your liking, or experiment with different dips. Cooking is about making it your own.
If you make these wings, I would love to hear how they turned out. Leave a comment below with your thoughts, or share a photo on social media. Tag me if you can—I love seeing your creations.
Enjoy the process, savor the flavors, and happy eating. And if you need more game day inspiration, check out our crispy bacon wrapped asparagus bundles for a savory side dish, or try our savory jalapeño popper cheesy cornbread casserole for a spicy twist.
Frequently Asked Questions
Can I use chicken drumsticks instead of wings?
Yes, you can. Just note that drumsticks are larger and may take 10-15 minutes longer to cook. Use a meat thermometer to ensure they reach 165°F (74°C).
Why is my baking powder not working?
Make sure you are using aluminum-free baking powder, not baking soda. Baking soda has a different chemical reaction and can leave a soapy taste. Also, ensure your baking powder is not expired.
Can I make the ranch dip ahead of time?
Yes, the ranch dip can be made up to 5 days in advance. Storing it in the fridge allows the flavors to meld, often improving the taste.
How do I keep the wings crispy after baking?
The best way is to serve them immediately. If you must store them, reheat them in an oven or air fryer at 400°F for 10-15 minutes. Avoid the microwave.
What can I use instead of buttermilk?
You can make a substitute by adding 1 tablespoon of lemon juice or white vinegar to 1 cup of regular milk. Let it sit for 10 minutes until it curdles slightly.
Pin This Recipe!

Crispy Oven-Baked Football Wings with Ranch

Perfectly crispy oven-baked chicken wings achieved through a dry brine and baking powder technique, served with a homemade creamy ranch dip. A healthier, less messy alternative to deep-fried wings that is ideal for game day or quiet Sunday cravings.
- Prep Time: 15 minutes
- Cook Time: 45 minutes
- Total Time: 1 hour
- Yield: 4 servings 1x
- Category: Appetizer
- Cuisine: American
Ingredients
- 3 to 4 lbs chicken wings (drumettes and wingettes)
- 1 cup buttermilk (or substitute: 1 cup milk + 1 tbsp lemon juice/vinegar)
- 1 tbsp aluminum-free baking powder
- 1 tsp kosher salt
- 1 tsp garlic powder
- 1 tsp onion powder
- 1 tsp paprika (smoked or regular)
- 1/2 tsp freshly cracked black pepper
- 1/2 cup full-fat sour cream
- 2 tbsp mayonnaise
- 1 tbsp dried parsley
- 1 tsp dried dill
- 1 small clove garlic, minced
- 1 tsp lemon juice
- Salt and pepper to taste
Instructions
- Pat chicken wings completely dry with paper towels to ensure crispiness.
- In a large bowl, whisk together baking powder, salt, garlic powder, onion powder, paprika, and black pepper.
- Add the dried wings to the spice mixture and toss thoroughly until evenly coated.
- Place coated wings on a wire rack set over a baking sheet. Refrigerate uncovered for at least 4 hours or overnight to dry out the skin (dry brine).
- Preheat oven to 400°F (200°C). Use convection setting if available.
- Arrange wings on the wire rack or baking sheet, ensuring they are not touching.
- Bake for 40-45 minutes. If not using a wire rack, flip wings halfway through.
- Wings are done when skin is golden brown and crispy, and internal temperature reaches 165°F (74°C).
- While wings bake, mix sour cream, mayonnaise, dried parsley, dill, minced garlic, lemon juice, salt, and pepper in a small bowl until smooth.
- Let wings rest for 5 minutes before serving with the ranch dip.
Notes
The key to crispiness is drying the wings thoroughly before seasoning and using a wire rack to allow air circulation. Do not overcrowd the pan. If you don’t have a wire rack, flip the wings halfway through baking. The ranch dip tastes better after sitting in the fridge for 30 minutes to allow flavors to meld. For leftovers, reheat in a 400°F oven for 10-15 minutes to restore crispiness; avoid the microwave.
Nutrition
- Serving Size: 4 wings with 2 table
- Calories: 375
- Sugar: 1
- Sodium: 650
- Fat: 28
- Saturated Fat: 8
- Carbohydrates: 4
- Fiber: 0.5
- Protein: 25
Keywords: crispy wings, oven-baked wings, football wings, ranch dip, game day food, chicken wings recipe, dry brine wings, healthy fried chicken alternative