The power cut out at 6:15 PM on a Tuesday, right when the sky turned that bruised purple color that always feels like a warning. I was standing in my kitchen, staring at a bowl of batter that was suddenly very cold and very still because the mixer had just died. My neighbor’s kid, Leo, showed up unannounced because he heard a noise and thought maybe a ghost was haunting my attic. He was wearing a sheet with eye holes cut out badly, and he was hungry. The only thing in my fridge was a block of cream cheese, some cocoa powder, and a bag of sugar that had seen better days.
Let’s face it, I wasn’t planning on baking anything dramatic. I usually just toast bread when things go sideways. But Leo looked at me with those wide eyes and asked if I could make something “spooky but sweet.” So I improvised. I melted butter in a pan over the stove, whisked in the cocoa until it smelled like dark chocolate rain, and folded in the cream cheese like I was trying to hide a secret. It wasn’t supposed to be a masterpiece. It was supposed to be fuel for a terrified eight-year-old.
The batter came out blacker than the night outside, thick and glossy. We ate them straight out of the bowl with spoons, sitting on the floor by candlelight. The texture was rich, almost like a dense truffle, but the cream cheese cut through the bitterness of the cocoa perfectly. Leo stopped shivering. He stopped asking about ghosts. He just kept eating. That was the moment I knew this wasn’t just a stopgap meal. It was something special. I didn’t plan to share it with the world, but now that I have, I can’t keep it to myself. This creamy black velvet Halloween cupcake recipe emerged from a blackout, and it’s the best thing I’ve ever baked in the dark.
Why You’ll Love This Recipe
There is a specific kind of magic in baking something that looks intimidating but is actually incredibly forgiving. I’ve spent years testing cake recipes, trying to balance acidity with sweetness, and I can tell you that this black velvet cake hits that perfect note of comfort and drama. It’s not just another chocolate cake in disguise. The addition of cream cheese into the batter itself gives it a tangy, luxurious mouthfeel that standard cocoa recipes just can’t match. It’s the kind of dessert that makes you close your eyes after the first bite, letting the rich, dark flavors wash over you.
- Quick & Easy: This comes together in under 45 minutes, perfect for busy weeknights or last-minute Halloween prep when you realize you forgot to buy decorations.
- Simple Ingredients: No fancy grocery trips needed; you likely already have cocoa, cream cheese, and butter in your kitchen. It’s pantry-friendly baking at its finest.
- Perfect for Halloween: Great for trick-or-treaters, classroom parties, or those late-night spooky movie marathons where you need something visually striking.
- Crowd-Pleaser: Always gets rave reviews from kids and adults alike. The black color scares them initially, but the taste wins them over immediately.
- Unbelievably Delicious: The texture and flavor combo is next-level comfort food. It’s moist, dense, and incredibly satisfying.
What makes this recipe different from the rest is the technique. We aren’t just adding black food coloring to a vanilla cake. We are using a high ratio of cocoa powder and cream cheese to create a true “black velvet” base. This isn’t just another version—it’s your best version. It’s comfort food reimagined with a spooky twist. Whether you are impressing guests or just treating yourself, this recipe turns a simple meal into something memorable without the stress of complicated frosting techniques.
What Ingredients You Will Need
This recipe uses simple, wholesome ingredients to deliver bold flavor and satisfying texture without the fuss. The key here is quality over quantity. Since the color is black, you want deep, robust flavors to stand up to the darkness. I recommend using a good quality unsweetened cocoa powder, as cheap varieties can taste dusty or metallic. Also, full-fat cream cheese is non-negotiable for that signature velvet texture. If you try to use light cream cheese, the cake will be dry and crumbly, and we don’t have time for that.
- Unsalted Butter: 1 cup (226g), softened to room temperature. This provides the fat structure and richness.
- Tip: If you are in a hurry, you can soften it in the microwave for 10-second bursts, but don’t melt it.
- Granulated Sugar: 1 ½ cups (300g). This is the standard sweetener that helps create a tender crumb.
- Eggs: 3 large eggs, room temperature. These bind the ingredients and add structure.
- Tip: Cold eggs can cause the batter to curdle, so let them sit out for 30 minutes.
- Full-Fat Cream Cheese: 8 oz (226g), softened. This is the star ingredient that gives the cake its name and tangy flavor.
- Unsweetened Cocoa Powder: ¾ cup (75g). Use natural cocoa for a deeper red-brown undertone that turns black when mixed.
- All-Purpose Flour: 1 ½ cups (190g). This provides the necessary gluten structure for the cake.
- Baking Powder: 1 teaspoon. This helps the cake rise slightly without being too airy.
- Baking Soda: ½ teaspoon. This reacts with the acidity in the cocoa and cream cheese.
- Salt: ½ teaspoon. Enhances the chocolate flavor and balances the sweetness.
- Milk: ½ cup (120ml). Whole milk works best for richness, but buttermilk adds extra tang.
- Vanilla Extract: 1 teaspoon. Adds warmth and depth to the dark flavor profile.
- Black Gel Food Coloring: 1-2 tablespoons. Gel coloring is essential because liquid coloring will throw off the batter consistency.
I personally prefer Philadelphia Cream Cheese for its consistency and lack of water content. For the cocoa, Hershey’s Special Dark works well because it has a slightly bitter profile that makes the black color look more authentic. If you need a dairy-free option, you can swap the butter for coconut oil and use a vegan cream cheese alternative, though the texture will be slightly different.
Equipment Needed
You don’t need a fancy kitchen to make these cupcakes, but having the right tools makes the process smoother. A standard 12-cup muffin tin is all you really need. I use a heavy-gauge aluminum pan because it conducts heat evenly. If you have non-stick pans, you might not even need to grease them, but I always line the bottom with parchment circles to be safe. A hand mixer or stand mixer is helpful for creaming the butter and cream cheese together. You can do it by hand, but it will take longer and your arms will get tired. A cooling rack is essential so the cupcakes don’t get soggy from steam. I also recommend using a small offset spatula for frosting if you plan to decorate them. For cleaning, keep a damp cloth handy because black batter can stain everything it touches.
Preparation Method
Start by preheating your oven to 350°F (175°C). This is a standard baking temperature that ensures the cake cooks through without burning the edges. While the oven heats, line your muffin tin with cupcake liners. I use black liners if I can find them, but standard black paper works too. If you don’t have black liners, just use any dark color. Next, in a medium bowl, whisk together the flour, baking powder, baking soda, and salt. Set this aside. It’s important to sift these dry ingredients if your cocoa powder is lumpy. Nobody wants gritty cocoa bits in their smooth velvet cake.
In a large bowl, beat the softened butter and cream cheese together on medium speed until the mixture is completely smooth and creamy. This should take about 3-4 minutes. If you can still see streaks of cream cheese, keep beating. It’s worth the effort. Gradually add the sugar, beating on high for another 3-5 minutes until the mixture is pale and fluffy. This step incorporates air, which helps the cake rise. Add the eggs one at a time, beating well after each addition. Scrape down the sides of the bowl with a spatula to ensure everything is incorporated. Stir in the vanilla extract.
Now, add the dry ingredients to the wet ingredients in three additions, alternating with the milk. Start with the flour, then the milk, then the flour, ending with the flour. Mix on low speed just until combined. Do not overmix, or the cake will be tough. Finally, add the black gel food coloring. Start with one tablespoon and mix. If it’s not black enough, add another half tablespoon. You want it to be the color of a void. Fold it in gently until the color is uniform. Spoon the batter into the prepared muffin cups, filling each about 2/3 full. Bake for 18-22 minutes, or until a toothpick inserted into the center comes out clean or with just a few moist crumbs.
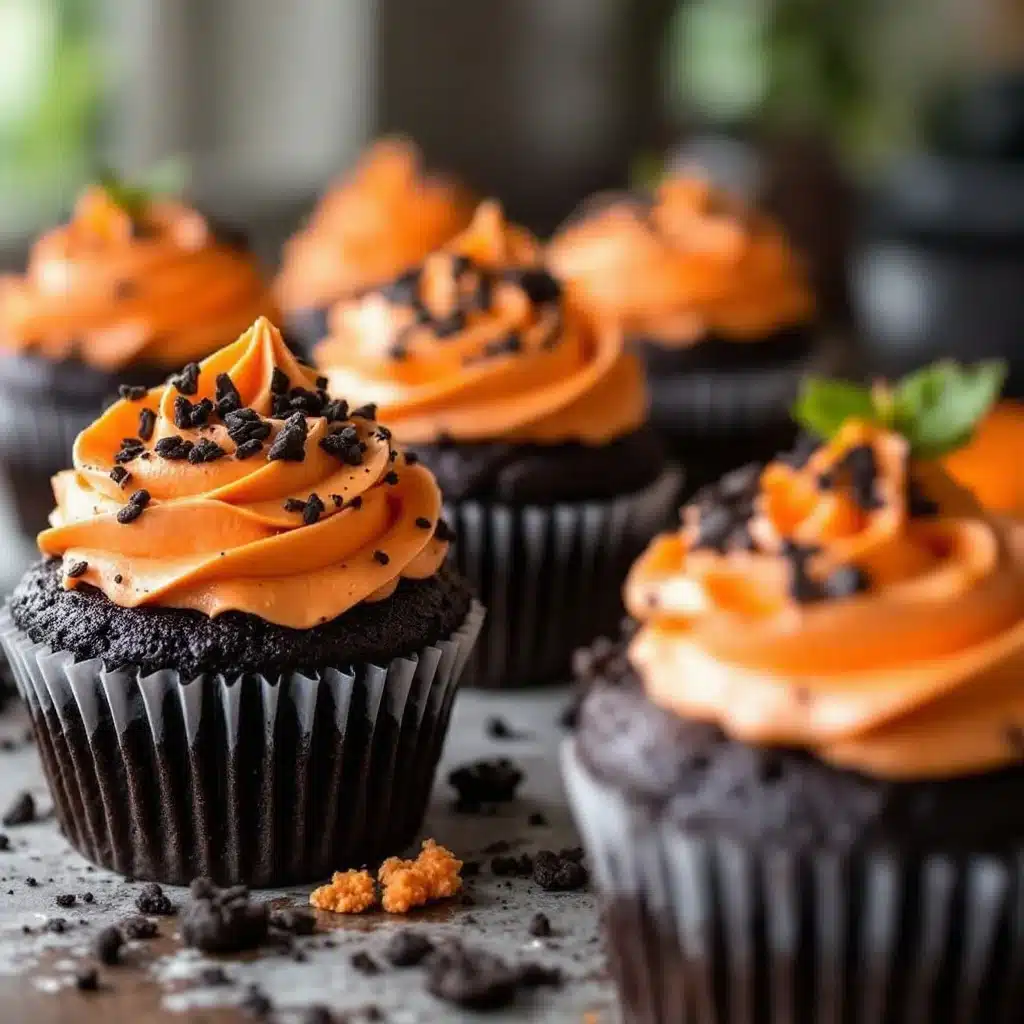
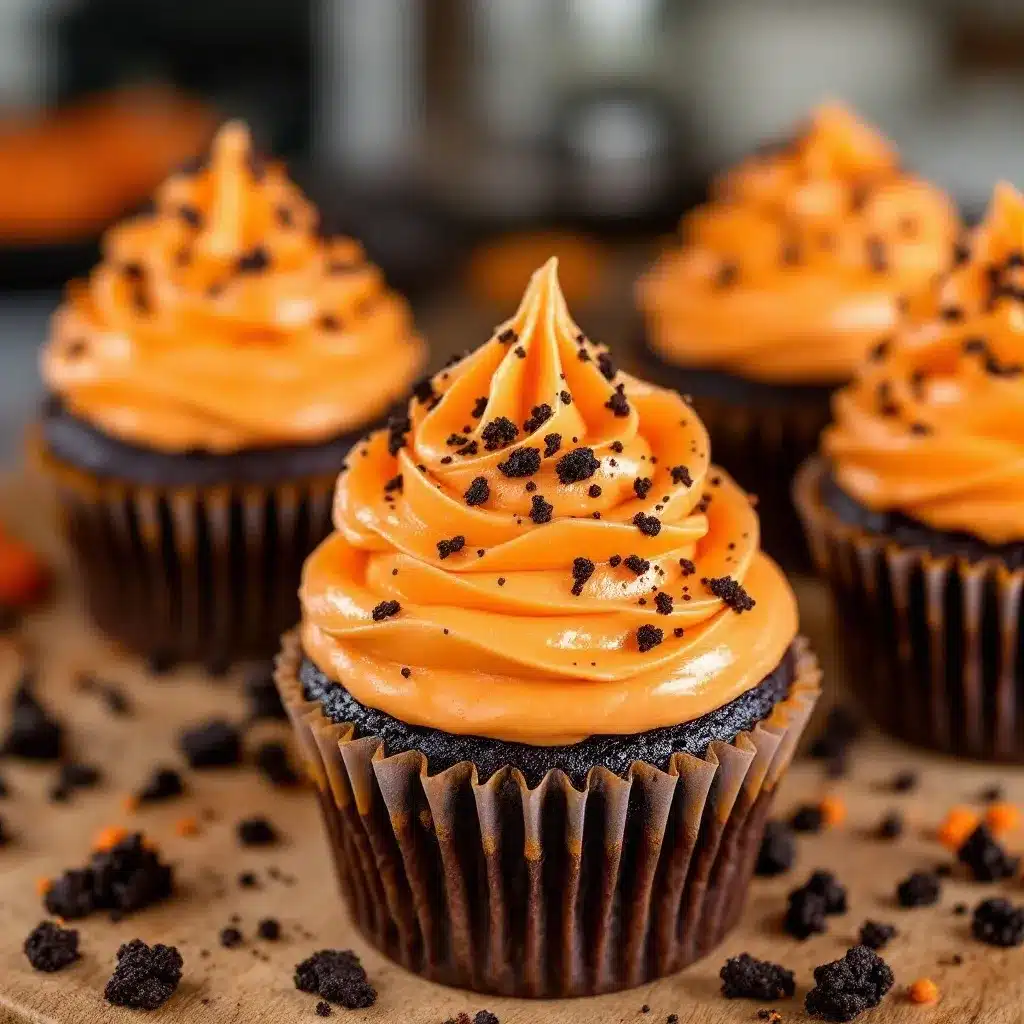
Let the cupcakes cool in the pan for 5 minutes, then transfer them to a wire rack to cool completely. This is crucial because if you frost them while they are warm, the frosting will melt and slide off. While they cool, you can prepare your frosting. I like a simple cream cheese frosting to complement the cake. Beat 4 oz of cream cheese with ½ cup of powdered sugar and a splash of vanilla until smooth. Spread this over the cooled cupcakes. The contrast of the white frosting on the black cake is visually stunning and tastes incredible together.
Cooking Tips & Techniques
One common mistake people make with black cakes is using too much liquid food coloring. This throws off the balance of wet to dry ingredients, resulting in a dense, gummy texture. Always use gel food coloring. It is more concentrated and doesn’t add extra water. Another tip is to ensure your cream cheese and butter are at the exact same temperature. If one is cold and the other is warm, the mixture will look curdled and you’ll have to work extra hard to smooth it out. Room temperature ingredients emulsify better, leading to a smoother batter.
I once tried to rush this process by microwaving the butter, and the result was a greasy cake that sank in the middle. Lesson learned: patience pays off. Also, don’t skip the resting time for the cupcakes. If you try to frost them too soon, the heat from the cake will melt the frosting, and your beautiful black velvet design will turn into a messy puddle. Let them cool completely on a rack. This allows the structure to set and the flavors to meld. If you are making these ahead of time, store them in an airtight container at room temperature for up to two days. They actually taste better the next day as the flavors mature.
Variations & Adaptations
While the classic black velvet is delicious, there are ways to tweak this recipe to suit different tastes or dietary needs. For a gluten-free version, you can substitute the all-purpose flour with a 1:1 gluten-free baking flour blend. Look for brands that include xanthan gum, as this helps mimic the elasticity of gluten. For a dairy-free option, use vegan butter and a plant-based cream cheese alternative. The texture might be slightly less rich, but the flavor will still be great. You can also add a swirl of pumpkin puree into the batter for a seasonal twist. Just reduce the milk by a tablespoon to account for the extra moisture in the pumpkin.
If you want to make these spicier, add a pinch of cayenne pepper or black pepper to the batter. It adds a subtle heat that pairs well with the dark chocolate and cream cheese. For a different frosting, try a dark chocolate ganache. Melt dark chocolate with heavy cream and pour it over the cooled cupcakes. The black-on-black look is very dramatic and sophisticated. I’ve also tried adding a layer of black raspberry jam in the center before baking, which creates a surprise burst of fruity flavor. These variations allow you to keep the spooky aesthetic while changing the taste profile slightly.
Serving & Storage Suggestions
These cupcakes are best served at room temperature, where the flavors are most pronounced and the texture is soft and tender. For presentation, pipe the cream cheese frosting into a swirl and add a dusting of powdered sugar or edible glitter. You can add candy eyes or spider decorations for a Halloween theme. They pair well with a cup of hot coffee or a glass of cold milk. The bitterness of the coffee complements the dark cocoa, while the milk cuts through the richness of the cream cheese.
For storage, keep the cupcakes in an airtight container at room temperature for up to two days. If you live in a hot or humid climate, store them in the refrigerator. Before serving, let them come to room temperature for about 30 minutes to restore the soft texture. You can also freeze the unfrosted cupcakes for up to three months. Wrap them tightly in plastic wrap and then in aluminum foil. Thaw them overnight in the refrigerator before frosting. The flavors develop over time, so these cupcakes often taste even better on the second day as the moisture distributes evenly throughout the crumb.
Nutritional Information & Benefits
Each cupcake contains approximately 350 calories, with a good balance of fats, carbohydrates, and a small amount of protein from the cream cheese. The cocoa powder provides antioxidants, which are beneficial for heart health. The cream cheese adds calcium and protein, making this treat slightly more nutritious than a standard vanilla cupcake. However, it is still a dessert, so enjoy it in moderation. For those with dietary restrictions, remember that this recipe contains gluten, dairy, and eggs. Always check your ingredient labels to ensure they meet your specific needs. Personally, I find that this rich, dense cake satisfies my sweet tooth quickly, so I only need one or two bites to feel content.
Conclusion
This creamy black velvet Halloween cupcake recipe is worth trying because it combines ease of preparation with a dramatic, delicious result. It’s perfect for anyone who wants to bake something spooky without spending hours in the kitchen. I love this recipe because it turns a simple blackout moment into a memorable experience. It’s forgiving, tasty, and visually striking. I encourage you to customize it with your own twists, whether that’s adding pumpkin, changing the frosting, or experimenting with different fillings. Try it out and let me know how it turns out in the comments below. Share your photos on social media and tag me so I can see your spooky creations. Happy baking, and enjoy the dark side of velvet!
Frequently Asked Questions
Can I use liquid food coloring instead of gel?
It is not recommended. Liquid food coloring adds too much water to the batter, which can make the cupcakes dense and gummy. Gel coloring is more concentrated and maintains the correct batter consistency.
How do I make the cupcakes gluten-free?
You can substitute the all-purpose flour with a 1:1 gluten-free baking flour blend. Ensure the blend includes xanthan gum to help with texture. The rest of the ingredients can remain the same.
Can I freeze these cupcakes?
Yes, you can freeze the unfrosted cupcakes for up to three months. Wrap them tightly in plastic wrap and then in aluminum foil. Thaw them overnight in the refrigerator before frosting.
What kind of frosting goes best with black velvet cake?
A simple cream cheese frosting is the classic choice, as it complements the tangy cake. However, a dark chocolate ganache or vanilla buttercream also works well for a different flavor profile.
Can I make these cupcakes dairy-free?
Yes, use vegan butter and a plant-based cream cheese alternative. The texture might be slightly less rich, but the flavor will still be delicious. You can also use almond milk or oat milk instead of dairy milk.
Pin This Recipe!
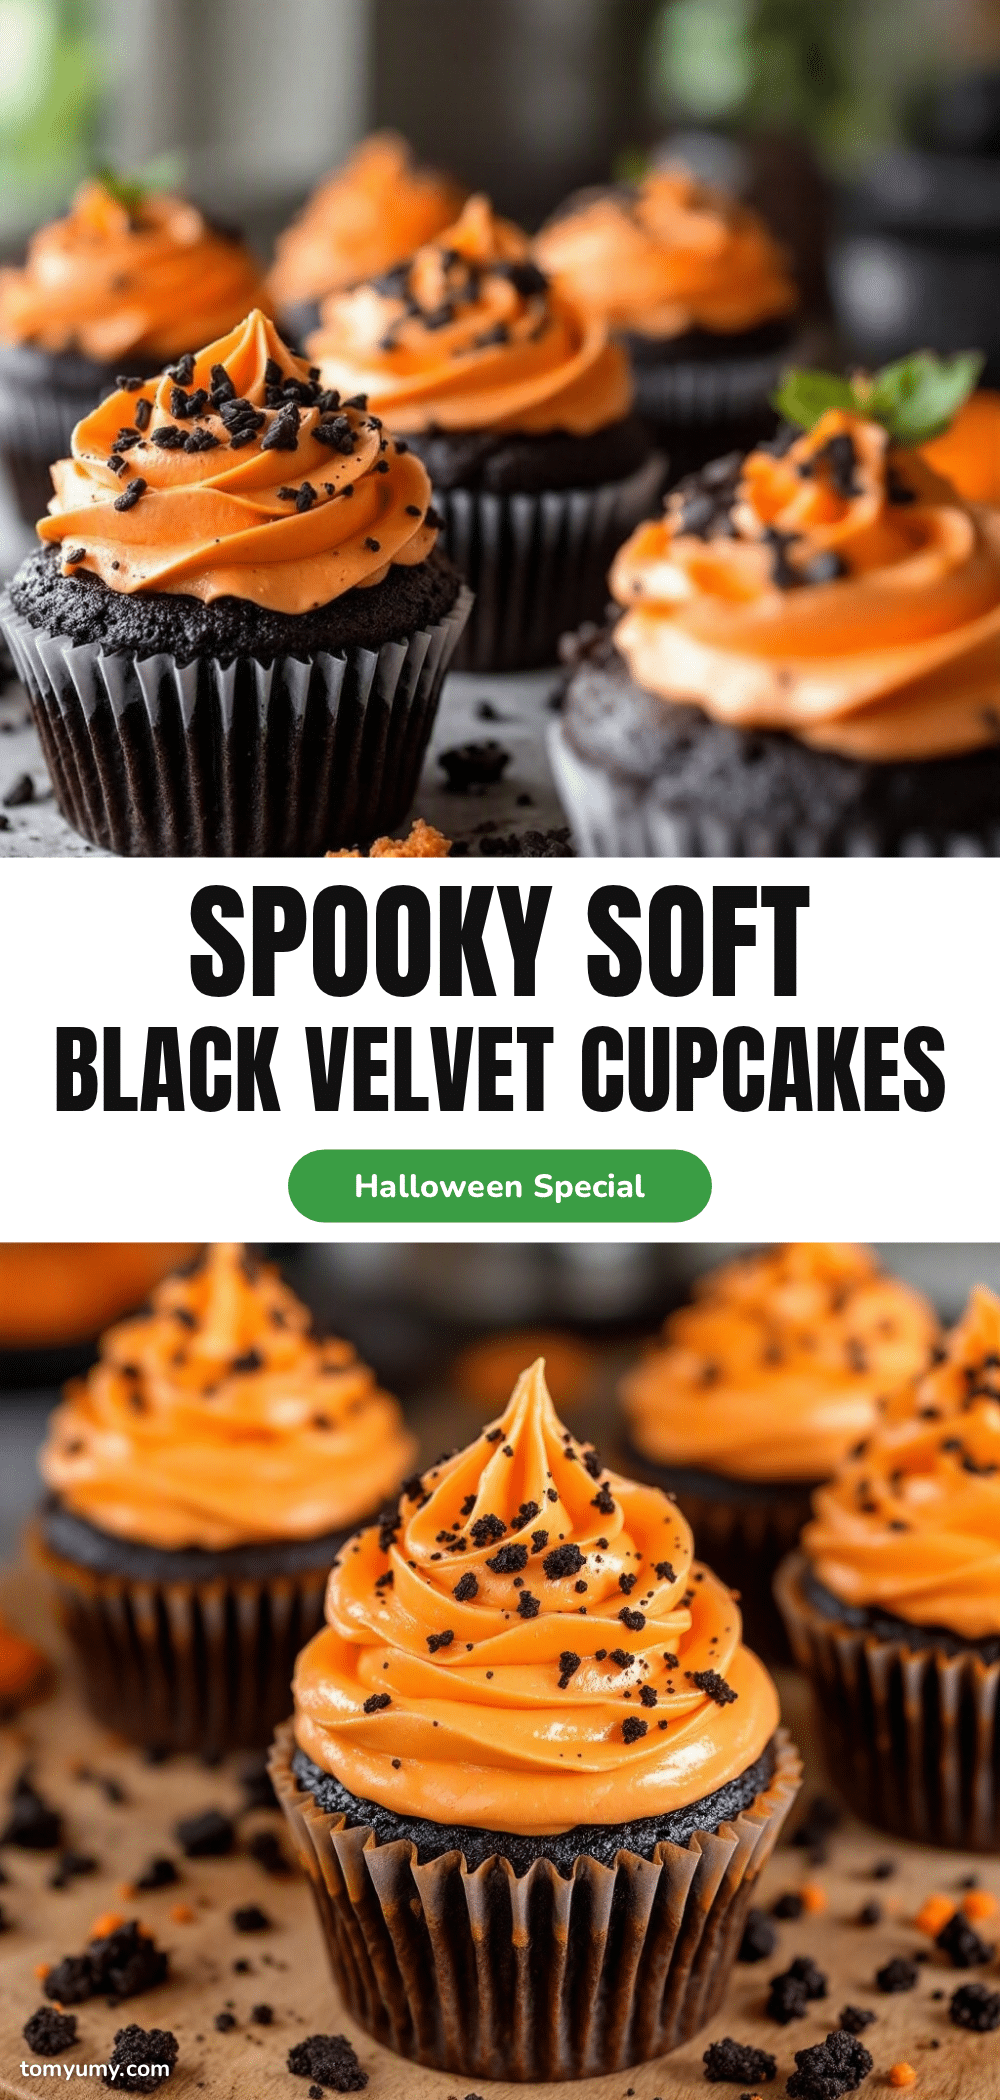
Creamy Black Velvet Halloween Cupcakes
A dramatic, spooky, and delicious cupcake recipe that combines rich cocoa with tangy cream cheese for a unique ‘black velvet’ texture. Perfect for Halloween or any time you want a comforting, visually striking dessert.
- Prep Time: 15 minutes
- Cook Time: 22 minutes
- Total Time: 45 minutes
- Yield: 12 servings 1x
- Category: Dessert
- Cuisine: American
Ingredients
- 1 cup (226g) unsalted butter, softened to room temperature
- 1 ½ cups (300g) granulated sugar
- 3 large eggs, room temperature
- 8 oz (226g) full-fat cream cheese, softened
- ¾ cup (75g) unsweetened cocoa powder
- 1 ½ cups (190g) all-purpose flour
- 1 teaspoon baking powder
- ½ teaspoon baking soda
- ½ teaspoon salt
- ½ cup (120ml) milk (whole or buttermilk)
- 1 teaspoon vanilla extract
- 1–2 tablespoons black gel food coloring
- 4 oz cream cheese (for frosting)
- ½ cup powdered sugar (for frosting)
- Splash of vanilla (for frosting)
Instructions
- Preheat oven to 350°F (175°C). Line a 12-cup muffin tin with cupcake liners.
- In a medium bowl, whisk together the flour, baking powder, baking soda, and salt. Set aside.
- In a large bowl, beat the softened butter and cream cheese together on medium speed until smooth and creamy (3-4 minutes).
- Gradually add the sugar, beating on high for 3-5 minutes until the mixture is pale and fluffy.
- Add the eggs one at a time, beating well after each addition. Scrape down the sides of the bowl. Stir in the vanilla extract.
- Add the dry ingredients to the wet ingredients in three additions, alternating with the milk (start and end with flour). Mix on low speed just until combined.
- Add the black gel food coloring and fold gently until the color is uniform and the batter is black.
- Spoon the batter into the prepared muffin cups, filling each about 2/3 full.
- Bake for 18-22 minutes, or until a toothpick inserted into the center comes out clean or with moist crumbs.
- Let cupcakes cool in the pan for 5 minutes, then transfer to a wire rack to cool completely.
- For frosting, beat 4 oz cream cheese, ½ cup powdered sugar, and a splash of vanilla until smooth.
- Spread frosting over the cooled cupcakes.
Notes
Ensure butter and cream cheese are at room temperature for best emulsification. Use gel food coloring instead of liquid to maintain batter consistency. Do not overmix the batter. Cool cupcakes completely before frosting to prevent melting. Store in an airtight container at room temperature for up to two days.
Nutrition
- Serving Size: 1 cupcake
- Calories: 350
- Sugar: 32
- Sodium: 250
- Fat: 18
- Saturated Fat: 11
- Carbohydrates: 45
- Fiber: 2
- Protein: 4
Keywords: Halloween cupcakes, black velvet cake, cream cheese cupcakes, easy baking, spooky dessert, chocolate cupcakes, gel food coloring