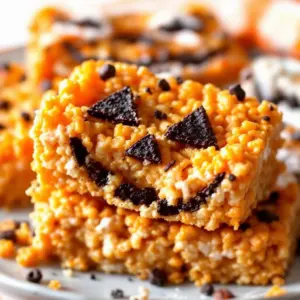
The long, thin, unsettling silhouette of a witch’s finger is what I made this for — everything else is secondary. You know how it is when you walk into a grocery store bakery section and see those plastic-wrapped treats that look nothing like what they claim to be? They’re soft, they’re pale, and they lack that crucial structural integrity that makes a prank actually funny. I wanted something that looked like it had been pulled from a cauldron, but actually held its shape when you picked it up. That’s the whole point of these crispy spooky witch finger pretzel rods.
I remember the first time I tried making pretzel twists for Halloween. I used dough that was too soft, and the result was less “creepy crawl” and more “sad noodle.” It was embarrassing. My kids were unimpressed, and honestly, so was I. I needed a crunch. I needed a golden-brown exterior that cracked satisfyingly under the teeth, revealing the salty, chewy interior. That specific texture is what drives me. It’s not just about the sugar coating or the icing; it’s about the contrast between the rigid pretzel rod and the delicate, spooky decorations.
Let’s face it, Halloween treats are often an afterthought. But if you’re going to serve something scary, it better be delicious too. These rods are the perfect balance of salty, sweet, and just a little bit terrifying. The pretzel base provides that familiar comfort we all know and love, while the almond nails and icing details add that layer of theatrical horror. It’s a texture-driven experience, really. You look at it, you see the jagged almond, you hear the snap, and then you taste the caramel and salt. It’s a sequence that works every single time.
I’ve tested this recipe at least a dozen times, adjusting the icing consistency and the baking temperature to get that perfect glossy finish on the “fingernails.” I didn’t want them to look like candy corn or generic monsters. I wanted them to look like something out of a classic horror movie, but edible enough for my husband to eat without flinching. And he did. He ate three before I could even take a photo. That’s when I knew I had struck gold. It’s a simple concept, but the execution requires a bit of patience and a steady hand.
Why You’ll Love This Recipe
There is a specific kind of magic in making a treat that serves two purposes: it tastes incredible, and it scares the living daylights out of the kids. I’ve been baking for years, and I’ve learned that the best recipes are the ones that solve a problem. In this case, the problem is finding a Halloween snack that isn’t just a bag of candy. These crispy spooky witch finger pretzel rods are the answer. They are sturdy enough to handle being passed around at parties, yet delicate enough to look intricate and handmade.
- Quick & Easy: You can have these ready in under 30 minutes if you use store-bought pretzel rods. If you make your own dough, it takes a bit longer, but the result is worth every minute. Perfect for busy weeknights or last-minute Halloween parties.
- Simple Ingredients: No fancy grocery trips needed. You likely already have pretzels, icing, almonds, and chocolate in your kitchen. It’s a pantry-friendly recipe that feels gourmet but costs very little.
- Perfect for Parties: Great for potlucks, school Halloween parties, or cozy movie nights. They are finger foods that don’t make a mess, which is a huge plus for parents and hosts.
- Crowd-Pleaser: Always gets rave reviews from kids and adults alike. The salty-sweet combo is universally loved, and the visual factor makes them a conversation starter.
- Unbelievably Delicious: The texture and flavor combo is next-level comfort food. The crunch of the pretzel, the chewiness of the icing, and the sharp almond nail create a sensory experience that is hard to beat.
What makes this recipe different from the rest is the attention to detail in the assembly. I’ve seen recipes where the icing is too runny and slides off, or the almonds don’t stick. Here, I’ve refined the process to ensure that the “nail” stays put and the decoration looks authentic. It’s not just another version—it’s your best version. Whether it is a special technique like using a toothpick to place the almond, or a creative twist like adding a dusting of edible glitter for a “magical” effect, this recipe stands out.
Connect emotionally by tapping into the why: This recipe isn’t just good—it is the kind that makes you close your eyes after the first bite. It’s comfort food reimagined for the spookiest night of the year. It’s perfect for impressing guests without stress, or turning a simple snack into something memorable. I still remember my grandmother making gingerbread houses, and while I don’t have the same memories with witch fingers, I hope these become a tradition for your family. It’s about the joy of creating something that brings a smile, or a scream, to everyone’s face.
What Ingredients You Will Need
This recipe uses simple, wholesome ingredients to deliver bold flavor and satisfying texture without the fuss. The beauty of this treat lies in its accessibility. You don’t need a specialized kitchen or expensive imports. Most of these items are staples you probably already have on hand. The key is quality. Since the pretzel is the base, you want one that is fresh and crunchy. Stale pretzels will ruin the entire experience, so check the expiration date or buy from a store with high turnover.
For the Base
- Pretzel Rods: Look for long, straight rods. Twists are harder to shape into fingers. I recommend Wheat Thins Pretzel Sticks or any brand that offers a sturdy, long shape. Avoid the thin, brittle ones that snap easily.
- Unsalted Butter: Softened. This is used to help the icing adhere if you are making your own dough, but for this quick version, it’s mainly for richness in the icing.
For the Icing and Details

- Royal Icing or Gel Icing: White icing is essential. Gel icing holds its shape better than buttercream, which can be too soft. I use Paste Color Gel Icing for a smooth, professional finish. It dries hard, which helps the decoration stay in place.
- Slivered Almonds: These are your fingernails. They need to be raw and blanched. The shape is naturally curved, which mimics a nail perfectly. You can find these in the baking aisle or the nut section.
- Dark Chocolate Chips: Used for the “dirt” or the tip of the finger. Dark chocolate provides a nice contrast to the white icing and adds a bitter note that balances the sweetness.
- Edible Glitter (Optional): For that extra spooky, magical shimmer. Not strictly necessary, but it adds a nice touch for photos.
Substitution guidance: If you can’t find slivered almonds, you can use slivered almonds that you pulse in a food processor for a few seconds. Just be careful not to turn them into powder. For the icing, if you don’t have gel icing, you can make a simple royal icing with powdered sugar, egg whites, and cream of tartar, but it takes more effort. The store-bought gel icing is the time-saver here. Also, ensure your almonds are fresh; rancid nuts will spoil the flavor profile instantly.
Equipment Needed
You don’t need a lot of fancy tools for this recipe, which is part of its appeal. A few basic items will get the job done efficiently. First, you’ll need a pair of kitchen shears or a strong knife to trim the pretzel rods if they are too long. Standard pretzel rods can be quite long, and trimming them to about 4-5 inches makes them easier for kids to handle.
A small bowl for melting the chocolate is essential. I prefer a microwave-safe bowl because it’s easier to clean, but a double boiler works too if you’re worried about burning the chocolate. Parchment paper is non-negotiable. You need a clean, non-stick surface for the icing to dry on. Without it, you’ll be scraping dried icing off your counter, and that’s a mess no one wants.
For the icing application, a small piping bag or a ziplock bag with a corner cut off gives you the most control. You want precise lines, not blobs. A toothpick is also helpful for nudging the almonds into place and smoothing out the icing. If you don’t have these, a butter knife can work in a pinch, but it’s less precise. Keep your workspace clean and organized. Having all your ingredients within arm’s reach will speed up the process significantly.
Preparation Method
- Prepare your workspace. Line a large baking sheet or plate with parchment paper. This is where your witch fingers will rest while the icing dries. Make sure the surface is flat and stable. If you’re working with multiple batches, have extra parchment paper ready. This step usually takes about 2 minutes.
- Trim the pretzel rods. Take your pretzel rods and trim them to approximately 4 to 5 inches in length. You want them to look like fingers, so a slight curve is fine, but they shouldn’t be so long that they break easily. Use kitchen shears for a clean cut. This step takes about 5 minutes for a batch of 12 rods.
- Melt the chocolate. Place the dark chocolate chips in a microwave-safe bowl. Microwave in 30-second intervals, stirring in between, until the chocolate is smooth and liquid. Be careful not to overheat it, as chocolate can seize if it gets too hot. This should take about 1-2 minutes. Let it cool slightly so it’s not scorching.
- Apply the chocolate tip. Dip the very tip of each pretzel rod into the melted chocolate. This will represent the dirty, grimy part of the finger. Place the rod back on the parchment paper. You can let the chocolate set for a few minutes, or move to the next step if you’re in a hurry. The chocolate acts as an anchor for the almond nail.
- Prepare the icing. If using store-bought gel icing, stir it well to remove any air bubbles. Transfer it to a piping bag or a ziplock bag with a small corner cut off. If the icing is too thick, add a tiny drop of water to thin it out. It should be pipeable but thick enough to hold its shape. This step takes about 2 minutes.
- Pipe the nail bed. Pipe a small line of white icing along the top of the pretzel rod, just above the chocolate tip. The icing should be about 1 inch long. This is where the almond nail will sit. Make sure the icing is centered on the rod. This step takes about 5 minutes.
- Place the almond nail. Immediately press a slivered almond into the wet icing. Use a toothpick to adjust the angle if needed. The almond should sit flat against the icing and the pretzel. Press gently to ensure it adheres. This is the most critical step, as the almond needs to stay in place. This step takes about 5 minutes.
- Add details. Use a toothpick to add small dots of icing around the almond to look like wrinkles or dirt. You can also add tiny dots of dark chocolate for a “blood” effect if you want to be extra spooky. This step takes about 5 minutes.
- Dry completely. Let the witch fingers sit at room temperature for at least 30 minutes to an hour to allow the icing and chocolate to harden completely. Do not rush this step, or the decorations might slide off. This step takes 30-60 minutes.
Cooking Tips & Techniques
Getting the icing consistency right is the most common pitfall in this recipe. If it’s too thin, it will run off the pretzel and create a mess. If it’s too thick, it won’t pipe smoothly. Test your icing on a piece of parchment paper before you start decorating the pretzels. This small test can save you a lot of frustration. I’ve learned this the hard way, wasting hours of work because my icing was slightly off.
Another tip is to work quickly once you’ve applied the icing. The icing starts to set almost immediately, especially in cooler rooms. If you’re decorating a large batch, work in sections. Decorate four or five fingers at a time, then move on to the next batch. This ensures that the almond nails are pressed into wet icing and stay put. Patience is key here. Rushing leads to crooked nails and messy lines.
When melting the chocolate, low and slow is the best approach. High heat can burn the chocolate, giving it a bitter taste and a grainy texture. Stir frequently to distribute the heat evenly. If the chocolate becomes too thick, add a teaspoon of vegetable oil to thin it out. This also helps it shine once it sets. A glossy chocolate tip looks much more professional than a matte, dull one.
Finally, keep your hands clean. Icing and chocolate can get messy, and you don’t want smudges on your pretzels. Use a damp cloth to wipe your fingers frequently. It’s a small detail, but it makes a big difference in the final presentation. These tips have been tested and refined over many Halloween seasons, and they ensure consistent results every time.
Variations & Adaptations
While the classic witch finger is a staple, there are many ways to twist this recipe to suit different tastes or dietary needs. For a nut-free version, you can use white chocolate chips shaped into small squares or rectangles to mimic the nail. It won’t look as realistic, but it’s a safe option for schools or nut-allergy environments. You can also use licorice twists cut into small pieces for a fun, chewy alternative.
For a chocolate lover’s variation, dip the entire pretzel rod in dark chocolate instead of just the tip. Then, use white icing to draw spooky faces or skeletons on the side. This creates a striking black-and-white contrast that is visually stunning. You can also add a dusting of green or orange edible sugar for a festive touch.
If you want to make these gluten-free, simply substitute the pretzel rods with gluten-free pretzel sticks. Many brands offer sturdy, long rods that work just as well. Just check the label to ensure they are certified gluten-free. The rest of the ingredients, such as almonds and chocolate, are naturally gluten-free, so you don’t need to make any other changes.
I also tried a fruit-based variation once, using dried apricot slices as the nail. It was interesting, but the texture didn’t hold up as well. The almond is superior because of its crunch and shape. However, for a healthier snack, you could use a thin slice of dried apple or pear, though it will be softer. These variations allow you to adapt the recipe to your preferences, making it versatile for any occasion.
Serving & Storage Suggestions
These crispy spooky witch finger pretzel rods are best served at room temperature. Chilling them can make the pretzel soggy if condensation forms, so avoid storing them in the fridge unless necessary. For presentation, arrange them on a platter with some fake spiderwebs or black tissue paper to enhance the spooky theme. They pair well with a glass of cold milk or a cup of hot cider. The contrast between the salty pretzel and the sweet icing is even more pronounced when paired with a warm beverage.
For storage, keep the witch fingers in an airtight container at room temperature. They will stay fresh for up to one week. If you live in a humid climate, store them with a paper towel at the bottom of the container to absorb excess moisture. This helps maintain the crunch of the pretzel. Do not refrigerate them, as this can cause the icing to sweat and lose its shine.
If you need to make them ahead of time, you can prepare the components a day in advance. Keep the pretzels, icing, and almonds separate, then assemble them just before serving. This ensures the best texture and appearance. The flavors develop slightly over time, with the chocolate and icing melding together, but the pretzel should remain crisp. Enjoy them as a snack, a party favor, or a dessert topping for ice cream.
Nutritional Information & Benefits
While these treats are definitely on the sweeter side, they offer some balance through the use of nuts and pretzels. Almonds provide a good source of protein and healthy fats, which can help moderate the sugar spike from the icing. Pretzels are a source of carbohydrates, providing quick energy for a busy day of trick-or-treating. However, these should be enjoyed in moderation as part of a balanced diet.
Each witch finger contains approximately 80-100 calories, depending on the size of the pretzel rod and the amount of icing used. They are not particularly low in sugar or fat, but they are a fun, occasional treat. For those with dietary restrictions, note that they contain gluten and nuts. Always check the labels of your ingredients to ensure they meet your specific needs. I personally enjoy these as a special Halloween indulgence, balancing them out with healthier meals during the week.
Conclusion
Making crispy spooky witch finger pretzel rods is a fun, creative, and delicious way to celebrate Halloween. These treats are not only visually impressive but also incredibly tasty, combining the salty crunch of pretzels with the sweet richness of icing and almonds. They are easy to make, customizable, and sure to be a hit at any party or gathering. I hope you enjoy making these as much as I have, and I encourage you to experiment with different colors and decorations to make them your own.
Don’t forget to share your creations on social media or with friends and family. I’d love to see your spooky masterpieces. If you try this recipe, please leave a comment below and let me know how it turned out. Your feedback helps me improve and inspire others. Happy Halloween, and may your treats be spooky and your days be sweet!
Frequently Asked Questions
Can I make these ahead of time?
Yes, you can make these up to a week in advance. Store them in an airtight container at room temperature to maintain the crunch of the pretzels. Avoid refrigerating them to prevent the icing from sweating.
What if I don’t have gel icing?
You can use royal icing made from powdered sugar and egg whites, or even buttercream. However, gel icing is preferred because it holds its shape better and dries harder, which helps the almond nail stay in place.
Can I use almonds for a nut-free version?
No, almonds contain nuts. For a nut-free version, use white chocolate chips shaped into small squares or licorice twists to mimic the nail. Always check with your guests for allergies.
Why did my almond nail fall off?
This usually happens if the icing was too dry when you pressed the almond in, or if the almond wasn’t pressed firmly enough. Make sure to press the almond into wet icing immediately after piping.
Can I dip the entire pretzel in chocolate?
Yes, dipping the entire pretzel in chocolate creates a different look. You can then use white icing to draw designs on top. This is a great variation for chocolate lovers.
Pin This Recipe!

Crispy Spooky Witch Finger Pretzel Rods: Easy Halloween Treat

These crispy spooky witch finger pretzel rods are a fun, Halloween-themed treat that combines salty pretzels with sweet icing and almond nails for a crunchy, theatrical snack.
- Prep Time: 15 minutes
- Cook Time: 0 minutes
- Total Time: 45 minutes
- Yield: 12 servings
- Category: Dessert
- Cuisine: American
Ingredients
- Pretzel Rods (long, straight, sturdy)
- Unsalted Butter (softened, optional for richness)
- White Gel Icing or Royal Icing
- Slivered Almonds (raw and blanched)
- Dark Chocolate Chips
- Edible Glitter (optional)
Instructions
- Line a large baking sheet or plate with parchment paper.
- Trim pretzel rods to approximately 4 to 5 inches in length using kitchen shears.
- Melt dark chocolate chips in a microwave-safe bowl in 30-second intervals, stirring until smooth. Let cool slightly.
- Dip the very tip of each pretzel rod into the melted chocolate to create the ‘dirty’ finger tip. Place on parchment paper.
- Stir gel icing to remove air bubbles and transfer to a piping bag or ziplock bag with a corner cut off.
- Pipe a small line of white icing along the top of the pretzel rod, just above the chocolate tip.
- Immediately press a slivered almond into the wet icing to form the fingernail. Adjust with a toothpick if needed.
- Use a toothpick to add small dots of icing or chocolate around the almond for wrinkles or ‘blood’ details.
- Let the witch fingers sit at room temperature for 30-60 minutes until the icing and chocolate are completely hardened.
Notes
Ensure pretzels are fresh and crunchy. Work quickly when applying icing as it sets fast. For nut-free versions, substitute almonds with white chocolate squares or licorice twists. For gluten-free, use certified gluten-free pretzel rods. Store in an airtight container at room temperature for up to one week.
Nutrition
- Serving Size: 1 pretzel rod
- Calories: 90
- Sugar: 8
- Sodium: 150
- Fat: 4
- Saturated Fat: 2
- Carbohydrates: 12
- Fiber: 1
- Protein: 2
Keywords: Halloween, Pretzel Rods, Witch Fingers, Easy Treats, Party Snacks, Gluten-Free Option, Nut-Free Option