
That was my roommate’s voice, sharp and urgent, cutting through the noise of our tiny kitchen. She was pointing a fork at the baking sheet like it was evidence in a crime scene. I looked down, confused, until I realized she wasn’t talking about the pie or the casserole nearby. She was talking about the cauliflower florets that had just come out of the oven, golden and trembling with heat. We had spent twenty minutes arguing about whether vegetables could ever truly be “fun food,” and in that moment, the debate ended. Those crispy baked buffalo cauliflower bites were the truce we didn’t know we needed.
I remember staring at the sticky, orange-red coating clinging to the florets. It looked messy. It looked dangerous. It looked exactly like what I needed after a long week of trying to eat “clean” and feeling miserable. The smell hit us a second later—a tangy, spicy, buttery aroma that filled the small apartment and made our stomachs growl in unison. We didn’t even wait for them to cool down. I grabbed one, burned my fingers slightly, and took a bite. The crunch was loud, audible even over the hum of the refrigerator. Then came the heat, not overwhelming, but present, waking up every taste bud that had been numb from a diet of plain steamed broccoli.
That Tuesday night changed how I view appetizers. It shifted the entire dynamic of our dinner parties. Suddenly, the vegetable platter wasn’t an afterthought or a guilt-ridden side dish. It became the centerpiece, the thing everyone fought over before the main course even arrived. I’ve made these bites dozens of times since then, tweaking the spice levels, swapping out flours, and testing different baking methods. But the core experience remains the same: that first bite of something that tastes like a cheat meal but doesn’t sit heavy in your stomach. It’s a trick, really. A culinary sleight of hand that turns a humble garden vegetable into a crave-worthy snack.
What stuck with me wasn’t just the flavor, but the feeling of sharing it. There’s a specific joy in watching someone who claims to hate vegetables take a second, and then a third, bite. It’s quiet satisfaction. It’s the realization that you don’t need deep fryers or excessive grease to make food exciting. You just need the right balance of crunch, spice, and a little bit of patience. That’s what these crispy baked buffalo cauliflower bites offer. They are proof that good food doesn’t have to be complicated, just honest and delicious.
Why You’ll Love This Recipe
Let’s be honest for a second. We’ve all been there. You’re scrolling through recipes, looking for something that feels indulgent but won’t wreck your week. You want that crunch, that tang, that spicy kick that makes your lips tingle. Most “healthy” alternatives fall flat. They’re soggy, bland, or taste like cardboard dressed up in sauce. This recipe is different because it actually works. I’ve tested this method enough times to know that getting true crispiness without frying is possible, and that’s where the magic happens. It’s not just about cooking cauliflower; it’s about transforming it.
- Quick & Easy: You’re looking at about 30 minutes from start to finish. That’s it. No marinating overnight, no complex techniques. It’s perfect for those busy weeknights when you’re hungry but don’t have hours to spare.
- Simple Ingredients: Check your pantry. You probably already have flour, spices, and hot sauce. You don’t need to make a special trip to the store. This is accessible cooking for real people, not just chefs with fully stocked kitchens.
- Perfect for Game Day: Whether it’s the big championship or a casual Sunday hang-out, these are the ultimate finger food. They hold up well in the oven on warm, and they don’t get soggy as fast as wings might.
- Crowd-Pleaser: I’ve served these to people who swear they don’t like veggies, and they’ve asked for the recipe. Kids love them because they’re fun to dip. Adults love them because they’re sophisticated enough to serve at parties.
- Unbelievably Delicious: The texture is key here. When you get that coating right, it shatters. The sauce clings perfectly, creating a sticky, spicy shell that gives way to the tender, creamy interior. It’s next-level comfort food that happens to be plant-based.
What makes this version stand out from the rest is the technique. Many recipes skip the step of drying the cauliflower thoroughly, leading to steam instead of crisp. Or they use a batter that turns gummy. This method uses a light dusting and a high-heat bake (or air fry) to ensure that crunch stays intact. It’s the kind of recipe that feels like a secret you’re letting in on. It’s comfort food reimagined—lighter, faster, but with the same soul-soothing satisfaction you’d get from traditional buffalo wings.
What Ingredients You Will Need
This recipe relies on a few key components to build that signature crunch and flavor profile. You don’t need anything fancy or hard to find. In fact, the beauty of this dish is how much you can play with what you already have. The cauliflower needs to be sturdy enough to hold the sauce but tender enough to eat easily. The coating needs to be thin enough to crisp up but thick enough to stick. And the sauce? That’s where the personality comes in.
- 1 large head of fresh cauliflower: Look for one that is tight and heavy for its size. A loose head might have dried-out florets. Remove the leaves and cut it into bite-sized florets. (Avoid pre-cut bags if possible; fresh is always better for texture.)
- 1/2 cup all-purpose flour: This creates the base for the crust. If you need a gluten-free option, a 1:1 gluten-free baking flour works well, though the texture might be slightly different. (Adds structure to the coating.)
- 1/2 cup almond flour: I like to mix this with the all-purpose flour for a nutty flavor and extra crispiness. It absorbs less oil and browns beautifully. (Optional but recommended for better crunch.)
- 1 teaspoon garlic powder: Don’t skip this. Fresh garlic can burn in the oven. Powder gives you that consistent, savory background note. (Use a trusted brand for potency.)
- 1 teaspoon onion powder: Complements the garlic and adds depth. (Essential for that classic buffalo flavor.)
- 1/2 teaspoon paprika: Adds color and a mild sweetness. If you want more heat, use smoked paprika. (Smoked paprika adds a nice smoky dimension.)
- 1/2 teaspoon salt: To taste. Adjust based on how salty your hot sauce is later. (Start with less, you can always add more.)
- 1/2 teaspoon black pepper: Freshly cracked is best. (Adds a little bite.)
- 1 large egg: Acts as the binder. It helps the flour stick to the wet cauliflower. (You can substitute with a flax egg for vegan option: 1 tbsp ground flaxseed + 3 tbsp water.)
- 1/2 cup water: To thin out the batter. You want it to be the consistency of heavy cream. (Too thick = clumpy. Too thin = no crust.)
- 1/2 cup Frank’s RedHot sauce: The classic choice for buffalo sauce. It’s vinegar-based and has the perfect heat level. (You can substitute with any vinegar-based hot sauce.)
- 2 tablespoons unsalted butter: Melted and mixed with the hot sauce. (Adds richness and helps the sauce cling.)
- 1 tablespoon honey or maple syrup: Just a touch to balance the acidity of the vinegar. (Optional, but recommended for flavor balance.)
- Cooking spray or olive oil: For lightly spraying the florets before baking. (Helps them brown evenly.)
I recommend using Frank’s RedHot because it’s the standard for a reason. It’s not too spicy, but it has that distinct tang. If you prefer heat, you can add a dash of cayenne to the sauce mixture. For the flour, I’ve found that adding a bit of almond flour prevents the coating from becoming too doughy. It keeps it light and airy. If you’re watching carbs, you can skip the flour entirely and use a light dusting of cornstarch, but the crunch won’t be quite the same.
Equipment Needed
You don’t need a lot of fancy gadgets to make these. In fact, keeping it simple is part of the appeal. Here is what you’ll need:
- Baking sheets: Two large sheets are ideal. You need space between the florets for air to circulate. Crowding them will cause steaming, which is the enemy of crispiness.
- Parchment paper: Line your baking sheets. This makes cleanup a breeze and prevents sticking. (Silicone mats work too, but parchment is easier to discard.)
- Two bowls: One for the dry ingredients, one for the wet batter. Medium-sized bowls are best.
- Whisk: To mix the batter smoothly. A fork works in a pinch.
- Tongs: For tossing the cauliflower in the batter and then in the sauce. It’s much cleaner than using your hands.
- Small saucepan: For melting the butter and mixing the sauce. Or, just use a microwave-safe bowl.
- Air Fryer (Optional): If you have one, this is great for extra crispiness. Use a lower temp and check frequently. (Reduces cook time by about 5-7 minutes.)
I used to use non-stick pans without parchment, and the cleanup was a nightmare. The sauce sticks and burns, and you’re scraping for ten minutes. Parchment paper is worth every penny. It’s also helpful to have a wire rack if you want to bake them on top of a sheet. This allows heat to reach the bottom of the florets, ensuring even cooking. But if you don’t have one, just flip them halfway through.
Preparation Method

Let’s walk through the process. It’s straightforward, but the details matter. Pay attention to the drying step—that’s where most people go wrong.
- Preheat the oven to 425°F (220°C). If using an air fryer, preheat to 375°F (190°C). High heat is essential for browning. (Give it about 5 minutes to fully heat up.)
- Prepare the cauliflower. Cut the head into florets. Try to keep them similar in size so they cook evenly. Place them in a large bowl or on a clean towel. Pat them dry thoroughly. (This is crucial. Wet cauliflower = soggy crust. Be patient here.)
- Make the dry mix. In a shallow bowl, whisk together the all-purpose flour, almond flour, garlic powder, onion powder, paprika, salt, and pepper. (Make sure there are no lumps of flour.)
- Make the wet batter. In another bowl, whisk the egg and water until smooth. (It should look like thin pancake batter.)
- Dip the florets. Take a handful of dried cauliflower and dip it into the wet batter, letting excess drip off. Then roll it in the dry mix, pressing gently to coat. (Don’t overload it. A light, even coat is better than a thick clump.)
- Arrange on the baking sheet. Place the coated florets on the parchment-lined sheet. Make sure they are not touching. (If they touch, they’ll steam each other.)
- Bake. Spray the tops lightly with cooking oil. Bake for 20-25 minutes, flipping halfway through. (They should be golden brown and crispy around the edges.)
- Make the sauce. While the cauliflower bakes, melt the butter in a small saucepan. Stir in the hot sauce and honey. (Heat just until melted, don’t boil.)
- Toss. Remove the cauliflower from the oven. Place it in a large clean bowl. Pour the sauce over it and toss gently with tongs until evenly coated. (Do this quickly so they stay crisp.)
- Serve. Return to the oven for 2-3 minutes if you want the sauce to set, or serve immediately. (Garnish with blue cheese or ranch if desired.)
When you’re tossing them in the sauce, go easy. You want them coated, not swimming. If they get too wet, they’ll lose their crunch. Also, watch them closely in the oven. Ovens vary. If your edges are browning too fast, cover them loosely with foil.
Cooking Tips & Techniques
I’ve learned a few things the hard way while perfecting this recipe. Here are some tips to ensure success.
- Dry is right. I cannot stress this enough. If your cauliflower is wet, the batter won’t stick properly, and it will slide off in the oven. Use paper towels. Be aggressive with the drying.
- Don’t overcrowd the pan. Air circulation is your friend. If you stack them, the bottom ones will stay soggy. Use two sheets if you have to.
- Flour mix is key. Using just all-purpose flour can result in a doughy coating. Adding almond flour or cornstarch helps create a lighter, crispier crust. It’s a small change that makes a big difference.
- High heat. Don’t be tempted to bake at a lower temperature. You need that initial blast of heat to set the crust. If you bake slow, you get steamed cauliflower.
- Toss quickly. The moment you add the sauce, the clock starts ticking. Toss them fast and serve them fast. If you let them sit in the sauce for too long, they’ll get soft.
One mistake I used to make was using too much batter. I wanted a thick coating, but it ended up looking like batter-dipped fries. A light dusting is better. You want to taste the cauliflower and the spice, not just the flour. Also, if you’re using an air fryer, don’t stack the florets. Cook in batches if needed. The air needs to circulate around every side.
Variations & Adaptations
One of the best things about this recipe is how flexible it is. You can tweak it to fit your taste or dietary needs.
- Vegan Option: Swap the egg for a flax egg (1 tbsp ground flaxseed mixed with 3 tbsp water, let sit for 5 minutes). Use maple syrup instead of honey and vegan butter or olive oil for the sauce.
- Gluten-Free: Use a 1:1 gluten-free flour blend instead of all-purpose flour. Almond flour is naturally gluten-free, so you can use that as the base.
- Mild Heat: If you’re serving kids or people who don’t like spice, use half hot sauce and half ketchup or tomato sauce. Add a pinch of sugar to balance it.
- Spicy Kick: Add cayenne pepper to the flour mix. Or use a spicier hot sauce like Texas Pete or Cholula. You can also add a dash of crushed red pepper flakes to the sauce.
- Garlic Parmesan: Skip the buffalo sauce. Toss the baked florets in melted butter, garlic powder, and grated parmesan cheese. (Great for a non-spicy alternative.)
I’ve tried making a honey garlic version, and it was surprisingly good. But the buffalo style is classic for a reason. The acidity cuts through the richness of the cheese dip perfectly. If you’re meal prepping, keep the sauce separate until you’re ready to eat. Reheating sauced cauliflower can make it soggy, so it’s best to crisp them up again in the oven or air fryer before adding the sauce.
Serving & Storage Suggestions
These are best served hot, right out of the oven. They pair perfectly with creamy dips. Blue cheese dressing is the traditional choice, but ranch is a close second. For a healthier option, try a Greek yogurt-based ranch dip. Serve them with celery sticks and carrot sticks for that classic buffalo wing experience.
If you have leftovers (unlikely, but possible), store them in an airtight container in the refrigerator for up to 3 days. Do not store them sauced. Keep the baked florets separate from the sauce. To reheat, pop them in the oven or air fryer at 375°F for 5-7 minutes. This will restore some of the crispiness. Microwave reheating will make them soft and chewy, so avoid that if you can.
The flavors actually meld a bit over time, so if you’re making them for a party ahead, you can bake them in the morning and reheat them before serving. Just remember to toss in the sauce right before serving. The crunch is part of the appeal, so don’t let it sit in the sauce too long.
Nutritional Information & Benefits
While this is a treat, it’s a lighter alternative to fried wings. Cauliflower is low in calories but high in fiber and vitamins C and K. The baking method uses significantly less oil than deep frying. However, the hot sauce and butter do add some sodium and fat. A typical serving (about 6-8 bites) has around 150-200 calories, depending on the sauce amount. It’s a guilt-free way to satisfy your craving for something spicy and crunchy. For those watching their carb intake, the flour coating adds some carbs, but you can reduce it by using more almond flour or cornstarch. It’s a balanced way to enjoy comfort food without the heavy grease.
Conclusion
These crispy baked buffalo cauliflower bites are more than just a snack. They’re a testament to the fact that you can enjoy flavorful, crunchy food without compromising your health or spending hours in the kitchen. They’re easy to make, easy to customize, and always a hit. I encourage you to try them and see how they compare to your previous attempts. Don’t be afraid to tweak the spice level or the coating. Make it your own. And if you do, let me know how they turned out. Drop a comment below with your tips or questions. I love hearing how you adapt recipes to fit your life. Happy cooking!
FAQs
Can I freeze baked buffalo cauliflower?
Yes, you can freeze the baked, unsauced florets. Let them cool completely, then store them in a freezer-safe bag. When you’re ready to eat, reheat them in the oven or air fryer until hot, then toss in the fresh sauce. Freezing sauced cauliflower will ruin the texture.
Why is my cauliflower soggy?
Usually, this happens because the florets weren’t dried thoroughly before coating, or they were overcrowded on the baking sheet. Make sure to pat them dry and give them space to breathe in the oven.
Can I use frozen cauliflower?
It’s not recommended. Frozen cauliflower releases a lot of water when thawed, making it very difficult to get a crispy coating. Fresh cauliflower is always the best choice for this recipe.
What dip goes best with buffalo cauliflower?
Blue cheese dressing is the classic pairing. Ranch dressing is also very popular. For a lighter option, try a Greek yogurt-based dip with herbs and garlic.
How spicy are these bites?
The heat level depends on the hot sauce you use. Frank’s RedHot is medium heat. If you want it milder, mix it with ketchup. If you want it hotter, add cayenne or use a spicier sauce.
Pin This Recipe!
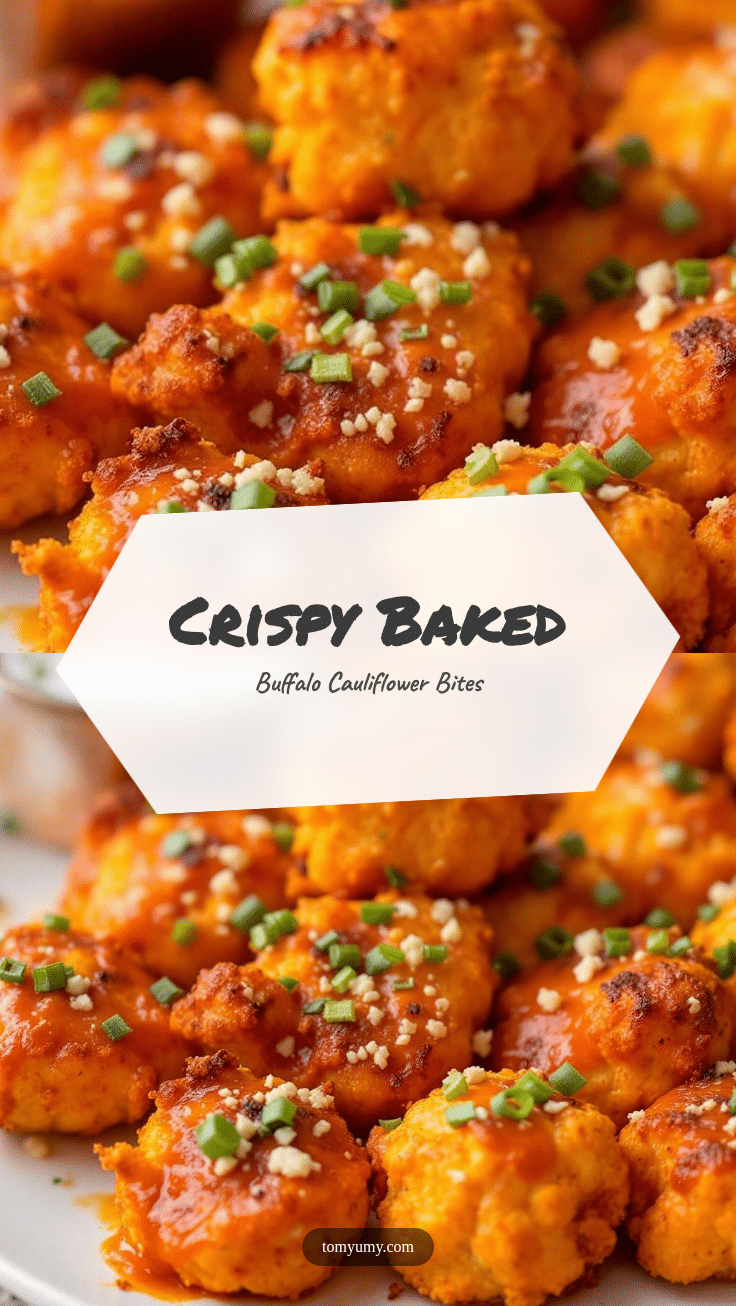
Crispy Baked Buffalo Cauliflower Bites: Easy Air Fryer Recipe

These crispy baked buffalo cauliflower bites offer the crunch and spice of traditional wings without the deep frying. Perfect for game day or a healthy weeknight snack, this recipe uses a simple flour coating and high heat to achieve a golden, crunchy exterior.
- Prep Time: 15 minutes
- Cook Time: 25 minutes
- Total Time: 40 minutes
- Yield: 4 servings 1x
- Category: Appetizer
- Cuisine: American
Ingredients
- 1 large head of fresh cauliflower, cut into bite-sized florets
- 1/2 cup all-purpose flour
- 1/2 cup almond flour
- 1 teaspoon garlic powder
- 1 teaspoon onion powder
- 1/2 teaspoon paprika
- 1/2 teaspoon salt
- 1/2 teaspoon black pepper
- 1 large egg
- 1/2 cup water
- 1/2 cup Frank’s RedHot sauce
- 2 tablespoons unsalted butter, melted
- 1 tablespoon honey or maple syrup
- Cooking spray or olive oil
Instructions
- Preheat the oven to 425°F (220°C). If using an air fryer, preheat to 375°F (190°C).
- Cut the cauliflower into florets and pat them thoroughly dry with paper towels to ensure crispiness.
- In a shallow bowl, whisk together the all-purpose flour, almond flour, garlic powder, onion powder, paprika, salt, and pepper.
- In another bowl, whisk the egg and water until smooth.
- Dip each dried cauliflower floret into the wet batter, let excess drip off, then roll in the dry flour mixture, pressing gently to coat.
- Arrange the coated florets on parchment-lined baking sheets, ensuring they are not touching.
- Lightly spray the tops with cooking oil or olive oil.
- Bake for 20-25 minutes, flipping halfway through, until golden brown and crispy.
- While baking, melt the butter in a small saucepan and stir in the hot sauce and honey.
- Remove cauliflower from the oven and place in a large bowl. Pour the sauce over and toss gently with tongs to coat evenly.
- Serve immediately, or return to the oven for 2-3 minutes to set the sauce.
Notes
Ensure cauliflower is completely dry before coating to prevent sogginess. Do not overcrowd the baking sheet to allow proper air circulation. For a vegan version, substitute the egg with a flax egg and use maple syrup and vegan butter. Store leftovers separately from sauce to maintain crispiness; reheat in oven or air fryer.
Nutrition
- Serving Size: 6-8 bites
- Calories: 175
- Sugar: 4
- Sodium: 450
- Fat: 8
- Saturated Fat: 3
- Carbohydrates: 18
- Fiber: 3
- Protein: 5
Keywords: buffalo cauliflower, air fryer cauliflower, healthy wings, vegan appetizer, gluten-free option, game day food, crispy baked cauliflower