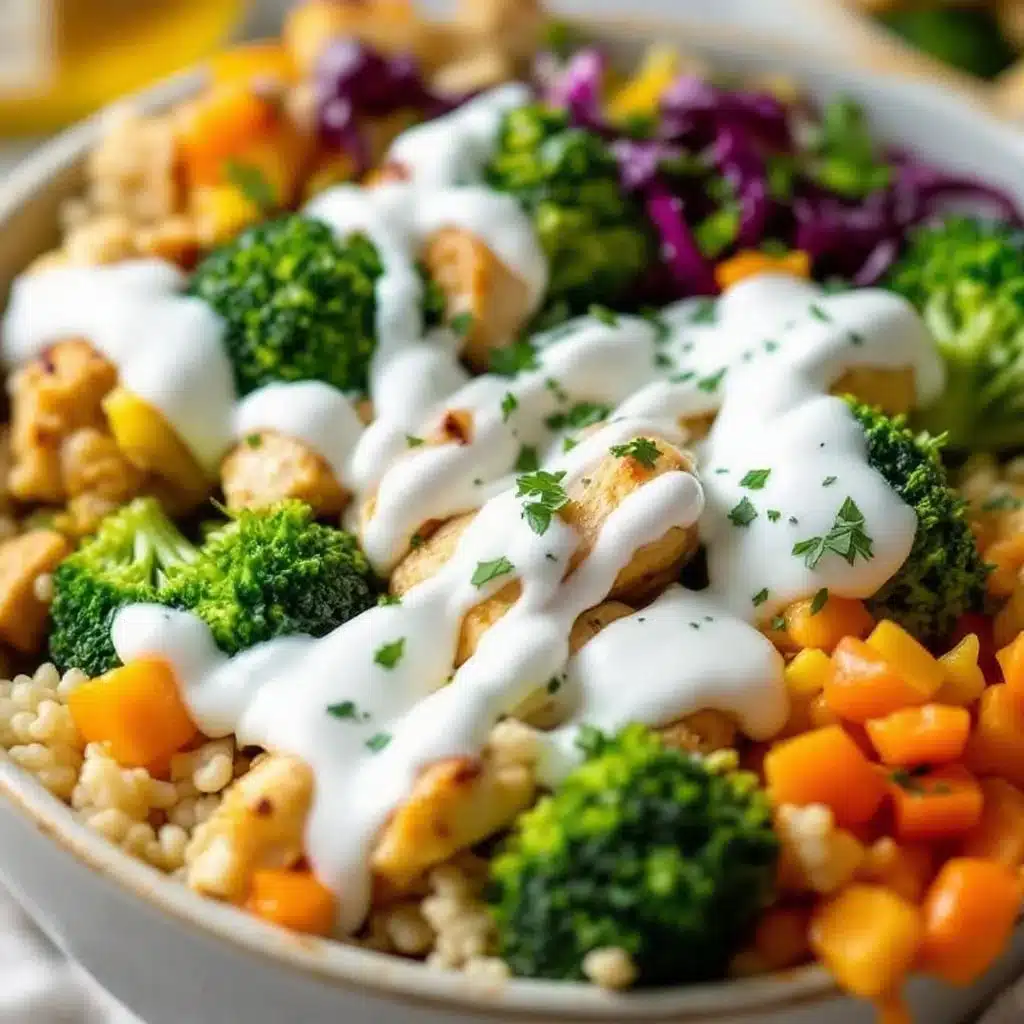
For a while, I just accepted that meal prep chicken and broccoli bowls weren’t going to taste like something I actually wanted to eat. You know the type. It’s that sad, gray-looking lunch you pull out of the fridge on Wednesday afternoon. The chicken is dry, the broccoli is mushy, and the rice is clinging together in a weird, cold clump. I used to think that eating healthy during the workweek meant surrendering to blandness. I thought I had to choose between convenience and flavor. Let’s face it, nobody wants to eat cardboard for lunch five days in a row.
It wasn’t until I stopped treating my meal prep like a chore that things changed. I started looking for a way to keep the vegetables crisp and the meat juicy without spending hours in the kitchen every single night. The gap was real. I needed a solution that survived the refrigerator overnight and still tasted good on day three. Honestly, I was skeptical that a simple combination could pull it off. But after testing a few different sauces and cooking methods, I found the sweet spot. It’s not complicated, but it is specific.
This easy meal prep chicken and broccoli bowl recipe finally bridged that divide. It’s not a magic wand, but it is a reliable routine. The garlic-soy glaze keeps everything moist, and the slight char on the broccoli adds a texture that most recipes miss. I keep making it because it just works. It’s become the quiet anchor of my weekly routine, the one thing I know will taste good no matter how tired I am. It’s a small victory, but it’s a consistent one.
Why You’ll Love This Recipe
I’ve tested a lot of chicken and veggie combos over the years. Some were too heavy on the sauce, leaving you with soggy rice. Others were too lean, leaving you hungry an hour later. This recipe hits that perfect balance because it’s built on simple, proven techniques rather than fancy ingredients. It’s the kind of meal that feels like a treat but functions like a necessity. Here is why this specific version has stuck around in my rotation:
- Quick & Easy: The entire process from prep to plate takes about 30 minutes. You can chop, cook, and assemble before you even finish your morning coffee. It’s perfect for busy weeknights when you just want to get dinner done.
- Simple Ingredients: You likely already have everything in your pantry. Soy sauce, garlic, ginger, sesame oil, and chicken thighs are staples. No fancy grocery trips needed for obscure spices.
- Perfect for Meal Prep: This isn’t just a dinner recipe; it’s a lunch strategy. The flavors actually get better after sitting in the fridge for a day or two. The chicken absorbs the sauce, becoming more tender as it rests.
- Crowd-Pleaser: Even people who claim they don’t like broccoli will eat this. The garlic and soy sauce mask any bitter notes, making the vegetable side of the plate disappear quickly.
- Unbelievably Delicious: The texture contrast between the tender chicken and the crisp-tender broccoli is next-level comfort food. It’s savory, slightly sweet, and deeply satisfying.
What makes this different from the rest is the use of chicken thighs instead of breasts. Thighs have more fat, which means they don’t dry out when you reheat them. I learned that the hard way with a batch of dry chicken back in 2018. Also, the sauce is emulsified properly with a bit of cornstarch, so it clings to every piece instead of pooling at the bottom of the container. It’s the kind of detail that makes all the difference.
This recipe isn’t just about fuel. It’s the kind of meal that makes you feel like you’re taking care of yourself without the stress. It’s comfort food reimagined—cleaner, faster, but with the same soul-soothing satisfaction. It’s perfect for impressing guests who are watching their macros, or just turning a simple Tuesday night into something memorable.
What Ingredients You Will Need
This recipe uses simple, wholesome ingredients to deliver bold flavor and satisfying texture without the fuss. The beauty here is in the quality of the basics. You don’t need expensive cuts of meat or exotic produce. Just good, fresh items prepared correctly. I like to keep this list short so it’s easy to shop for. Here is what you need to get started.
- Chicken Thighs: Boneless, skinless thighs are the way to go. They stay juicy during reheating. I recommend using a brand like Perdue or Tyson for consistent quality. You’ll need about 1.5 pounds.
- Broccoli: Fresh florets are best. Look for tight, dark green heads. In summer, you can swap in asparagus or green beans, but broccoli holds up best to the sauce. Cut into bite-sized pieces.
- Soy Sauce: Low-sodium soy sauce is preferred to control the salt level. I use Kikkoman because it has a balanced umami flavor without being too salty. You need ¼ cup.
- Garlic: Fresh minced garlic is non-negotiable. Jarred garlic just doesn’t have the same punch. Use about 4 cloves. It adds that essential aromatic base.
- Fresh Ginger: Grated fresh ginger adds a bright, spicy note. Pre-grated ginger in a tube is okay in a pinch, but fresh is better. About 1 tablespoon is perfect.
- Sesame Oil: Toasted sesame oil provides that nutty aroma. A little goes a long way. Don’t use the untoasted version for cooking, or it will taste bland. 1 teaspoon is all you need.
- Honey: To balance the saltiness of the soy sauce, a touch of sweetness is key. Honey works best for its floral notes. 2 tablespoons is the right amount.
- Cornstarch: This is the secret weapon. It thickens the sauce so it coats the chicken and broccoli instead of running off. 1 tablespoon mixed with water.
- Red Pepper Flakes: Optional, but recommended if you like a little heat. Just a pinch adds depth.
- Sesame Seeds: For garnish. They add a nice crunch and visual appeal. White or black seeds both work.
If you need to substitute, you can use chicken breasts, but reduce the cooking time slightly and watch them closely so they don’t dry out. For a gluten-free option, use tamari instead of soy sauce. Almond rice or cauliflower rice also work well if you are cutting carbs. The sauce is versatile, so don’t be afraid to tweak the sweetness or saltiness to your taste.
Equipment Needed
You don’t need a fancy kitchen to make this. A few basic tools will get the job done efficiently. Here is what I use and why.
- Large Skillet or Wok: A 12-inch non-stick skillet is ideal. It gives the chicken room to sear rather than steam. A wok is great for tossing the broccoli, but a skillet works fine if you are careful.
- Cutting Board and Knife: A sturdy board and a sharp chef’s knife make prep much faster. Dull knives are dangerous and frustrating.
- Mixing Bowls: One medium bowl for the chicken and sauce. One small bowl for the cornstarch slurry.
- Measuring Spoons: Basic set. Precision matters a bit with the cornstarch.
- Meal Prep Containers: Glass containers are best for reheating. They don’t stain from the soy sauce and are easier to clean. I like the 3-compartment style to keep rice separate if you prefer.
If you don’t have a non-stick pan, a well-seasoned cast iron skillet works too, but you’ll need a bit more oil to prevent sticking. For the containers, avoid plastic if you can. Glass keeps the food fresher longer and doesn’t retain odors. I’ve ruined several plastic containers with curry stains, so I stick to glass now. It’s a small investment that pays off.
Preparation Method
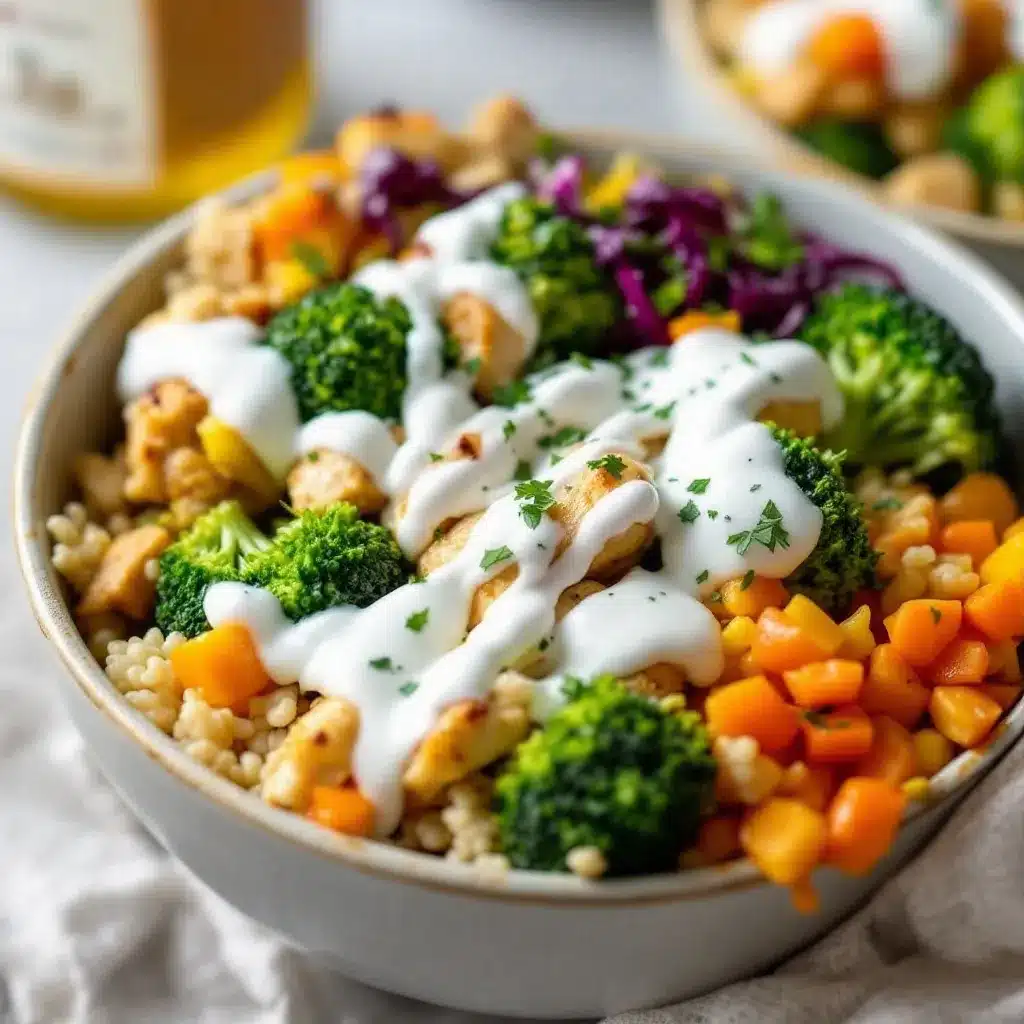
Let’s get into the nitty-gritty. This process is straightforward, but timing is everything. Follow these steps closely for the best results.
- Prep the Chicken: Pat the chicken thighs dry with paper towels. This is crucial for getting a good sear. Wet chicken steams. Cut the thighs into bite-sized pieces, about 1-inch cubes. Place them in a medium bowl. Add 2 tablespoons of soy sauce, half of the minced garlic, and half of the ginger. Toss to coat. Let it sit while you chop the veggies. (10 minutes)
- Prep the Broccoli: Wash the broccoli and cut it into florets. Try to keep them roughly the same size so they cook evenly. If the stems are thick, peel the outer layer and slice them into coins. They take longer to cook, so this helps. (5 minutes)
- Make the Sauce: In a small bowl, whisk together the remaining 2 tablespoons of soy sauce, the honey, the remaining garlic, ginger, sesame oil, and red pepper flakes. Set this aside. (2 minutes)
- Make the Slurry: In another tiny bowl, mix 1 tablespoon of cornstarch with 2 tablespoons of cold water. Stir until smooth. No lumps. This will thicken the sauce later. (1 minute)
- Cook the Chicken: Heat a large skillet over medium-high heat. Add 1 tablespoon of oil. Once the oil shimmers, add the chicken in a single layer. Do not overcrowd the pan. Cook for 3-4 minutes without moving it too much to get a golden crust. Flip and cook for another 3-4 minutes until cooked through. Remove chicken to a plate. (8 minutes)
- Steam the Broccoli: In the same pan, add a splash of water and the broccoli. Cover with a lid for 2-3 minutes to steam. This keeps it bright green and tender-crisp. Remove the lid and let any remaining water evaporate. (3 minutes)
- Combine and Sauce: Return the chicken to the pan with the broccoli. Pour the sauce mixture over everything. Stir gently to coat. Let it bubble for 1 minute. Then, stir in the cornstarch slurry. The sauce will thicken almost instantly. Cook for another 30 seconds until glossy. (3 minutes)
- Assemble: Divide the chicken and broccoli mixture into your meal prep containers. Serve over rice or cauliflower rice. Sprinkle with sesame seeds. Let cool before sealing. (5 minutes)
If the sauce looks too thick, add a splash of water. If it’s too thin, cook it a bit longer. The goal is a glossy coating, not a soup. Watch it closely during the slurry step.
Cooking Tips & Techniques
I’ve made plenty of mistakes while perfecting this recipe. Here is what I’ve learned to help you avoid them.
- Don’t Skip the Sear: It’s tempting to just throw everything in the pan. But searing the chicken first creates flavor through the Maillard reaction. It adds depth that boiling or steaming just can’t match.
- Room Temperature Ingredients: If your garlic and ginger are cold, they might burn in the hot pan. Let them sit out for a few minutes, or add them later in the cooking process.
- Control the Heat: Medium-high is the sweet spot. If it’s too high, the sauce will burn before it thickens. If it’s too low, the chicken will stew in its own juices. Aim for a steady sizzle.
- Batch Cooking: If you are making a large batch, cook the chicken in two batches. Overcrowding the pan lowers the temperature and leads to steaming instead of frying. Patience pays off.
- Sauce Consistency: The cornstarch slurry must be stirred before adding. Cornstarch settles quickly. If you add it without stirring, you’ll get lumps of thick paste.
One personal lesson: I once forgot to pat the chicken dry. The result was gray, soggy meat that tasted boiled. Never skip that step. It’s the difference between good and great. Also, taste the sauce before pouring it over the food. Adjust the honey or soy sauce if it needs tweaking. Your palate is the best guide.
Variations & Adaptations
This recipe is a framework, not a rigid rulebook. Here are some ways to adapt it to your needs.
- Gluten-Free: Swap soy sauce for tamari or coconut aminos. Use cornstarch, which is naturally gluten-free. Serve over rice or quinoa.
- Low-Carb: Skip the rice entirely. Serve over cauliflower rice or zucchini noodles. The sauce is low-carb friendly as long as you watch the honey amount.
- Vegan: Swap chicken for extra-firm tofu or tempeh. Press the tofu first to remove moisture. Use maple syrup instead of honey. The technique remains the same.
- Spicy: Add a diced jalapeño with the garlic. Or use chili garlic sauce instead of fresh ginger for a different heat profile.
- Seasonal Veggies: In spring, try asparagus. In autumn, switch to broccoli rabe or Brussels sprouts. They all work with this sauce profile.
I once tried this with sweet potatoes instead of rice. It was a hit. The sweetness of the potato paired well with the savory sauce. Don’t be afraid to experiment with what’s in season. It keeps the routine fresh.
Serving & Storage Suggestions
This meal is best served warm, but it’s also good cold. I often eat it straight from the fridge for lunch. The flavors meld nicely overnight.
- Storage: Store in airtight containers in the refrigerator for up to 4 days. Glass containers are best to prevent staining.
- Reheating: Microwave for 2-3 minutes, stirring halfway through. If using a stovetop, add a splash of water to keep it moist. Reheating in the oven takes longer but gives a better texture.
- Freezing: This recipe freezes well. Freeze for up to 3 months. Thaw in the fridge overnight before reheating. The broccoli might get slightly softer, but it’s still tasty.
- Serving: Garnish with fresh green onions or cilantro for a pop of color. A squeeze of lime juice adds brightness if it feels too heavy.
The flavors develop over time. Day one is good. Day two is better. Day three is peak flavor. The chicken gets more tender and the sauce penetrates deeper. Plan your meals accordingly.
Nutritional Information & Benefits
This bowl is a balanced meal. Chicken thighs provide protein and healthy fats. Broccoli offers fiber, vitamin C, and vitamin K. The sauce adds a touch of sugar but keeps the sodium manageable if you use low-sodium soy sauce.
- Protein: High protein content helps with muscle repair and satiety.
- Fiber: Broccoli adds significant fiber, aiding digestion.
- Healthy Fats: Sesame oil and chicken skin (if left on) provide healthy fats.
- Allergens: Contains soy. Gluten-free if using tamari. Dairy-free.
I find this meal keeps me full for hours. It doesn’t spike my blood sugar like a carb-heavy lunch would. It’s a steady energy source. I feel good eating it. It supports my wellness goals without feeling restrictive.
Conclusion
This easy meal prep chicken and broccoli bowl is more than just lunch. It’s a system. It saves time, saves money, and saves you from making bad food choices when you’re tired. I love it because it’s reliable. It’s the one thing I know will work every single time. It’s simple, but it’s done right.
I encourage you to try it. Make it your own. Add more veggies, change the spice level, or swap the protein. The base is solid. Let me know how it turns out. Leave a comment below with your tweaks. Share your photos. I love seeing how you adapt it. This recipe is a starting point, not an endpoint. Enjoy the process. Happy cooking.
FAQs
Can I use chicken breasts instead of thighs?
Yes, but chicken breasts dry out faster. Reduce the cooking time by a minute or two and watch them closely. Thighs are more forgiving for meal prep.
How long does this meal prep last in the fridge?
It lasts up to 4 days. The flavors actually improve after the first day as the chicken absorbs the sauce.
Can I freeze these bowls?
Absolutely. Freeze for up to 3 months. Thaw in the fridge overnight before reheating. The texture of the broccoli may soften slightly.
What can I serve with this bowl?
Rice, cauliflower rice, quinoa, or zucchini noodles work well. A side salad is also a good option if you want something light.
Can I make this ahead for the whole week?
Yes. Cook the chicken and broccoli, portion it out, and store in containers. Reheat as needed throughout the week.
Pin This Recipe!
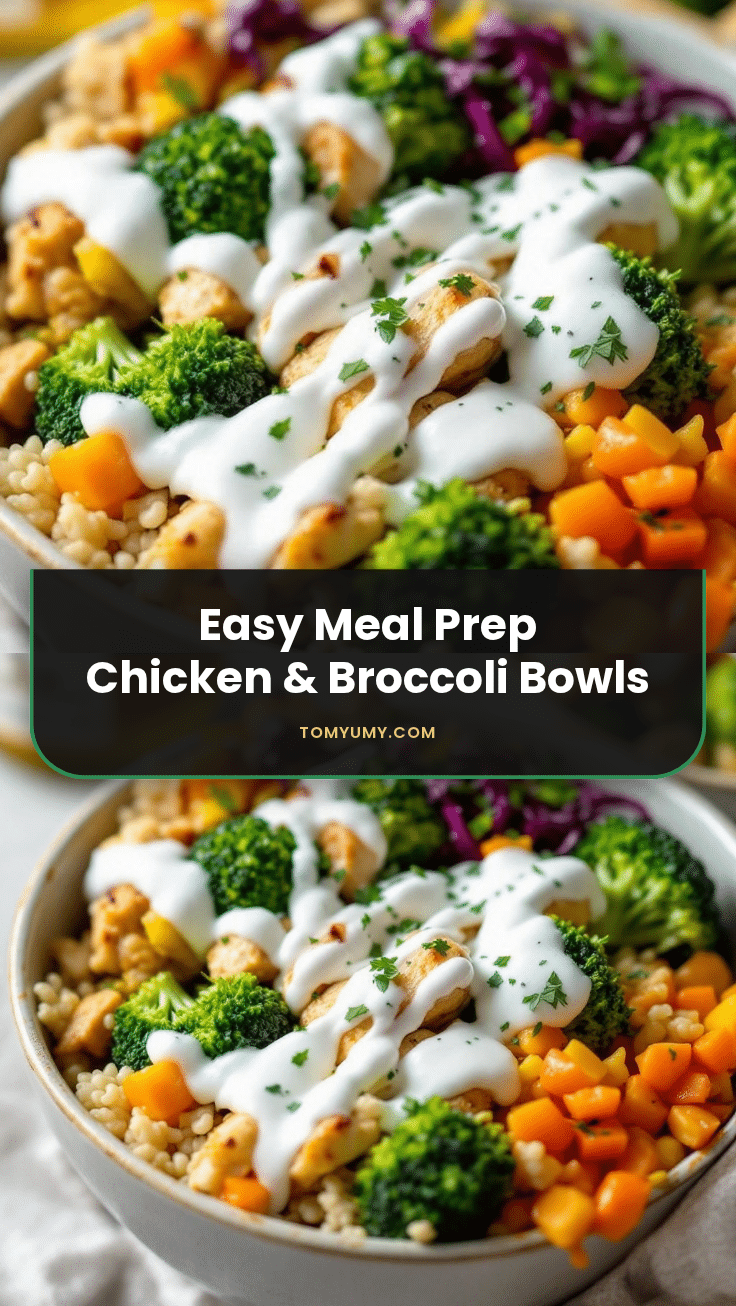
Easy Meal Prep Chicken and Broccoli Bowls

A reliable and delicious meal prep recipe featuring juicy chicken thighs and crisp-tender broccoli in a savory garlic-soy glaze. This dish is designed to stay moist and flavorful for days, making it perfect for busy weeknights.
- Prep Time: 15 minutes
- Cook Time: 15 minutes
- Total Time: 30 minutes
- Yield: 4 servings 1x
- Category: Main Course
- Cuisine: Asian Fusion
Ingredients
- 1.5 pounds boneless, skinless chicken thighs
- 1 head fresh broccoli, cut into bite-sized florets
- 1/4 cup low-sodium soy sauce (divided)
- 4 cloves garlic, minced
- 1 tablespoon fresh ginger, grated
- 1 teaspoon toasted sesame oil
- 2 tablespoons honey
- 1 tablespoon cornstarch mixed with 2 tablespoons cold water
- 1 tablespoon cooking oil (for skillet)
- Pinch of red pepper flakes (optional)
- Sesame seeds for garnish
Instructions
- Pat chicken thighs dry and cut into 1-inch cubes. Place in a bowl with 2 tablespoons soy sauce, half the garlic, and half the ginger. Let marinate while prepping vegetables.
- Wash and cut broccoli into florets. If stems are thick, peel and slice into coins.
- In a small bowl, whisk together remaining 2 tablespoons soy sauce, honey, remaining garlic, ginger, sesame oil, and red pepper flakes.
- Ensure the cornstarch slurry is smooth with no lumps.
- Heat a large skillet over medium-high heat with 1 tablespoon oil. Add chicken in a single layer and sear for 3-4 minutes until golden. Flip and cook another 3-4 minutes until done. Remove chicken to a plate.
- In the same pan, add a splash of water and broccoli. Cover and steam for 2-3 minutes until tender-crisp. Remove lid to evaporate excess water.
- Return chicken to the pan with broccoli. Pour sauce mixture over everything and stir to coat. Let bubble for 1 minute.
- Stir in the cornstarch slurry and cook for 30 seconds until the sauce is glossy and thickened.
- Divide mixture into meal prep containers, serve over rice or cauliflower rice, and garnish with sesame seeds.
Notes
Chicken thighs are preferred over breasts to prevent drying out during reheating. Patting the chicken dry is crucial for a good sear. The sauce thickens quickly with cornstarch, so stir the slurry before adding. Store in airtight glass containers for up to 4 days. Flavors improve after sitting in the fridge for a day.
Nutrition
- Serving Size: 1 bowl with rice or
- Calories: 450
- Sugar: 12
- Sodium: 600
- Fat: 18
- Saturated Fat: 4
- Carbohydrates: 25
- Fiber: 4
- Protein: 35
Keywords: chicken and broccoli, meal prep, healthy lunch, easy dinner, chicken thighs, soy sauce glaze, gluten-free option, low carb