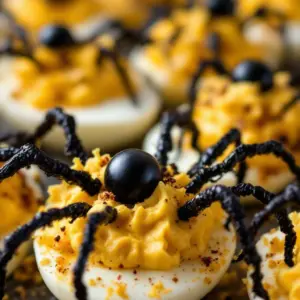
October 31st, and the only thing I want is something that looks like it crawled out of a garden bed but tastes like pure sugar. The air outside is crisp, smelling of damp leaves and distant bonfires, while inside the house the lights are dimmed low. I prefer the quiet hours, just before the doorbell rings or the kids rush in with their candy bags. It’s a solitary ritual, standing over the kitchen island with a piping bag in hand. There is something deeply satisfying about transforming a simple, salty pretzel into something grotesque yet delightful.
I remember the first time I made these. I was trying to avoid the store-bought plastic monsters that always ended up in the trash. I wanted something that felt homemade, something with real texture. The contrast of the crunchy salt against the sweet, creamy white chocolate is what keeps me coming back to this recipe. It’s not just a snack; it’s a small act of culinary theater. You know how sometimes you just need a project that doesn’t require much effort but looks impressive? This is it.
These witch finger pretzel rods are perfect for that specific time of year when you want to lean into the spooky vibe without spending hours in the kitchen. They are sturdy enough to handle, easy to eat, and surprisingly sophisticated in their simplicity. I like to make them on a rainy Tuesday afternoon when the house is quiet. The smell of melting chocolate fills the space, warm and inviting, completely at odds with the creepy appearance of the final product. It’s a fun paradox that I think you’ll appreciate.
There is a certain joy in watching the transformation. A straight, salty rod becomes a finger with a nail and a wrinkle. It’s silly, it’s fun, and it tastes amazing. Honestly, I think they are better than any candy bar you can buy. The crunch is right, and the sweetness isn’t cloying. It’s just the right amount of sugar to balance the pretzel salt. This recipe has stuck with me for years because it’s reliable. It works every single time, even if you are a novice cook. And let’s face it, we all have nights where we just want to make something easy but special.
So, here I am, sharing this quiet little tradition with you. It’s not about perfection; it’s about the fun of making something creepy and delicious. I hope you find as much peace in the process as I do. It’s a small ritual that marks the season, a bite of autumn that lingers on the tongue.
Why You’ll Love This Recipe
These crispy witch finger pretzel rods are a staple in my kitchen every October. I’ve tested dozens of variations over the years, from using dark chocolate to adding sprinkles, but this white chocolate version remains the gold standard. The texture is key here. You want that distinct snap of a high-quality pretzel rod, which holds up perfectly against the coating. I recommend using the thick, jumbo pretzel rods for the best structural integrity. Thinner ones can get soggy or break too easily during the dipping process.
- Quick & Easy: These come together in under 30 minutes. Honestly, most of that time is just waiting for the chocolate to set. You can have a batch ready before your neighbors even finish their pumpkin carving.
- Simple Ingredients: You likely already have everything in your pantry. Pretzels, white chocolate, and a few drops of food coloring. No fancy grocery trips needed. It’s the kind of recipe that feels like magic because it requires so little effort.
- Perfect for Halloween Parties: Whether it’s a trick-or-treat handout or a centerpiece for a spooky gathering, these are always a hit. They are easy to grab and eat, which is crucial when you have a crowd of excited kids (and adults) around.
- Crowd-Pleaser: I’ve served these at office parties and family gatherings. Even people who claim they don’t like “too sweet” treats usually go back for seconds. The saltiness cuts the sugar perfectly.
- Unbelievably Delicious: The combination of salty and sweet is a classic for a reason. It’s comforting yet exciting. The white chocolate provides a smooth, creamy backdrop that lets the pretzel flavor shine through.
What makes this recipe different from the rest is the attention to detail in the decoration. Many recipes just dip the pretzel and add a dot. But taking a moment to create the “nail” and the “wrinkles” elevates it from a simple snack to a themed treat. It shows care. And people notice that. It’s the kind of thing that makes you look like a pro baker, even if you’re just melting chocolate in the microwave. This isn’t just another version—it’s the version that has stood the test of time in my house.
What Ingredients You Will Need
This recipe relies on high-quality ingredients to deliver the best flavor and texture. Since there are only a few components, each one plays a significant role. You want a pretzel that is fresh and crunchy, and chocolate that melts smoothly without seizing. Avoid cheap chocolate chips that contain stabilizers which can make the coating grainy. Look for high-quality white chocolate melting wafers or high-percentage white chocolate bars for the best results.
- Jumbo Pretzel Rods: Choose the thick, sturdy ones. Thin rods will bend too much and look less like fingers. I prefer brands that are lightly salted, as the salt enhances the chocolate flavor. (Ensure they are fresh to maintain crunch)
- White Chocolate: Use real white chocolate or high-quality white chocolate melts. Avoid candy melts if you want a rich, creamy taste, though they do harden faster. (Adds richness and smooth texture)
- Green Food Coloring: Gel food coloring works best because it doesn’t add extra liquid to the chocolate. Liquid coloring can cause the chocolate to seize up. (Use sparingly for a subtle tint)
- Red Food Coloring: Also gel-based. You only need a tiny amount to create the “blood” effect under the nail. (Creates a spooky detail)
- Butter or Coconut Oil: A small teaspoon of fat helps thin the chocolate slightly, making it easier to dip and coat evenly. (Optional, but helps with consistency)
I always keep a bag of jumbo pretzel rods on hand because they are versatile. They work for this recipe, but also for dipping in caramel or other candies. When buying white chocolate, check the ingredient list. If it starts with sugar and not cocoa butter, it might not taste as good. Cocoa butter gives it that velvety mouthfeel. For the food coloring, gel pastes are concentrated, so you need less. This prevents the chocolate from becoming too runny or breaking. If you can’t find gel coloring, liquid works in a pinch, but add it drop by drop and stir vigorously.
Equipment Needed
You don’t need much to make these witch fingers, which is part of their appeal. A microwave-safe bowl is essential for melting the chocolate. If you don’t have a microwave, a double boiler works well, but it requires more attention. I use a glass measuring cup with a spout for dipping; it makes the process much cleaner and easier to control. The spout allows you to pour the chocolate over the pretzel without dripping everywhere.
A silicone baking mat or parchment paper is necessary for setting the coated pretzels. Silicone mats are reusable and provide a non-stick surface that makes removing the finished treats easy. Parchment paper works too, but you might need to gently peel the chocolate off if it sticks. Tweezers are helpful for placing the small “nails” if you are using candy melts or frosting for that detail. If you don’t have tweezers, toothpicks work fine for positioning the decorations.
I also recommend having a paper towel nearby. If you make a mess, which happens sometimes, you can wipe it up quickly. A clean workspace helps keep the focus on the task. Some people prefer to use a fork for dipping, but I find the measuring cup gives a more even coat. The fork can leave excess chocolate dripping off in uneven streams. Whichever tool you choose, make sure it’s dry. Water is the enemy of melting chocolate, so even a drop can ruin the batch.
Preparation Method

- Prepare the Workspace: Line a baking sheet with a silicone mat or parchment paper. Ensure your surface is clean and dry. This step takes about 2 minutes. Having everything ready before you start melting chocolate prevents panic later. (Time: 2 minutes)
- Melt the White Chocolate: Break the white chocolate into small pieces if using bars. Place them in a microwave-safe bowl. Microwave in 30-second intervals, stirring well between each interval. This usually takes about 2-3 minutes total. Stop when there are still a few small unmelted chunks; the residual heat will finish the job. Do not overheat, or the chocolate will become grainy. (Time: 3 minutes)
- Add Color: Once the chocolate is smooth, add a small amount of green gel food coloring. Start with a toothpick-sized amount. Stir until the color is evenly distributed. You want a pale, sickly green, not a bright neon color. Add more if needed. This step takes about 1 minute. (Time: 1 minute)
- Coat the Pretzels: Hold a pretzel rod by one end. Dip it into the chocolate, covering about three-quarters of the rod. Use the spout of your measuring cup to pour chocolate over the top if needed. Let excess chocolate drip off for a few seconds. Place the coated pretzel on the prepared baking sheet. This is the most time-consuming part. (Time: 10 minutes for a batch)
- Create the Nail: While the chocolate is still wet, add a small dot of red food coloring or a tiny piece of red candy melt near the tip to look like a nail. You can also use a toothpick dipped in red gel to create a small line. If you are using frosting for the nail, pipe a small dot on. This step takes about 5 minutes. (Time: 5 minutes)
- Add Wrinkles: Use a toothpick to gently drag lines into the wet chocolate, creating wrinkles that look like skin. Do this carefully so you don’t break the coating. You can create multiple lines for a more aged look. This step requires a steady hand. (Time: 5 minutes)
- Set the Treats: Allow the witch fingers to set at room temperature for about 20-30 minutes. If you are in a hurry, you can place them in the refrigerator for 10 minutes. Once hard, they are ready to serve or store. (Time: 20-30 minutes)
Throughout the process, keep an eye on the chocolate. If it starts to thicken, you can add a tiny bit more melted chocolate or fat to loosen it up. Working in small batches helps ensure the chocolate doesn’t cool down too much while you are decorating. If the chocolate gets too thick, it will be hard to get an even coat. Consistency is key here. You want a smooth, glossy finish.
Cooking Tips & Techniques
The biggest mistake people make is using too much food coloring. Gel coloring is potent, so a little goes a long way. If you add too much, the chocolate can become too thin or even seize. Always start with a small amount and build up. Another common error is not drying the pretzels thoroughly. If there is any moisture on the pretzel, the chocolate will slide off. Always use dry pretzels for the best adhesion.
I’ve learned the hard way that microwaving chocolate requires patience. It’s easy to burn it in seconds. Stirring is crucial because microwaves heat unevenly. By stirring between intervals, you distribute the heat and prevent hot spots. If you see steam coming off the chocolate, it’s too hot. Let it cool for a few seconds before stirring again.
For the wrinkles, use a toothpick with a blunt end. A sharp needle might pierce the pretzel and ruin the texture. Drag the toothpick gently through the chocolate, creating shallow lines. You don’t need to press hard. The goal is to create texture, not holes. If you make a mistake, you can smooth it out with a clean toothpick before the chocolate sets.
Multitasking is key here. While one batch is setting, prepare the next batch of pretzels. This keeps the workflow smooth. If you are making a large quantity, consider using two baking sheets so you have space to work. Also, keep a bowl of warm water nearby to clean your toothpicks and tweezers between colors. This prevents cross-contamination of the green and red colors.
Variations & Adaptations
While the classic white chocolate version is my favorite, there are many ways to customize these witch fingers. You can use dark chocolate for a less sweet, more sophisticated treat. The green color will be less visible in dark chocolate, so you might want to skip the coloring or use a gold dust for a different effect. Milk chocolate is another option, offering a richer flavor profile.
For a seasonal twist, try using orange chocolate for Thanksgiving. Add a small pretzel stick to the tip to look like a turkey leg. This ties in nicely with other holiday treats, similar to how S’mores Turkey Leg Treats combine marshmallow and chocolate for a festive look. You can also add sprinkles or edible glitter for a more magical appearance.
If you are looking for a healthier option, you can use sugar-free white chocolate. It doesn’t taste quite the same, but it reduces the sugar content significantly. For a nut-free version, ensure your chocolate and pretzels are made in a facility that doesn’t process nuts. This is important for school parties or gatherings with allergies.
I once tried making these with peanut butter chips, and they were delicious but harder to work with because peanut butter chips don’t melt as smoothly. If you try this, add extra oil to help the consistency. Another variation is to dip only half of the pretzel, leaving the other end exposed for a two-tone effect. This looks very elegant and is easier to decorate.
Serving & Storage Suggestions
These witch fingers are best served at room temperature. Cold chocolate can taste waxy, and room temperature allows the flavors to fully develop. Present them on a platter with a spooky theme. You can arrange them to look like they are crawling across the plate. Add some fake spiderwebs or candy eyeballs for extra effect.
They pair well with hot cocoa or milk. The saltiness of the pretzel balances the sweetness of the drink. For a more sophisticated pairing, serve them with a cup of black coffee or a glass of red wine. The bitterness of the coffee complements the white chocolate nicely. You can also serve them alongside other Halloween treats, like Pumpkin Spice Ghost Oreo Truffles, for a complete dessert spread.
For storage, keep the witch fingers in an airtight container at room temperature. They will stay fresh for up to two weeks. Do not refrigerate them unless necessary, as condensation can cause the chocolate to sweat and lose its shine. If you must refrigerate, let them come to room temperature before serving. Avoid storing them near strong-smelling foods, as chocolate can absorb odors.
If you need to make them ahead of time, you can prepare the coated pretzels up to a week in advance. Just ensure they are stored properly to maintain their crunch. The decorations hold up well over time, so you don’t need to worry about them melting or fading. These treats are perfect for party planning because they can be made in bulk and stored easily.
Nutritional Information & Benefits
These witch finger pretzel rods are a treat, so they should be enjoyed in moderation. Each piece contains approximately 150 calories, depending on the size of the pretzel and the amount of chocolate used. The white chocolate provides calcium and vitamin D, while the pretzels offer carbohydrates for energy. The salt content is moderate, so be mindful if you are watching your sodium intake.
For those with dietary restrictions, this recipe can be adapted. Use gluten-free pretzel rods for a gluten-free version. There are many high-quality brands available now that taste just like regular pretzels. For a dairy-free option, use dairy-free white chocolate melts. These have improved significantly in taste and texture over the years. They melt smoothly and provide a similar creamy experience.
The recipe is also nut-free, making it suitable for many school and office environments. However, always check the labels of your ingredients to confirm. Some chocolate manufacturers process nuts in the same facility. By choosing carefully, you can make these treats safe for everyone. From a wellness perspective, these are a fun way to get kids excited about homemade snacks rather than processed candy. The homemade aspect allows you to control the sugar and ingredient quality.
Conclusion
Making crispy witch finger pretzel rods is a fun and rewarding activity. It combines simple ingredients with a bit of creativity to produce a treat that is both visually striking and delicious. I love this recipe because it brings a sense of whimsy to the holiday season. It’s not just about the taste; it’s about the experience of making something spooky and sharing it with others. Whether you are making them for trick-or-treaters or just for your own enjoyment, these witch fingers are sure to be a hit.
I encourage you to try this recipe and make it your own. Feel free to experiment with different colors, decorations, or chocolate types. The sky is the limit. I’d love to see your creations, so please share your photos and comments below. Did you add your own twist? Did your kids enjoy them? Let me know in the comments section. Your feedback helps me improve and inspires others to try these treats.
Happy Halloween, and happy baking! May your kitchen be filled with joy and your treats be delicious. I hope these witch fingers bring a smile to your face and a crunch to your snack time. Enjoy the process, and don’t forget to save the recipe for next year.
FAQs
Can I use regular pretzel sticks instead of rods?
Yes, you can use pretzel sticks, but they are thinner and more fragile. Jumbo rods are better because they resemble fingers more closely and are sturdier to handle. If you use sticks, expect a smaller, more delicate treat.
How do I prevent the chocolate from seizing?
Ensure there is no water in the bowl or on the pretzels. Water causes chocolate to seize and become grainy. Also, melt the chocolate slowly and stir frequently. Avoid overheating by using short intervals in the microwave.
Can I make these ahead of time?
Yes, these can be made up to two weeks in advance. Store them in an airtight container at room temperature. They will maintain their crunch and flavor for a long time.
What can I use if I don’t have gel food coloring?
You can use liquid food coloring, but add it very sparingly. Liquid coloring contains water, which can affect the chocolate’s texture. You may need to add more chocolate to compensate for the thinning effect.
Are these treats suitable for kids?
Absolutely. They are a fun and safe treat for kids, especially if you use nut-free ingredients. They are easy to eat and don’t require much chewing, making them great for younger children.
Pin This Recipe!

Crispy Witch Finger Pretzel Rods: Easy Halloween Snack

Transform simple salty pretzel rods into spooky, crunchy witch fingers coated in creamy white chocolate with green and red food coloring details. This easy, no-bake Halloween treat is perfect for parties and trick-or-treaters.
- Prep Time: 15 minutes
- Cook Time: 5 minutes
- Total Time: 20 minutes
- Yield: 12 servings
- Category: Dessert
- Cuisine: American
Ingredients
- Jumbo pretzel rods (thick, sturdy, lightly salted)
- High-quality white chocolate or white chocolate melting wafers
- Green gel food coloring
- Red gel food coloring
- Butter or coconut oil (optional, for thinning chocolate)
Instructions
- Line a baking sheet with a silicone mat or parchment paper.
- Break white chocolate into small pieces and place in a microwave-safe bowl.
- Microwave in 30-second intervals, stirring well between each, until mostly melted (about 2-3 minutes). Do not overheat.
- Stir in a small amount of green gel food coloring until evenly distributed for a pale green tint.
- Hold a pretzel rod by one end and dip it into the chocolate, covering about three-quarters of the rod. Let excess drip off.
- Place the coated pretzel on the prepared baking sheet.
- While the chocolate is still wet, add a small dot of red food coloring or a tiny piece of red candy melt near the tip to create a nail.
- Use a toothpick to gently drag lines into the wet chocolate to create skin wrinkles.
- Allow the treats to set at room temperature for 20-30 minutes, or in the refrigerator for 10 minutes.
Notes
Ensure all equipment and pretzels are completely dry, as water causes chocolate to seize. Use gel food coloring to avoid thinning the chocolate. Store in an airtight container at room temperature for up to two weeks. Do not refrigerate unless necessary to prevent condensation.
Nutrition
- Serving Size: 1 pretzel rod
- Calories: 150
- Sugar: 12
- Sodium: 120
- Fat: 8
- Saturated Fat: 5
- Carbohydrates: 18
- Fiber: 1
- Protein: 2
Keywords: Halloween snack, witch finger pretzels, white chocolate pretzels, easy Halloween treats, no-bake dessert, spooky snacks, party food