
Introduction
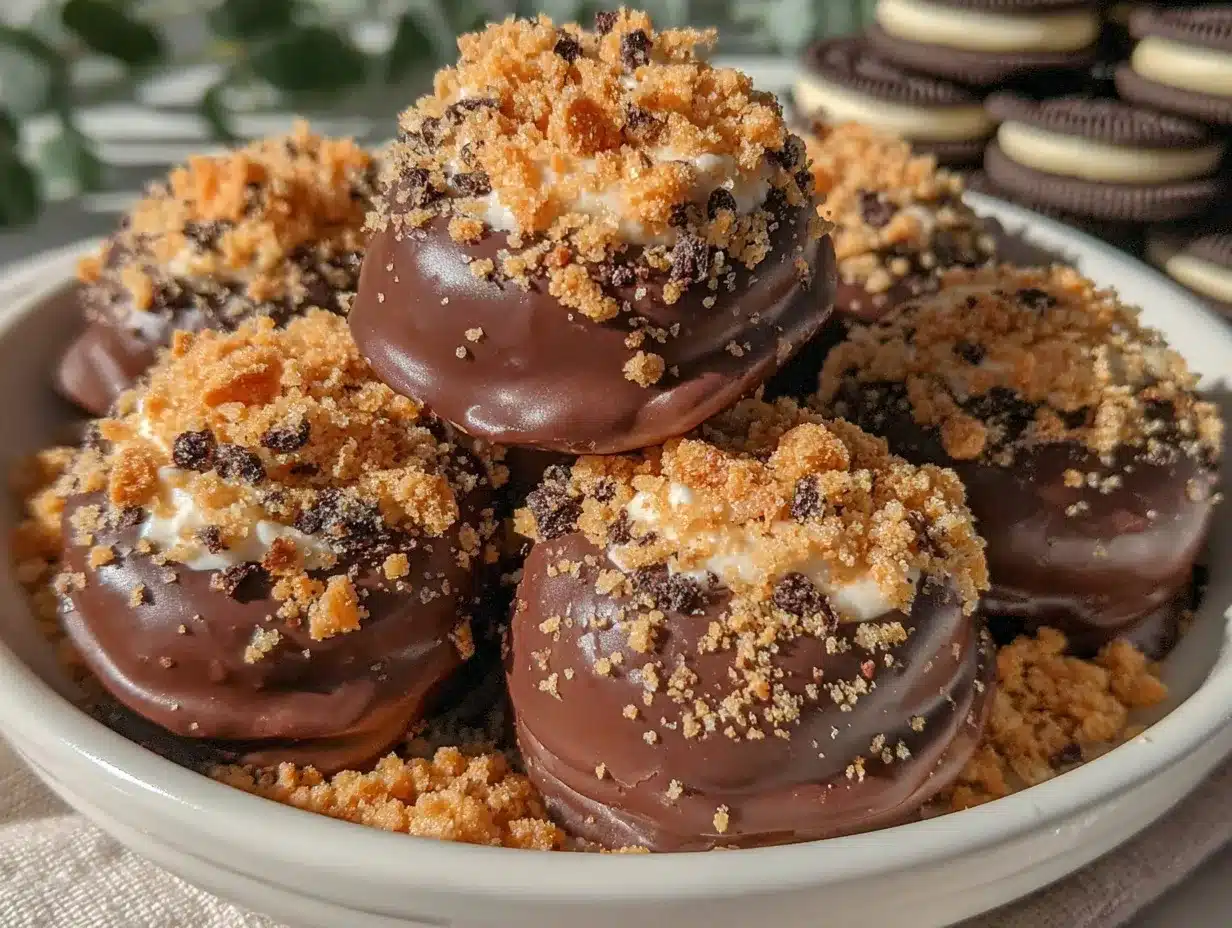
Let me paint you a picture: the unmistakable aroma of roasted peanuts and rich chocolate drifting through my kitchen, mixing with that nostalgic, sweet scent of caramelized sugar. It’s the kind of moment that stops you in your tracks—honestly, Butterfinger Bites with Crunchy Candy Topping have that power. The first time I whipped up a batch, I was instantly hooked. It was a rainy Saturday, the kind where you want something fun and a little bit decadent to brighten up the afternoon.
Back when I was knee-high to a grasshopper, my grandma would tuck Butterfinger bars into my lunch box as a surprise treat. Fast forward a few years, and here I am, trying to recreate that perfect crunchy, peanut-buttery magic—but in bite-sized form that you can pop right into your mouth. Let’s face it, these little treats are dangerously easy to make and even harder to resist.
My family couldn’t stop sneaking them off the cooling rack (and honestly, neither could I). I remember my youngest declaring, “These taste just like candy!” and the older kids tried to argue over who got the last one. It’s the kind of recipe that brings out playful competition, giggles, and that pure, nostalgic comfort you crave on a cozy day.
Butterfinger Bites have become a staple for family gatherings, potlucks, and gifting (because who doesn’t love a sweet, crunchy surprise?). I’ve tested this recipe so many times—in the name of research, of course—and every batch feels like a warm hug. You’re going to want to bookmark this one, trust me.
Why You’ll Love This Recipe
After years of tinkering in the kitchen, I can confidently say these Butterfinger Bites stand out for more reasons than just their addictive crunch. Here’s why you’ll be reaching for this recipe again and again:
- Quick & Easy: Comes together in under 35 minutes, which is perfect for spontaneous cravings or busy weeknights.
- Simple Ingredients: No wild goose chases at the grocery store. Odds are, you probably have everything you need sitting in your pantry right now.
- Perfect for Every Occasion: These bites are ideal for holiday cookie trays, birthday parties, or as a pick-me-up after school. They even brighten up your Pinterest snack board!
- Crowd-Pleaser: Kids, adults, and even picky eaters keep coming back for seconds. They’re always the first to vanish at potlucks.
- Unbelievably Delicious: The combination of creamy peanut butter, crispy cornflakes, and rich chocolate makes each bite pure comfort food.
What really makes my Butterfinger Bites different? The secret’s in blending the peanut butter just enough for extra-smooth texture while keeping plenty of crunchy candy bits on top. I’ve played with ratios, tested microwave vs. stovetop melting, and even tried swapping in almond butter for a twist. Nothing beats the original, though—especially when you sprinkle a little extra crushed candy on top for that signature, mouthwatering crunch.
These bites are more than just a treat; they’re a memory-maker. There’s something special about sharing a batch with friends and watching their eyes light up. Whether you’re impressing guests or just treating yourself after a long day, Butterfinger Bites deliver soul-soothing satisfaction every single time.
What Ingredients You Will Need
This Butterfinger Bites recipe uses simple, wholesome ingredients to create bold flavor and satisfy your sweet tooth—without any complicated steps. Most of these are pantry staples, and you can swap a few things if you need to. Here’s what you’ll need:
- For the Base:
- 1 cup (250 g) creamy peanut butter (I prefer Jif or Skippy for best texture)
- 1/4 cup (60 g) unsalted butter, softened
- 1 cup (120 g) powdered sugar (sifted for smoothness)
- 2 cups (60 g) cornflakes, lightly crushed (adds crunch)
- For the Chocolate Coating:
- 1 1/2 cups (255 g) milk chocolate chips (or semi-sweet, if you want it less sweet)
- 1 tablespoon (13 g) coconut oil or vegetable shortening (helps the chocolate set with a glossy finish)
- For the Crunchy Candy Topping:
- 3 standard Butterfinger bars (approx. 60 g each), crushed (the star of the show!)
- Optional: 1/4 cup (30 g) chopped roasted peanuts (for extra crunch)
Ingredient Tips: If you’re gluten-free, use certified gluten-free cornflakes. You can swap in almond butter for a slightly different flavor profile (it’s tasty, though the texture is a bit softer). Out of Butterfinger bars? Try using crushed peanut brittle or toffee bits in a pinch—just don’t tell my grandma!
For a dairy-free version, use plant-based butter and dairy-free chocolate chips. If you love a salty-sweet vibe, sprinkle a pinch of flaky sea salt on top before the chocolate sets. In summer, you could toss in some chopped dried cherries for a fun twist. The ingredients are flexible, but the classic combo is what keeps everyone reaching for “just one more.”
Equipment Needed
- Medium mixing bowl (for combining the base ingredients)
- Rubber spatula or wooden spoon (for mixing—honestly, a sturdy spatula saves your wrist here)
- Baking sheet (lined with parchment paper for easy cleanup)
- Microwave-safe bowl or double boiler (for melting chocolate)
- Small ice cream scoop or tablespoon (for shaping the bites)
- Plastic wrap or wax paper (for storing the finished bites)
- Zip-top bag and rolling pin (for crushing Butterfinger bars)
If you don’t have a double boiler, the microwave works just fine (just go slow and stir often). I’ve tried shaping these with a regular spoon, but an ice cream scoop gives more uniform bites. For cleanup, parchment paper is a lifesaver—no stuck chocolate messes! If your baking sheet is ancient (like mine), just line it well and you’re good to go. Budget-friendly tools totally work; I’ve made these with thrift store finds and never missed a beat.
Maintenance tip: If your mixing bowl is plastic, be gentle with hot chocolate. Glass or metal bowls last longer and make cleanup easier.
Preparation Method
- Prepare the base: In a medium mixing bowl, combine 1 cup (250 g) creamy peanut butter and 1/4 cup (60 g) unsalted butter, softened. Beat together with a rubber spatula or wooden spoon until smooth and creamy. This takes about 2 minutes. (Tip: Room temperature butter blends more easily.)
- Add the dry ingredients: Stir in 1 cup (120 g) powdered sugar and 2 cups (60 g) lightly crushed cornflakes. Mix until everything is evenly combined and the mixture holds together when pressed. If it’s too sticky, add another tablespoon of cornflakes.
- Shape the bites: Use a small ice cream scoop or tablespoon to portion the mixture into 1-inch balls (about 25 g each). Roll gently between your palms for a smooth, round shape. Place each ball onto a parchment-lined baking sheet. You should get about 24 bites.
- Chill: Refrigerate the shaped bites for 20 minutes to firm up. (If you’re impatient, 10 minutes in the freezer works too.) This step helps them hold their shape when dipped in chocolate.
- Melt the chocolate: In a microwave-safe bowl, combine 1 1/2 cups (255 g) milk chocolate chips and 1 tablespoon (13 g) coconut oil. Microwave in 30-second bursts, stirring between each, until fully melted and smooth. (Or use a double boiler over simmering water—your call.)
- Dip the bites: Using two forks, dip each chilled bite into the melted chocolate, turning to coat completely. Let excess chocolate drip off, then place back on the parchment-lined sheet.
- Add the crunchy topping: Immediately sprinkle each chocolate-coated bite with crushed Butterfinger bars (and optional chopped roasted peanuts). Press lightly so the topping sticks. (It’s messy but worth it!)
- Set the chocolate: Return the bites to the fridge for 15-20 minutes, or until the chocolate is firm. You’ll know they’re ready when you can gently lift them without smudging.
- Final touches: Once set, transfer the Butterfinger Bites to an airtight container, layering with wax paper. They keep well at room temp for 2 days, or refrigerate for up to a week.
- Troubleshooting: If the chocolate seizes or thickens, stir in a bit more coconut oil. For bites that flatten, let the base chill longer before dipping. If your topping slides off, dip quickly and sprinkle right away.
Sensory cues: The base should feel dense but pliable, and the chocolate coating should be glossy, not streaky. The crunchy candy topping adds a pop of color and texture—don’t skimp!
Personal tip: Prep all ingredients before you start, so the process flows smoothly. It’s a fun job for helpers if you have little ones around (just watch out for sneaky fingers!).
Cooking Tips & Techniques
Making Butterfinger Bites is pretty straightforward, but a few pro tricks make all the difference. Here’s what I’ve learned (sometimes the hard way):
- Chill for Success: Don’t skip chilling the bites before dipping. If they’re too soft, they’ll fall apart in the chocolate—trust me, I’ve tried to rush this step, and it gets messy fast.
- Perfect Chocolate Coating: For shiny, smooth chocolate, add a touch of coconut oil. It helps the chocolate melt evenly and sets with a glossy finish. Overheating makes chocolate grainy, so go slow.
- Keep Toppings Handy: Candy topping needs to go on before the chocolate sets. I once waited too long, and the Butterfinger bits rolled right off. Sprinkle quickly and gently press them in place.
- Uniform Bites: Use a scoop or tablespoon for even sizing. This helps them set evenly and look great on a platter.
- Clean Workstation: Line everything with parchment paper for easy cleanup. Chocolate loves to travel, and sticky bites are no fun to pry off a baking sheet.
- Multitasking: Melt the chocolate while the bites chill. It saves time and keeps things moving.
Consistency is key. If your base feels too dry, add a smidge more peanut butter. Too sticky? Another sprinkle of cornflakes does the trick. I’ve had a few batches come out flat or crumbly—that’s usually from skipping the chilling step or rushing the mixing. Slow and steady wins the Butterfinger Bite race!
Honestly, don’t stress about perfection. A few lopsided bites just prove they’re homemade—and that’s half the charm.
Variations & Adaptations
One of the best things about Butterfinger Bites is how easy they are to customize. Here are some fun ways to mix it up:
- Gluten-Free Version: Swap regular cornflakes for certified gluten-free cornflakes. Some brands, like Nature’s Path, work perfectly.
- Vegan/Dairy-Free: Use plant-based butter and vegan chocolate chips. Sub out the Butterfinger bars for a vegan-friendly crunchy candy or homemade brittle.
- Flavor Swaps: Try almond butter or sunflower seed butter instead of peanut butter for a different twist. You can also use dark chocolate for a richer flavor.
- Seasonal Add-Ins: Stir in chopped dried cherries or cranberries for a holiday version. In summer, add crushed pretzels for an extra salty crunch.
- Cooking Method: If you don’t want to melt chocolate, roll the bites in cocoa powder or powdered sugar instead. It’s a little less decadent but still delicious.
- Allergen-Friendly: For nut allergies, use sunflower seed butter and skip the roasted peanuts. My neighbor swears by this version for her kiddos.
Personal variation: Once, I mixed mini marshmallows into the base for a s’mores vibe. It was a little sticky, but the kids went wild for it. Feel free to experiment—these Butterfinger Bites are super forgiving!
Serving & Storage Suggestions
Butterfinger Bites are best served chilled or at cool room temperature. The chocolate coating stays crisp, and the candy topping keeps its crunch. I love piling them high on a festive platter (add a few extra crushed Butterfinger bits for color) or tucking them into cupcake liners for easy grabbing.
Pair these bites with a tall glass of cold milk, hot cocoa, or even a creamy latte if you’re feeling fancy. They go nicely with salty snacks like pretzels or popcorn at a party, and they’re a hit alongside fruit trays.
For storing, layer the bites between sheets of wax paper in an airtight container. They’ll keep at room temperature for up to 2 days (though we rarely have leftovers!), or in the fridge for up to a week. If you want to freeze them, just pop the container in the freezer—they’ll last about 2 months. Thaw in the fridge overnight for best texture.
To reheat (if you want a softer bite), microwave for 5 seconds. Don’t overdo it, or the chocolate will melt. Flavors actually deepen after a day or two, so make ahead for parties if you can.
Nutritional Information & Benefits
Each Butterfinger Bite packs a delightful punch of flavor and texture. Here’s an approximate breakdown per bite (based on a batch of 24):
- Calories: 110
- Fat: 7 g
- Saturated Fat: 3 g
- Carbohydrates: 11 g
- Sugar: 8 g
- Protein: 2 g
Peanut butter provides healthy fats and plant-based protein. Cornflakes add a crunchy, whole grain element. The Butterfinger topping is pure treat, but you can use less if you’re watching sugar.
This recipe is naturally gluten-free with the right cornflakes, and can be made dairy-free or nut-free with substitutions. It does contain peanuts, milk, and soy (from the candy and chocolate).
From a wellness perspective, these bites are a fun way to satisfy sweet cravings in moderation. I believe in balance—enjoying treats like this makes healthy eating sustainable!
Conclusion
If you’re looking for a recipe that’s easy, irresistibly crunchy, and guaranteed to make everyone smile, Butterfinger Bites with Crunchy Candy Topping are it. The simple prep means you can whip up a batch whenever the mood strikes, and the familiar flavors bring a wave of comfort and nostalgia.
Don’t be afraid to tweak the ingredients to suit your taste or dietary needs. Add a pinch of salt, swap the chocolate, or mix in your favorite candies—you can make this recipe your own. Personally, I love how these bites bring back memories of childhood treats and family kitchen adventures.
I’d love to hear how your batch turns out! Drop a comment below, share your creative twists, or tag me if you post your Butterfinger Bites on Pinterest. Happy snacking—and remember, the best treats are made with a little mess and a lot of heart.
Frequently Asked Questions
How do I crush Butterfinger bars easily?
Pop the bars into a zip-top bag and roll with a rolling pin. It keeps the mess contained and gives you perfect, crunchy bits.
Can I use crunchy peanut butter instead of creamy?
Absolutely! It adds extra texture. Just make sure to mix well so the base holds together.
How do I prevent the chocolate from getting grainy?
Go slow with melting—use low heat and stir often. Adding coconut oil helps keep it smooth and glossy.
Can Butterfinger Bites be frozen?
Yes, they freeze beautifully. Store in an airtight container and thaw in the fridge overnight before serving.
What can I use instead of Butterfinger candy for the topping?
Try crushed peanut brittle, toffee bits, or even chopped Reese’s cups if you want a different flavor. The candy topping is flexible—just make sure it’s crunchy!
Pin This Recipe!
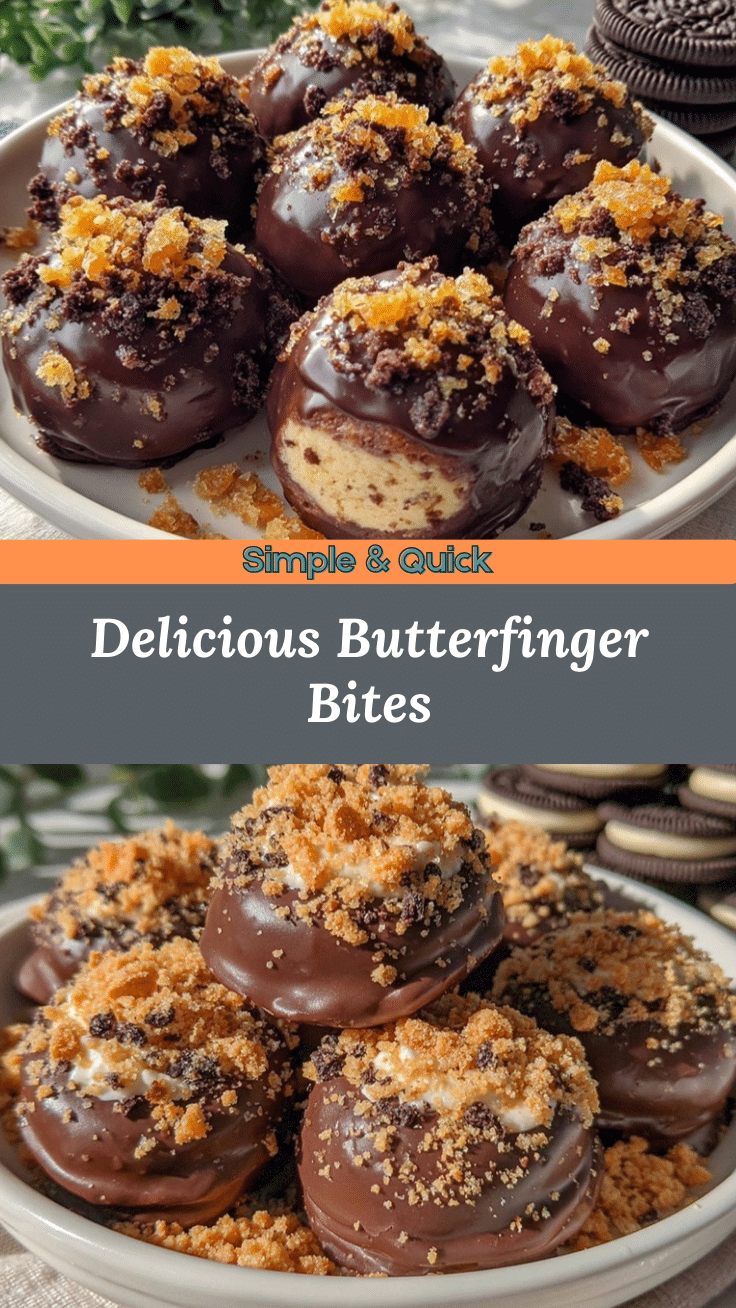
Butterfinger Bites Recipe: Easy Homemade Crunchy Candy Treats

These Butterfinger Bites are irresistibly crunchy, peanut-buttery treats coated in chocolate and topped with crushed Butterfinger candy. Perfect for parties, gifting, or a nostalgic snack, they come together quickly with simple pantry ingredients.
- Prep Time: 15 minutes
- Cook Time: 20 minutes
- Total Time: 35 minutes
- Yield: 24 bites 1x
- Category: Dessert
- Cuisine: American
Ingredients
- 1 cup creamy peanut butter
- 1/4 cup unsalted butter, softened
- 1 cup powdered sugar, sifted
- 2 cups cornflakes, lightly crushed
- 1 1/2 cups milk chocolate chips (or semi-sweet)
- 1 tablespoon coconut oil or vegetable shortening
- 3 Butterfinger bars (approx. 2 oz each), crushed
- Optional: 1/4 cup chopped roasted peanuts
Instructions
- In a medium mixing bowl, combine peanut butter and softened butter. Beat together until smooth and creamy (about 2 minutes).
- Stir in powdered sugar and lightly crushed cornflakes. Mix until evenly combined and the mixture holds together when pressed. If too sticky, add another tablespoon of cornflakes.
- Use a small ice cream scoop or tablespoon to portion the mixture into 1-inch balls. Roll gently between your palms for a smooth, round shape. Place each ball onto a parchment-lined baking sheet (makes about 24 bites).
- Refrigerate the shaped bites for 20 minutes to firm up, or freeze for 10 minutes if short on time.
- In a microwave-safe bowl, combine chocolate chips and coconut oil. Microwave in 30-second bursts, stirring between each, until fully melted and smooth. Alternatively, melt using a double boiler.
- Using two forks, dip each chilled bite into the melted chocolate, turning to coat completely. Let excess chocolate drip off, then place back on the parchment-lined sheet.
- Immediately sprinkle each chocolate-coated bite with crushed Butterfinger bars and optional chopped roasted peanuts. Press lightly so the topping sticks.
- Return the bites to the fridge for 15-20 minutes, or until the chocolate is firm.
- Once set, transfer Butterfinger Bites to an airtight container, layering with wax paper. Store at room temperature for up to 2 days, or refrigerate for up to a week.
- Troubleshooting: If chocolate seizes or thickens, stir in a bit more coconut oil. For bites that flatten, chill the base longer before dipping. If topping slides off, dip quickly and sprinkle right away.
Notes
For gluten-free bites, use certified gluten-free cornflakes. You can substitute almond or sunflower seed butter for peanut butter. For dairy-free, use plant-based butter and chocolate chips. Chill bites before dipping for best results. Sprinkle toppings immediately after dipping for best adhesion. Bites can be frozen for up to 2 months.
Nutrition
- Serving Size: 1 bite
- Calories: 110
- Sugar: 8
- Sodium: 60
- Fat: 7
- Saturated Fat: 3
- Carbohydrates: 11
- Fiber: 0.5
- Protein: 2
Keywords: Butterfinger Bites, homemade candy, peanut butter bites, chocolate treats, crunchy candy, party snacks, easy dessert, nostalgic recipe, gluten-free option, kid-friendly


