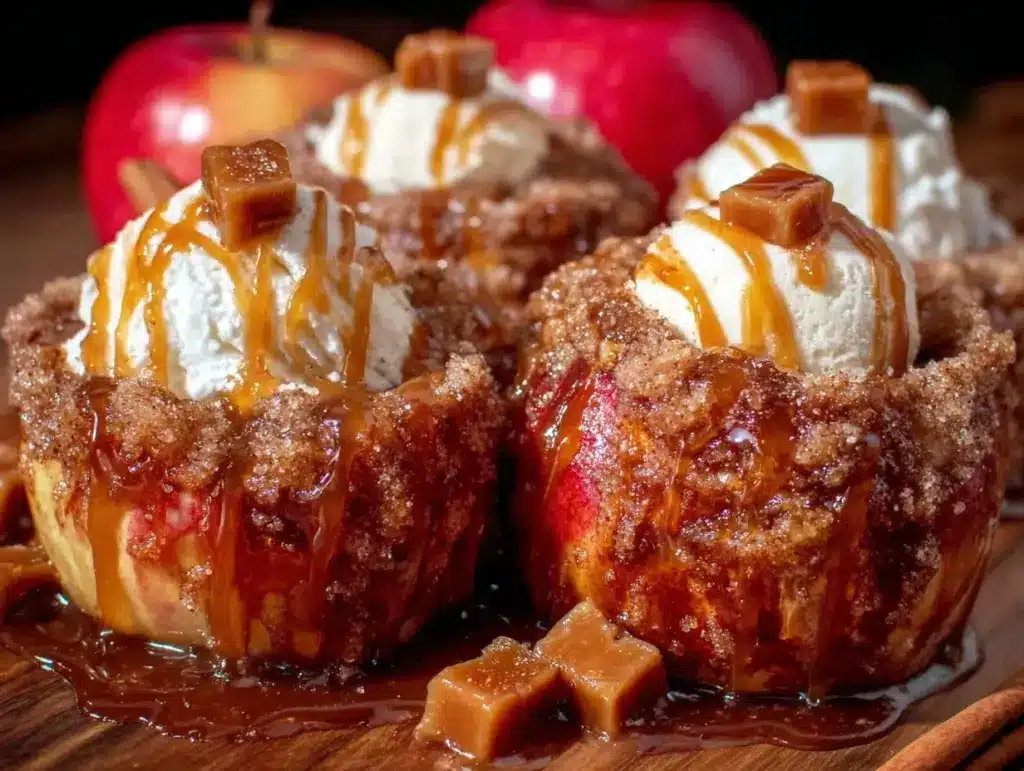
Let me just paint you a picture—the aroma of fresh apples mingling with cinnamon and brown sugar, rising up in sweet, buttery waves from the oven. It’s the kind of scent that practically wraps itself around you, cozy and warm, begging you to sneak a peek inside. The first time I made these baked bloomin’ apples, I was instantly hooked. I remember standing by the oven, watching those apples open up like flowers, just waiting for the moment when the caramel started bubbling in the crevices. That was a pause-and-smile kind of moment, you know? Like, this is something special.
The whole recipe takes me back to my childhood when I was knee-high to a grasshopper, spending autumn weekends at my grandma’s house. She’d toss apples with cinnamon and sugar, and I’d try to snag a slice before she caught me. Fast forward to today, and I’m still sneaking bites—only now, my own kids are the ones trying to steal these baked bloomin’ apples off the cooling rack (and honestly, who could blame them?). This dish is pure, nostalgic comfort. Dangerously easy, but so impressive that it brightens up your Pinterest board and makes you look like a baking genius.
I first stumbled on the idea during a rainy Saturday, scrolling for something quick but showstopping for dessert. Wish I’d found it years ago! These apples are now a staple for family gatherings, gifting, or just treating yourself after a long week. They’re perfect for potlucks, a sweet treat for your kids, or that cozy night in when you want dessert to feel like a warm hug. Trust me, after a couple rounds of “testing” (in the name of research, of course), I promise you’re going to want to bookmark this one. This baked bloomin’ apples recipe is here to win hearts and taste buds—especially when you add caramel and ice cream. Let’s face it, dessert doesn’t get much better than this.
Why You’ll Love This Baked Bloomin’ Apples Recipe
When you’re looking for a dessert that’s as stunning as it is simple, baked bloomin’ apples with caramel & ice cream are a total game-changer. I’ve made these countless times (sometimes three batches in one weekend, just saying) and every single time, folks rave about them. Here’s why you’ll love this recipe as much as I do:
- Quick & Easy: Comes together in under 45 minutes (prep and bake!), so it’s perfect for busy weeknights or those last-minute sweet cravings.
- Simple Ingredients: No fancy grocery trips required. You probably have everything—apples, cinnamon, brown sugar, butter, caramel sauce, and ice cream—sitting in your kitchen already.
- Perfect for Any Occasion: This baked bloomin’ apples recipe is great for brunch, potlucks, cozy dinners, or even holiday mornings when you want something special but not fussy.
- Crowd-Pleaser: Every age group loves this dessert. Kids love the gooey caramel, adults swoon over the warm spiced apples, and everyone asks for seconds.
- Unbelievably Delicious: The contrast of tender, baked apple petals, rich caramel, and cold, creamy ice cream is pure comfort food heaven.
What makes this recipe different, you ask? It’s all about the “bloomin’” technique. Scoring the apple just right lets the heat and flavor work their magic, making every bite extra tender and flavorful. Plus, the caramel pools in all the nooks and crannies, creating little pockets of molten sweetness. I’ve tried other recipes, but this one’s my best version—no soggy apples, no bland bites, just perfect every time.
This baked bloomin’ apples recipe isn’t just good—it’s the kind that makes you close your eyes after the first bite and sigh with satisfaction. It’s comfort food, made easier and a little healthier, but with all the nostalgic joy of a classic apple dessert. Whether you’re looking to impress guests or just treat yourself, this is the sweet finish you’ll keep coming back to.
What Ingredients You Will Need
This baked bloomin’ apples recipe uses simple, wholesome ingredients to deliver bold flavor and a satisfyingly tender texture—no fuss, no fancy stuff. Most are pantry staples, and there’s plenty of room to swap or adapt based on what you have on hand.
- For the Apples:
- 4 large crisp apples (e.g., Honeycrisp, Fuji, Gala, or Granny Smith for tartness)
- 1 tablespoon lemon juice (keeps apples from browning)
- For the Filling:
- 4 tablespoons unsalted butter, softened (adds richness)
- 1/3 cup light brown sugar, packed (for deep caramel notes)
- 1 teaspoon ground cinnamon (warm spice flavor)
- 1/4 teaspoon ground nutmeg (optional, for extra warmth)
- Pinch of salt (balances sweetness)
- For Topping & Serving:
- 1/2 cup caramel sauce (homemade or store-bought; I like Trader Joe’s for a smooth, buttery finish)
- Vanilla ice cream (as much as your heart desires—use dairy-free if needed)
- Chopped toasted pecans or walnuts (optional, for a crunchy finish)
Ingredient Selection Tips: I always go for firm, crisp apples—Honeycrisp is my top pick because they stay juicy and hold their shape. If you want it tarter, Granny Smith is ace. For butter, I recommend using unsalted to control flavor; if you only have salted, just skip the pinch of salt. Brown sugar brings that classic caramel flavor, but you can swap in coconut sugar for a slightly nutty twist.
Substitutions: Gluten-free? No worries—there’s no flour. Vegan? Use plant-based butter and coconut ice cream. Don’t have nutmeg? Skip it or use pumpkin pie spice for a fun autumn twist. You can also swap caramel sauce with dulce de leche or chocolate fudge if you’re feeling wild.
Seasonal Variations: In summer, toss in a handful of fresh berries on top before baking for a bright, fruity flavor. In winter, add a dash of ginger for extra warmth. Seriously, this recipe is versatile and forgiving, so don’t stress if you need to make a swap!
Equipment Needed
You don’t need a chef’s kitchen to pull off this baked bloomin’ apples recipe. Here’s what I use (and a few tips if you’re working with limited tools):
- Sharp paring knife (essential for scoring and slicing the apples—serrated works in a pinch)
- Cutting board (preferably sturdy; apples can get a little slippery)
- Melon baller or small spoon (for scooping out the apple core)
- Baking dish or small oven-safe ramekins (keeps apples upright and catches all that caramel goodness)
- Mixing bowl (for combining the filling ingredients)
- Measuring spoons and cups (accuracy matters for the caramel ratio)
If you don’t have ramekins, just nestle the apples in a regular baking dish—works just fine. I’ve tried making these on a sheet pan, but the juices spread out a bit too much. For maintenance, always keep your paring knife sharp (makes scoring easier and safer). Budget-friendly tip: Dollar store ramekins work great here, and you can reuse them for everything from soufflés to mini casseroles.
Preparation Method
Ready to make some magic? Here’s how I prep my baked bloomin’ apples with caramel & ice cream, step-by-step. You’ll have dessert on the table in under an hour, promise.
- Preheat and Prep: Preheat your oven to 350°F (175°C). Lightly grease your baking dish or ramekins with a dab of butter.
- Prepare the Apples: Wash and dry the apples. Using a paring knife, cut off the top 1/2 inch of each apple. With a melon baller or small spoon, scoop out the core, being careful not to puncture the bottom.
- Bloomin’ Technique: Place each apple, cut-side up, on your cutting board. Slice vertical cuts around the apple, about 1/2 inch apart, stopping about 1/2 inch from the bottom so the apple stays intact. Now, make shallow horizontal cuts between the vertical slices. This helps the apple “bloom” during baking.
- Lemon Bath: Drizzle each apple with lemon juice to prevent browning. Let them sit for 2-3 minutes while you prep the filling.
- Mix the Filling: In a bowl, combine 4 tablespoons (57g) unsalted butter, 1/3 cup (67g) brown sugar, 1 teaspoon cinnamon, 1/4 teaspoon nutmeg (if using), and a pinch of salt. Mix until it forms a thick paste.
- Stuff the Apples: Using a spoon (or your fingers—no shame), fill the center cavity of each apple with the sugar-butter mixture. Push some into the scored cracks so every petal gets flavor.
- Bake: Place apples in your prepared dish. Cover loosely with foil and bake for 25 minutes. Remove foil and bake another 15-20 minutes, or until apples are tender and petals have opened. The kitchen should smell like a caramel apple festival by now!
- Check for Doneness: Apples are done when a knife slides in easily but they still hold their shape. If they’re too firm, bake another 5 minutes. If they’re falling apart, you may have baked a tad too long (still tasty, just a little messier).
- Caramel Time: Warm your caramel sauce in the microwave for 20 seconds. Drizzle generously over each baked apple.
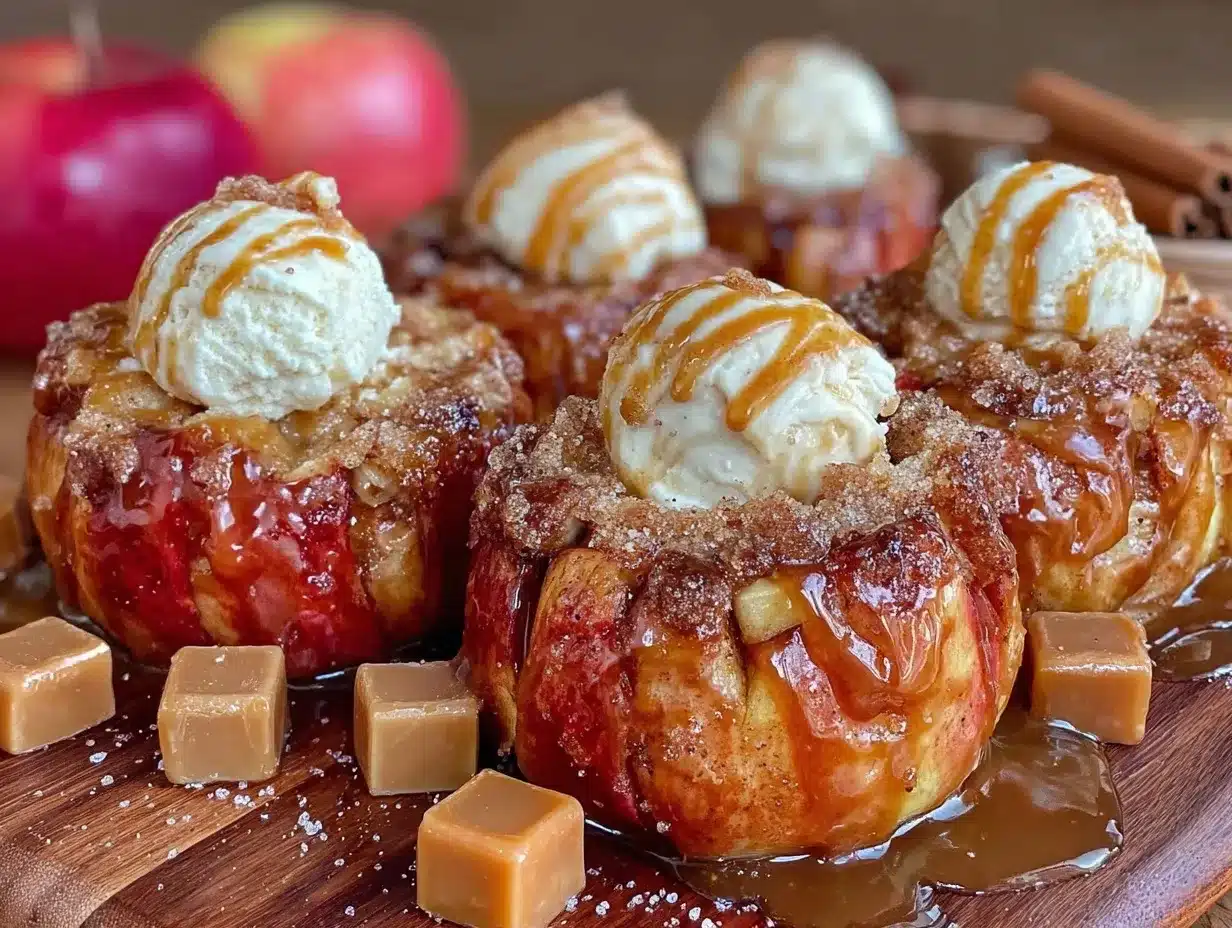
- Serve: Top each apple with a big scoop of vanilla ice cream. Add chopped nuts if you like crunch. Serve immediately for maximum gooeyness.
Personal Efficiency Tips: If you’re making a big batch, prep apples ahead and keep them in water with lemon juice. The filling can be made up to 2 days in advance and stored in the fridge. For troubleshooting, if apples don’t “bloom,” check your scoring depth—too shallow and they stay closed, too deep and they fall apart. Don’t stress! Even the “ugly” ones taste delicious.
Cooking Tips & Techniques
Over the years, I’ve picked up a few tricks—plus a couple of kitchen fails—that’ll help you nail this baked bloomin’ apples recipe every time.
- Choose the Right Apple: Firm apples like Honeycrisp or Fuji hold their shape best. Softer varieties (like Red Delicious) can get mushy—trust me, I learned that the hard way.
- Scoring Depth: The secret is to cut deep enough for blooming but not so deep you slice through. If you slip, don’t sweat it! Just prop the apple up in the dish and patch it with a bit of filling.
- Butter Consistency: Use room-temperature butter for the filling so it mixes smooth and sticks in the apple crevices.
- Prevent Burning: Always bake covered for the first half. Uncovering too soon can cause the tops to brown too quickly. If you see caramel bubbling too much, loosely re-cover with foil.
- Timing: Multi-task by prepping the filling while your apples soak in lemon juice. It saves time and keeps apples from browning.
- Consistency: For perfectly tender apples, check with a knife after baking. Every oven is a little different (mine runs hot), so adjust as needed.
- Flavor Boosts: Add a splash of vanilla to the filling for more depth, or sprinkle with sea salt before serving for a sweet-salty finish.
I once tried using a mandoline for scoring—big mistake. Stick with a paring knife! If you forget the lemon juice, apples might brown, but the flavor is still spot-on. And if you want to prep ahead, baked apples reheat beautifully, though nothing beats that fresh-out-of-the-oven aroma.
Variations & Adaptations
One of the best things about the baked bloomin’ apples recipe is how flexible it is. You can switch things up to suit your tastes, dietary needs, or whatever’s hanging out in your pantry.
- Dietary Adaptations: For a vegan version, use plant-based butter and coconut ice cream. Swap the caramel sauce for a dairy-free alternative (Trader Joe’s has a good one).
- Flavor Variations: If you love spice, add a dash of ginger or cardamom to the filling. For a citrusy twist, mix in orange zest with the butter-sugar blend.
- Seasonal Swaps: In summer, stuff a few fresh raspberries or blueberries into the apple before baking. In fall, add chopped dried cranberries for extra chew.
- Cooking Method: No oven? Try making these in an air fryer—bake at 330°F (165°C) for 20-25 minutes, checking for doneness.
- Nut-Free Option: Skip the nuts or use sunflower seeds for crunch without allergens.
My favorite personal twist: swapping out vanilla ice cream for cinnamon ice cream and topping with a sprinkle of crushed ginger snaps. So good—like autumn in a bowl. Don’t be afraid to experiment. Every batch gets a little better!
Serving & Storage Suggestions
For the best experience, serve these baked bloomin’ apples hot—straight from the oven with a big scoop of ice cream (the melty factor is unreal). If you’re feeling fancy, dust with powdered sugar or drizzle extra caramel sauce over the top.
Presentation Tips: Set each apple in a small bowl or ramekin. Sprinkle with toasted nuts for texture. Pair with a cup of strong coffee, spiced chai, or hot cider for the ultimate fall dessert moment.
Storing Leftovers: Store cooled apples in an airtight container in the fridge for up to 3 days. They’ll soak up even more flavor overnight. Reheat gently in the microwave (about 45 seconds), or cover with foil and warm in a 300°F (150°C) oven for 10 minutes. The caramel may thicken a bit, so add a splash of cream before reheating if you want extra sauce. These apples freeze surprisingly well—just wrap tightly in plastic and foil. Thaw overnight in the fridge and reheat as above.
Honestly, the flavors deepen after a day or two, so leftovers are almost better (if you can resist eating them all right away!).
Nutritional Information & Benefits
Here’s a rough estimate for each baked bloomin’ apple (with caramel & a scoop of ice cream):
- Calories: ~350
- Fat: 15g
- Carbohydrates: 55g
- Fiber: 5g
- Protein: 3g
Health Benefits: Apples are packed with fiber, vitamin C, and antioxidants—so you get a nutritional boost even in dessert form. Using nuts adds healthy fats and extra crunch. Want a lighter option? Swap ice cream for Greek yogurt or use less caramel.
This recipe has no gluten, and you can easily make it vegan or nut-free. Main allergens to watch for: dairy (butter, ice cream), nuts (if using), and possible traces in caramel sauce. I love that you can enjoy a treat that feels decadent but still offers some wholesome perks (fruit plus comfort—yes, please!).
Conclusion
If you’ve been searching for a dessert that’s as easy as it is impressive, this baked bloomin’ apples recipe hits the sweet spot. You get the warmth of spiced apples, the gooey joy of caramel, and the cool creaminess of ice cream—all in one cozy, Pinterest-worthy package.
Feel free to customize! Whether you’re swapping apples, changing up the toppings, or making it dairy-free, these baked bloomin’ apples are meant to be yours. I genuinely love this recipe—partly for the nostalgia, partly for the “wow” factor, but mostly for how happy it makes my family every single time.
Give it a try, share your own twists in the comments, or send a photo if you make it for your next get-together. Bookmark this one for all your dessert emergencies. Honestly, every bite feels like a celebration!
FAQs
Can I make baked bloomin’ apples ahead of time?
Yes! You can prep the apples and filling, refrigerate them (unbaked) for up to 1 day, then bake when ready. Leftovers reheat great, too.
Which apples are best for this recipe?
Firm, crisp apples like Honeycrisp, Fuji, or Granny Smith work best. Softer apples may not hold their shape as well during baking.
What if I don’t have caramel sauce?
No worries—use dulce de leche, chocolate fudge, or even a spoonful of honey. The recipe is flexible and still delicious!
Can I make this recipe vegan?
Absolutely! Use plant-based butter, dairy-free ice cream, and a vegan caramel sauce. The results are just as tasty.
How do I keep the apples from browning during prep?
Drizzle cut apples with lemon juice right after slicing. This keeps them fresh and bright until you’re ready to bake.
Pin This Recipe!
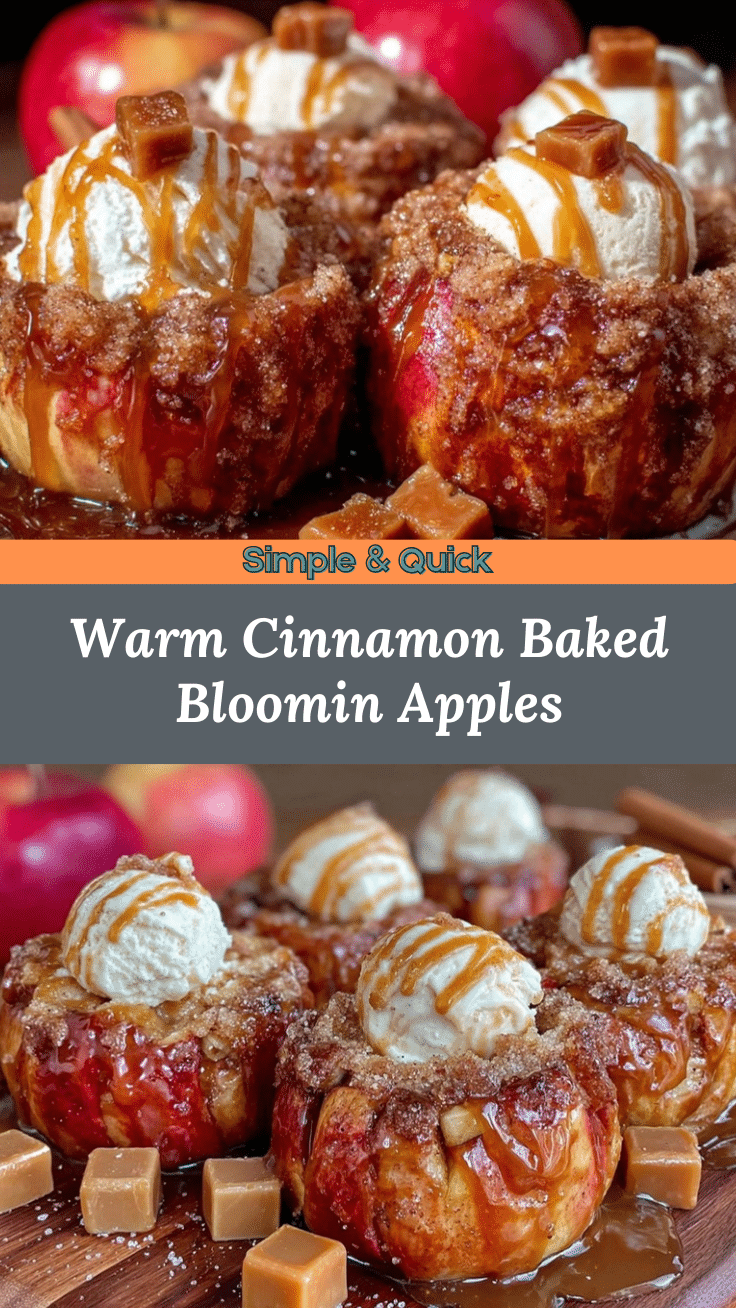
Baked Bloomin Apples Recipe: Easy Caramel & Ice Cream Dessert

Tender, oven-baked apples scored to bloom like flowers, filled with cinnamon-brown sugar butter, and finished with caramel sauce and ice cream. This cozy dessert is quick, impressive, and perfect for any occasion.
- Prep Time: 15 minutes
- Cook Time: 40 minutes
- Total Time: 55 minutes
- Yield: 4 servings 1x
- Category: Dessert
- Cuisine: American
Ingredients
- 4 large crisp apples (Honeycrisp, Fuji, Gala, or Granny Smith)
- 1 tablespoon lemon juice
- 4 tablespoons unsalted butter, softened
- 1/3 cup light brown sugar, packed
- 1 teaspoon ground cinnamon
- 1/4 teaspoon ground nutmeg (optional)
- Pinch of salt
- 1/2 cup caramel sauce (homemade or store-bought)
- Vanilla ice cream (as desired)
- Chopped toasted pecans or walnuts (optional)
Instructions
- Preheat oven to 350°F (175°C). Lightly grease a baking dish or ramekins with butter.
- Wash and dry apples. Cut off the top 1/2 inch of each apple. Use a melon baller or small spoon to scoop out the core, keeping the bottom intact.
- Place apples cut-side up on a cutting board. Make vertical cuts around each apple, about 1/2 inch apart, stopping 1/2 inch from the bottom. Make shallow horizontal cuts between the vertical slices.
- Drizzle apples with lemon juice to prevent browning. Let sit for 2-3 minutes.
- In a mixing bowl, combine butter, brown sugar, cinnamon, nutmeg (if using), and salt. Mix until a thick paste forms.
- Fill the center cavity and scored cracks of each apple with the sugar-butter mixture.
- Place apples in the prepared dish. Cover loosely with foil and bake for 25 minutes.
- Remove foil and bake another 15-20 minutes, until apples are tender and petals have opened.
- Warm caramel sauce in the microwave for 20 seconds. Drizzle generously over each baked apple.
- Top each apple with vanilla ice cream and chopped nuts if desired. Serve immediately.
Notes
Use firm apples for best results. For vegan, use plant-based butter and dairy-free ice cream. Apples can be prepped ahead and refrigerated before baking. Add berries or dried fruit for seasonal variation. Reheat leftovers gently; flavors deepen after a day.
Nutrition
- Serving Size: 1 apple with caramel
- Calories: 350
- Sugar: 42
- Sodium: 120
- Fat: 15
- Saturated Fat: 9
- Carbohydrates: 55
- Fiber: 5
- Protein: 3
Keywords: baked apples, caramel dessert, fall dessert, easy apple recipe, bloomin apples, ice cream, comfort food, gluten-free dessert, autumn recipe


