
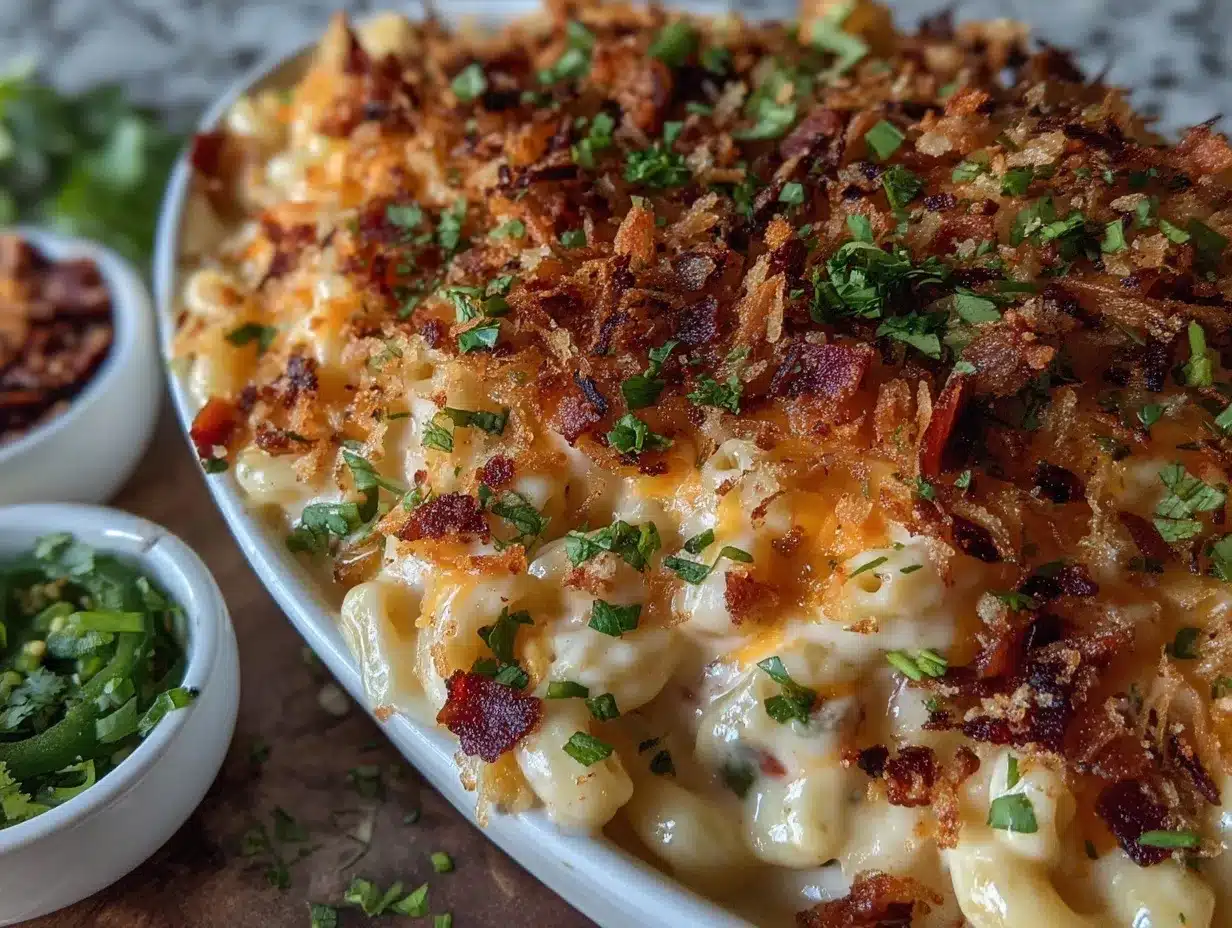
Picture this: It’s a chilly Friday night, you’re craving something bold and comforting, and the aroma of bubbling cheese, smoky bacon, and spicy jalapeños wafts from your oven. The top is golden and crispy, the edges just a bit caramelized, and—honestly—the anticipation alone is enough to make you hover near the oven door, stealing glances like a kid waiting for cookies to finish. The first time I made this crispy loaded jalapeño popper baked mac and cheese, I was instantly hooked. There’s that perfect pause: you dish up a spoonful, the cheese stretches (yes, in drool-worthy ribbons), and you just know you’ve stumbled onto something dangerously easy and totally irresistible.
I remember trying to recreate my grandma’s classic mac and cheese, but, you know what, I wanted a little something extra. Something with a kick, a crunch, and that creamy nostalgia. Years ago, when I was knee-high to a grasshopper, jalapeño poppers were the party treat that disappeared first—so why not blend those memories with the comfort of baked mac? Well, I did, and now my family can’t stop sneaking bites off the cooling rack. My kids call it “the party pasta,” and even my picky aunt asked for seconds (and the recipe, naturally).
Honestly, this dish brightens any potluck, makes a sweet treat for late-night cravings, and would absolutely steal the show on your Pinterest board. It’s the kind of meal you wish you’d known about years ago, especially if you love cheesy heat with a crispy twist. I’ve tested this recipe more times than I’d like to admit (all in the name of research, of course), and now it’s become a staple for family gatherings, gifting, and those nights when you just need a warm hug in a bowl. Bookmark this one—you’re going to want it on repeat.
Why You’ll Love This Crispy Loaded Jalapeño Popper Baked Mac and Cheese
- Quick & Easy: Comes together in about 45 minutes, so you can whip it up even when you’re short on time or patience.
- Simple Ingredients: No fancy grocery runs—everything’s right in your pantry or fridge. Seriously, you probably have half the stuff already.
- Perfect for Any Occasion: Whether it’s Sunday dinner, a game-day snack, or a holiday side, this mac and cheese fits right in. It’s become our go-to for birthdays and snow days.
- Crowd-Pleaser: Kids love the creamy cheese, adults love the spicy kick, and even those “not too sure about jalapeños” folks come back for more.
- Unbelievably Delicious: Creamy, cheesy, smoky, and crispy—every bite is comfort food bliss, with a little popper-inspired heat.
What sets this crispy jalapeño popper mac and cheese apart? For one, it’s not just another baked mac. The blend of sharp cheddar, smooth cream cheese, and smoky bacon is unbeatable. I use fresh jalapeños for that crisp, clean heat, and a layer of crunchy panko on top makes every forkful a little celebration. I’ve tried plenty of baked macs, but this one’s got that extra “wow”—the kind you close your eyes and savor after the first bite.
It’s comfort food, but with a twist: a little heat, a lot of crunch, and all the creamy goodness you dream about. You don’t need to be a chef—just a little adventurous! If you want a dish that turns a regular night into a memorable meal, this is it. Behind the easy directions are real, tested tips (I’ve messed up enough to know what really works!). So, whether you’re aiming to impress guests or just treat yourself, this recipe delivers every time.
What Ingredients You Will Need
This loaded jalapeño popper baked mac and cheese relies on simple, bold ingredients for maximum flavor and irresistible texture. Most are pantry staples and fridge regulars, with easy swaps if you need them. Here’s what you’ll need:
For the Mac and Cheese
- Elbow macaroni – 12 oz (340 g); classic shape, cooks up perfectly (can sub with shells or penne for variety).
- Unsalted butter – 4 tbsp (56 g); adds richness and helps make the roux.
- All-purpose flour – 1/4 cup (30 g); thickens the cheese sauce.
- Whole milk – 2 cups (480 ml); creamy base (can sub with 2% or plant-based milk, but whole is best).
- Heavy cream – 1 cup (240 ml); for extra luxe texture (can use half-and-half if you prefer).
- Cream cheese – 4 oz (115 g), softened; gives that jalapeño popper flavor and extra creaminess.
- Sharp cheddar cheese – 2 cups (230 g), shredded; bold cheese flavor (I love Tillamook or Cabot for real sharpness).
- Monterey Jack cheese – 1 cup (115 g), shredded; melts super smooth (can use pepper jack for extra heat).
- Fresh jalapeños – 3-4, diced; adjust for spice level (seeds in for more heat, out for milder kick).
- Cooked bacon – 6 slices, chopped; smoky crunch (turkey bacon works too).
- Garlic powder – 1 tsp; brings subtle depth.
- Onion powder – 1/2 tsp; rounds out the flavor.
- Salt & black pepper – to taste (start with 1/2 tsp each, adjust as needed).
For the Crispy Topping
- Panko breadcrumbs – 1 cup (60 g); extra crispy texture (regular breadcrumbs work, but panko is king).
- Butter – 2 tbsp (28 g), melted; helps the crumbs brown up nicely.
- Parmesan cheese – 1/4 cup (25 g), finely grated; salty finish (can skip or use Pecorino Romano).
Optional Add-Ins & Substitutions
- Green onions – for garnish and extra pop.
- Red pepper flakes – if you like it extra spicy.
- Gluten-free pasta & breadcrumbs – swap for gluten-free needs.
- Dairy-free cheese blend – use plant-based cheese and milk for dairy-free adaptation.
Tip: I always recommend shredding your own cheese from a block for the creamiest sauce. Pre-shredded cheese can be a little clumpy—trust me, I’ve learned this the hard way! For jalapeños, pick firm, glossy peppers for the freshest bite. And if you’re feeling fancy, add a little smoked paprika to the topping for a hint of BBQ flavor.
Equipment Needed
Here’s what I pull out for this jalapeño popper baked mac and cheese—nothing too fancy, but a few key tools make a difference:
- Large pot – For boiling pasta. I use my trusty 6-quart stockpot (easy to clean, too).
- Colander – For draining macaroni. If you don’t have one, a slotted spoon works in a pinch.
- Medium saucepan – For making the cheese sauce. Nonstick is nice, but stainless steel gives better control.
- Whisk – Essential for a lump-free roux and smooth sauce.
- Cutting board & sharp knife – For dicing jalapeños and chopping bacon.
- Mixing bowl – For tossing the topping.
- 9×13-inch baking dish (or similar size); ceramic or glass work best for even browning.
- Oven mitts – Don’t skip these (speaking from a burned finger incident!).
- Measuring cups & spoons – For accuracy (I have a set that nest together—super handy).
If you don’t have a whisk, a fork works for stirring the sauce, though it takes a bit more elbow grease. For budget-friendly gear, check out thrift stores—I scored my favorite baking dish there. And if you’re using a metal pan, a little extra butter on the bottom keeps sticking at bay.
Preparation Method
-
Preheat your oven: Set to 375°F (190°C). Grease a 9×13-inch baking dish with a little butter or nonstick spray for easy serving later.
Prep tip: Let the oven fully heat so your topping crisps up right! -
Cook the pasta: Boil 12 oz (340 g) elbow macaroni in salted water until just al dente (about 6-7 minutes). Drain and set aside.
Don’t overcook—pasta will finish cooking in the oven. It should feel just firm. -
Make the cheese sauce: In a medium saucepan, melt 4 tbsp (56 g) butter over medium heat. Whisk in 1/4 cup (30 g) flour and cook, whisking constantly, for 1-2 minutes until foamy (but not brown).
Personal tip: If flour clumps, keep whisking—it’ll smooth out as you add liquid. -
Add milk and cream: Slowly pour in 2 cups (480 ml) whole milk and 1 cup (240 ml) heavy cream, whisking continuously. Cook 3-5 minutes until thickened and glossy.
Sauce should coat the back of a spoon—if it feels thin, let it simmer another minute. -
Melt in the cheeses: Lower heat, add 4 oz (115 g) cream cheese, 2 cups (230 g) shredded cheddar, and 1 cup (115 g) Monterey Jack. Stir until smooth and completely melted.
If cheese isn’t melting, turn up the heat slightly but don’t boil—sauce can split. -
Season and add flavor: Stir in 1 tsp garlic powder, 1/2 tsp onion powder, salt, pepper, and 3-4 diced jalapeños (remove seeds for less heat, keep some for spicy fans). Add chopped bacon and mix well.
Smell check: Sauce should be cheesy, creamy, and just a little spicy. -
Combine pasta and sauce: Add drained macaroni to the cheese sauce. Mix until every noodle is coated and glossy.
Efficiency note: If your pot is big enough, combine everything right in there—one less bowl to wash. -
Layer in the baking dish: Pour the cheesy macaroni mixture into your prepared dish. Smooth out the top with a spatula.
If you want extra bacon or jalapeño on top, sprinkle them here. -
Prepare the crispy topping: In a bowl, mix 1 cup (60 g) panko breadcrumbs, 2 tbsp (28 g) melted butter, and 1/4 cup (25 g) Parmesan. Sprinkle evenly over the mac and cheese.
Personal tip: Toss with your fingers for even distribution (and a little fun!). -
Bake: Place in the oven, uncovered, for 20-25 minutes until golden brown and bubbling at the edges. If you like a super-crispy top, broil for 1-2 minutes at the end—but watch closely!
Sensory cue: The top should be crunchy and the cheese sauce visibly bubbling around the edges. -
Cool and serve: Let rest 10 minutes before serving (trust me—this helps everything set and makes scooping easier).
Taste test: The first bite should be creamy, spicy, smoky, and ultra-crunchy. If you get a gooey cheese pull, you nailed it!
Troubleshooting: If your sauce is grainy, it’s probably from pre-shredded cheese—next time, shred your own. If it’s too spicy, add a little extra milk and cheese to mellow it out. For a thicker sauce, use less milk. And if you want a smoother texture, blend the sauce before adding pasta. Efficiency tip: Prep bacon and jalapeños while pasta cooks, and have all cheeses shredded ahead of time for a stress-free flow.
Cooking Tips & Techniques
After several rounds of testing this jalapeño popper mac and cheese, I’ve picked up a few tricks (and, yes, made a few mistakes you don’t need to repeat):
- Use room temperature cream cheese: It blends faster for a super-smooth sauce. Cold cream cheese tends to clump—learned that one the hard way!
- Shred your own cheese: Pre-shredded has anti-caking agents that mess with meltiness. Block cheese = creamier sauce, every time.
- Balance the heat: Jalapeños vary a lot. Taste one before chopping and adjust how many seeds you add. For milder heat, stick with fewer seeds or swap in canned green chiles.
- Don’t overbake: The topping should be golden, not dry. If it looks done around 20 minutes, pull it out! I’ve left it in too long and ended up with a tough crust (still edible, but not ideal).
- Layer flavors: A little bacon on top and inside gives that smoky surprise. If you skip bacon, add smoked paprika or chipotle powder for depth.
- Timing matters: Multitask by prepping toppings while sauce cooks. If you’re short on time, cook bacon and chop jalapeños ahead.
- Consistency: For a thinner sauce, add a splash more milk. For thicker, simmer longer before adding cheese. Sauce thickens as it bakes and cools.
- Troubleshooting: If sauce splits, whisk in a little cold milk gradually. If topping browns too fast, tent with foil for last 10 minutes.
Honestly, my biggest failure was not letting the mac cool before serving—cheese sauce ran everywhere. Now I always let it rest. Patience pays off! If you want every batch to turn out just right, follow those sensory cues: creamy sauce, spicy aroma, and a crunchy top. That’s mac and cheese perfection.
Variations & Adaptations
One thing I love about this crispy jalapeño popper baked mac and cheese is how easy it is to tweak for different tastes, dietary needs, or whatever’s in your fridge. Here are my favorite ways to mix things up:
- Gluten-free version: Swap in gluten-free pasta and breadcrumbs. I like Jovial or Barilla GF elbows and Schär breadcrumbs—the texture stays great.
- Vegetarian adaptation: Skip the bacon and add sautéed mushrooms or roasted corn for extra savoriness. Smoked paprika gives that “meaty” flavor without the meat.
- Extra spicy twist: Use pepper jack cheese instead of Monterey Jack, add a sprinkle of red pepper flakes, or top with sliced jalapeño coins before baking. For a true heat lover, drizzle with Sriracha after serving!
- Low-carb or dairy-free: Try chickpea or lentil pasta, and use plant-based cheeses and unsweetened almond milk. Daiya or Violife make good dairy-free blends.
- Seasonal swaps: In summer, add roasted red peppers or fresh corn; in winter, toss in a bit of chopped chipotle for smoky warmth.
- Personal favorite: I sometimes stir in a handful of frozen peas (adds color and a sweet pop) or top with extra crispy onions for that “casserole” vibe.
- Allergen notes: For nut allergies, double-check cheese and breadcrumb ingredients—some brands sneak in nut flours.
Honestly, the best part is watching people customize their own bowl—some go heavy on bacon, others pile on jalapeños. Make it yours!
Serving & Storage Suggestions
Serve this jalapeño popper mac and cheese piping hot, straight from the oven, with a sprinkle of green onions or extra bacon on top. I love it as a main dish with a crisp green salad, but it’s also perfect as a side for BBQ, burgers, or grilled chicken. For parties, scoop into ramekins for individual servings—makes for a Pinterest-worthy presentation!
Pair with a cold beer, fizzy lemonade, or even a tangy margarita if you’re feeling festive. It’s rich, so something bright and refreshing works well.
To store leftovers, let the mac cool completely, then transfer to an airtight container. Keep in the fridge up to 4 days. For freezer storage, portion out into freezer-safe containers—freeze up to 2 months. To reheat, bake covered in the oven at 350°F (175°C) for 15-20 minutes, or microwave individual servings with a splash of milk for creaminess.
Flavor note: The spices and bacon deepen overnight, making leftovers even tastier. If topping gets soft, pop under the broiler for 2-3 minutes to crisp it back up. This dish is honestly just as good the second day!
Nutritional Information & Benefits
Each serving (about 1/8th of the pan) of crispy jalapeño popper mac and cheese provides approximately:
- Calories: 420
- Protein: 15g
- Fat: 22g
- Carbohydrates: 38g
- Fiber: 2g
- Sodium: 650mg
Cheddar and cream cheese offer calcium and protein, while jalapeños bring vitamin C and antioxidants. Opt for whole grain or legume pasta for extra fiber, or use turkey bacon for a lighter option. This recipe can be made gluten-free and dairy-free with simple swaps, so everyone gets a bite.
Wellness note: It’s rich, so enjoy as a treat—pair with veggies or a salad for balance. Jalapeños add metabolism-boosting capsaicin, and homemade mac is always better for you than boxed versions. Just keep an eye on allergens (dairy, gluten, bacon) if serving a crowd.
Conclusion
If you’re searching for a cheesy, spicy, crunchy comfort dish, this crispy jalapeño popper baked mac and cheese is absolutely worth your time. It’s the kind of meal that brings people together—whether it’s a family dinner, potluck, or just a night in. Customize it for your crew with different cheeses, add-ins, or spice levels. That’s the beauty of comfort food—it’s yours to play with!
Honestly, I make this recipe because it always brings smiles (and quiet moments of bliss at the table). My favorite part is the crunch of the topping and the little kick from jalapeños. Don’t be afraid to tweak it—share your adaptations in the comments or tag me with your creations! I’d love to hear how you make it your own.
So grab your whisk, invite some friends, and bake up a batch. Warm, cheesy, and just a little spicy—this mac and cheese will be your new favorite. Enjoy every bite, and remember: the best recipes are the ones you make your own!
FAQs About Crispy Jalapeño Popper Mac and Cheese
Can I use canned jalapeños instead of fresh?
Absolutely! Canned jalapeños work in a pinch, though fresh ones give a brighter, crunchier kick. Just drain and chop before adding.
How do I make this recipe gluten-free?
Just swap the pasta and breadcrumbs for gluten-free versions. Most supermarkets carry good options—Barilla and Schär are my favorites.
Can I prepare this ahead of time?
Yes! Assemble everything except the topping, cover, and refrigerate up to 24 hours. Add the breadcrumbs right before baking so the top stays crispy.
What if my mac and cheese sauce is too thick?
If the sauce feels dense, stir in a splash of milk until it loosens up. It’ll thicken more in the oven, so a little extra liquid helps maintain creaminess.
Can I freeze leftovers?
Definitely! Freeze in individual containers for up to 2 months. Thaw in the fridge overnight, then reheat in the oven or microwave with a splash of milk to revive the sauce.
Pin This Recipe!

Crispy Jalapeño Popper Mac and Cheese

A bold, comforting baked mac and cheese loaded with sharp cheddar, cream cheese, smoky bacon, and spicy jalapeños, finished with a crispy panko-Parmesan topping. Perfect for potlucks, family dinners, or late-night cravings.
- Prep Time: 15 minutes
- Cook Time: 30 minutes
- Total Time: 45 minutes
- Yield: 8 servings 1x
- Category: Main Course
- Cuisine: American
Ingredients
- 12 oz elbow macaroni
- 4 tbsp unsalted butter
- 1/4 cup all-purpose flour
- 2 cups whole milk
- 1 cup heavy cream
- 4 oz cream cheese, softened
- 2 cups sharp cheddar cheese, shredded
- 1 cup Monterey Jack cheese, shredded
- 3–4 fresh jalapeños, diced (seeds in for more heat, out for milder)
- 6 slices cooked bacon, chopped
- 1 tsp garlic powder
- 1/2 tsp onion powder
- Salt & black pepper to taste (start with 1/2 tsp each)
- 1 cup panko breadcrumbs
- 2 tbsp butter, melted
- 1/4 cup Parmesan cheese, finely grated
- Optional: green onions for garnish
- Optional: red pepper flakes for extra spice
Instructions
- Preheat oven to 375°F (190°C). Grease a 9×13-inch baking dish with butter or nonstick spray.
- Boil elbow macaroni in salted water until just al dente (6-7 minutes). Drain and set aside.
- In a medium saucepan, melt 4 tbsp butter over medium heat. Whisk in flour and cook for 1-2 minutes until foamy.
- Slowly pour in milk and heavy cream, whisking continuously. Cook 3-5 minutes until thickened.
- Lower heat, add cream cheese, cheddar, and Monterey Jack. Stir until smooth and melted.
- Stir in garlic powder, onion powder, salt, pepper, diced jalapeños, and chopped bacon. Mix well.
- Add drained macaroni to cheese sauce and mix until evenly coated.
- Pour macaroni mixture into prepared baking dish and smooth the top.
- In a bowl, mix panko breadcrumbs, melted butter, and Parmesan. Sprinkle evenly over mac and cheese.
- Bake uncovered for 20-25 minutes until golden brown and bubbling. Broil for 1-2 minutes for extra crispiness if desired.
- Let rest 10 minutes before serving. Garnish with green onions or extra bacon if desired.
Notes
For best results, shred cheese from a block for a creamier sauce. Adjust jalapeño quantity and seeds for desired spice level. Let the dish rest before serving for best texture. Easily adapted for gluten-free or vegetarian diets by swapping pasta, breadcrumbs, and omitting bacon.
Nutrition
- Serving Size: About 1/8th of the p
- Calories: 420
- Sodium: 650
- Fat: 22
- Carbohydrates: 38
- Fiber: 2
- Protein: 15
Keywords: jalapeño popper mac and cheese, baked mac and cheese, spicy mac and cheese, comfort food, party pasta, loaded mac and cheese, crispy topping, bacon mac and cheese


