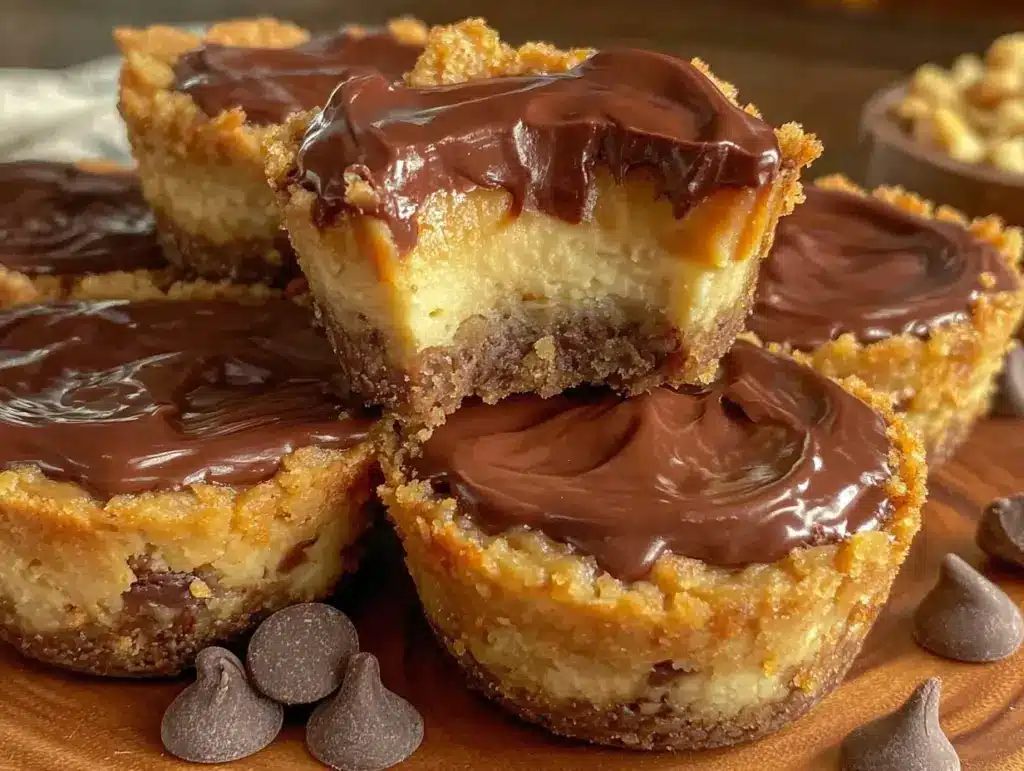
Picture this: you walk into your kitchen, and the air is thick with the scent of cocoa and freshly crushed peanuts. The creamy sweetness of cheesecake filling mingles with a hint of salt from peanut butter, and honestly, your stomach does a happy little flip. The first time I whipped up these Creamy No-Bake Chocolate Peanut Butter Cup Cheesecake Bites, I was elbow-deep in a bowl of melted chocolate, just hoping to satisfy my sweet tooth on a rainy Saturday. The moment I popped one in my mouth, I paused—eyes closed, grinning like a fool—because, you know, sometimes you stumble onto a recipe that just feels like winning the dessert lottery.
Back when I was knee-high to a grasshopper, peanut butter cups were my absolute favorite treat. My grandma used to keep a secret stash in her pantry for “emergencies” (which, let’s face it, meant whenever I visited). Years later, I combined her love for peanut butter and my obsession with cheesecake and, well, magic happened. I wish I’d figured this out years ago, especially for those times when you need a quick, crowd-pleasing dessert—like potlucks, birthday parties, or, honestly, just Tuesday nights when life calls for a little something extra.
I’ve tested these bites more times than I care to admit (in the name of research, of course), and each batch vanishes before I can even snap a photo for Pinterest. My family sneaks them off the tray while they’re still setting up, and I can’t blame them—they’re dangerously easy and deliver pure, nostalgic comfort. If you’re looking for something to brighten up your dessert board or need a sweet treat for your kids (or yourself!), bookmark this recipe. It’s become a staple for family gatherings, gifting, and anytime I crave that warm hug only chocolate and peanut butter can provide.
Why You’ll Love These Creamy No-Bake Chocolate Peanut Butter Cup Cheesecake Bites
You know what? These cheesecake bites are the kind of dessert that makes you double back for seconds—and sometimes thirds. Here’s why they’ve become my go-to:
- Quick & Easy: No baking, no fuss—ready in under 30 minutes (plus chill time). Perfect for busy weeknights, spontaneous cravings, or when you just want dessert without heating up the kitchen.
- Simple Ingredients: Pantry staples like cream cheese, chocolate chips, and peanut butter. Most folks already have everything on hand, which is a lifesaver when you don’t want another grocery run.
- Perfect for Any Occasion: From potlucks and birthday parties to cozy Netflix nights or holiday gatherings, these bites fit right in. They look adorable on a dessert tray and make for fantastic edible gifts.
- Crowd-Pleaser: I’ve never met a kid (or adult) who didn’t love them. Even picky eaters can’t resist the creamy filling and chocolatey shell.
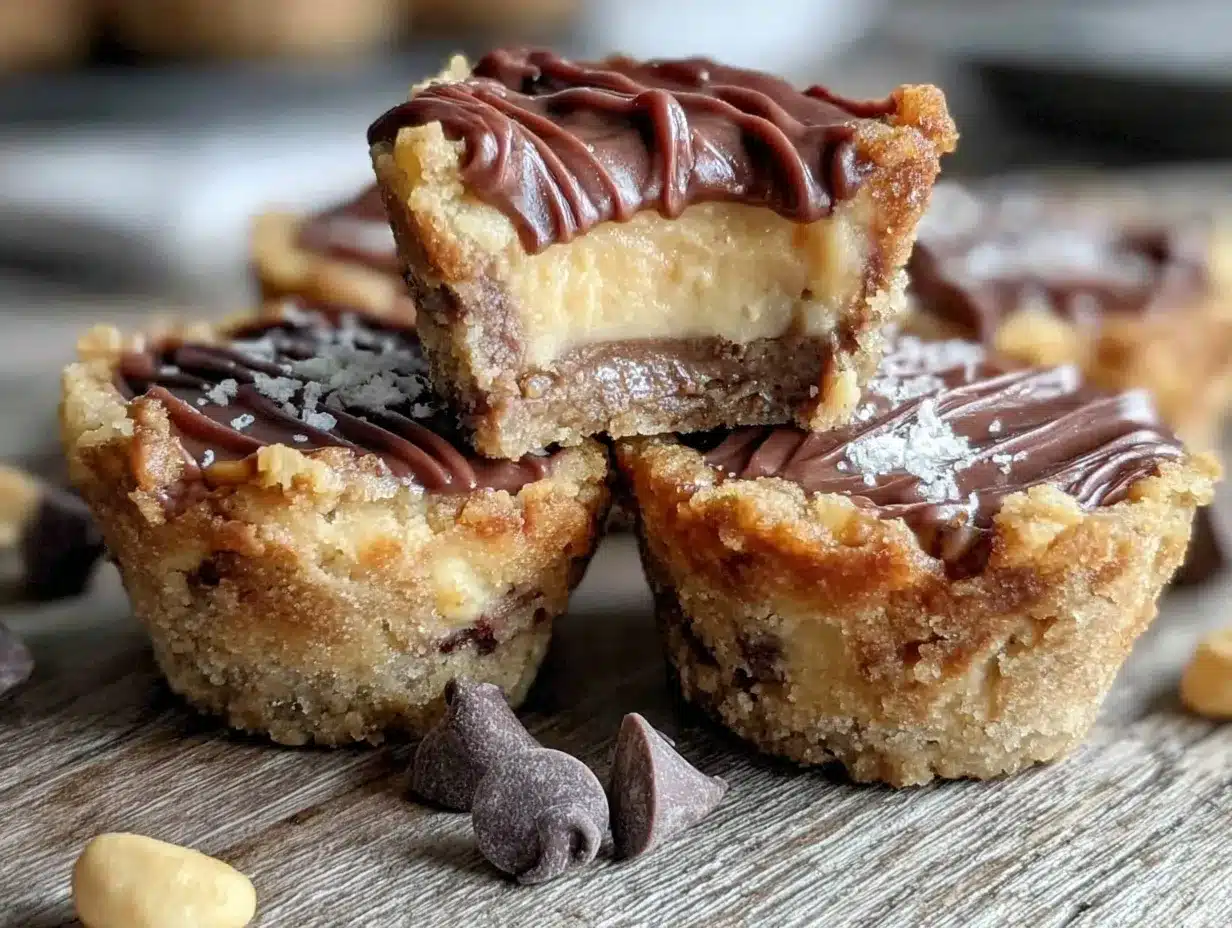
- Unbelievably Delicious: The texture is pure silk—rich cheesecake meets peanut butter cup in every bite. That sweet-salty combo is just next-level comfort food.
But what sets my version apart? For starters, I blend the cream cheese until it’s super smooth and fold in whipped cream for extra fluffiness. I use high-quality chocolate for the shell (Ghirardelli is my go-to), and I’ve got the peanut butter ratio down to a science—so it’s never overpowering.
Honestly, these Creamy No-Bake Chocolate Peanut Butter Cup Cheesecake Bites aren’t just good—they’re the kind you savor, eyes closed, letting the flavors linger. They’re comfort food reimagined: faster, easier, and just as soul-soothing as the classics. Whether you’re impressing guests or treating yourself, these bites deliver all the wow without the stress. Trust me, you’ll want to keep this recipe on repeat.
What Ingredients You Will Need
This recipe uses simple, wholesome ingredients to deliver bold flavor and satisfying texture without unnecessary fuss. Most are pantry staples, and you can swap a few based on what you’ve got at home. Here’s the breakdown:
- For the cheesecake filling:
- 8 oz (225 g) cream cheese, softened (full-fat is best for creaminess)
- 1/2 cup (120 ml) creamy peanut butter (Skippy and Jif both work; natural peanut butter is okay, but mix well)
- 1/4 cup (60 ml) powdered sugar (sifted for extra smoothness)
- 1/2 cup (120 ml) heavy whipping cream, whipped to stiff peaks (adds that dreamy, fluffy texture)
- 1 tsp (5 ml) pure vanilla extract (Madagascar vanilla if you want to splurge)
- Pinch of salt (balances sweetness, trust me)
- For the chocolate shell:
- 1 1/2 cups (270 g) semi-sweet chocolate chips (Ghirardelli or Enjoy Life for allergy-friendly)
- 2 tbsp (30 ml) coconut oil (makes the shell snappier; vegetable oil works in a pinch)
- For assembly:
- Mini muffin liners or silicone molds (for easy release)
- Optional: Chopped peanuts, mini peanut butter cups, or flaky sea salt for garnish
If you need gluten-free, all ingredients here are naturally gluten-free, just check your vanilla and chocolate for hidden wheat. For dairy-free, swap the cream cheese and whipped cream for your favorite plant-based versions (I’ve had good luck with Kite Hill).
In summer, you can toss in a few fresh raspberries or chopped strawberries for a fruity twist. For a lower-carb option, swap powdered sugar for Swerve or another sugar substitute. If you’re out of coconut oil, butter works, but the shell sets a bit softer.
Ingredient tips: Look for cream cheese blocks, not tubs—blocks whip up better. And always use room temperature cream cheese for smooth mixing (learned the hard way when I tried to rush it!).
Equipment Needed
- Mini muffin pan or silicone mold: These create perfect bite-sized portions. Silicone is my favorite—never sticks!
- Hand mixer or stand mixer: For whipping the cheesecake filling to a dreamy, fluffy texture. Honestly, a sturdy whisk works in a pinch (just expect some arm workout).
- Mixing bowls: At least two—one for the filling, one for the chocolate shell.
- Spatula: For scraping down the bowl and transferring the filling (flexible silicone spatulas are the easiest to clean).
- Microwave-safe bowl: For melting chocolate and coconut oil (double boiler is fine if you want to get fancy).
- Spoon or small cookie scoop: Makes portioning simple and less messy.
- Mini cupcake liners: For easy release and pretty presentation—plus, less mess to clean up.
If you don’t have a mini muffin pan, you can use regular muffin tins and double the portion size (yum!). For melting chocolate, I’ve used both microwave and stovetop methods; just keep an eye so it doesn’t scorch. Hand mixers are budget-friendly and work wonders—mine’s been going strong for years. Pro tip: soak the beaters in warm water right after use for quick cleanup.
Preparation Method
- Prepare your mini muffin pan: Line 24 mini muffin cups with liners or lightly grease silicone molds. Set aside. (This keeps them easy to pop out later—trust me, skipping liners means more cleanup!)
- Mix the cheesecake filling: In a large bowl, beat 8 oz (225 g) softened cream cheese with a hand mixer until smooth and creamy—about 1 minute. Add 1/2 cup (120 ml) peanut butter, 1/4 cup (60 ml) powdered sugar, 1 tsp (5 ml) vanilla, and a pinch of salt. Beat again until well combined, about 1–2 minutes. The mixture should look light and fluffy.
- Whip the cream: In a separate bowl, whip 1/2 cup (120 ml) heavy cream to stiff peaks (2–3 minutes with a hand mixer on high). Fold gently into the peanut butter cheesecake mixture using a spatula—don’t overmix, or you’ll lose that airy texture. (If you don’t fold gently, the filling can get dense—learned this after a few failed batches!)
- Melt the chocolate shell: In a microwave-safe bowl, combine 1 1/2 cups (270 g) chocolate chips and 2 tbsp (30 ml) coconut oil. Microwave in 20-second bursts, stirring between each, until smooth and glossy (about 1 minute total). (If you notice chocolate getting grainy, stop and stir—overheating is a common pitfall.)
- Assemble the bites: Spoon about 1 teaspoon of melted chocolate into each muffin liner, swirl to coat the bottom and halfway up the sides. Freeze for 5 minutes to set.
- Add cheesecake filling: Drop about 1 tablespoon of peanut butter cheesecake mixture into each chocolate shell. Smooth the tops with a spoon or spatula. (If the filling sticks, wet your spoon lightly.)
- Top with more chocolate: Spoon another teaspoon of melted chocolate over each bite to seal in the filling. Tap the pan gently on the counter to level the tops. Sprinkle with chopped peanuts or flaky salt if desired.
- Chill: Refrigerate for at least 2 hours, or until firm. (Overnight is fine if you want to prep ahead. The flavors get even better!)
- Remove and serve: Pop the bites out of the pan. If using silicone molds, just push from the bottom—they slip right out. Enjoy cold for best texture!
Prep notes: If you notice the chocolate setting too quickly, reheat gently before topping. For perfectly smooth cheesecake filling, always use room temperature ingredients—cold cream cheese gets lumpy. The bites hold their shape best when fully chilled, so don’t rush the chill time.
Cooking Tips & Techniques
Here’s what I’ve learned after a dozen batches of these Creamy No-Bake Chocolate Peanut Butter Cup Cheesecake Bites:
- Consistency is key: Blend the cream cheese well—no shortcuts! Lumps in the filling ruin that velvet texture, and no one wants that.
- Chocolate shell tricks: Use coconut oil, not butter, for a snappier shell. If your chocolate gets grainy, you probably overheated it (happened to me more than once)—so stick to short bursts in the microwave and lots of stirring.
- Filling matters: Don’t skip whipping the cream and folding it in. It makes a world of difference—without it, the bites are dense instead of cloud-like.
- Multitasking: While the bottom chocolate shell sets in the freezer, prep your cheesecake filling. You’ll save a few minutes and keep the workflow smooth.
- Troubleshooting: If your bites stick to the liners, let them warm up for 5 minutes on the counter before removing. Silicone molds are a lifesaver for this.
- Personal failures: I once tried using chunky peanut butter—big mistake! It made the filling grainy and hard to portion. Stick with creamy for best results.
- Portion perfection: Use a small cookie scoop or spoon for even portions. If you eyeball it, some bites end up way bigger (which isn’t a bad thing, but they won’t all fit in the pan).
If you want to make a bigger batch, just double everything—the method stays the same. And remember: patience during chilling pays off. The texture is pure magic when fully set.
Variations & Adaptations
One thing I love about these cheesecake bites is how flexible they are. You can tweak them for any taste, dietary need, or season:
- Dairy-Free: Use plant-based cream cheese and coconut whipped cream. I’ve tried Kite Hill and So Delicious—both work great.
- Low-Carb/Keto: Swap powdered sugar for Swerve or monk fruit sweetener. Use Lily’s stevia-sweetened chocolate chips for the shell.
- Seasonal Flavors: Mix in a tablespoon of pumpkin puree and a dash of cinnamon for fall vibes, or fold in crushed peppermint candies for a winter treat.
- Nut-Free: Sub sunflower seed butter for peanut butter. It’s a little earthier, but still delicious—my niece with nut allergies gobbled them up!
- Crunchy twist: Stir in mini chocolate chips or chopped pretzels to the cheesecake filling for a bit of crunch.
- Cooking methods: If you don’t have a microwave, melt chocolate on the stovetop with a double boiler—just stir constantly.
My personal favorite adaptation? Swapping out half the peanut butter for Nutella. It’s messy but so worth it—chocolate, hazelnut, and cheesecake is a combo you have to taste to believe.
Serving & Storage Suggestions
For the best experience, serve these Creamy No-Bake Chocolate Peanut Butter Cup Cheesecake Bites cold—straight from the fridge. The chocolate shell is crisp, the filling is creamy, and everything holds together perfectly.
Presentation-wise, arrange them on a pretty plate, sprinkle with extra chopped peanuts or drizzle with melted chocolate. They look gorgeous on a dessert board next to fresh berries or a bowl of whipped cream.
Storing is easy: keep them in an airtight container in the fridge for up to five days. They also freeze beautifully—just layer with parchment paper to prevent sticking. Thaw in the fridge for a few hours before serving.
Reheating isn’t necessary, but if you want a softer bite, let them sit at room temperature for 5–10 minutes. Over time, the flavors meld together even more, and the texture gets even creamier. Honestly, they taste just as good (maybe better!) on day two.
Nutritional Information & Benefits
Each cheesecake bite is approximately 110 calories, with about 8g fat, 7g carbs, and 2g protein (based on standard ingredients). They’re naturally gluten-free, and you can make them dairy-free or low-carb with the swaps mentioned above.
Key ingredients like peanut butter and cream cheese provide a boost of protein and healthy fats, which help you feel satisfied. Dark chocolate chips add antioxidants and a touch of magnesium, too.
If you’re watching allergens, these bites contain dairy and peanuts, so make substitutions if needed. From a wellness perspective, I love that these are bite-sized—perfect for portion control and satisfying a sweet craving without going overboard.
Conclusion
Let’s be real—a tray of Creamy No-Bake Chocolate Peanut Butter Cup Cheesecake Bites brings smiles every single time. Whether you’re a die-hard peanut butter fan or just love creamy, chocolatey desserts, this recipe hits all the right notes. It’s easy, customizable, and honestly, feels like a little moment of joy in every bite.
Try swapping ingredients, adding your own twist, and make these bites your own. I’d love to hear how you adapt them—leave a comment below, share on Pinterest, or tag me if you try a fun variation! For me, these bring back sweet childhood memories and make new ones with every batch. Go ahead, make them tonight—you won’t regret it!
Wishing you happy, creamy, chocolate-filled baking adventures!
Frequently Asked Questions
How long do Creamy No-Bake Chocolate Peanut Butter Cup Cheesecake Bites need to chill before serving?
They’re best after chilling for at least 2 hours in the fridge. Overnight works great, too!
Can I make these cheesecake bites dairy-free?
Yes! Use plant-based cream cheese and coconut whipped cream. The results are still creamy and delicious.
Will these cheesecake bites freeze well?
Absolutely. Store in an airtight container with parchment between layers. Thaw in the fridge before serving.
What if my chocolate shell is too thick or hard?
Add a bit more coconut oil when melting the chocolate for a softer shell. If it’s too thin, let it set a little longer in the freezer.
Can I use crunchy peanut butter instead of creamy?
I’d stick with creamy for best texture, but if you love a little crunch, go for it—just mix well!
Pin This Recipe!
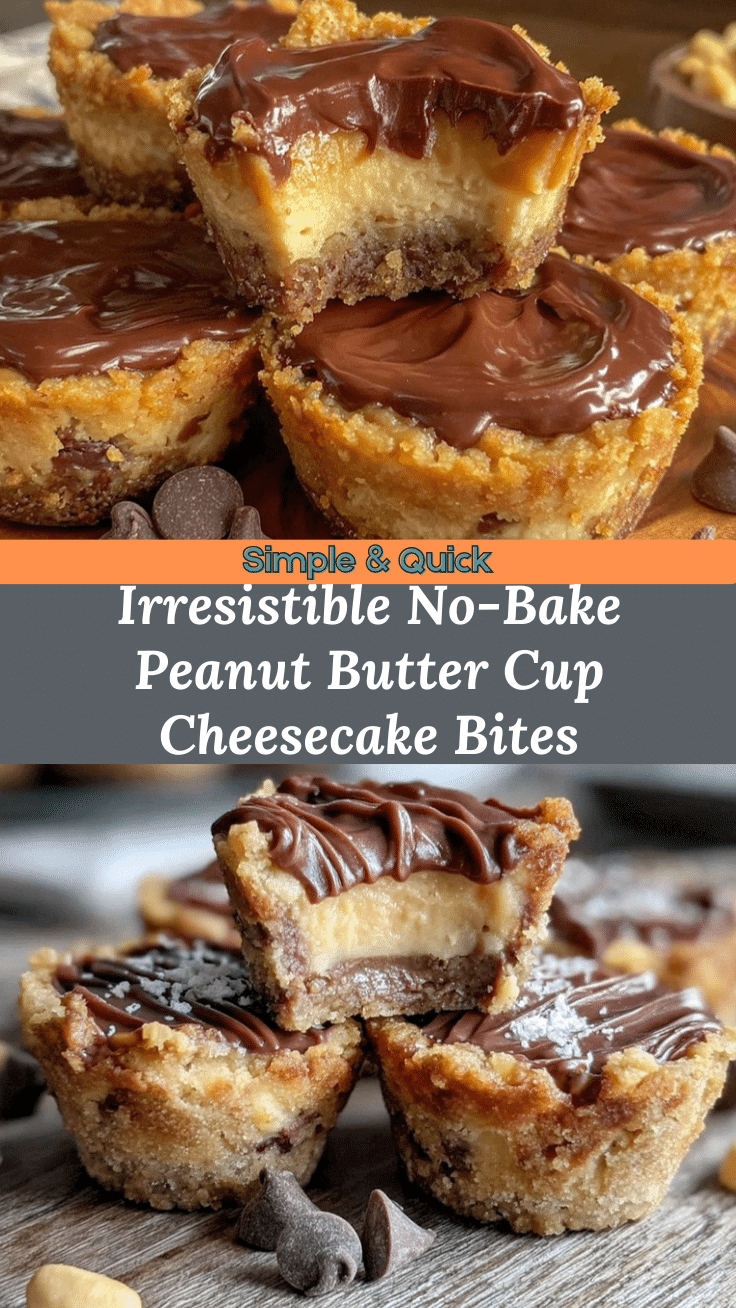
Creamy No-Bake Chocolate Peanut Butter Cup Cheesecake Bites
These easy, no-bake cheesecake bites combine creamy peanut butter, rich chocolate, and fluffy cheesecake filling for a nostalgic, crowd-pleasing dessert. Perfect for parties, gifting, or a sweet treat any night of the week.
- Prep Time: 15 minutes
- Cook Time: 5 minutes
- Total Time: 2 hours 20 minutes
- Yield: 24 bites 1x
- Category: Dessert
- Cuisine: American
Ingredients
- 8 oz cream cheese, softened (full-fat recommended)
- 1/2 cup creamy peanut butter
- 1/4 cup powdered sugar, sifted
- 1/2 cup heavy whipping cream, whipped to stiff peaks
- 1 tsp pure vanilla extract
- Pinch of salt
- 1 1/2 cups semi-sweet chocolate chips
- 2 tbsp coconut oil
- Mini muffin liners or silicone molds
- Optional: Chopped peanuts, mini peanut butter cups, or flaky sea salt for garnish
Instructions
- Line 24 mini muffin cups with liners or lightly grease silicone molds. Set aside.
- In a large bowl, beat softened cream cheese until smooth and creamy (about 1 minute).
- Add peanut butter, powdered sugar, vanilla, and salt. Beat until well combined and fluffy (1–2 minutes).
- In a separate bowl, whip heavy cream to stiff peaks (2–3 minutes on high).
- Gently fold whipped cream into the peanut butter cheesecake mixture with a spatula. Do not overmix.
- In a microwave-safe bowl, combine chocolate chips and coconut oil. Microwave in 20-second bursts, stirring between each, until smooth and glossy (about 1 minute total).
- Spoon about 1 teaspoon of melted chocolate into each muffin liner, swirling to coat the bottom and halfway up the sides. Freeze for 5 minutes to set.
- Drop about 1 tablespoon of cheesecake filling into each chocolate shell. Smooth the tops.
- Spoon another teaspoon of melted chocolate over each bite to seal. Tap the pan gently to level the tops. Sprinkle with optional garnishes.
- Refrigerate for at least 2 hours, or until firm.
- Remove bites from pan or molds and serve cold.
Notes
Use room temperature cream cheese for smooth filling. Coconut oil helps the chocolate shell set snappier. For dairy-free, substitute plant-based cream cheese and whipped cream. Bites freeze well; thaw in fridge before serving. For best texture, chill fully before serving.
Nutrition
- Serving Size: 1 bite
- Calories: 110
- Sugar: 5
- Sodium: 60
- Fat: 8
- Saturated Fat: 4
- Carbohydrates: 7
- Fiber: 1
- Protein: 2
Keywords: no-bake, cheesecake bites, chocolate peanut butter, easy dessert, gluten-free, party food, kid-friendly, homemade, creamy, bite-sized


