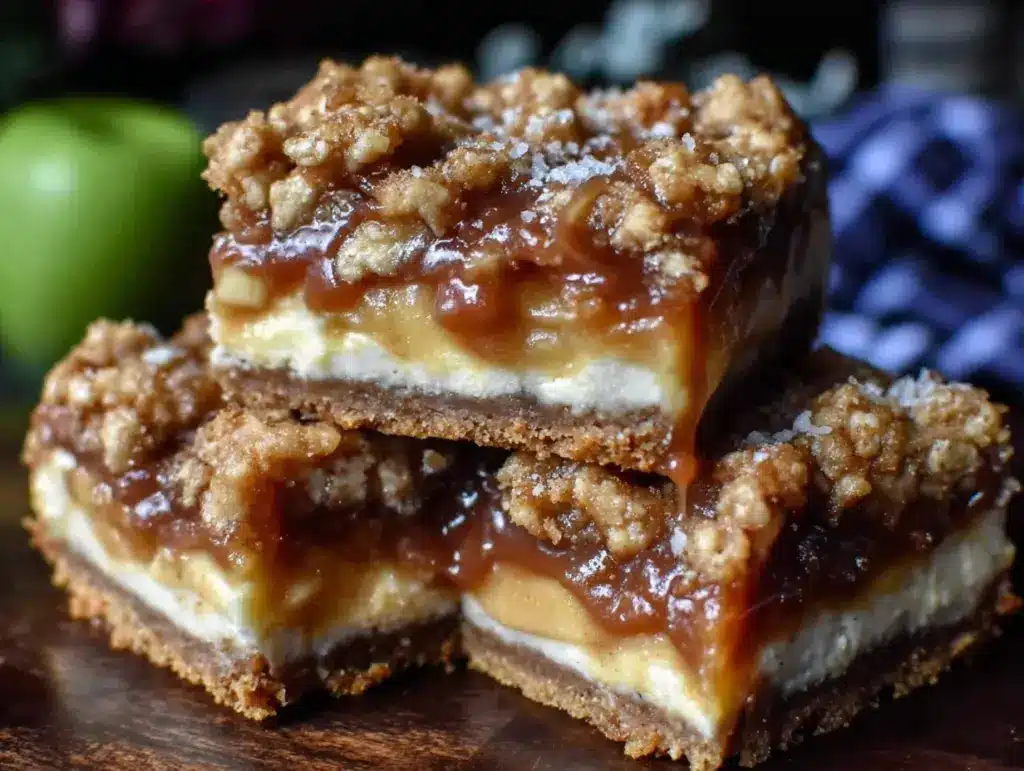
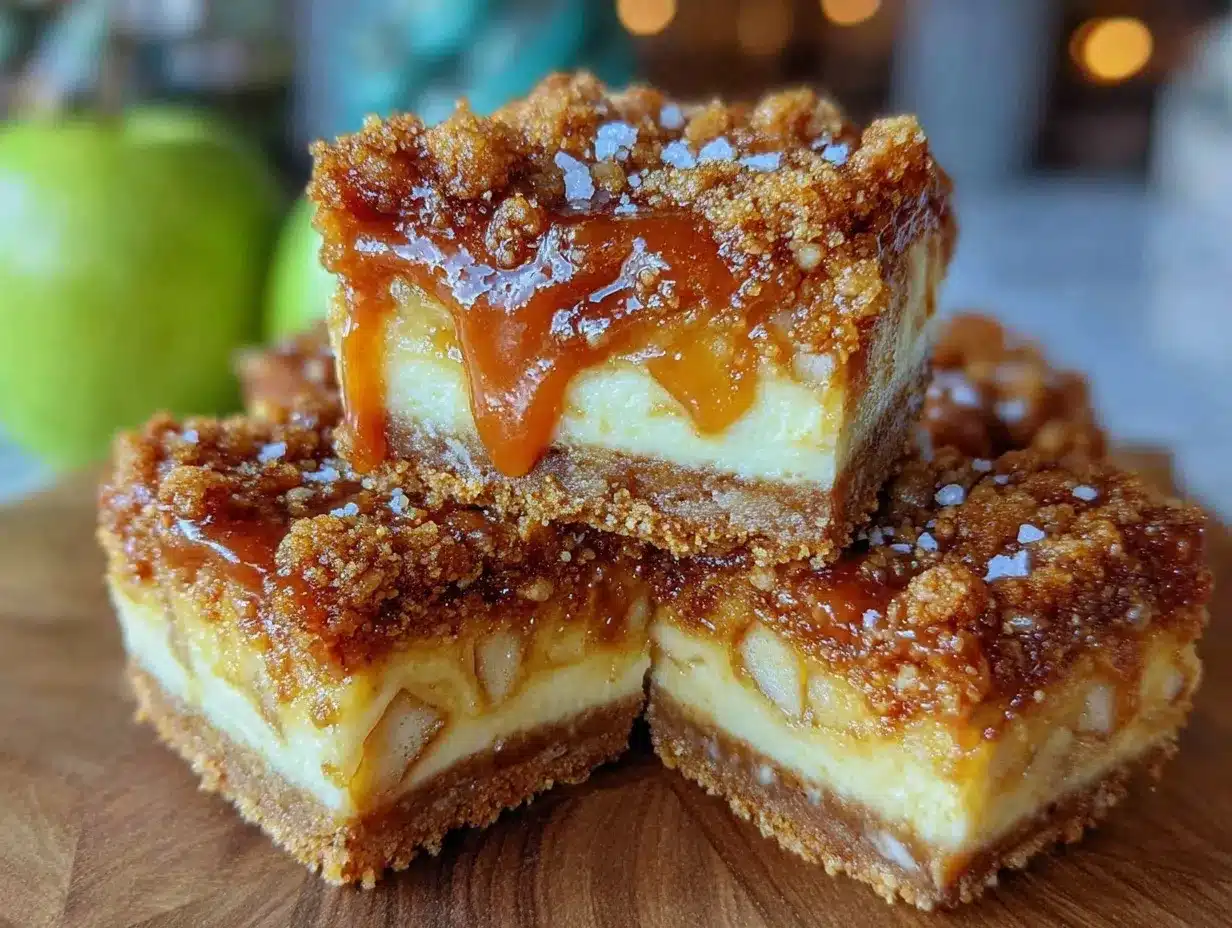
Let me paint a picture for you—the warm, toasty aroma of cinnamon-dusted apples mingles with buttery oats in my kitchen, while golden caramel bubbles gently in a saucepan. The first whiff hits you like a childhood memory, the kind that makes you want to wrap yourself in a cozy blanket and just let the world slow down. There’s a richness in the air, a hint of tang from creamy cheesecake, all packed into a bar that’s equal parts crunchy, creamy, and gooey. This is the kind of dessert that has neighbors knocking on your door for “just one more piece,” and honestly, who can blame them?
The first time I made these Crispy Salted Caramel Apple Crisp Cheesecake Bars, I was instantly hooked. It was a chilly October afternoon, and I wanted something that tasted like autumn itself—so I threw together all my favorite fall flavors in one pan, and I have to say, I hit the jackpot. The moment I sliced into the pan, my kids hovered like hawks, sneaking bites off the corner (the crispy edge pieces are always the best, you know). There was this pause, a happy hush while everyone took their first bite, and then the verdict: “Mom, these are unreal!” That’s the kind of moment where you pause, take a deep breath, and just smile because you know you’re onto something truly special.
Growing up, apple crisp was a staple at family get-togethers—my grandma used to say there was no problem a good apple dessert couldn’t solve. I took that wisdom and gave it a little twist with a creamy cheesecake layer and a drizzle of salted caramel (because, let’s face it, caramel makes everything better). I wish I’d discovered this combo years ago! These bars are dangerously easy to whip up, pure nostalgic comfort with just enough crunch to keep you coming back for seconds. Whether you’re looking for a sweet treat for your kids, a showstopper for your next potluck, or just a way to brighten up your Pinterest dessert board, this recipe delivers.
After countless rounds of “testing” (in the name of research, of course), these bars have become a staple for family gatherings, gifting, and yes—midnight snacks. There’s just something about that blend of crispy oat topping, silky cheesecake, and tart-sweet apples wrapped in a blanket of salted caramel that feels like a warm hug. Trust me, you’re going to want to bookmark this one.
Why You’ll Love These Crispy Salted Caramel Apple Crisp Cheesecake Bars
Honestly, there are a million reasons why these bars deserve a spot in your fall dessert rotation. I’ve baked them for bake sales, family brunches, and even as a treat to myself after a long week. They’re the kind of recipe that gets you rave reviews every time. Here’s why you’ll love them:
- Quick & Easy: Comes together in under an hour (plus a little chill time). Perfect for busy weekends or spontaneous cravings.
- Simple Ingredients: No fancy grocery trips needed—just apples, cream cheese, oats, and pantry basics. You probably already have everything on hand.
- Perfect for Any Occasion: These bars are a hit at potlucks, holiday gatherings, or just a cozy night in. They look gorgeous on a dessert table and taste even better.
- Crowd-Pleaser: Adults and kids alike can’t resist that crispy edge and creamy center. I’ve yet to meet someone who didn’t ask for seconds.
- Unbelievably Delicious: The combo of tangy cheesecake and sweet apples, with a layer of salted caramel, is pure comfort food. It’s the kind of treat that makes you close your eyes and savor every bite.
What sets this recipe apart? For starters, the cheesecake layer is creamy but not too dense (I blend the cream cheese with a touch of sour cream for that ultra-smooth texture). The apple crisp topping is extra crispy thanks to a sprinkle of turbinado sugar and just the right ratio of oats to butter. And the salted caramel—oh my stars—it’s homemade, but you can use store-bought if you’re in a pinch.
It’s not just another apple dessert. This one hits the sweet spot between tart and creamy, soft and crunchy, comfort and indulgence. Perfect for impressing guests without feeling frazzled, or for turning a regular afternoon into something memorable. You know what? If you love classic apple crisp and creamy cheesecake, these bars are your dream come true.
What Ingredients You Will Need
This recipe uses simple, wholesome ingredients to deliver bold flavor and satisfying texture without the fuss. Most are pantry staples, and I’ve included notes for easy substitutions so you can make these bars work for you (no last-minute grocery runs required!).
- For the Crust:
- 1 1/2 cups (150g) graham cracker crumbs (or digestive biscuits)
- 1/4 cup (50g) granulated sugar
- 6 tbsp (85g) unsalted butter, melted
- Pinch of salt
- For the Cheesecake Layer:
- 16 oz (450g) cream cheese, softened (I like Philadelphia for best texture)
- 1/2 cup (120g) sour cream (adds creaminess)
- 2/3 cup (130g) granulated sugar
- 2 large eggs, room temperature
- 1 tsp vanilla extract
- For the Apple Filling:
- 2 1/2 cups (300g) peeled and diced apples (Granny Smith for tartness; Honeycrisp for sweetness; mix if you like!)
- 1/4 cup (50g) brown sugar
- 1 tsp ground cinnamon
- 1/4 tsp ground nutmeg (optional for warmth)
- 1 tbsp (8g) all-purpose flour (helps thicken juices)
- Pinch of salt
- For the Crisp Topping:
- 1 cup (100g) old-fashioned oats (not quick oats)
- 1/2 cup (65g) all-purpose flour (swap with almond flour for gluten-free)
- 1/3 cup (60g) brown sugar
- 1/2 tsp ground cinnamon
- 6 tbsp (85g) unsalted butter, cold and cubed
- 2 tbsp (18g) turbinado sugar (for extra crunch)
- Pinch of salt
- For the Salted Caramel:
- 1/2 cup (120ml) heavy cream
- 1 cup (200g) granulated sugar
- 6 tbsp (85g) unsalted butter
- 3/4 tsp flaky sea salt (Maldon or similar)
- Optional: Use store-bought caramel for convenience
Ingredient Tips: For apples, I usually stick with Granny Smith for their tartness, but Honeycrisp adds a lovely sweetness—feel free to mix! If you’re sensitive to dairy, swap the cream cheese and sour cream for plant-based alternatives. Gluten-free? Oat flour and almond flour work great in the crust and topping. For caramel, homemade gives the best flavor, but honestly, store-bought works in a pinch.
Equipment Needed
- 9×13-inch (23x33cm) baking pan: The classic size for bars; if you only have an 8×8, halve the recipe and watch for a slightly shorter bake time.
- Mixing bowls: At least three—one for apples, one for cheesecake, and one for the crisp topping.
- Hand mixer or stand mixer: Makes the cheesecake layer silky smooth. You could do it by hand, but your arm might get tired (been there, done that).
- Rubber spatula: For scraping down the sides and getting every last bit into the pan.
- Whisk: For blending ingredients evenly.
- Small saucepan: For making the salted caramel.
- Measuring cups and spoons: Accuracy is key for baking, trust me.
- Parchment paper: Optional, but makes lifting bars out a breeze.
- Sharp knife: For slicing apples and cutting bars.
I’ve made these bars in both metal and glass pans—metal gives a crispier edge, but glass works too. If you don’t have parchment, just grease your pan really well. As for mixers, I’ve used a cheap handheld one for years and it does the job (no need to splurge unless you want to!). For the caramel, any small saucepan will do—just keep an eye on it, as caramel can go from golden to burnt fast.
Preparation Method
- Prep the Pan: Line a 9×13-inch (23x33cm) pan with parchment paper or generously grease it. This makes for easy bar removal and less sticking.
- Make the Crust: In a medium bowl, combine 1 1/2 cups (150g) graham cracker crumbs, 1/4 cup (50g) sugar, and a pinch of salt. Stir in 6 tbsp (85g) melted butter until mixture resembles wet sand. Press firmly into the bottom of the pan. Bake at 350°F (175°C) for 8 minutes, then let cool slightly. (Tip: Use the bottom of a measuring cup to pack the crust down tight!)
- Prepare the Cheesecake Layer: In a large bowl, beat 16 oz (450g) softened cream cheese until smooth. Add 1/2 cup (120g) sour cream, 2/3 cup (130g) sugar, and 2 eggs, one at a time. Mix in 1 tsp vanilla. Beat until creamy and lump-free. Pour over the cooled crust, spreading evenly. (Sensory cue: It should look glossy and thick, no lumps!)
- Make the Apple Filling: Toss 2 1/2 cups (300g) diced apples with 1/4 cup (50g) brown sugar, 1 tsp cinnamon, 1/4 tsp nutmeg (optional), 1 tbsp (8g) flour, and a pinch of salt in a bowl. Spread evenly over the cheesecake layer. (If apples release lots of juice, drain excess so bars don’t get soggy.)
- Prepare the Crisp Topping: In another bowl, mix 1 cup (100g) oats, 1/2 cup (65g) flour, 1/3 cup (60g) brown sugar, 1/2 tsp cinnamon, 6 tbsp (85g) cold butter (cubed), 2 tbsp (18g) turbinado sugar, and a pinch of salt. Use your fingers or a pastry cutter to blend until crumbly and butter is evenly distributed. Sprinkle generously over the apples. (Tip: Don’t worry if topping looks uneven—clumps bake up extra crispy!)
- Bake: Bake bars at 350°F (175°C) for 40-45 minutes, until topping is golden and apples are bubbling at the edges. Cheesecake layer should be set but still slightly jiggly in the center. (If edges brown too quickly, cover loosely with foil at the 30-minute mark.)
- Make the Salted Caramel: While bars bake, in a small saucepan, melt 1 cup (200g) sugar over medium heat, swirling occasionally. Once melted and amber, whisk in 6 tbsp (85g) butter (it will bubble!). Slowly add 1/2 cup (120ml) heavy cream, whisking constantly. Stir in 3/4 tsp flaky sea salt. Let cool. (Warning: Caramel is hot—don’t touch!)
- Cool and Chill: Let bars cool at room temperature for 30 minutes, then refrigerate for at least 2 hours to firm up. (I know, waiting is torture, but it’s worth it for clean slices!)
- Slice and Serve: Use a sharp knife to cut bars into squares. Drizzle generously with salted caramel before serving. (If caramel thickens, warm it gently.)
Troubleshooting: If bars seem too soft, chill longer. If topping’s not crisp, bake 5 more minutes. Apples too watery? Use firmer apples and toss in extra flour. For efficiency, prep topping while crust bakes. Trust your senses—golden color, caramel scent, and a slight jiggle in the middle mean you’re good to go!
Cooking Tips & Techniques
Let’s face it—baking layered bars can be a little tricky, but with a few pro tips you’ll be pulling perfect slices every time. Here’s what I’ve learned (sometimes the hard way):
- Room Temperature Ingredients: Make sure cream cheese and eggs are room temp for a lump-free cheesecake layer. Cold ingredients will create pockets and uneven baking.
- Don’t Overmix: For cheesecake, mix just until smooth—overmixing can make it crack or get too dense. It’s okay if you see a few streaks when pouring it in.
- Layering Order Matters: Always add apples after the cheesecake layer. If you reverse the order, apples will sink and get soggy.
- Crisp Topping Consistency: Cold butter is key. Warm butter melts too fast and you lose that signature crunch. If topping looks too powdery, squeeze a few clusters together for extra crispy bites.
- Caramel Dangers: Caramel can burn in seconds. Don’t walk away! Keep the heat low and swirl (not stir) until sugar melts, then add butter and cream slowly.
- Chill for Clean Cuts: Bars slice best after a good chill. I’ve tried to rush it before—big mistake! Warm bars are gooey and delicious, but they won’t hold their shape.
- Multitasking: Prep the caramel while the bars bake so everything’s ready at once. If you’re short on time, store-bought caramel works fine (just add a sprinkle of sea salt for that homemade touch).
- Common Mistakes: Soggy crust? Make sure to bake it before adding layers. Runny cheesecake? Check that apples aren’t too juicy and bake until the center’s just set.
- Personal Failures: The first time, I forgot to chill the bars and ended up with a delicious mess. Learn from me—patience makes perfect!
Consistency comes from baking with love and not sweating the little things. As long as you layer, chill, and don’t skimp on caramel, you’ll have a dessert worth sharing (or keeping all to yourself).
Variations & Adaptations
One of my favorite things about these Crispy Salted Caramel Apple Crisp Cheesecake Bars is how versatile they are. Here’s how you can make them your own:
- Gluten-Free: Swap the graham cracker crumbs with gluten-free cookies and use almond flour or oat flour in the topping. I’ve tried this and, honestly, couldn’t tell the difference!
- Dairy-Free: Use plant-based cream cheese and sour cream alternatives. Coconut oil in place of butter works for the topping and crust. The flavor gets a subtle tropical twist!
- Seasonal Fruit Swaps: Replace apples with pears in winter, or fresh berries in summer. Just adjust sweetness and flour amount as berries are juicier.
- Flavor Twists: Add a handful of chopped pecans or walnuts to the crisp topping for extra crunch. Sprinkle a little ginger or cardamom in with the apples for a spicy kick.
- No-Bake Option: Skip the crisp topping and caramel for a simple cheesecake apple bar—just bake the crust and layers, then chill and serve.
- Personal Variation: Last Thanksgiving, I added dried cranberries to the apple layer for a tart pop. It was a hit!
For allergies, swap nuts for seeds or omit them altogether. If you’re avoiding eggs, try a flaxseed egg in the cheesecake layer. Taste preferences? More cinnamon, less caramel, or a dash of vanilla bean—make it yours! That’s the beauty of home baking.
Serving & Storage Suggestions
These bars are best served slightly chilled or at cool room temperature. Drizzle with extra salted caramel right before serving for maximum wow factor—seriously, it makes them Pinterest-perfect.
- Presentation: Arrange bars on a pretty platter, sprinkle with a pinch of flaky sea salt, and add a few apple slices for garnish. They look gorgeous in photos and even better in person.
- Complementary Dishes: Pair with hot coffee, spiced chai, or a scoop of vanilla ice cream for a truly decadent treat. They’re great alongside savory quiches or breakfast casseroles at brunch.
- Storage: Keep bars in an airtight container in the fridge for up to 5 days. The flavors actually deepen and meld together—day two is my favorite! For longer storage, freeze for up to 2 months. Thaw overnight in the fridge.
- Reheating: Warm gently in the microwave for 10-15 seconds if you want a gooier texture. Caramel can be microwaved or warmed on the stove if it thickens.
Honestly, they never last long enough in my house to worry about storage. But if you’re lucky enough to have leftovers, rest assured—they taste just as good the next day (maybe even better!).
Nutritional Information & Benefits
Here’s a quick rundown of what you’re getting in each bar (based on 16 servings):
- Calories: ~320 per bar
- Fat: 18g
- Carbs: 38g
- Protein: 4g
- Fiber: 2g
Health Benefits: Apples bring fiber and vitamin C, oats offer slow-release energy, and the cheesecake layer adds calcium. If you use almond flour, you’ll get a healthy boost of vitamin E. Though it’s a treat, you can feel good about real, whole-food ingredients—no weird preservatives.
Dietary Considerations: Easily adapted gluten-free and dairy-free, as mentioned above. Contains eggs, dairy, and wheat in the classic version. If you have nut allergies, skip the optional add-ins. My personal wellness tip: Enjoy in moderation, and savor every bite—it’s all about balance!
Conclusion
Crispy Salted Caramel Apple Crisp Cheesecake Bars are more than just a fall dessert—they’re a little slice of happiness, packed with layers of nostalgia, comfort, and flavor. Whether you’re baking for a crowd or just treating yourself, these bars are worth every minute in the kitchen. Remember, you can always tweak the recipe to suit your tastes—add more spice, switch up the fruit, or play with the caramel. The main thing is to make them your own.
I love this recipe because it reminds me of family, laughter, and the simple joys of sharing good food. So grab your ingredients, give it a whirl, and let me know how you put your spin on it. Drop a comment below, share with friends, or tag your Pinterest creations—I can’t wait to see what you come up with! Here’s to desserts that bring us together and make every day a little sweeter.
Happy baking—may your bars be crispy, your caramel be salty, and your kitchen filled with smiles!
FAQs About Crispy Salted Caramel Apple Crisp Cheesecake Bars
Can I make these cheesecake bars ahead of time?
Absolutely! They’re actually better after chilling overnight, so make them a day ahead for easier slicing and deeper flavor.
What apples work best for this recipe?
I recommend Granny Smith for tartness and Honeycrisp for sweetness. Mixing both gives a balanced flavor, but any firm apple will do.
Can I use store-bought caramel instead of homemade?
Yes, store-bought caramel works perfectly if you’re short on time. Just sprinkle a little flaky sea salt on top for that signature salted caramel touch.
How do I make these bars gluten-free?
Swap the graham cracker crumbs and flour with gluten-free versions (almond flour or oat flour work great). The texture stays crispy and delicious!
Can I freeze the cheesecake bars?
Definitely! Freeze in an airtight container for up to 2 months. Thaw in the fridge overnight before serving for best texture and flavor.
Pin This Recipe!

Crispy Salted Caramel Apple Crisp Cheesecake Bars
These decadent fall dessert bars feature layers of creamy cheesecake, cinnamon-spiced apples, crispy oat topping, and a drizzle of homemade salted caramel. Perfect for gatherings, potlucks, or cozy nights in, they combine the best of apple crisp and cheesecake in one irresistible treat.
- Prep Time: 20 minutes
- Cook Time: 45 minutes
- Total Time: 2 hours 15 minutes (includes chilling)
- Yield: 16 bars 1x
- Category: Dessert
- Cuisine: American
Ingredients
- 1 1/2 cups graham cracker crumbs (or digestive biscuits)
- 1/4 cup granulated sugar
- 6 tablespoons unsalted butter, melted
- Pinch of salt
- 16 ounces cream cheese, softened
- 1/2 cup sour cream
- 2/3 cup granulated sugar
- 2 large eggs, room temperature
- 1 teaspoon vanilla extract
- 2 1/2 cups peeled and diced apples (Granny Smith and/or Honeycrisp)
- 1/4 cup brown sugar
- 1 teaspoon ground cinnamon
- 1/4 teaspoon ground nutmeg (optional)
- 1 tablespoon all-purpose flour
- Pinch of salt
- 1 cup old-fashioned oats
- 1/2 cup all-purpose flour (or almond flour for gluten-free)
- 1/3 cup brown sugar
- 1/2 teaspoon ground cinnamon
- 6 tablespoons unsalted butter, cold and cubed
- 2 tablespoons turbinado sugar
- Pinch of salt
- 1/2 cup heavy cream
- 1 cup granulated sugar
- 6 tablespoons unsalted butter
- 3/4 teaspoon flaky sea salt (Maldon or similar)
- Optional: store-bought caramel for convenience
Instructions
- Preheat oven to 350°F (175°C). Line a 9×13-inch baking pan with parchment paper or grease well.
- In a medium bowl, mix graham cracker crumbs, granulated sugar, and a pinch of salt. Stir in melted butter until mixture resembles wet sand. Press firmly into the bottom of the pan. Bake for 8 minutes, then let cool slightly.
- In a large bowl, beat softened cream cheese until smooth. Add sour cream, granulated sugar, and eggs (one at a time), then vanilla extract. Beat until creamy and lump-free. Pour over cooled crust and spread evenly.
- In another bowl, toss diced apples with brown sugar, cinnamon, nutmeg (if using), flour, and a pinch of salt. Spread evenly over cheesecake layer.
- In a separate bowl, mix oats, flour, brown sugar, cinnamon, cold cubed butter, turbinado sugar, and a pinch of salt. Blend with fingers or pastry cutter until crumbly. Sprinkle over apples.
- Bake at 350°F for 40-45 minutes, until topping is golden and apples are bubbling at the edges. Cheesecake layer should be set but slightly jiggly in the center. Cover loosely with foil if edges brown too quickly.
- While bars bake, make salted caramel: In a small saucepan, melt granulated sugar over medium heat, swirling occasionally. Once melted and amber, whisk in butter (it will bubble). Slowly add heavy cream, whisking constantly. Stir in flaky sea salt. Let cool.
- Let bars cool at room temperature for 30 minutes, then refrigerate for at least 2 hours to firm up.
- Slice bars into squares with a sharp knife. Drizzle with salted caramel before serving. Warm caramel gently if it thickens.
Notes
For best results, use a mix of tart and sweet apples. Chill bars thoroughly before slicing for clean cuts. Store in the fridge for up to 5 days or freeze for up to 2 months. Easily adapted to gluten-free or dairy-free diets. If using store-bought caramel, add a sprinkle of sea salt for flavor. For extra crunch, add chopped nuts to the topping.
Nutrition
- Serving Size: 1 bar (1/16 of pan)
- Calories: 320
- Sugar: 24
- Sodium: 220
- Fat: 18
- Saturated Fat: 10
- Carbohydrates: 38
- Fiber: 2
- Protein: 4
Keywords: apple crisp bars, cheesecake bars, salted caramel, fall dessert, apple dessert, easy baking, potluck dessert, autumn recipe, oat topping, creamy cheesecake


