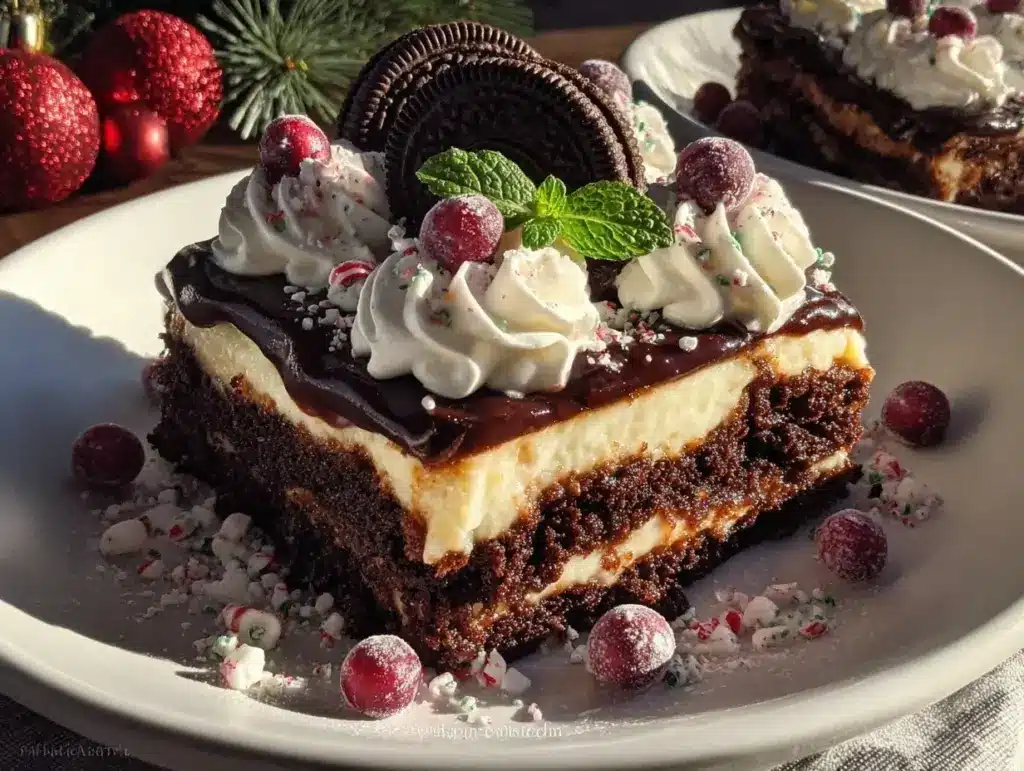
Picture this: you’re standing in your kitchen, and the irresistible scent of chocolate Oreos mingling with sweet vanilla wafts through the air. It’s the kind of aroma that stops you in your tracks and makes you grin – that unmistakable promise of a treat that’s both decadent and fun. The first time I made this creamy no-bake Christmas Oreo lasagna, it was a chilly December evening, and the twinkle lights were glowing just right. I remember pressing the first layer into the pan, wondering if my family would love it as much as I did. Spoiler: they couldn’t stop sneaking bites straight from the fridge (I caught my husband red-handed at midnight, and honestly, I can’t blame him!).
This recipe brings back the heartwarming chaos of my childhood Christmases, when I was knee-high to a grasshopper and desserts were a big event. I stumbled upon the idea during a holiday bake sale, desperate for something festive but easy enough to whip up after work. If only I’d had this creamy Oreo lasagna in my festive recipe arsenal years ago! It’s become a staple for family gatherings, school parties, and even last-minute gifting. There’s just something magical about those layered textures – the crunchy Oreo base, the silky cream cheese, the velvety pudding, and the fluffy whipped topping. Each bite feels like pure, nostalgic comfort, dangerously easy to make and impossible to resist.
Honestly, this is the kind of dessert that gets devoured at potlucks and brightens up your Pinterest board for the holidays. It’s perfect for cozy nights in, sweet treats for your kids, or impressing your friends without breaking a sweat. You know you’re onto something truly special when people ask for the recipe before they’ve even finished their first helping. I’ve tested it more times than I can count (all in the name of research, of course), and every time, it feels like a warm hug in dessert form. So, grab your favorite Christmas Oreos and get ready to make a creamy no-bake Oreo lasagna that’s guaranteed to be the hit of your holiday table – you’re going to want to bookmark this one!
Why You’ll Love This Recipe
Let’s face it, there are tons of holiday desserts out there, but this creamy no-bake Christmas Oreo lasagna stands out. After years of tinkering with layered desserts and enduring my fair share of lumpy fillings and soggy crusts, I can confidently say this is my best version yet. Every layer is thoughtfully crafted for flavor, texture, and that wow factor you really want at Christmas.
- Quick & Easy: Comes together in under 30 minutes, with no oven required. Ideal for busy holiday schedules or last-minute dessert emergencies.
- Simple Ingredients: You probably have most of these in your pantry already – no mysterious items or specialty store runs.
- Perfect for Gatherings: Whether you’re hosting a festive brunch, bringing a dish to the office party, or spoiling your in-laws, this lasagna fits right in.
- Crowd-Pleaser: Kids, adults, even picky eaters – everyone goes back for seconds. It’s got the nostalgic Oreo flavor and creamy layers everyone loves.
- Unbelievably Delicious: The combination of crunchy cookies, tangy cream cheese, sweet pudding, and fluffy whipped topping is pure comfort food with a festive twist.
What makes this creamy no-bake Oreo lasagna different? Well, for starters, I use holiday-themed Christmas Oreos for that extra splash of color and flavor (plus, they just look adorable). My secret is in blending the cream cheese until it’s ultra-smooth, so no lumps – just silky perfection. Plus, no-bake means you can make it ahead and free up your oven for other Christmas goodies.
This dessert isn’t just “good.” It’s the kind that makes you close your eyes on the first bite and forget about the holiday stress for a minute. It’s comfort food, Christmas-style – faster, lighter, but with all the soul-soothing sweetness you crave. Perfect for wowing your guests or making a simple family night feel special. Trust me, you’ll be making this creamy Oreo lasagna every December (and maybe a few times in between!).
What Ingredients You Will Need
This creamy no-bake Christmas Oreo lasagna relies on a handful of simple ingredients to deliver bold flavor and dreamy texture. Most are classic pantry staples, with a couple of festive additions to really make your dessert holiday-ready. Here’s what you’ll need to whip up this showstopper:
- For the Oreo crust:
- Christmas-themed Oreo cookies (about 36 cookies, crushed; those with red and green filling are perfect for a festive look)
- Unsalted butter, melted (6 tablespoons / 85g; adds richness and helps the crust set)
- For the cream cheese layer:
- Cream cheese, softened (8 ounces / 225g; I love Philly brand for that ultra-creamy texture)
- Powdered sugar (1 cup / 120g; helps the layer stay smooth and sweet)
- Vanilla extract (1 teaspoon; adds depth and a touch of holiday warmth)
- Whipped topping, thawed (1 cup / 240ml; you can use Cool Whip or homemade stabilized whipped cream)
- For the pudding layer:
- Instant vanilla pudding mix (1 box, 3.4 ounces / 96g; or white chocolate pudding for a twist)
- Cold milk (2 cups / 480ml; whole milk makes it extra creamy, but 2% works too)
- For the topping:
- Whipped topping, thawed (another 1 cup / 240ml; gives that fluffy, snow-like finish)
- Crushed Christmas Oreos (about 6 cookies, for garnish)
- Holiday sprinkles (optional; red, green, and white for that Pinterest-perfect finish)
Ingredient Tips:
- If you’re in a pinch, regular Oreos work fine – just add festive sprinkles for color.
- Swap out cream cheese for a dairy-free version if needed (I’ve tried Kite Hill and it works great!).
- For gluten-free, use gluten-free sandwich cookies – just check for festive varieties.
- I recommend using full-fat cream cheese for best results; the low-fat version can be runny and doesn’t set as well.
- If you can’t find instant pudding, you can use homemade custard (just cool it completely before layering).
- Homemade whipped cream works too, but stabilize it with a little cornstarch or gelatin so it holds up overnight.
Honestly, these ingredients are so easy to find and swap, you’ll never feel stuck. Plus, you can mix and match flavors to suit your holiday mood – peppermint Oreos, chocolate pudding, or even a dash of cinnamon. That’s the beauty of this creamy no-bake Oreo lasagna: festive, flexible, and always delicious.
Equipment Needed
You won’t need any fancy gadgets for this creamy no-bake Christmas Oreo lasagna – just a few kitchen basics and maybe a little elbow grease. Here’s what I use every time:
- 9×13-inch (23x33cm) glass or ceramic baking dish (anything with straight sides works, but I prefer glass so you can see those pretty layers!)
- Food processor or zip-top bag and rolling pin (for crushing Oreos; honestly, smashing them by hand is kind of therapeutic)
- Mixing bowls (at least two medium-sized, preferably with a non-slip base)
- Electric mixer or sturdy whisk (for whipping cream cheese and pudding; a hand mixer makes it easy, but a whisk builds arm muscles!)
- Rubber spatula (for smooth spreading and scraping every last bit of creamy goodness)
- Measuring cups and spoons (accuracy matters – don’t eyeball the milk, trust me)
- Offset spatula (optional, for perfect layers and clean edges)
If you don’t have a food processor, just toss the Oreos in a zip-top bag and let out some holiday stress with a rolling pin. I’ve tried both methods, and honestly, hand-crushing works just fine. For mixing, a basic hand mixer gets everything smooth fast. If you’re working on a budget, thrift store baking dishes and dollar store whisks do the job great. Just make sure your baking dish is deep enough for all those luscious layers!
One tip: keep your mixer and spatulas squeaky clean between layers. It keeps flavors pure and your dessert looking Pinterest-worthy. Oh, and if you’re using a glass dish, let it come to room temp before pouring melted butter – otherwise, you might hear a scary “crack!” (learned that the hard way, oops!).
Preparation Method
Ready to build your creamy no-bake Christmas Oreo lasagna? Here’s my step-by-step method, complete with measurements, time estimates, and a few hard-earned tips:
- Crush the Oreos:
Place 36 Christmas Oreos in a food processor and pulse until fine crumbs form. (If using a zip-top bag, crush with a rolling pin – aim for sand-like texture, but a few chunky bits are fine.) - Make the crust:
Pour the crushed Oreos into your 9×13-inch dish. Add 6 tablespoons (85g) melted unsalted butter and stir until all crumbs are coated. Press firmly into an even layer using your fingers or the bottom of a measuring cup. Chill in the fridge for 10 minutes to set. - Prepare the cream cheese layer:
In a mixing bowl, beat 8 ounces (225g) softened cream cheese until smooth, about 2 minutes. Add 1 cup (120g) powdered sugar and 1 teaspoon vanilla extract. Beat until fluffy and lump-free. Fold in 1 cup (240ml) whipped topping until just combined. (Tip: Don’t overmix or it’ll go runny.) - Spread the cream cheese layer:
Gently spread the cream cheese mixture over the chilled Oreo crust. Use a spatula for an even finish. Return to the fridge while you prep the next layer. - Whip up the pudding:
In a clean bowl, whisk together 1 box (3.4 ounces / 96g) instant vanilla pudding mix and 2 cups (480ml) cold milk. Beat for 2–3 minutes until thickened. (It should look like soft serve ice cream – if it’s too thin, let it sit for a couple extra minutes.) - Layer the pudding:
Spread the pudding evenly over the cream cheese layer. Be gentle – a light touch keeps layers neat. - Add the final whipped topping:
Spread 1 cup (240ml) whipped topping over the pudding. Fluff up the top with the back of a spoon for a snowy look. - Decorate:
Sprinkle crushed Christmas Oreos (about 6 cookies) and holiday sprinkles on top. (Kids love helping with this part – just expect a little chaos!) - Chill:
Cover loosely with foil or plastic wrap and refrigerate for at least 4 hours, overnight if possible. This lets the layers firm up and flavors meld. - Slice and serve:
Use a sharp knife and clean between cuts for perfect squares. Expect a little gooeyness if it’s freshly made – that’s normal!
Troubleshooting Tips:
- If your cream cheese is lumpy, let it sit at room temp longer and beat until smooth.
- If the crust seems dry, add another tablespoon of melted butter.
- Pudding too runny? Make sure to use cold milk and instant pudding, not cook-and-serve.
Personal Note: Don’t stress about perfect layers – a little swirl just means more flavor in every bite. I usually prep the crust and cream cheese layer the night before, then finish the topping with the kids right before serving. Easy, festive, and always a hit!
Cooking Tips & Techniques
Over the years, I’ve made just about every mistake possible with this creamy no-bake Oreo lasagna – and learned a few professional tricks along the way. Here’s what I wish I’d known sooner:
- Chill Between Layers: Don’t rush! Let each layer set for at least 10 minutes in the fridge before adding the next. It keeps everything neat and prevents mixing.
- Room Temp Ingredients: Bring cream cheese to room temp for the smoothest, lump-free filling. Cold cream cheese just won’t blend right (I’ve tried to cheat, didn’t work).
- Gentle Spreading: Use an offset spatula or back of a spoon for spreading – don’t press too hard, or the layers will squish.
- Crushing Oreos: If you want a chunky base, pulse Oreos briefly. For a smoother crust, keep pulsing until fine. There’s no wrong way, just personal preference!
- Stabilized Whipped Topping: If making homemade whipped cream, add a little cornstarch or gelatin. Otherwise, it can weep and make the lasagna soggy overnight.
- Clean Cuts: For perfect slices, dip your knife in hot water and wipe between cuts. It makes a world of difference for presentation.
- Make Ahead: This dessert actually tastes better after a day in the fridge – the flavors blend and the layers firm up. Don’t be afraid to prep early!
- Multitasking: While the crust chills, whip up the cream cheese layer. I usually set up a little assembly line when making multiples for parties.
Common Mistakes (and How to Avoid Them):
- Pudding too thin? Use instant pudding and cold milk, and let it stand to thicken before layering.
- Crust crumbles? Press firmly and don’t skimp on butter.
- Layers run together? Chill between each layer, and don’t rush the process.
Honestly, I’ve had a few disasters (once forgot to thaw whipped topping, and my layers were a mess), but with these tips, your creamy Oreo lasagna will look and taste dreamy every time. Consistency is key – and a little patience pays off in Pinterest-worthy results!
Variations & Adaptations
The beauty of creamy no-bake Christmas Oreo lasagna is how flexible it is. Whether you need a dietary tweak, a seasonal swap, or just want to jazz up the flavor, here are my favorite variations:
- Gluten-Free Version: Use gluten-free chocolate sandwich cookies – there are holiday versions out there, just check your local store. All other ingredients are naturally gluten-free.
- Peppermint Twist: Swap Christmas Oreos for peppermint-flavored Oreos and add a few drops of peppermint extract to the cream cheese layer. Garnish with crushed candy canes for a super festive touch.
- Flavor Adventure: Try chocolate pudding instead of vanilla, or layer with both for a marbled effect. White chocolate pudding is also amazing (and makes the colors pop against the Oreos).
- Dairy-Free Adaptation: Use plant-based cream cheese and coconut whipped topping. Almond or oat milk works for the pudding layer, just check that your pudding mix is dairy-free.
- Seasonal Swaps: In spring, use pastel Oreos and rainbow sprinkles. For Halloween, go orange and black. The basic recipe stays the same – just change up the cookies and toppings!
Allergen Substitutions:
- Nut allergy? No nuts here, but always check your cookie labels for cross-contamination warnings.
- Egg allergy? No eggs in this recipe – safe for most dietary needs.
My personal favorite variation? Chocolate mint Oreo lasagna with a drizzle of hot fudge over the whipped topping – it’s rich, refreshing, and always disappears first at parties. Honestly, once you try the basic recipe, you’ll find a hundred ways to make it your own. Just don’t be afraid to experiment – sometimes the best flavors come from happy accidents!
Serving & Storage Suggestions
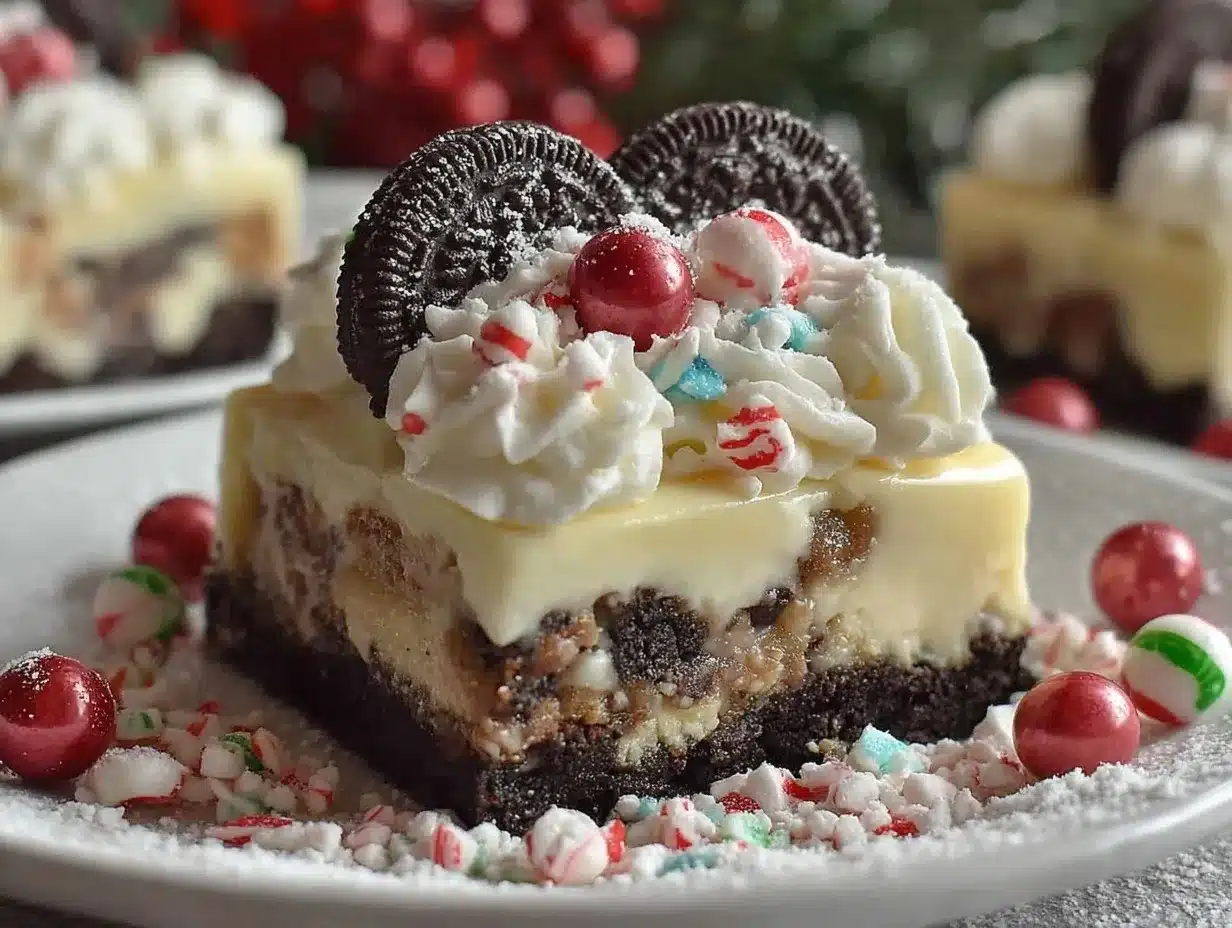
This creamy no-bake Christmas Oreo lasagna is best served chilled, straight from the fridge. The cool temperature keeps the layers firm and the flavors bright – plus, it’s extra refreshing after a heavy holiday meal. I love slicing it into big, generous squares and serving on festive plates with a dusting of extra sprinkles or cookie crumbs.
Presentation Ideas:
- Top each slice with a dollop of whipped cream and a mini Oreo for Pinterest-perfect style.
- Serve alongside mugs of hot cocoa or peppermint tea for a cozy treat.
- Pair with fresh berries for a pop of color and tartness.
Storage Tips:
- Refrigerator: Cover tightly with plastic wrap or foil and store up to 3 days. The flavors meld and the texture stays soft but not soggy.
- Freezer: You can freeze leftovers for up to 1 month. Slice and wrap each piece individually for best results. Thaw in the fridge overnight before serving – the texture is slightly softer but still delicious.
- Reheating: No need to reheat, but if you want a slightly softer bite, let slices sit at room temp for 10–15 minutes before serving.
One thing I’ve learned: the flavors get even better after a night in the fridge. The Oreos soften and mix with the creamy layers, turning every bite into pure holiday comfort. If you plan to make it ahead, add the sprinkles and cookie crumbs just before serving to keep them crisp and colorful.
Nutritional Information & Benefits
This creamy no-bake Christmas Oreo lasagna is all about festive indulgence, but here’s a quick look at the nutritional side for those who like to track their treats:
| Per Serving (1/12 of pan) | Estimated Values |
|---|---|
| Calories | 320 |
| Carbohydrates | 38g |
| Fat | 17g |
| Protein | 3g |
| Sugar | 26g |
Key Ingredient Benefits:
- Cream cheese: Adds a bit of calcium and protein, plus that smooth, satisfying texture.
- Oreo cookies: Well, let’s call them “happiness boosters” – they’re not health food, but they do make the holidays sweeter!
- Whipped topping: Light and fluffy, keeps the dessert from feeling heavy.
- Pudding: Provides creaminess without the need for eggs or extra fat.
Dietary Notes:
- Gluten-free option available (see variations).
- Dairy-free option available.
- No eggs or nuts in the basic recipe.
Personal wellness tip: I believe in celebrating balance, especially at Christmas. This dessert is meant for sharing and savoring – it’s not about perfection, just joy and togetherness!
Conclusion
If you’re searching for a festive, crowd-pleasing treat that’s almost too easy to make, creamy no-bake Christmas Oreo lasagna is your answer. It’s packed with holiday cheer, layer after layer of creamy, crunchy, fluffy goodness. Whether you’re a dessert pro or just dipping your toes into holiday baking, this recipe delivers every time.
Don’t be afraid to customize it – swap in your favorite flavors, play with toppings, or adjust for allergies. Every family has their own twist, and that’s what makes it special! Personally, I love how this dessert brings everyone together, sparking smiles and laughter with every bite.
So go ahead, bookmark this recipe, share it with friends, and let me know how it turns out in the comments! What’s your favorite Christmas Oreo lasagna variation? I’d love to hear your ideas and tips. Wishing you a sweet, merry holiday – and lots of creamy Oreo lasagna in your future!
FAQs
Can I make creamy no-bake Christmas Oreo lasagna ahead of time?
Absolutely! It actually tastes better after chilling overnight. Just add the final toppings right before serving for best texture and color.
Can I use regular Oreos instead of Christmas Oreos?
Yes! Regular Oreos work perfectly. Just add festive sprinkles or colored candies to keep it holiday-themed.
Is there a way to make this dessert gluten-free?
Definitely – substitute gluten-free sandwich cookies for the Oreos. All other ingredients are naturally gluten-free, so it’s an easy swap.
Can I freeze creamy Oreo lasagna?
Yep! Slice into portions, wrap tightly, and freeze for up to a month. Thaw in the fridge overnight before serving for best results.
What’s the best way to crush Oreos for the crust?
A food processor is fastest, but smashing them in a zip-top bag with a rolling pin works just as well. Aim for fine crumbs so the crust holds together.
Pin This Recipe!
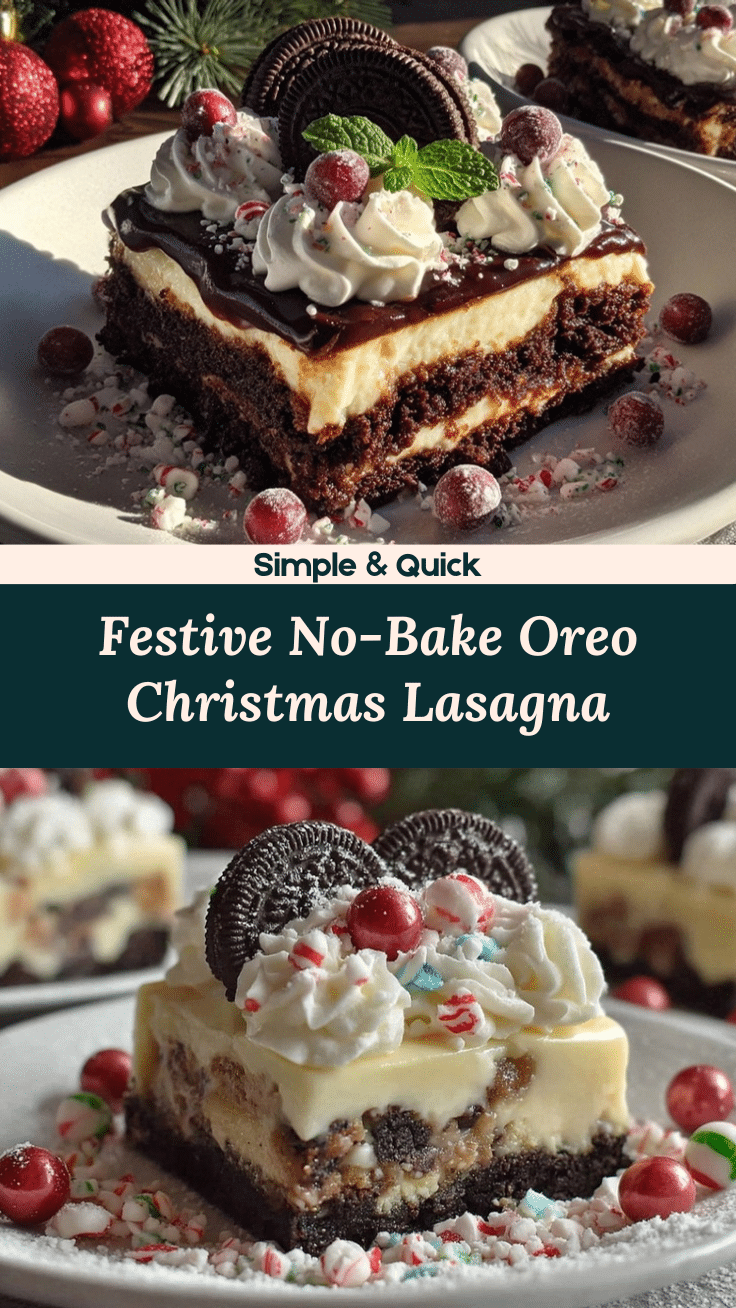
Creamy No-Bake Oreo Lasagna

This festive, creamy no-bake Oreo lasagna is a decadent layered dessert featuring a crunchy Oreo crust, silky cream cheese, velvety pudding, and fluffy whipped topping. Perfect for Christmas gatherings, potlucks, or cozy nights in, it’s easy to make and guaranteed to be a crowd-pleaser.
- Prep Time: 20 minutes
- Cook Time: 0 minutes
- Total Time: 4 hours 20 minutes
- Yield: 12 servings 1x
- Category: Dessert
- Cuisine: American
Ingredients
- 36 Christmas-themed Oreo cookies, crushed (or regular Oreos)
- 6 tablespoons unsalted butter, melted
- 8 ounces cream cheese, softened
- 1 cup powdered sugar
- 1 teaspoon vanilla extract
- 2 cups whipped topping, thawed (divided)
- 1 box (3.4 ounces) instant vanilla pudding mix (or white chocolate pudding)
- 2 cups cold milk
- 6 Christmas Oreos, crushed (for garnish)
- Holiday sprinkles (optional)
Instructions
- Place 36 Christmas Oreos in a food processor and pulse until fine crumbs form. Alternatively, crush in a zip-top bag with a rolling pin.
- Pour the crushed Oreos into a 9×13-inch dish. Add 6 tablespoons melted butter and stir until all crumbs are coated. Press firmly into an even layer. Chill in the fridge for 10 minutes to set.
- In a mixing bowl, beat 8 ounces softened cream cheese until smooth, about 2 minutes. Add 1 cup powdered sugar and 1 teaspoon vanilla extract. Beat until fluffy and lump-free. Fold in 1 cup whipped topping until just combined.
- Gently spread the cream cheese mixture over the chilled Oreo crust. Use a spatula for an even finish. Return to the fridge while you prep the next layer.
- In a clean bowl, whisk together 1 box instant vanilla pudding mix and 2 cups cold milk. Beat for 2–3 minutes until thickened.
- Spread the pudding evenly over the cream cheese layer.
- Spread 1 cup whipped topping over the pudding. Fluff up the top with the back of a spoon for a snowy look.
- Sprinkle crushed Christmas Oreos and holiday sprinkles on top.
- Cover loosely and refrigerate for at least 4 hours, overnight if possible.
- Slice and serve chilled. Clean knife between cuts for neat squares.
Notes
Chill each layer for at least 10 minutes before adding the next to keep layers neat. Use room temperature cream cheese for a smooth filling. For gluten-free, use gluten-free sandwich cookies. Make ahead for best flavor and texture. Add final toppings just before serving for crispness.
Nutrition
- Serving Size: 1/12 of pan
- Calories: 320
- Sugar: 26
- Fat: 17
- Carbohydrates: 38
- Protein: 3
Keywords: Oreo lasagna, Christmas dessert, no-bake, layered dessert, holiday recipe, easy dessert, potluck, creamy, festive, Oreo, pudding, whipped topping


