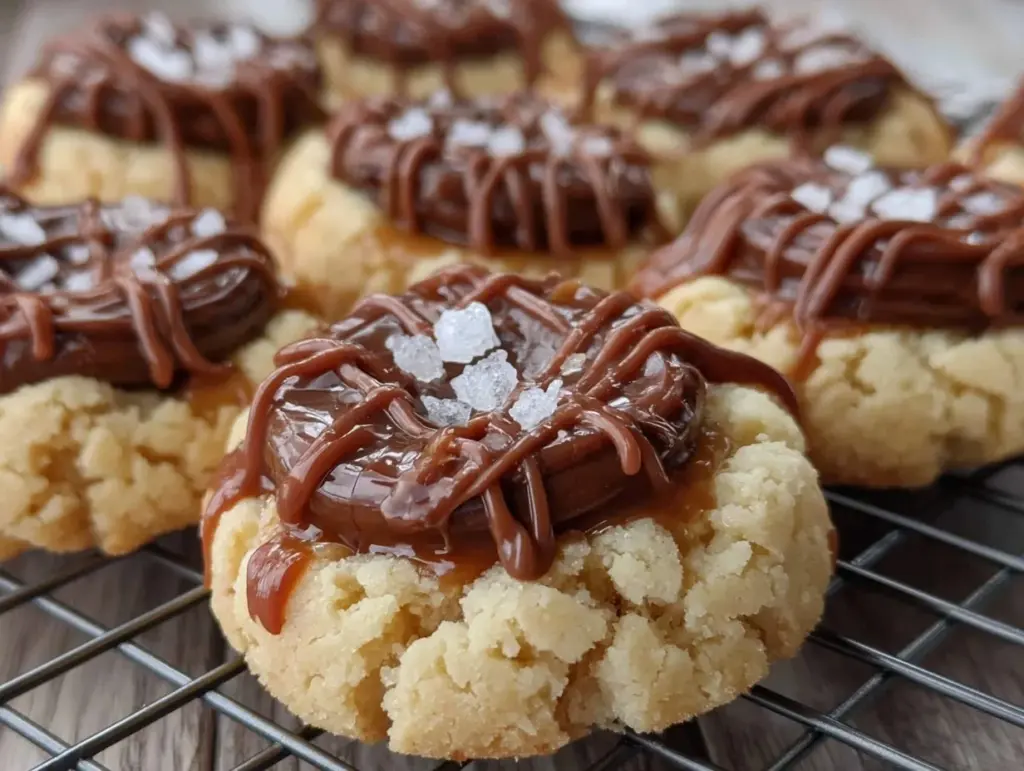
Let me tell you, the aroma of buttery cookie dough mingling with caramel and chocolate swirling from my oven is pure magic—like walking into a bakery you wish you could bottle up and keep forever. The first time I made these Twix Thumbprint Cookies with Caramel & Sea Salt, I was instantly hooked. I remember pausing mid-bake, just grinning at the glistening pools of gooey caramel nestled inside each cookie, topped with a glossy chocolate drizzle and a sprinkle of flaky salt. It’s the kind of moment where you stop, take a deep breath, and know you’ve stumbled upon something truly special.
Honestly, these cookies carry a touch of nostalgia for me. When I was knee-high to a grasshopper, my grandma used to whip up thumbprint cookies for every holiday—always with her signature thumbprint (hers were so dainty). Years ago, I tried to recreate that same comfort but with a twist: combining the classic thumbprint style with the irresistible flavors of a Twix bar. The first batch was a game changer, and I found myself wishing I’d discovered this little trick ages ago.
My family couldn’t stop sneaking these Twix Thumbprint Cookies off the cooling rack (and I can’t really blame them). “These taste just like the candy bar!” my youngest declared, with a mouthful of caramel. Whether you’re baking for a potluck, looking for a sweet treat for your kids, or simply wanting to brighten up your Pinterest cookie board, these cookies deliver pure, nostalgic comfort. Let’s face it, they’re dangerously easy and always hit the spot.
I’ve tested these Twix Thumbprint Cookies more times than I can count—in the name of research, of course—and they’ve become a staple at family gatherings and gifting. They feel like a warm hug in cookie form, and you’re going to want to bookmark this one for every sweet occasion.
Why You’ll Love This Recipe
Having baked thousands of cookies over the years (yes, really!), I can promise you these Twix Thumbprint Cookies are something special. They combine the best of a classic candy bar and a homemade treat—plus, they’re easy enough for a Tuesday night baking session. Here’s why you’ll fall in love:
- Quick & Easy: Whip up a batch in under 45 minutes, including baking and assembling. Perfect for last-minute dessert needs or when the sweet tooth hits.
- Simple Ingredients: No need for a fancy grocery run. Most ingredients are pantry staples (flour, butter, sugar, chocolate, caramel).
- Perfect for Every Occasion: These cookies shine at brunches, potlucks, holiday gatherings, or as a sweet surprise in lunchboxes.
- Crowd-Pleaser: Kids and adults alike rave about the soft cookie base, rich caramel, and hint of sea salt. They disappear fast, trust me!
- Unbelievably Delicious: The texture is melt-in-your-mouth tender, and the flavor combo of buttery cookie, gooey caramel, chocolate, and sea salt is pure comfort.
What sets this Twix Thumbprint Cookies recipe apart from the rest? For starters, the caramel is homemade (but can be swapped for store-bought in a pinch), and the sea salt brings out every rich note. The cookie itself is buttery and soft, not crumbly or dry. Unlike most thumbprint cookies, these hold their shape beautifully and don’t spread too much, thanks to just the right flour ratio. The chocolate drizzle adds that signature Twix flavor—and honestly, who doesn’t love a little chocolate cascade?
This recipe isn’t just good—it’s the kind that makes you close your eyes and savor every bite. It’s comfort food reimagined: easy, fast, and full of soul-soothing satisfaction. Whether you’re hoping to impress guests or just want a sweet pick-me-up, these Twix Thumbprint Cookies are the answer. The first time I served these at a party, they were gone before the main course hit the table. That’s a testament to their irresistible charm!
What Ingredients You Will Need
This recipe uses simple, wholesome ingredients to deliver bold flavor and a satisfying, tender texture without any fuss. Most of what you need is probably already hanging out in your kitchen. Here’s how everything comes together for the ultimate Twix Thumbprint Cookie experience:
- For the Cookie Dough:
- 1 cup (2 sticks/226g) unsalted butter, softened (adds rich flavor and tender crumb)
- 2/3 cup (135g) granulated sugar
- 1 large egg, room temperature
- 2 teaspoons pure vanilla extract (I love Nielsen-Massey for the deepest flavor)
- 2 1/4 cups (280g) all-purpose flour (King Arthur is my go-to for consistency)
- 1/2 teaspoon fine sea salt
- For the Caramel Filling:
- 20 soft caramel candies, unwrapped (Werther’s or Kraft work great)
- 2 tablespoons heavy cream (for smooth, spreadable caramel)
- Optional: 1/2 teaspoon vanilla extract for extra depth
- Alternatively: Use homemade caramel sauce (see adaptation notes below)
- For the Chocolate Drizzle:
- 1/2 cup (85g) semisweet chocolate chips or chopped chocolate (Ghirardelli is my favorite for meltability)
- 1 teaspoon coconut oil or butter (helps give a glossy finish)
- For Garnish:
- Flaky sea salt (Maldon or any good finishing salt)
Ingredient Tips & Substitutions:
- Gluten-Free: Swap in a 1:1 gluten-free flour blend—Bob’s Red Mill makes a solid option.
- Dairy-Free: Use plant-based butter and coconut cream in place of dairy.
- Caramel: Homemade caramel sauce is next-level, but the candies work for speed.
- Chocolate: Milk chocolate chips for a classic Twix vibe, or dark chocolate if you like it richer.
- Egg-Free: Sub in a flax egg (1 tablespoon ground flaxseed + 3 tablespoons water) if needed.
Look for high-quality butter and chocolate for the absolute best flavor, and don’t be afraid to mix up your caramel filling depending on what’s in your pantry. In summer, swap in a little berry jam for the caramel if you want a fresh twist—my kids go crazy for that!
Equipment Needed
- Mixing Bowls: One large for the dough, one small for melting chocolate.
- Hand Mixer or Stand Mixer: Both work, but I’m partial to my old hand mixer for cookies (less clean-up!)
- Baking Sheet: Standard half-sheet pan lined with parchment paper.
- Measuring Cups & Spoons: For accuracy—don’t eyeball flour, trust me.
- Small Saucepan: For melting caramel and cream together.
- Teaspoon or Cookie Scoop: For portioning the dough evenly.
- Cooling Rack: Essential for setting chocolate and caramel.
- Spatula: Flexible silicone spatula for scraping bowls.
If you don’t have a stand mixer, don’t worry—a sturdy wooden spoon does the trick with a little elbow grease. For melting chocolate, a microwave-safe bowl works if you’re short on time (just stir every 20 seconds). Parchment paper makes clean-up a breeze and keeps the cookies from sticking—my budget trick is to reuse the same sheet for multiple batches.
Keep your tools in good shape by washing the mixer attachments right away (caramel can be sticky!). If you’re just starting out, don’t stress over fancy gear—the basics get you there just fine.
Preparation Method
-
Preheat & Prep:
Preheat oven to 350°F (175°C). Line a baking sheet with parchment paper. Set out butter to soften if you haven’t already. This step keeps your cookies from sticking and makes clean-up a breeze. -
Mix the Dough:
In a large mixing bowl, cream together 1 cup (226g) unsalted butter and 2/3 cup (135g) sugar using a hand mixer on medium speed for 2-3 minutes, until light and fluffy. Add 1 egg and 2 teaspoons vanilla, beating until combined. Sprinkle in 2 1/4 cups (280g) flour and 1/2 teaspoon sea salt; mix on low until just combined and a soft dough forms. If dough feels too sticky, add an extra tablespoon of flour. -
Shape Cookies:
Using a cookie scoop or tablespoon, portion dough into 1-inch (2.5cm) balls. Roll between your palms for smoothness, then place 2 inches apart on the prepared baking sheet. (If dough is too soft, pop it in the fridge for 10 minutes.) -
Form Thumbprints:
Press your thumb or the back of a teaspoon gently into the center of each dough ball to create a well. Don’t press all the way through—just enough for a caramel pool later. -
Bake:
Bake cookies for 12-14 minutes, until edges are set and just starting to turn golden. Centers will look pale and soft—don’t overbake! If the wells puff up, gently press them again right out of the oven. -
Make Caramel Filling:
While cookies cool, melt 20 caramel candies with 2 tablespoons heavy cream in a small saucepan over low heat, stirring constantly (about 3 minutes). Caramel should be smooth and pourable. If it stiffens, add another splash of cream. -
Fill Thumbprints:
Spoon or pipe about 1/2 teaspoon of melted caramel into each cookie well. Let set for 5 minutes—caramel will thicken as it cools. -
Drizzle Chocolate:
Melt 1/2 cup (85g) chocolate chips with 1 teaspoon coconut oil in a microwave-safe bowl, stirring every 20 seconds until smooth. Use a fork or squeeze bottle to drizzle chocolate over each caramel-filled cookie. -
Finish with Sea Salt:
Before chocolate sets, sprinkle a pinch of flaky sea salt on top. This step is key for balancing the sweetness and bringing out flavor. -
Cool & Enjoy:
Transfer cookies to a wire rack to cool completely. Chocolate and caramel will set in about 15 minutes. Sneak one while they’re still warm for the ultimate gooey experience!
Troubleshooting Tips: If your cookies spread too much, chill the dough for 30 minutes before baking. Caramel too thick? Add a splash more cream. Chocolate not melting smoothly? Stir in a bit more coconut oil. These little tweaks can save a batch!
My personal efficiency trick: melt the caramel while cookies bake, and get the chocolate ready while you fill the thumbprints. Saves time and keeps everything moving.
Cooking Tips & Techniques
I’ve had my fair share of cookie fails, so here’s what I’ve learned to make Twix Thumbprint Cookies consistently tender and delicious:
- Use Room Temperature Ingredients: Butter and eggs blend better and make the dough smooth. Cold butter can cause uneven texture (been there, done that).
- Don’t Overmix: Once you add flour, mix just until combined. Overmixing makes cookies tough instead of tender.
- Chill the Dough: If your kitchen is warm or your dough feels sticky, a quick chill (10-30 minutes) keeps cookies from spreading too much.
- Perfect Thumbprint Wells: Press gently—too deep and caramel leaks, too shallow and you won’t get enough filling.
- Caramel Consistency: If caramel thickens too quickly, warm it briefly or add more cream. Hard caramel isn’t fun to bite into!
- Chocolate Drizzle: Melt chocolate slowly. Microwave is fine, but stir every 20 seconds. If it seizes up, a touch more oil saves it.
- Sea Salt Application: Sprinkle while chocolate is wet so salt sticks. (I learned this the hard way with a batch of bald cookies!)
- Batch Baking: Bake one tray at a time for even heat. If you must use two, rotate pans halfway through.
Timing is everything. Prep caramel and chocolate while cookies bake, then assemble while they’re still a little warm for best results. My multitasking tip: set up a little assembly line—kids love helping with the drizzle and salt!
Consistency comes from measuring flour correctly (spoon and level!) and keeping a close eye on oven temp. Trust your senses—cookies should smell sweet and buttery, and thumbprints should look pale, not brown. If you’re unsure, err on the side of slightly underbaked for a softer bite.
Variations & Adaptations
One of the best things about Twix Thumbprint Cookies is how easy it is to switch things up! Here are a few favorite twists:
- Gluten-Free: Use a 1:1 gluten-free flour blend. I’ve tried Bob’s Red Mill and the texture stays tender (no gritty cookies here!).
- Dairy-Free: Swap plant-based butter and coconut cream for dairy ingredients. Dark chocolate chips are usually dairy-free, but check your labels.
- Seasonal Swaps: In summer, sub the caramel for a dollop of berry jam or lemon curd. Adds a fresh, tangy twist!
- Nutty Version: Stir 1/2 cup finely chopped pecans or almonds into the dough for a crunchy surprise. I love this for holiday cookie trays!
- Flavor Customization: Add a pinch of cinnamon or espresso powder to the dough for warmth or depth. My personal favorite is a dash of espresso—it makes the chocolate pop.
- Different Cooking Methods: These bake best in a conventional oven, but I’ve had success in a toaster oven for small batches—just watch closely!
- Allergen Substitutions: Egg-free? Try a flax egg. Nut-free? Skip add-ins and use seed-based caramel if needed.
I once swapped out the caramel for homemade salted date caramel—so good and a little healthier! Don’t be afraid to experiment; these cookies are forgiving. You can even try white chocolate drizzle or add orange zest for a citrusy pop.
Serving & Storage Suggestions
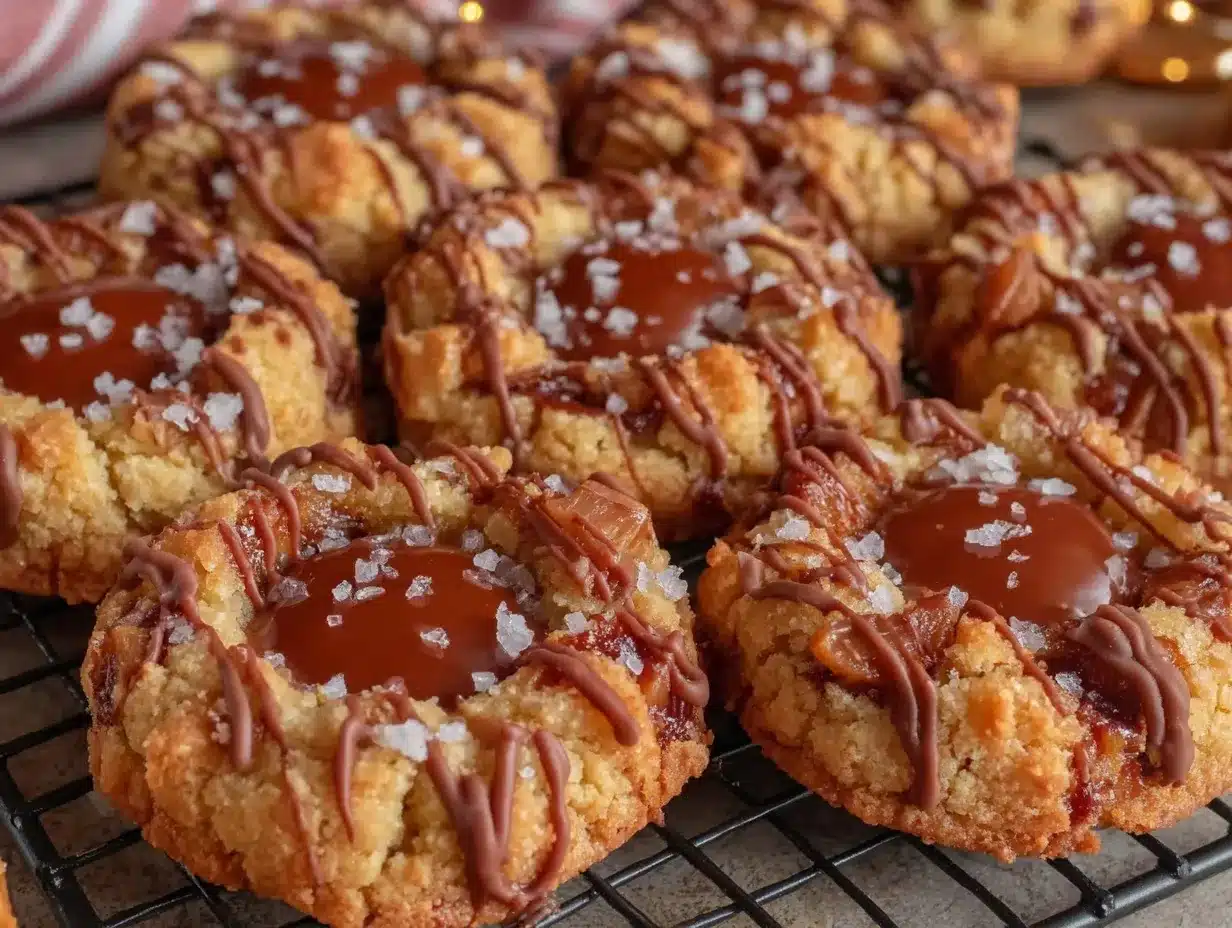
Twix Thumbprint Cookies with Caramel & Sea Salt are best served at room temperature, so the centers stay soft and gooey. Arrange on a pretty platter with a sprinkle of extra sea salt for a Pinterest-worthy presentation. They pair perfectly with a cup of coffee, cold milk, or even a scoop of vanilla ice cream.
For gifting, stack cookies in a cellophane bag tied with ribbon—they look adorable and travel well. I like to tuck a few into lunchboxes or offer them at bake sales (honestly, they always go first).
Storage: Store cookies in an airtight container at room temperature for up to 4 days. If you want to keep them longer, freeze in layers separated by parchment paper. Thaw at room temp—caramel and chocolate will firm up but stay tender.
To reheat (if you want that fresh-baked vibe), pop a cookie in the microwave for 5-8 seconds. The caramel gets gooey again and tastes just like day one! Flavors actually deepen overnight, so don’t worry if you stash a few away—they might be even better tomorrow.
Nutritional Information & Benefits
Each Twix Thumbprint Cookie is estimated at about 120 calories, with 7g fat, 15g carbohydrates, and 2g protein (based on a batch of 28 cookies). Butter provides healthy fats, and a touch of sea salt adds trace minerals. The homemade caramel can be adjusted for less sugar, and using dark chocolate boosts antioxidants.
If you make them gluten-free or dairy-free, the nutritional values shift but remain similar—just a touch lighter on saturated fat. These cookies contain wheat, dairy, and egg (unless adapted), so watch out for allergies.
I like to think of these as an occasional treat that brings joy—sometimes that’s just as important as any health stat. Enjoy in moderation, with a happy heart!
Conclusion
Twix Thumbprint Cookies with Caramel & Sea Salt are the kind of recipe you’ll reach for whenever you want to impress—or simply treat yourself to a little nostalgic sweetness. Their tender crumb, gooey center, and hint of salty crunch make every bite memorable. Customize them as you like, and don’t be afraid to try new flavors or adaptations—these cookies are forgiving and fun!
Personally, I love making these for family gatherings and gifting—there’s something special about sharing a cookie that tastes like pure comfort and a little bit of childhood magic. I hope you’ll give these a try and make them your own.
If you bake a batch, leave a comment below with your tweaks or tag me on social media. Let’s build a community of sweet memories, one cookie at a time. Happy baking!
FAQs
Can I use store-bought caramel sauce instead of melting caramel candies?
Absolutely! Just spoon a bit of thick caramel sauce into each thumbprint. If it’s too runny, chill the cookies after filling to help it set.
Do Twix Thumbprint Cookies freeze well?
Yes, they freeze beautifully. Lay them in a single layer, separated by parchment, and thaw at room temperature before serving.
What’s the best chocolate for drizzling?
I prefer semisweet chocolate chips for balance, but milk chocolate gives a true Twix flavor. Melt with a little coconut oil for shine.
How do I keep my thumbprints from losing their shape?
Chill the dough before baking and gently press the wells again right out of the oven if they puff up. Works every time!
Can I make these cookies without eggs?
Yes! Use a flax egg (1 tablespoon ground flaxseed plus 3 tablespoons water). The texture stays tender—just a bit denser than classic.
Pin This Recipe!
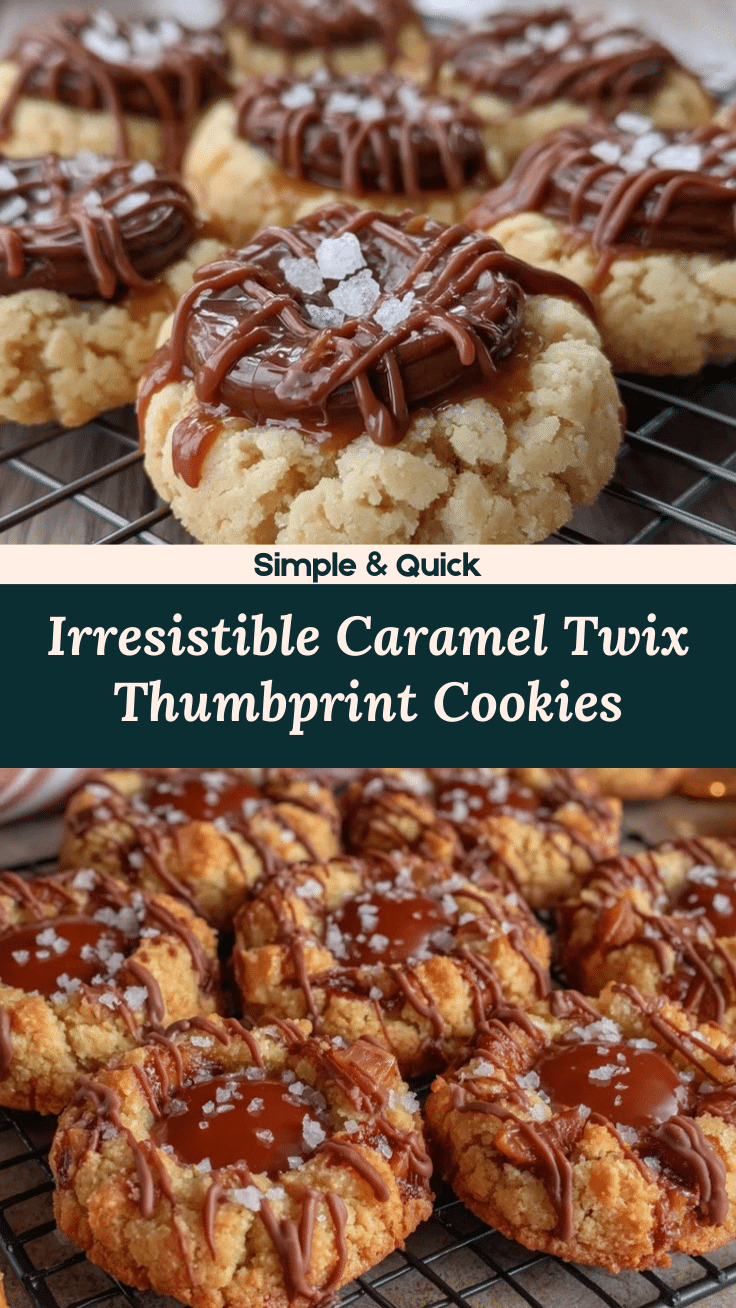
Twix Thumbprint Cookies with Caramel & Sea Salt

Tender, buttery thumbprint cookies filled with gooey caramel, drizzled with chocolate, and finished with a sprinkle of flaky sea salt. These homemade treats capture the nostalgic flavors of a Twix bar in a soft, melt-in-your-mouth cookie.
- Prep Time: 20 minutes
- Cook Time: 14 minutes
- Total Time: 45 minutes
- Yield: 28 cookies 1x
- Category: Dessert
- Cuisine: American
Ingredients
- 1 cup (2 sticks) unsalted butter, softened
- 2/3 cup granulated sugar
- 1 large egg, room temperature
- 2 teaspoons pure vanilla extract
- 2 1/4 cups all-purpose flour
- 1/2 teaspoon fine sea salt
- 20 soft caramel candies, unwrapped
- 2 tablespoons heavy cream
- Optional: 1/2 teaspoon vanilla extract (for caramel)
- 1/2 cup semisweet chocolate chips or chopped chocolate
- 1 teaspoon coconut oil or butter
- Flaky sea salt, for garnish
Instructions
- Preheat oven to 350°F (175°C). Line a baking sheet with parchment paper.
- In a large mixing bowl, cream together butter and sugar using a hand mixer on medium speed for 2-3 minutes, until light and fluffy.
- Add egg and vanilla extract, beating until combined.
- Sprinkle in flour and sea salt; mix on low until just combined and a soft dough forms. If dough feels too sticky, add an extra tablespoon of flour.
- Using a cookie scoop or tablespoon, portion dough into 1-inch balls. Roll between your palms for smoothness, then place 2 inches apart on the prepared baking sheet.
- Press your thumb or the back of a teaspoon gently into the center of each dough ball to create a well.
- Bake cookies for 12-14 minutes, until edges are set and just starting to turn golden. If the wells puff up, gently press them again right out of the oven.
- While cookies cool, melt caramel candies with heavy cream in a small saucepan over low heat, stirring constantly (about 3 minutes) until smooth and pourable. If it stiffens, add another splash of cream.
- Spoon or pipe about 1/2 teaspoon of melted caramel into each cookie well. Let set for 5 minutes.
- Melt chocolate chips with coconut oil in a microwave-safe bowl, stirring every 20 seconds until smooth. Drizzle chocolate over each caramel-filled cookie.
- Before chocolate sets, sprinkle a pinch of flaky sea salt on top.
- Transfer cookies to a wire rack to cool completely. Chocolate and caramel will set in about 15 minutes.
Notes
Chill dough if your kitchen is warm or dough feels sticky to prevent spreading. For gluten-free, use a 1:1 gluten-free flour blend. For dairy-free, substitute plant-based butter and coconut cream. Store cookies in an airtight container at room temperature for up to 4 days or freeze for longer storage. Drizzle chocolate while cookies are still slightly warm for best results.
Nutrition
- Serving Size: 1 cookie
- Calories: 120
- Sugar: 8
- Sodium: 60
- Fat: 7
- Saturated Fat: 4
- Carbohydrates: 15
- Protein: 2
Keywords: Twix thumbprint cookies, caramel cookies, sea salt cookies, homemade Twix, chocolate drizzle cookies, easy cookie recipe, holiday cookies, kid-friendly dessert


