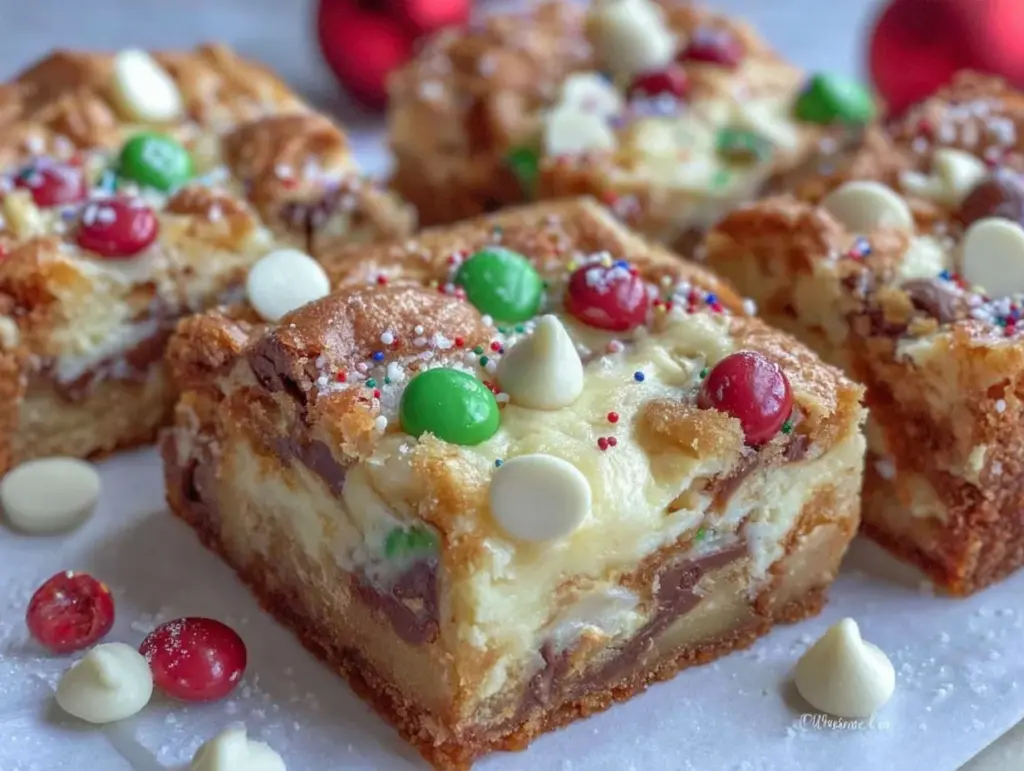
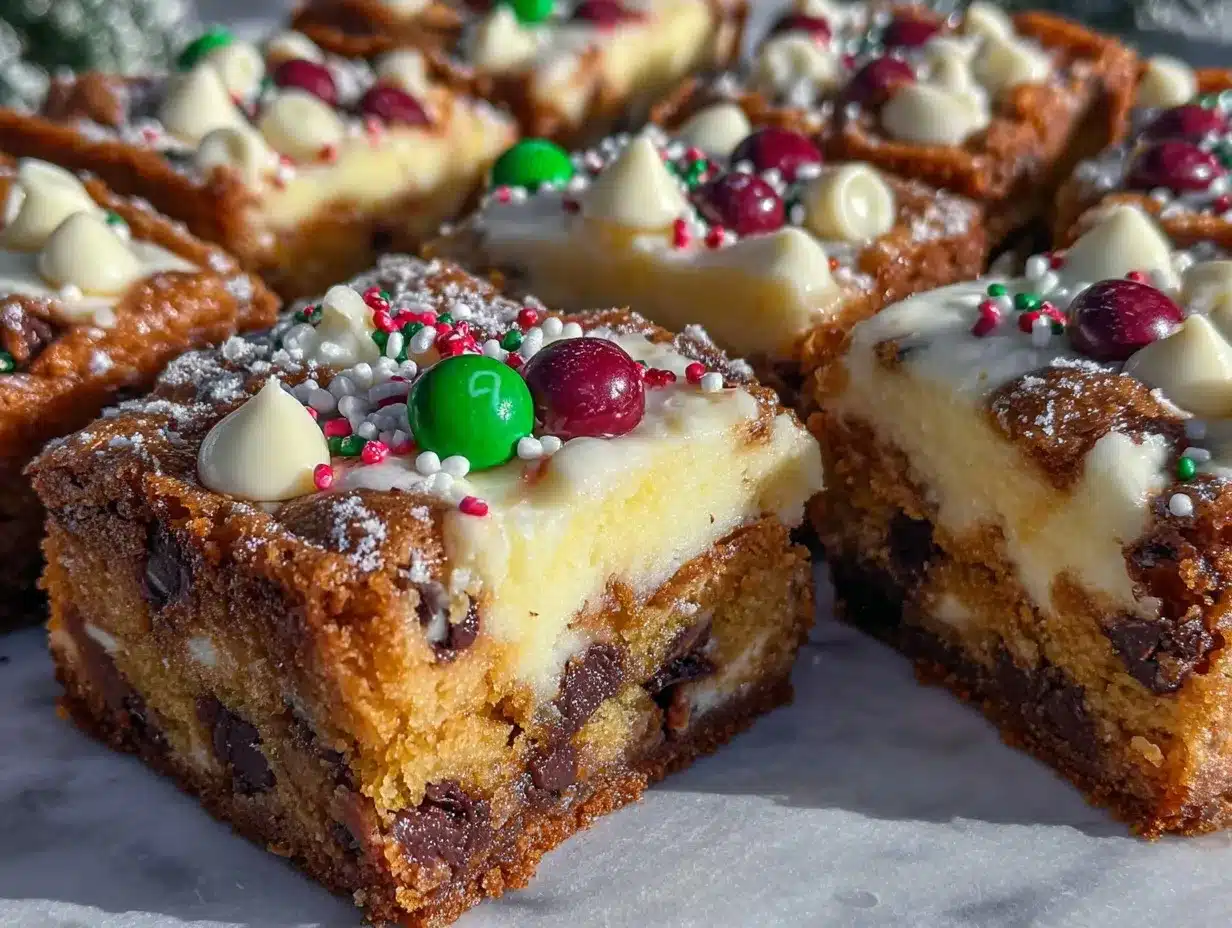
Let me paint the scene for you: the aroma of buttery dough, warm vanilla, and melting chocolate candies swirling around the kitchen, wrapping everyone in a cozy hug – that’s exactly what happens every time I bake these Christmas Cookie Bars with Colorful Candy Crunch. The first time I pulled a pan from the oven, I could barely get them cooled before my kids were sneaking pieces, crumbs trailing behind like a trail of holiday mischief. Honestly, the way the red, green, and white candies pop against the golden cookie base is enough to make you pause, take a breath, and soak in that pure, nostalgic comfort.
Years ago, when I was knee-high to a grasshopper, my grandma would whip up cookie bars for every holiday. I remember watching her press the dough into her old metal pan, always insisting that the secret was a pinch more salt than the recipe called for (she was right). Fast forward to a rainy December weekend when I was determined to create a treat that was festive, dangerously easy, and just a little bit over-the-top for a Pinterest-worthy cookie platter. I stumbled on the idea of loading bars with crushed candies for extra crunch, and let me tell you, I wish I’d thought of this years ago!
My family can’t get enough of these Christmas Cookie Bars with Colorful Candy Crunch. They’re the kind of treat that gets requested for school parties, makes neighbors smile when tucked into holiday tins, and even gets the thumbs-up from picky eaters (you know who you are). Whether you’re looking for something to brighten your cookie board, a sweet treat for a cozy movie night, or a recipe that’s just fun to make with kids, you’re in for a real treat. I’ve tested these bars more times than I care to admit (all in the name of research, of course), and they’ve become a staple for family gatherings and last-minute gifting. Trust me – this recipe feels like a warm hug, and you’re going to want to bookmark it for every festive season!
Why You’ll Love This Recipe
If you’ve been searching for a holiday dessert that’s easy, festive, and absolutely irresistible, these Christmas Cookie Bars with Colorful Candy Crunch are about to become your new favorite. After making dozens of batches over the years (including a few late-night experiments that didn’t quite go as planned), I’ve nailed down the secrets that make these cookie bars a true crowd-pleaser. Here’s why you’re going to fall in love:
- Quick & Easy: Comes together in under 40 minutes – perfect for busy holiday schedules or sudden sweet cravings.
- Simple Ingredients: No fancy grocery runs required; most items are pantry staples you already have.
- Perfect for Gatherings: These bars are ideal for potlucks, cookie swaps, or cozy nights by the fireplace.
- Crowd-Pleaser: Kids and adults alike rave about the chewy texture and candy crunch (I’ve watched grown-ups sneak seconds when they thought no one was looking).
- Unbelievably Delicious: The mix of golden cookie base and crunchy, colorful candies is a combo you’ll crave all season.
What sets this recipe apart? For starters, the perfectly balanced dough (a touch more brown sugar for chewiness, a hint of almond extract for depth), and the secret step of pressing extra candies on top for that bakery-style look. I’ve tested versions with different candy blends, and honestly, this mix of classic M&Ms and crushed peppermint bits is my personal favorite. It’s comfort food in cookie bar form – fast, festive, and so much fun to make.
Whether you’re impressing guests or just trying to bring a little joy to a gray winter day, these Christmas Cookie Bars with Colorful Candy Crunch are the kind of treat that makes you close your eyes and savor every bite. No stress, no fuss – just a simple recipe that turns a regular day into something worth celebrating!
What Ingredients You Will Need
This recipe uses simple, wholesome ingredients to deliver bold flavor and a satisfyingly chewy texture, all dressed up with a festive candy crunch. Most items are pantry staples, and you can easily swap ingredients to fit your tastes or dietary needs. Here’s what you’ll need:
- For the Cookie Bar Base:
- 2 1/4 cups (280g) all-purpose flour – gives structure and chew
- 1/2 teaspoon baking soda – helps bars rise and stay soft
- 1/2 teaspoon fine sea salt – brings out the flavors (I always use Morton’s)
- 1 cup (226g) unsalted butter, softened – for rich, buttery flavor
- 1 1/4 cups (250g) packed light brown sugar – adds moisture and caramel notes
- 1/4 cup (50g) granulated sugar – balances sweetness
- 2 large eggs, room temperature – binds everything together
- 2 teaspoons pure vanilla extract – classic cookie aroma
- 1/2 teaspoon almond extract (optional) – provides a subtle, festive twist
- For the Candy Crunch:
- 1 cup (175g) red and green chocolate candies (like M&Ms) – for color and crunch
- 1/2 cup (75g) crushed peppermint candies or candy canes – adds a bright, minty kick
- 1/2 cup (90g) mini white chocolate chips – creamy sweetness and extra holiday flair
- Optional Toppings:
- 1/3 cup (60g) colorful sprinkles – for extra festive fun
Ingredient Tips: If you want gluten-free bars, swap in a 1-for-1 gluten-free flour blend (I’ve had great results with King Arthur’s). For dairy-free, use plant-based butter and dairy-free chocolate candies. In a pinch, you can swap out the peppermint for crushed pretzels or nuts – just as crunchy and delicious! During summer, you can switch up the candy colors for a different vibe. I always stick with classic brands for consistency, but feel free to use your favorites.
Every ingredient plays its part: the butter and sugars make the bars chewy and rich, while the candies bring the crunch and color that make these cookie bars a show-stopper on any holiday dessert table.
Equipment Needed
You don’t need any fancy gadgets to whip up these Christmas Cookie Bars with Colorful Candy Crunch. Here’s what I use, plus a few handy alternatives:
- 9×13-inch baking pan (metal preferred for even browning; glass works too, just add 2 extra minutes to baking time)
- Large mixing bowl (sturdy enough for thick dough)
- Hand mixer or stand mixer (I’ve made these with just a wooden spoon and elbow grease – it works!)
- Measuring cups and spoons (accuracy means consistent bars)
- Rubber spatula (for getting every last bit of dough)
- Small zip-top bag and rolling pin (for crushing peppermint candies – or use a heavy mug)
- Cooling rack (optional, but helps bars cool evenly)
Maintenance tip: If you use nonstick pans, check for scratches that can affect baking. I’ve picked up budget-friendly pans at Target and they’ve lasted for years. For mixers, wipe down attachments right after use – dried dough is a pain to clean! If you’re baking with kids, let them crush the candies (under supervision – those flying bits are no joke). Honestly, the simpler the tools, the easier cleanup is, which means more time for sneaking an extra cookie bar.
Preparation Method
- Prep your pan: Preheat your oven to 350°F (175°C). Line a 9×13-inch pan with parchment paper, leaving an overhang so you can lift the bars out later. Lightly grease the paper with butter or nonstick spray (trust me, it makes for easy removal).
- Mix dry ingredients: In a large bowl, whisk together 2 1/4 cups (280g) flour, 1/2 teaspoon baking soda, and 1/2 teaspoon salt. Set aside. This keeps your bars light and helps prevent overmixing.
- Cream butter and sugars: In a separate bowl, beat 1 cup (226g) softened butter, 1 1/4 cups (250g) brown sugar, and 1/4 cup (50g) granulated sugar until light and fluffy (about 2-3 minutes). You’ll see it turn pale and fluffy. If your butter is too cold, it won’t blend well – just let it sit a few more minutes to soften.
- Add eggs and extracts: Beat in 2 large eggs, one at a time, mixing well after each. Add 2 teaspoons vanilla extract and 1/2 teaspoon almond extract (if using). Scrape down the sides so everything gets incorporated.
- Combine wet and dry: Gradually add the flour mixture to the wet ingredients, mixing on low speed just until combined. Don’t overmix – a few streaks of flour are okay. The dough will be thick and sticky.
- Fold in candies: Gently stir in 3/4 cup (130g) chocolate candies, 1/2 cup (75g) crushed peppermint, and 1/2 cup (90g) mini white chocolate chips. Reserve a handful of candies for topping (for that bakery look).
- Spread and top: Press the dough evenly into your prepared pan. Sprinkle remaining candies and sprinkles on top, pressing them lightly into the dough so they stick.
- Bake: Bake for 24-28 minutes, or until the edges are golden and the center is just set (a toothpick should come out with a few moist crumbs, not wet batter). If using glass, add 2-3 more minutes. The top will be shiny and slightly crackled.
- Cool: Let the bars cool in the pan on a rack for at least 1 hour. If you rush this step, you risk messy slices (I’ve learned the hard way!).
- Slice and serve: Use the parchment overhang to lift the bars out. Cut into squares or rectangles, depending on your mood. For cleaner slices, use a sharp knife and wipe it between cuts.
Troubleshooting: Bars too gooey? Bake 2-3 minutes longer. Candies sinking? Press extra on top before baking. Dough too crumbly? Add 1 tablespoon milk. For best results, work quickly once you add the candies – they can start to melt if the kitchen is warm. And don’t forget to taste the dough (no judgment here)!
Cooking Tips & Techniques
After years of holiday baking, I’ve picked up some tricks that make these Christmas Cookie Bars with Colorful Candy Crunch turn out perfect every time. Here’s what I’ve learned – sometimes the hard way!
- Room temperature ingredients are key. Cold eggs or butter won’t blend as smoothly, and the dough can turn out dense.
- Don’t overmix once you add the flour – if you do, the bars get tough instead of chewy. When in doubt, stop early.
- Even spreading matters. Use a spatula or damp fingers to press the dough evenly into the pan, especially the corners. Uneven bars bake unevenly, and nobody likes dry edges.
- Reserve some candies for topping. I learned this after my first batch – all the candies disappeared inside, and the top looked plain. Now, I always press extras on top for a festive look.
- Baking time is crucial. Ovens vary, so start checking at 24 minutes. The edges should be golden, but the center just set. Overbaked bars lose their chewiness (I’ve made that mistake more than once).
- Let bars cool completely before slicing. Warm bars will fall apart. If you’re in a hurry, pop the pan in the fridge for 20 minutes.
- Multitasking tip: While bars are baking, crush your peppermint candies and set out toppings. It makes assembly quicker (and keeps little helpers busy).
If you mess up (I’ve had my share of burnt edges and underbaked middles), don’t stress – crumbled bars make amazing ice cream toppings. For consistent results, always measure flour by spooning and leveling, not scooping (it really does matter!). And if you want extra thick bars, use a smaller pan and add a few minutes to the bake time. It’s all about finding what works best for you and your kitchen.
Variations & Adaptations
The beauty of these Christmas Cookie Bars with Colorful Candy Crunch is how easily you can switch things up. Here are some of my favorite tweaks:
- Gluten-Free: Use a 1-for-1 gluten-free flour blend instead of all-purpose. I’ve tested King Arthur’s and Bob’s Red Mill – both work well and keep the bars chewy.
- Nutty Twist: Add 1/2 cup (60g) chopped pecans or walnuts to the dough. It’s a hit with adults, and the extra crunch is so satisfying.
- Seasonal Swap: For Easter, use pastel M&Ms and swap peppermint for mini marshmallows. In summer, try lemon zest and yellow candies for a sunny vibe.
- Dairy-Free: Replace butter with plant-based sticks, and use dairy-free chocolate chips. You won’t miss a thing.
- Spiced Bars: Add 1/2 teaspoon ground cinnamon and a dash of nutmeg to the flour for a warm, spicy twist. I tried this last Christmas and it was a hit with my cinnamon-loving neighbor.
If you prefer a softer texture, reduce the flour by 1/4 cup. For crunchier edges, use a metal pan and bake an extra 2 minutes. When it comes to allergies, always check your candy labels – some brands use nuts or gluten. I’ve made these with sunflower seed butter for a nut-free version, and honestly, it’s just as delicious. Don’t be afraid to get creative – that’s half the fun!
Serving & Storage Suggestions
These Christmas Cookie Bars with Colorful Candy Crunch are best served at room temperature, where the flavors and textures shine. I love piling them high on a holiday platter with a sprinkle of extra candy on top for a Pinterest-worthy look. Pair them with a mug of hot cocoa, coffee, or even a glass of cold milk – they’re a perfect match.
If you’re serving a crowd, slice the bars small so everyone can grab a piece. For an extra special touch, wrap individual bars in cellophane and tie with a ribbon for homemade holiday gifts. They also look gorgeous tucked into lunch boxes or stacked in cookie tins for sharing.
Storage: Store bars in an airtight container at room temperature for up to 4 days. For longer storage, refrigerate for up to a week – just let them come to room temp before serving. You can also freeze the bars (layered with parchment) for up to 2 months. Thaw overnight in the fridge or for an hour at room temperature. Reheat briefly in the microwave if you like warm, gooey bars. Honestly, the flavors get even better after a day or two – the candies soften slightly, and the cookie base becomes even more chewy. If you ever have leftovers (rare at my house!), they make an excellent base for ice cream sundaes or holiday trifles.
Nutritional Information & Benefits
Here’s an estimate for each serving (1 bar out of 24):
| Calories | ~185 |
|---|---|
| Fat | 8g |
| Carbohydrates | 26g |
| Sugar | 17g |
| Protein | 2g |
Health Benefits: The recipe offers a little boost from eggs and nuts (if added), and you can lower sugar by using dark chocolate candies. Using real butter and pure extracts keeps things wholesome. For gluten-free or dairy-free diets, simple swaps make the bars accessible. Just watch for potential allergens in candies if you’re baking for a crowd – peanuts, dairy, and gluten are common. From a wellness perspective, these bars are a treat meant for sharing and celebration. I like to remind myself that the best part of holiday baking is making memories – and yes, sneaking a bite or two!
Conclusion
If you ask me, these Christmas Cookie Bars with Colorful Candy Crunch are the kind of recipe you’ll keep coming back to. They’re fun, festive, and bring people together over laughter and crumbs (because let’s face it, someone always snags the corner pieces). Whether you want to customize with your favorite candies, swap out flavors, or add a little spice, this recipe is endlessly adaptable. Honestly, I love how these bars turn an ordinary day into a celebration.
I hope you give these a try, and make them your own – add your favorite twists, share with friends, and snap a photo for your Pinterest board. If you do, please leave a comment below and let me know how they turned out, or tag me on social media with your creations. There’s nothing better than seeing these bars spread a little holiday cheer. Wishing you happy baking, sweet moments, and plenty of candy crunch!
FAQs
Can I make Christmas Cookie Bars with Colorful Candy Crunch ahead of time?
Absolutely! Bake the bars up to 2 days in advance and store in an airtight container. The flavors actually get better as they sit.
What’s the best way to crush peppermint candies without making a mess?
Place candies in a zip-top bag and gently pound with a rolling pin. Do it on a cutting board for easy cleanup – and watch out for flying bits!
Can I freeze these cookie bars?
Yes, these bars freeze beautifully. Wrap tightly in plastic and store up to 2 months. Thaw overnight in the fridge or at room temperature.
Are these bars gluten-free?
Not by default, but you can use a gluten-free flour blend for a delicious gluten-free version. Always check your candy labels for hidden gluten.
Can I use different kinds of candies?
For sure! Swap in your favorite chocolate candies, chopped nuts, or even dried fruit for a unique twist. The recipe is super flexible – just have fun with it!
Pin This Recipe!
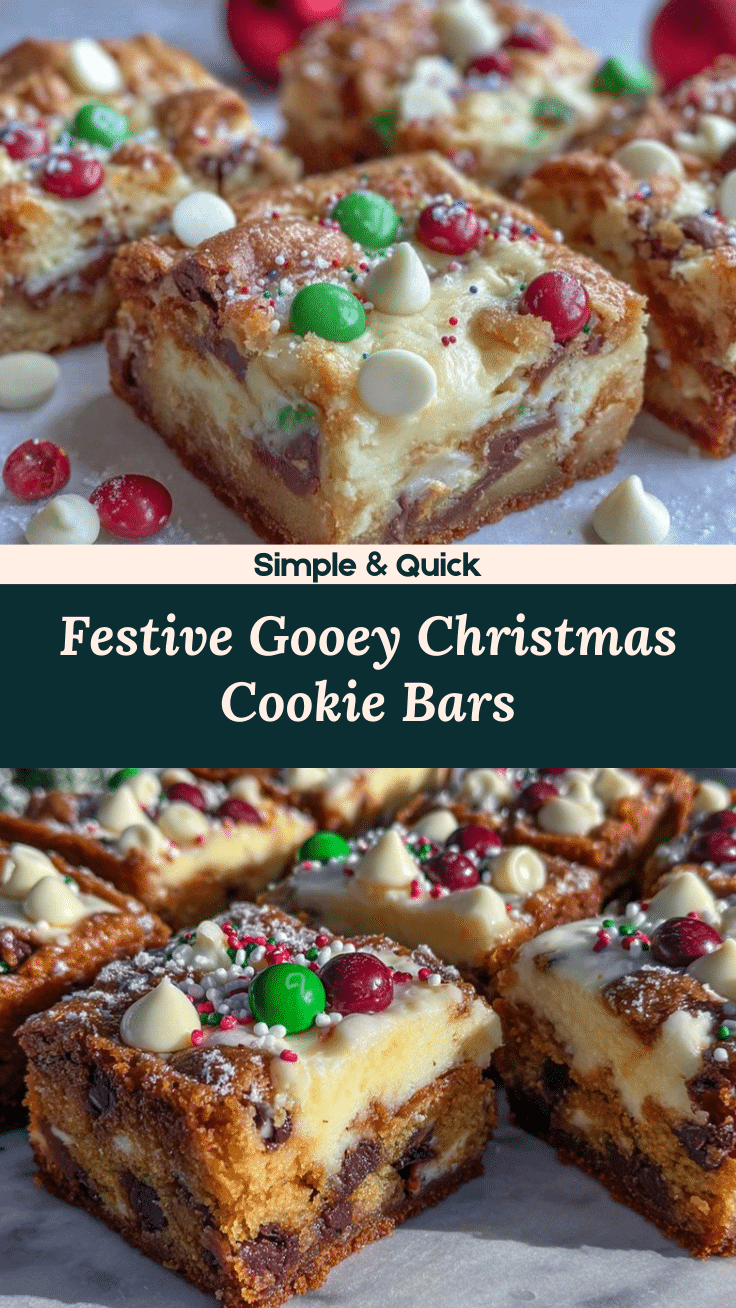
Christmas Cookie Bars Easy Festive Recipe with Candy Crunch

These Christmas Cookie Bars are chewy, buttery, and loaded with colorful chocolate candies, crushed peppermint, and white chocolate chips for a festive holiday treat. Quick to make and perfect for parties, gifting, or cozy nights in.
- Prep Time: 15 minutes
- Cook Time: 25 minutes
- Total Time: 40 minutes
- Yield: 24 bars 1x
- Category: Dessert
- Cuisine: American
Ingredients
- 2 1/4 cups all-purpose flour
- 1/2 teaspoon baking soda
- 1/2 teaspoon fine sea salt
- 1 cup unsalted butter, softened
- 1 1/4 cups packed light brown sugar
- 1/4 cup granulated sugar
- 2 large eggs, room temperature
- 2 teaspoons pure vanilla extract
- 1/2 teaspoon almond extract (optional)
- 1 cup red and green chocolate candies (such as M&Ms), divided
- 1/2 cup crushed peppermint candies or candy canes
- 1/2 cup mini white chocolate chips
- 1/3 cup colorful sprinkles (optional for topping)
Instructions
- Preheat oven to 350°F (175°C). Line a 9×13-inch pan with parchment paper, leaving an overhang. Lightly grease the paper.
- In a large bowl, whisk together flour, baking soda, and salt. Set aside.
- In a separate bowl, beat softened butter, brown sugar, and granulated sugar until light and fluffy (2-3 minutes).
- Beat in eggs one at a time, then add vanilla and almond extract (if using). Scrape down the sides as needed.
- Gradually add the flour mixture to the wet ingredients, mixing on low speed just until combined. Do not overmix.
- Gently fold in 3/4 cup chocolate candies, crushed peppermint, and mini white chocolate chips. Reserve remaining candies for topping.
- Press dough evenly into prepared pan. Sprinkle reserved candies and sprinkles on top, pressing lightly.
- Bake for 24-28 minutes, or until edges are golden and center is just set. If using a glass pan, bake 2-3 minutes longer.
- Cool in pan on a rack for at least 1 hour.
- Lift bars out using parchment overhang. Slice into squares or rectangles. For cleaner cuts, use a sharp knife and wipe between slices.
Notes
For gluten-free bars, use a 1-for-1 gluten-free flour blend. Dairy-free butter and chocolate chips work well for substitutions. Reserve extra candies for topping to keep bars colorful. Let bars cool completely before slicing for neat squares. Bars freeze well for up to 2 months.
Nutrition
- Serving Size: 1 bar
- Calories: 185
- Sugar: 17
- Sodium: 80
- Fat: 8
- Saturated Fat: 5
- Carbohydrates: 26
- Fiber: 0.5
- Protein: 2
Keywords: Christmas cookie bars, holiday dessert, festive cookies, candy crunch, easy cookie bars, peppermint, M&Ms, white chocolate, party treats, baking


