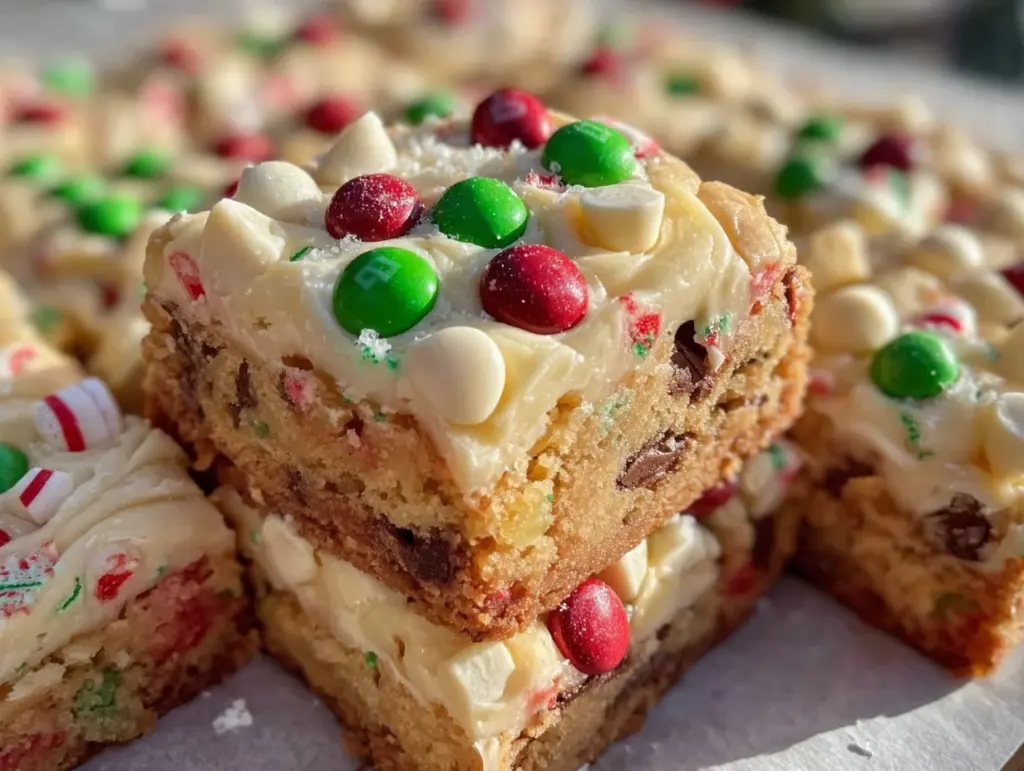
Let me paint a picture for you: the kitchen is humming with holiday cheer, and the sweet aroma of sugar, butter, and vanilla is swirling through the air—so much so that it feels like Christmas itself is baking right alongside you. The moment that vibrant green batter hits the pan, you just know something magical is about to come out of the oven. The first time I whipped up these Festive Grinch Christmas Cookie Bars with Creamy White Chocolate Frosting, it was a snowy afternoon, and honestly, I was just trying to bring a little whimsy to our annual cookie swap.
That first bite—soft, chewy, and bursting with playful sweetness—was the kind of moment where you pause, take a deep breath, and just smile because you know you’re onto something truly special. These bars aren’t just another Christmas treat. They’re a nostalgic nod to childhood, inspired by those classic Grinch tales (I was knee-high to a grasshopper when I first heard the story!), and they bring out the kid in everyone. My family couldn’t stop sneaking them off the cooling rack (and I can’t really blame them). Even my skeptical aunt, who’s normally a gingerbread purist, was instantly hooked and asked for the recipe.
What I love most is how these Grinch Christmas Cookie Bars always seem to turn any gathering into a full-blown celebration. They’re perfect for potlucks, classroom parties, or just brightening up your Pinterest cookie board. Honestly, I wish I’d discovered this dangerously easy recipe years ago—it’s now a staple for family gatherings, gifting, and those cozy nights when you want comfort wrapped in a whimsical, green package. Trust me, after a few rounds of “testing” (in the name of research, of course), these bars feel like a warm hug in cookie form. You’re going to want to bookmark this one.
Why You’ll Love This Recipe
After years of baking for family, friends, and the occasional bake sale showdown, I’ve got a pretty good sense of what makes a recipe stand out. These Grinch Christmas Cookie Bars with Creamy White Chocolate Frosting aren’t just festive—they’re a tried-and-true crowd-pleaser that’s been through plenty of taste tests, tweaks, and holiday shenanigans.
- Quick & Easy: These bars come together in under 45 minutes, so you can whip them up even when your schedule is packed (trust me, they save you during last-minute holiday prep).
- Simple Ingredients: You don’t need anything fancy—just pantry basics and a few festive extras. Most of the time, I have everything on hand, which is a lifesaver.
- Perfect for Parties: I love bringing these to potlucks, cookie exchanges, or even classroom celebrations. They’re always the first to disappear from the dessert table!
- Crowd-Pleaser: Both kids and adults go wild for these bars. Something about that Grinch-green color and creamy frosting makes them irresistible.
- Unbelievably Delicious: The texture is soft and chewy, the flavor is sweet with a hint of vanilla, and the white chocolate frosting adds the perfect creamy finish.
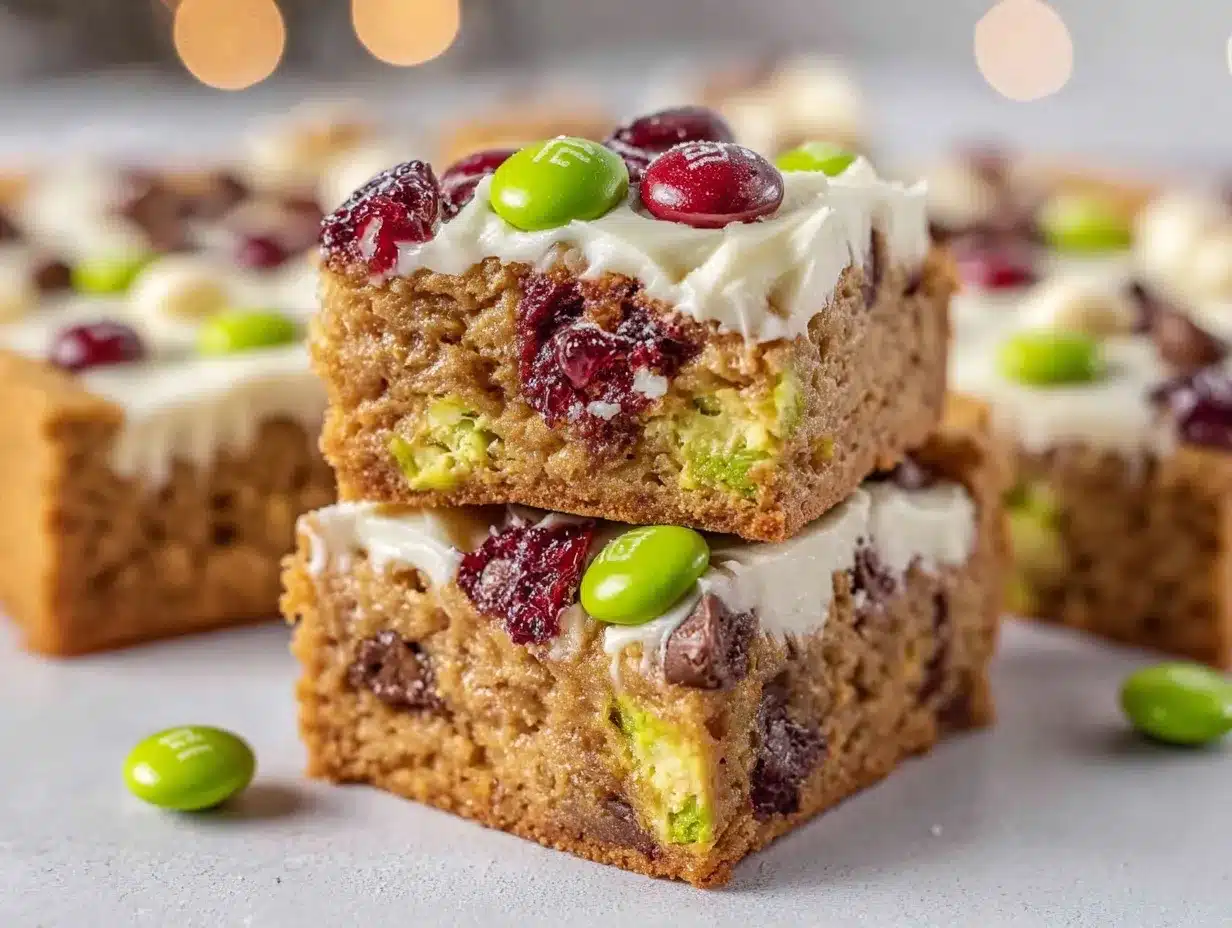
What truly sets this recipe apart is the vibrant color (hello, Grinch green!), the playful heart-shaped sprinkles, and the luscious, homemade white chocolate frosting. I use a dash of gel food coloring for the most vivid shade, and a splash of almond extract for a subtle twist. No neon flavor here—just pure, nostalgic comfort with a whimsical spin.
This isn’t just another cookie bar—it’s the kind that makes you close your eyes after the first bite. It’s comfort food for holiday lovers, but with a fun, Pinterest-worthy look. Whether you’re impressing guests or just making an ordinary day feel special, these bars deliver. They’re my go-to for turning any moment into a memory, and honestly, I can’t recommend them enough.
What Ingredients You Will Need
This recipe uses simple, wholesome ingredients to deliver bold flavor and that signature Grinch-green hue without any fuss. If you’re like me, you’ll find most of these items right in your pantry or fridge—no wild goose chase for specialty foods required.
- For the Cookie Bars:
- 2 1/4 cups (280g) all-purpose flour (King Arthur is my go-to for consistent results)
- 1 cup (220g) unsalted butter, softened (room temp for easy mixing)
- 1 1/4 cups (250g) granulated sugar
- 1/2 cup (100g) light brown sugar, packed
- 2 large eggs, room temperature
- 2 tsp vanilla extract (I love Nielsen-Massey for its rich flavor)
- 1/4 tsp almond extract (optional, but adds a subtle depth)
- 1/2 tsp baking soda
- 1/2 tsp salt
- Green gel food coloring (Wilton or AmeriColor for vibrant shades)
- 1/2 cup (90g) white chocolate chips (optional for extra sweetness)
- Heart-shaped red sprinkles (for classic Grinch style)
- For the Creamy White Chocolate Frosting:
- 1/2 cup (110g) unsalted butter, softened
- 4 oz (115g) cream cheese, softened
- 1 1/2 cups (180g) powdered sugar, sifted
- 4 oz (115g) white chocolate, melted and cooled
- 1/2 tsp vanilla extract
- Pinch of salt
- 1-2 tbsp milk (as needed for consistency)
Ingredient notes: For a gluten-free option, swap the all-purpose flour with your favorite blend (Bob’s Red Mill works well). If you need dairy-free, use a dairy-free butter and cream cheese alternative, and check your white chocolate chips for vegan certification. In a pinch, regular green food coloring works, but gel creates the brightest hue (without watering down your dough).
Sometimes I toss in extra white chocolate chips or switch the almond extract for peppermint during December—it’s a fun way to keep things fresh. Feel free to experiment with heart sprinkles, but the classic red ones really make these bars pop for Christmas!
Equipment Needed
- 9×13-inch (23×33 cm) baking pan (glass or metal both work—just adjust baking time slightly for glass)
- Mixing bowls (one large, one medium)
- Hand mixer or stand mixer (I’ve done it both ways; hand mixer works fine if you don’t mind a little workout)
- Rubber spatula (for folding and spreading—my favorite tool for getting every last bit of batter)
- Measuring cups and spoons (accuracy matters for perfect texture)
- Whisk (for mixing dry ingredients)
- Small saucepan (for melting white chocolate)
- Offset spatula or butter knife (for frosting the bars)
- Parchment paper (optional, but makes lifting bars from the pan a breeze)
If you don’t have a stand mixer, don’t sweat it—a sturdy whisk and some elbow grease will do the trick. For melting white chocolate, a microwave works in short bursts if you watch closely. I’ve had good luck with budget-friendly pans from Target, just make sure they’re not too thin to avoid uneven baking. Give your mixer beaters and spatulas a quick rinse between batter and frosting to keep things tidy. Trust me, a little prep makes cleanup way easier!
Preparation Method
- Prep your pan and ingredients: Line a 9×13-inch (23×33 cm) baking pan with parchment paper (leave a little overhang for easy removal) and lightly grease. Preheat your oven to 350°F (175°C). Set out butter, cream cheese, and eggs so they’re all room temp.
- Mix dry ingredients: In a medium bowl, whisk together 2 1/4 cups (280g) flour, 1/2 tsp baking soda, and 1/2 tsp salt. Set aside.
- Cream butter and sugars: In a large mixing bowl, beat 1 cup (220g) butter with 1 1/4 cups (250g) granulated sugar and 1/2 cup (100g) brown sugar until light and fluffy—about 2-3 minutes. You’ll know it’s ready when it’s pale and fluffy (don’t rush this; it really helps the texture).
- Add eggs and extracts: Beat in 2 eggs, one at a time, mixing well after each. Stir in 2 tsp vanilla and 1/4 tsp almond extract (if using).
- Color your batter: Add green gel food coloring, a few drops at a time, until you get that perfect Grinch shade. Start with 1/4 tsp, mix, and add more if needed. It should be vivid but not neon.
- Combine wet and dry: Gradually mix in the dry ingredients, scraping the bowl as you go. Fold in 1/2 cup (90g) white chocolate chips if desired. Batter will be thick.
- Spread and bake: Scoop batter into your prepared pan and spread evenly with a spatula. Sprinkle heart-shaped sprinkles over the top (save some for garnish if you like). Bake for 22-28 minutes, until edges are golden and a toothpick comes out clean. If using a glass pan, check at 25 minutes—sometimes it needs a couple extra minutes.
- Cool completely: Let bars cool in the pan for 10 minutes, then use the parchment to lift them onto a wire rack. Cool fully before frosting (otherwise your frosting will melt—learned that the hard way).
- Make the frosting: Melt 4 oz (115g) white chocolate in a microwave-safe bowl or small saucepan, stirring every 20 seconds until smooth. Cool slightly. In a bowl, beat 1/2 cup (110g) butter and 4 oz (115g) cream cheese until fluffy. Add melted white chocolate, 1 1/2 cups (180g) powdered sugar, 1/2 tsp vanilla, and a pinch of salt. Beat until smooth, adding 1-2 tbsp milk for spreadable consistency.
- Frost and decorate: Spread frosting evenly over cooled bars. Add more heart-shaped sprinkles for classic Grinch style.
- Cut and serve: Slice into 24 squares (or larger bars for extra indulgence). Wipe your knife between cuts for neat edges.
Troubleshooting: If bars seem too soft, let them cool a little longer—they firm up as they sit. If icing is runny, chill it for 5 minutes before spreading. For extra chewy bars, don’t overbake—the edges should just turn golden.
Efficiency tip: Prep your frosting while the bars bake. Clean as you go so you’re ready for decorating as soon as the bars cool. The green batter is thick, so just nudge it gently into the corners.
Cooking Tips & Techniques
Over the years, I’ve learned a few tricks (sometimes the hard way) to guarantee the best Grinch Christmas Cookie Bars every time. First off, always make sure your butter and eggs are truly at room temperature—cold ingredients make for a dense, uneven batter (one time my bars baked up lumpy, and I’m still not over it).
When adding food coloring, go slow and mix thoroughly. Gel food coloring packs a punch, so a tiny amount goes a long way—too much and you’ll end up with cookie bars that look more swamp than Grinch. I’ve had kids giggle at neon green bars, but trust me, a balanced shade is much more appetizing.
For the frosting, melt white chocolate gently and let it cool before mixing with butter and cream cheese. If it’s too hot, the frosting separates (don’t ask me how many batches I’ve had to redo). Beat your frosting until it’s fluffy and smooth; if it’s too stiff, a splash of milk works wonders.
Timing is everything: bake just until the edges are golden and the center looks set. Overbaking leads to dry bars, while underbaking can make them gooey (not in a good way). If you’re multitasking—like prepping the frosting while the bars bake—set a timer so you don’t forget them in the oven (been there, burnt that).
And finally, don’t skimp on the sprinkles! Press them gently into the batter before baking so they stick. If you frost while bars are even slightly warm, the frosting will melt and slide. Patience pays off with a picture-perfect finish every time.
Variations & Adaptations
There’s plenty of room to make these Grinch Christmas Cookie Bars your own—trust me, I’ve tested more versions than I can count. Here are some of my favorite twists:
- Gluten-Free: Swap the all-purpose flour for a 1:1 gluten-free baking blend (Bob’s Red Mill is solid). Bars stay soft and chewy, no weird aftertaste.
- Vegan/Dairy-Free: Use plant-based butter and cream cheese, and check your white chocolate for dairy-free certification. For eggs, try flaxseed meal (1 tbsp flax + 2.5 tbsp water per egg)—it works surprisingly well!
- Peppermint Twist: Replace almond extract with peppermint extract, and sprinkle crushed candy canes on top for a wintery vibe.
- Seasonal Swaps: For spring, swap green coloring for pastel shades and use flower-shaped sprinkles. For Halloween, go orange and black with chocolate chips.
- Flavor Add-Ins: Stir in mini marshmallows, chopped nuts, or a handful of festive M&Ms. My personal favorite is adding pistachio pieces for a little crunch.
If you’re baking for someone with nut allergies, skip the almond extract and double up on vanilla. For extra thick bars, use a smaller pan (8×8-inch) and increase baking time by 5-7 minutes. I once tried swirling raspberry jam into the batter—delicious but a little messy, so spread thinly if you go that route. There’s no wrong way to Grinch-ify these bars!
Serving & Storage Suggestions
These Grinch Christmas Cookie Bars are best served at room temperature, where the frosting is creamy and the bars are soft. For parties, slice them into neat squares and arrange on a festive platter—don’t forget a sprinkle of extra hearts for that classic look. They pair perfectly with hot cocoa, peppermint mochas, or a mug of mulled cider (my personal favorite combo for movie night).
Leftovers keep well in an airtight container at room temperature for up to 3 days. If you want to make them ahead, they’ll stay fresh in the fridge for 5 days—just let them come to room temp before serving so the frosting softens up again. These bars freeze beautifully, too: layer with parchment paper in a freezer-safe container, and freeze up to one month. Thaw at room temperature for a few hours before serving.
For reheating, skip the microwave (it makes the frosting runny)—just let them sit out. As the bars sit, the flavors meld and the texture gets even chewier. Honestly, I think they’re even better the next day!
Nutritional Information & Benefits
| Serving Size | 1 bar (1/24th of recipe) |
|---|---|
| Calories | Approx. 210 |
| Carbs | 26g |
| Fat | 10g |
| Protein | 2g |
Key ingredients like butter and eggs provide satisfying richness and structure, while white chocolate offers antioxidants (yes, really!). If you use gluten-free flour or vegan swaps, these bars can fit more dietary needs. Be aware they contain wheat, dairy, and eggs—so check substitutions for allergies. From my wellness perspective, these bars are a fun way to celebrate the season in moderation. Sweet treats can nourish the soul!
Conclusion
There’s just something magical about making Grinch Christmas Cookie Bars with Creamy White Chocolate Frosting. Maybe it’s the vibrant color, maybe it’s that soft chew, or maybe it’s the way they bring smiles to faces young and old. If you’re looking for a festive treat that’s easy, delicious, and a total showstopper, this recipe is worth trying—whether you’re a baking pro or just starting out.
Feel free to customize the bars with your favorite mix-ins or swap ingredients to fit your needs. Personally, I love how these bars have become a holiday tradition in my family—everyone waits for that first bite! So go ahead, whip up a batch, and make some memories. If you have any creative twists or family stories, I’d love to hear them in the comments. Share this recipe, pin it for later, and let’s keep the Grinchy cheer going all season long. Happy baking, friends!
Frequently Asked Questions
Can I make Grinch Christmas Cookie Bars ahead of time?
Absolutely! Bake the bars and frost them, then store in an airtight container. They’re delicious for up to 3 days at room temperature, or 5 days in the fridge.
What if I don’t have gel food coloring?
No problem. Liquid food coloring works, but you’ll need a bit more for that vivid green. Just watch the batter’s consistency—don’t overdo it or it’ll get runny.
Can I freeze these cookie bars?
Yes! Freeze unfrosted or frosted bars in a container with parchment between layers. Thaw at room temp before serving—so easy for holiday prep.
What’s the best way to cut these bars neatly?
Use a sharp knife and wipe it clean between each slice. Chilling the bars for 15 minutes before cutting also helps with tidy edges.
How do I make these gluten-free?
Just substitute all-purpose flour with a 1:1 gluten-free baking blend. The bars come out just as soft and chewy—no one will notice the difference!
Pin This Recipe!
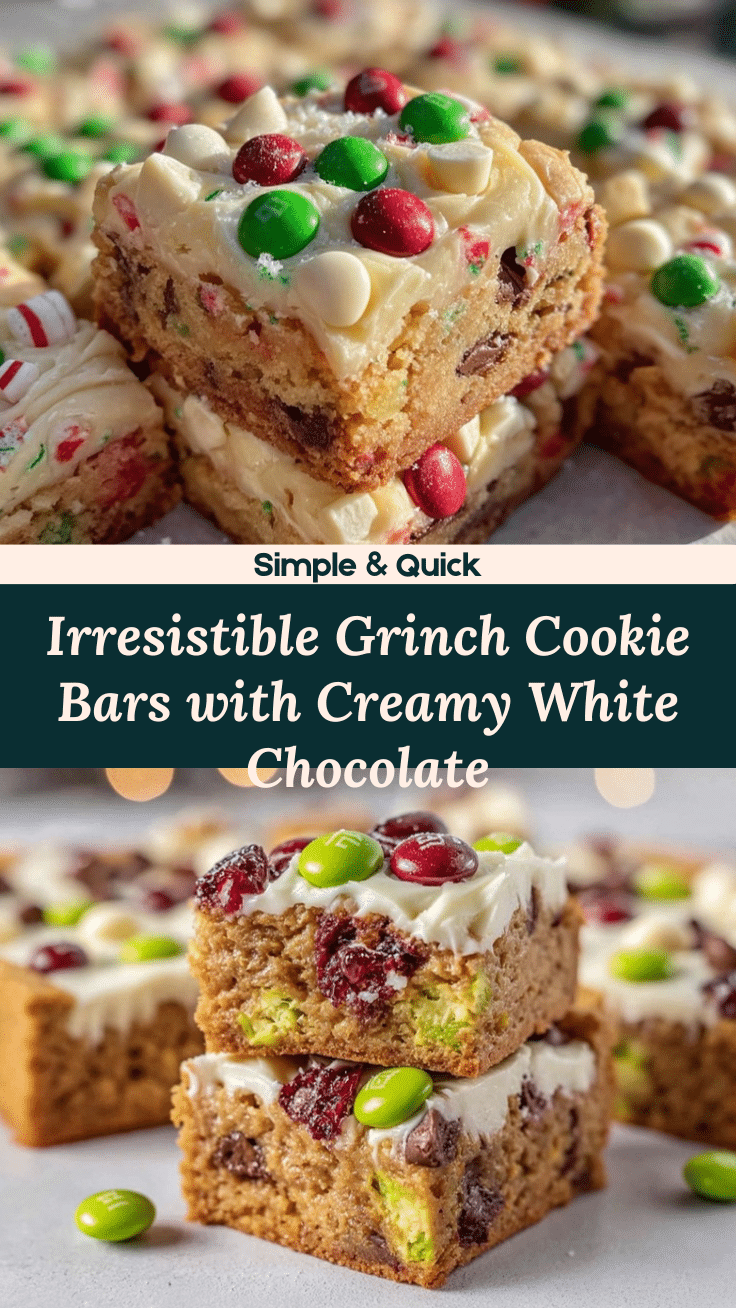
Grinch Christmas Cookie Bars Recipe – Easy Festive Treat with White Chocolate Frosting
These festive Grinch Christmas Cookie Bars are soft, chewy, and bursting with playful sweetness, topped with creamy white chocolate frosting and heart-shaped sprinkles. Perfect for holiday gatherings, cookie swaps, or adding a whimsical touch to your dessert table.
- Prep Time: 15 minutes
- Cook Time: 25 minutes
- Total Time: 40 minutes
- Yield: 24 bars 1x
- Category: Dessert
- Cuisine: American
Ingredients
- 2 1/4 cups all-purpose flour
- 1 cup unsalted butter, softened
- 1 1/4 cups granulated sugar
- 1/2 cup light brown sugar, packed
- 2 large eggs, room temperature
- 2 teaspoons vanilla extract
- 1/4 teaspoon almond extract (optional)
- 1/2 teaspoon baking soda
- 1/2 teaspoon salt
- Green gel food coloring
- 1/2 cup white chocolate chips (optional)
- Heart-shaped red sprinkles
- For the Frosting:
- 1/2 cup unsalted butter, softened
- 4 oz cream cheese, softened
- 1 1/2 cups powdered sugar, sifted
- 4 oz white chocolate, melted and cooled
- 1/2 teaspoon vanilla extract
- Pinch of salt
- 1–2 tablespoons milk (as needed for consistency)
Instructions
- Line a 9×13-inch baking pan with parchment paper and lightly grease. Preheat oven to 350°F (175°C). Set out butter, cream cheese, and eggs to reach room temperature.
- In a medium bowl, whisk together flour, baking soda, and salt. Set aside.
- In a large mixing bowl, beat butter with granulated sugar and brown sugar until light and fluffy, about 2-3 minutes.
- Beat in eggs one at a time, mixing well after each. Stir in vanilla and almond extract (if using).
- Add green gel food coloring, a few drops at a time, until you reach the desired Grinch shade.
- Gradually mix in the dry ingredients, scraping the bowl as you go. Fold in white chocolate chips if desired. Batter will be thick.
- Spread batter evenly into prepared pan. Sprinkle heart-shaped sprinkles over the top.
- Bake for 22-28 minutes, until edges are golden and a toothpick comes out clean. If using a glass pan, check at 25 minutes.
- Let bars cool in the pan for 10 minutes, then lift onto a wire rack using parchment. Cool completely before frosting.
- For the frosting: Melt white chocolate in a microwave-safe bowl or small saucepan, stirring every 20 seconds until smooth. Cool slightly.
- In a bowl, beat butter and cream cheese until fluffy. Add melted white chocolate, powdered sugar, vanilla, and salt. Beat until smooth, adding milk for spreadable consistency.
- Spread frosting evenly over cooled bars. Add more heart-shaped sprinkles for decoration.
- Slice into 24 squares. Wipe knife between cuts for neat edges. Serve at room temperature.
Notes
For gluten-free bars, substitute all-purpose flour with a 1:1 gluten-free blend. Use plant-based butter and cream cheese for dairy-free/vegan adaptation. Add food coloring gradually for best color. Let bars cool completely before frosting to prevent melting. Bars freeze well for up to one month. For neat cuts, chill bars for 15 minutes before slicing.
Nutrition
- Serving Size: 1 bar (1/24th of rec
- Calories: 210
- Fat: 10
- Carbohydrates: 26
- Protein: 2
Keywords: Grinch cookie bars, Christmas dessert, holiday baking, white chocolate frosting, festive treats, easy cookie bars, party dessert, kid-friendly, chewy bars, green cookie bars


