Let me tell you, the scent of vanilla and butter wafting from my kitchen as these easy shamrock sugar cookies baked was enough to make anyone’s mouth water. The first time I baked these charming little green delights, I was instantly hooked—the kind of moment where you pause, take a deep breath, and just smile because you know you’re onto something truly special. Years ago, when I was knee-high to a grasshopper, my grandma used to make sugar cookies for every St. Patrick’s Day, but her recipe was always a bit fussy. This version? Oh, it’s dangerously easy and brings pure, nostalgic comfort with every bite. You know what’s funny? My family couldn’t stop sneaking them off the cooling rack (and I can’t really blame them). Honestly, these cookies have become a staple for our holiday gatherings and sweet treats for the kids when they need a little extra cheer.
These shamrock sugar cookies are perfect for brightening up your Pinterest cookie board or making your next potluck stand out. I’ve tested and tweaked this recipe more times than I can count—in the name of research, of course—and it always delivers that perfect balance of tender crumb and glossy royal icing that just makes you want to dive right in. Whether you’re looking to impress guests or just treat yourself, you’re going to want to bookmark this one.
Why You’ll Love This Easy Shamrock Sugar Cookies Recipe
Having baked countless sugar cookies over the years, I can say this easy shamrock sugar cookies recipe really hits the sweet spot. Here’s why it stands out:
- Quick & Easy: Comes together in under 30 minutes, perfect for busy weeknights or last-minute celebrations.
- Simple Ingredients: No fancy grocery store trips needed; you likely already have everything in your pantry.
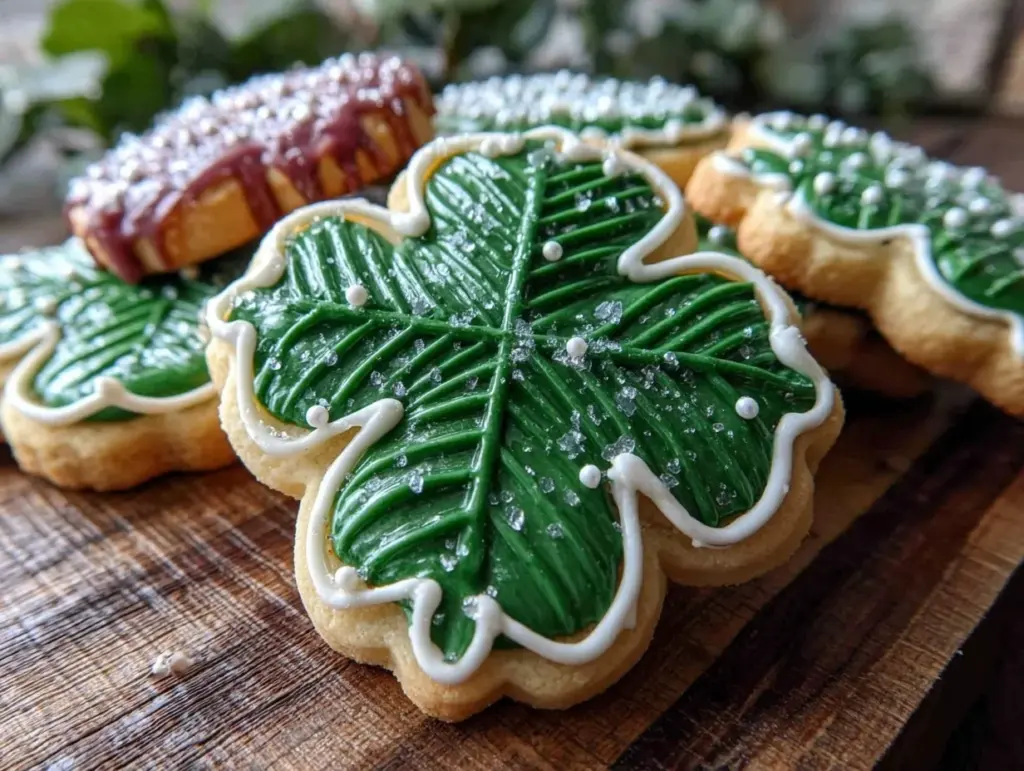
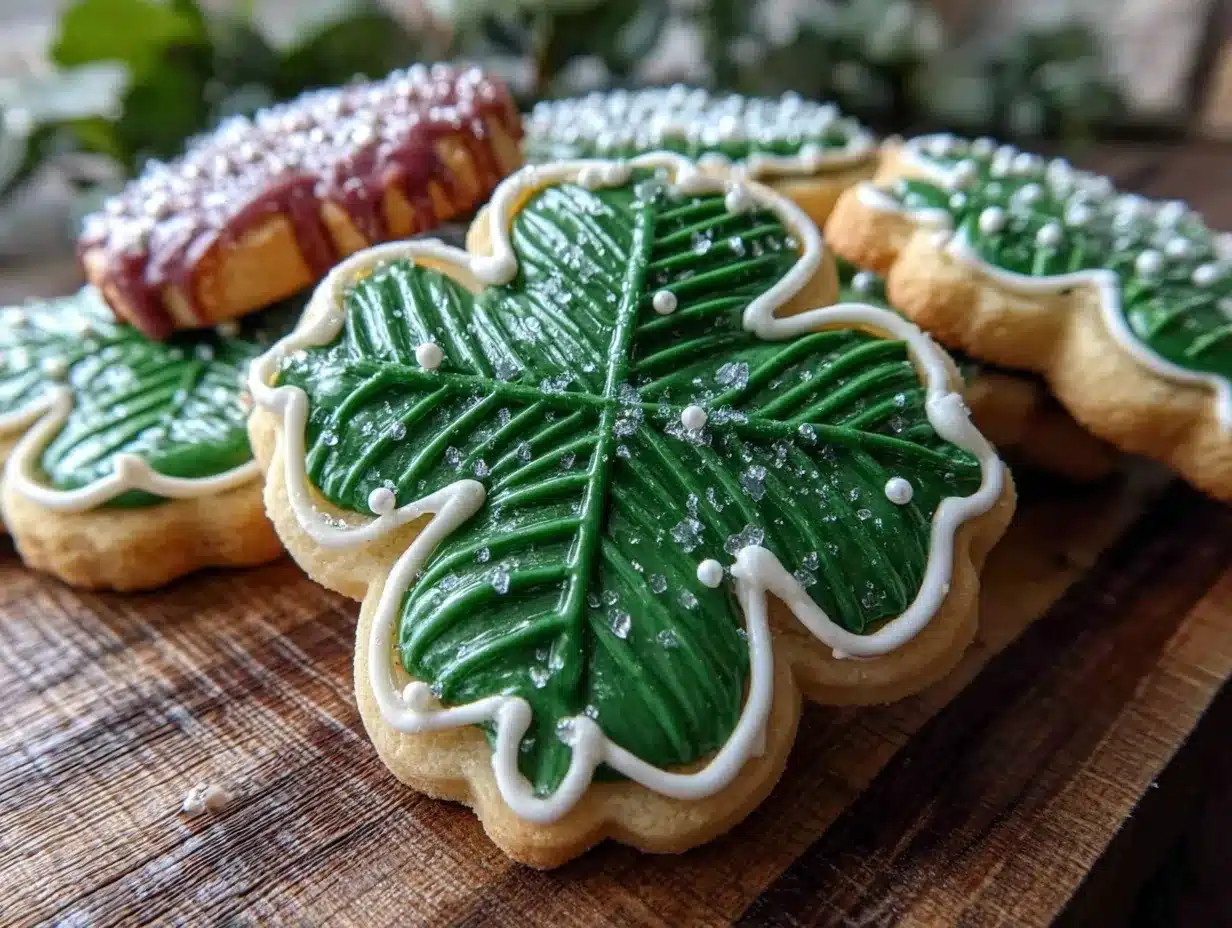
- Perfect for St. Patrick’s Day: The shamrock shape and vibrant green icing make these cookies festive and fun.
- Crowd-Pleaser: Kids and adults alike rave about the buttery softness paired with that smooth, glossy royal icing.
- Unbelievably Delicious: The texture is just right—not too crunchy, not too soft—with an icing that dries to a beautiful sheen.
This recipe isn’t just another sugar cookie—it’s the best version I’ve found. The trick? A quick chill of the dough that keeps these cookies from spreading too much, plus a royal icing that’s perfectly glossy thanks to a simple meringue powder mix. It’s comfort food with a festive twist, and honestly, it makes you close your eyes after the first bite. You can impress guests without stress, or turn a simple afternoon snack into something memorable.
What Ingredients You Will Need
This recipe uses simple, wholesome ingredients to deliver bold flavor and satisfying texture without the fuss. Most of these are pantry staples, and the icing requires just a few extra items you might already have on hand.
- For the sugar cookie dough:
- 2 ¾ cups (340 g) all-purpose flour (I recommend King Arthur for best texture)
- 1 teaspoon baking powder
- ½ teaspoon salt
- 1 cup (227 g) unsalted butter, softened (room temperature is key here)
- 1 ½ cups (300 g) granulated sugar
- 1 large egg, room temperature
- 2 teaspoons pure vanilla extract (or almond extract for a twist)
- 2 tablespoons whole milk (use dairy-free milk if needed)
- Green gel food coloring (for that shamrock hue)
- For the glossy royal icing:
- 3 cups (360 g) powdered sugar, sifted
- 2 tablespoons meringue powder (this is the secret to that perfect shine)
- 6 tablespoons (90 ml) warm water
- Green gel food coloring (adjust shade to your liking)
- Optional: a few drops of lemon juice for brightness
If you want to swap for gluten-free, almond flour is a decent option but expect a slightly different texture. For a dairy-free version, substitute coconut oil for butter and almond milk for the milk. When picking meringue powder, Wilton is my go-to brand for consistent results.
Equipment Needed
- Mixing bowls (large and medium-sized)
- Electric mixer or stand mixer (hand mixers work too but expect a bit more arm workout)
- Measuring cups and spoons (accuracy matters here!)
- Rolling pin (a nonstick one helps keep dough from sticking)
- Shamrock-shaped cookie cutter (around 3 inches wide works great)
- Baking sheets lined with parchment paper or silicone mats
- Cooling racks
- Spoons and small bowls for icing mixing
- Piping bags or ziplock bags (snipped corner) for decorating royal icing
If you don’t have a rolling pin, a clean wine bottle can do the trick in a pinch. For piping, I often use disposable bags for easy cleanup but reusable silicone ones work well too. Keeping your baking sheets cool and switching them out mid-bake can help prevent cookies from browning too fast—trust me, I learned that the hard way!
Preparation Method
- Mix Dry Ingredients: In a medium bowl, whisk together 2 ¾ cups (340 g) all-purpose flour, 1 teaspoon baking powder, and ½ teaspoon salt. Set aside. This ensures even distribution and a tender crumb. (Prep time: 5 minutes)
- Cream Butter and Sugar: In a large bowl, use an electric mixer to cream 1 cup (227 g) softened unsalted butter with 1 ½ cups (300 g) granulated sugar until light and fluffy—about 3-4 minutes. You’ll notice the texture become silky and pale. (Prep time: 5 minutes)
- Add Egg and Vanilla: Beat in 1 large room temperature egg and 2 teaspoons vanilla extract until fully combined. The batter will look glossy now. (Prep time: 2 minutes)
- Incorporate Dry Ingredients and Milk: Gradually add the flour mixture in batches, alternating with 2 tablespoons whole milk. Mix on low speed to avoid flour clouds—stir just until combined. The dough should be soft but not sticky. (Prep time: 5 minutes)
- Add Green Food Coloring: Add gel food coloring a drop at a time until you reach your preferred shamrock green. Knead gently with your hands if needed to distribute color evenly. (Prep time: 2 minutes)
- Chill the Dough: Wrap the dough tightly in plastic wrap and chill in the fridge for at least 1 hour. This step stops spreading and makes rolling easier. (Chill time: 1 hour)
- Preheat Oven and Prepare Baking Sheets: Preheat your oven to 350°F (175°C). Line baking sheets with parchment paper or silicone mats. (Prep time: 10 minutes)
- Roll and Cut: Lightly flour your work surface and roll the dough to about ¼ inch (6 mm) thick. Use your shamrock cookie cutter to cut out shapes, then transfer them gently to your prepared sheets. (Prep time: 10-15 minutes)
- Bake Cookies: Bake for 8-10 minutes, until edges are just starting to turn golden but centers remain pale. Remove from oven and let cookies cool on sheets for 5 minutes before transferring to wire racks to cool completely. (Bake time: 8-10 minutes)
- Prepare Royal Icing: Whisk together 3 cups (360 g) powdered sugar, 2 tablespoons meringue powder, and 6 tablespoons warm water until smooth and glossy. Add green gel coloring to desired shade. Adjust consistency by adding more powdered sugar (for thicker) or water (for thinner). (Prep time: 10 minutes)
- Decorate: Fill piping bags with icing. Outline each cookie first with thicker icing, then flood the center with thinner icing for that signature glossy finish. Let dry completely—this can take 2-4 hours depending on humidity. (Decorate time: 30-45 minutes)
Pro tip: If your icing is too runny, add powdered sugar a tablespoon at a time. Too thick? Add a few drops of warm water. Also, drying royal icing in a cool, dry spot helps avoid cracking.
Cooking Tips & Techniques
Getting these easy shamrock sugar cookies just right can feel like a dance, but a few tricks will have you feeling like a pro. First, chilling the dough is non-negotiable. I skipped this once, and the cookies spread into sad little blobs—lesson learned!
When rolling, dust your surface lightly with flour, but not too much, or the dough stiffens. If the dough feels sticky, pop it back in the fridge for 10 minutes. Also, using gel food coloring instead of liquid keeps the dough from getting too wet and altering the texture.
For the royal icing, the magic lies in the meringue powder. It gives you that glossy sheen and sturdy finish without the hassle of whipping egg whites. When piping, steady hands help but if you mess up, just scrape off with a toothpick and try again—this icing is forgiving.
Timing is everything, especially with the drying phase. If you’re rushing, a fan set on low can speed drying but be careful not to blow dust onto your masterpiece. Multitask by preparing the dough the night before and decorating the next day for less stress.
Variations & Adaptations
Want to mix things up with your shamrock sugar cookies? Here are some fun twists you can try:
- Flavor Variations: Add a teaspoon of almond or peppermint extract instead of vanilla for a refreshing change.
- Dietary Tweaks: Swap all-purpose flour for a gluten-free blend and use dairy-free butter to make these cookies allergy-friendly (though texture varies slightly).
- Color Play: Mix different shades of green royal icing for a marbled or ombre shamrock effect—great for impressing guests!
- Alternative Shapes: Not feeling shamrocks? Use clovers, rainbows, or even hearts for a playful twist.
Personally, I once tried adding finely chopped pistachios to the dough for a nutty surprise—delicious, but be mindful of guests with allergies. For a festive touch, sprinkle edible gold glitter over the iced cookies while still wet for a little lucky sparkle.
Serving & Storage Suggestions
These easy shamrock sugar cookies are best served at room temperature so you get that perfect balance of soft cookie and crisp icing. Arrange them on a pretty platter with some green napkins for St. Patrick’s Day parties or as a sweet surprise in lunchboxes.
Leftovers? Store cookies in an airtight container at room temperature for up to 5 days. If you want to keep them longer, they freeze beautifully—just layer parchment paper between cookies and pop them in a freezer-safe container for up to 3 months. To thaw, leave at room temperature for a few hours.
Reheating isn’t really needed here; these cookies shine cold or at room temp. Over time, the royal icing may soften a bit, which some folks actually prefer. Just keep them dry to avoid any sogginess. Pair these cookies with a cup of hot tea or a cold glass of milk for pure nostalgic comfort.
Nutritional Information & Benefits
Each shamrock sugar cookie (about 3 inches) clocks in around 150 calories, with 7 grams of fat and 20 grams of carbs. While this treat is definitely a splurge, it’s made with wholesome ingredients free from artificial preservatives or additives.
Butter provides a bit of vitamin A and healthy fats, while eggs add protein and essential nutrients. Using real vanilla extract means no artificial flavors sneaking in. For those mindful of allergens, this recipe contains gluten, dairy, and eggs, but substitutions can be made to fit your needs.
Honestly, sometimes it’s about the joy and memories these cookies bring rather than the macros. A little indulgence like this, especially when shared with loved ones, feels like a well-earned reward.
Conclusion
These easy shamrock sugar cookies with glossy royal icing are truly worth trying if you want a festive, fun, and foolproof treat. They bring that perfect blend of buttery softness and shiny, sweet icing that’s hard to resist. Feel free to customize the shade of green or flavorings to make them your own. I love this recipe because it brings back warm memories, is simple enough for beginner bakers, and always impresses at every gathering.
If you make these cookies, please share your photos and any fun twists you try—I’d love to hear how your batch turns out! Go ahead, give this recipe a whirl; it’s a sweet way to add a little luck and joy to your day.
FAQs About Easy Shamrock Sugar Cookies
How long do these sugar cookies keep fresh?
Stored in an airtight container, they stay fresh at room temperature for about 5 days. You can freeze them for up to 3 months too.
Can I make the dough ahead of time?
Absolutely! Chill the dough for up to 2 days before rolling and baking. Just keep it wrapped tight in the fridge.
What if I don’t have meringue powder for royal icing?
You can use egg whites, but it requires careful handling and immediate use. Meringue powder is safer and easier for beginners.
Can I use liquid food coloring instead of gel?
Gel food coloring is best because it doesn’t thin out the dough or icing. Liquid colors might change the texture.
How do I get the royal icing super glossy?
The secret is the meringue powder and mixing until smooth. Also, avoid adding too much powdered sugar or water—consistency matters!
Pin This Recipe!
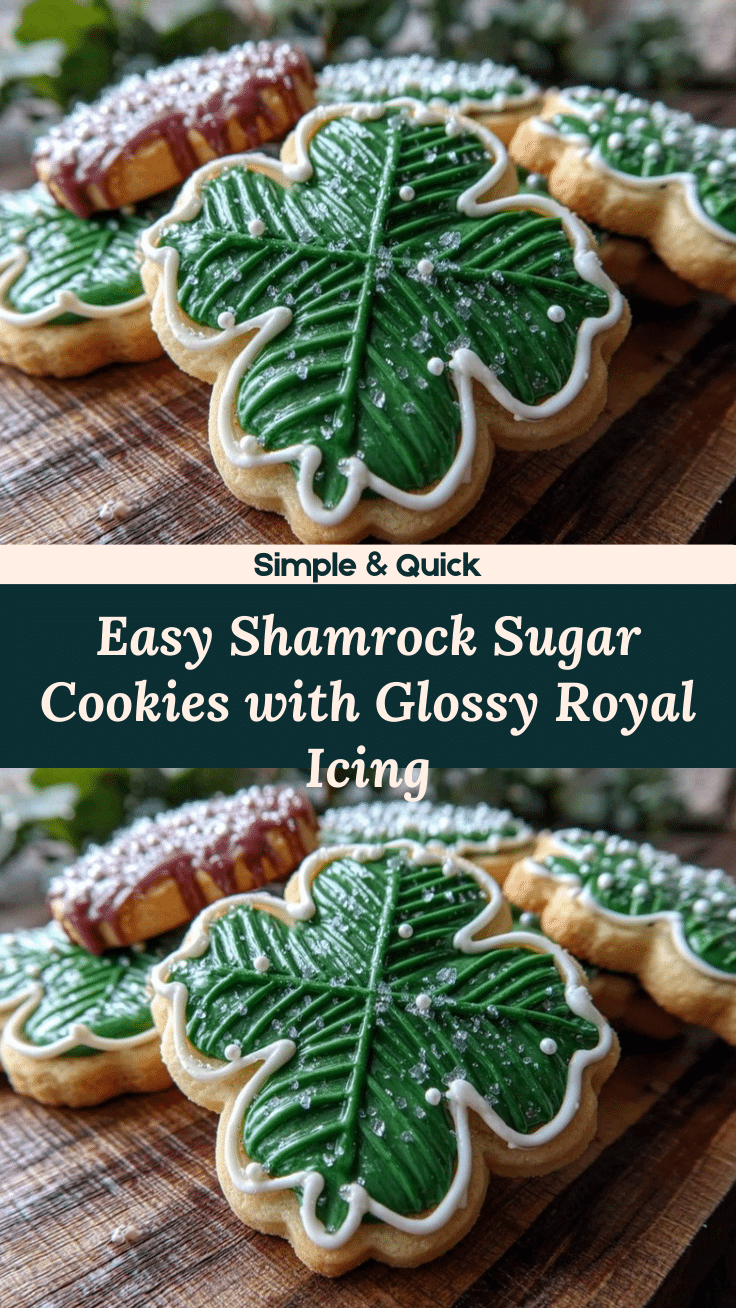
Easy Shamrock Sugar Cookies Recipe with Glossy Royal Icing Tutorial
These easy shamrock sugar cookies feature a tender crumb and glossy royal icing, perfect for St. Patrick’s Day celebrations or any festive occasion. The recipe is quick, simple, and yields buttery soft cookies with a beautiful shamrock green finish.
- Prep Time: 30 minutes
- Cook Time: 10 minutes
- Total Time: 1 hour 40 minutes
- Yield: 24 cookies 1x
- Category: Dessert
- Cuisine: American
Ingredients
- 2 ¾ cups (340 g) all-purpose flour
- 1 teaspoon baking powder
- ½ teaspoon salt
- 1 cup (227 g) unsalted butter, softened
- 1 ½ cups (300 g) granulated sugar
- 1 large egg, room temperature
- 2 teaspoons pure vanilla extract (or almond extract)
- 2 tablespoons whole milk (or dairy-free milk)
- Green gel food coloring
- 3 cups (360 g) powdered sugar, sifted
- 2 tablespoons meringue powder
- 6 tablespoons (90 ml) warm water
- Optional: a few drops of lemon juice
Instructions
- In a medium bowl, whisk together flour, baking powder, and salt. Set aside.
- In a large bowl, cream softened butter and granulated sugar with an electric mixer until light and fluffy, about 3-4 minutes.
- Beat in the egg and vanilla extract until fully combined.
- Gradually add the flour mixture in batches, alternating with milk, mixing on low speed just until combined.
- Add green gel food coloring a drop at a time until desired shamrock green is reached; knead gently if needed.
- Wrap dough tightly in plastic wrap and chill in the fridge for at least 1 hour.
- Preheat oven to 350°F (175°C). Line baking sheets with parchment paper or silicone mats.
- Lightly flour work surface and roll dough to about ¼ inch (6 mm) thick. Cut out shamrock shapes and transfer to prepared baking sheets.
- Bake for 8-10 minutes until edges start to turn golden but centers remain pale. Cool on sheets for 5 minutes, then transfer to wire racks to cool completely.
- Whisk together powdered sugar, meringue powder, and warm water until smooth and glossy. Add green gel coloring to desired shade and adjust consistency as needed.
- Fill piping bags with icing. Outline each cookie with thicker icing, then flood centers with thinner icing. Let dry completely for 2-4 hours.
Notes
Chilling the dough for at least 1 hour is essential to prevent spreading. Use gel food coloring to avoid altering dough texture. Adjust royal icing consistency by adding powdered sugar or water as needed. Dry icing in a cool, dry place to avoid cracking. Dough can be chilled up to 2 days before baking. Store cookies in an airtight container at room temperature for up to 5 days or freeze for up to 3 months.
Nutrition
- Serving Size: 1 cookie (about 3 in
- Calories: 150
- Fat: 7
- Carbohydrates: 20
Keywords: shamrock sugar cookies, St. Patrick's Day cookies, royal icing cookies, easy sugar cookies, festive cookies, green cookies, holiday baking


