“You know that feeling when you’re craving something sweet but don’t want to spend hours in the kitchen? That’s exactly how this red white blue berry icebox cake came to be. It was a scorching Fourth of July afternoon, and my friend Jake showed up at my door holding a container of whipped cream and a bag of berries, insisting we put together something quick for the backyard barbecue. Honestly, I wasn’t expecting much—just a simple no-bake dessert to cool off. But as we layered those vibrant berries and fluffy cream between crisp cookies, I realized we were onto something special. The way the colors popped against the creamy layers was almost too pretty to eat, but of course, we did.
What really makes this icebox cake stand out is the effortless assembly paired with that burst of fresh berry flavor in every bite. I remember Jake accidentally dropping a whole layer of cookies (classic!) right before the final step, and it didn’t matter one bit. The cake still held together beautifully, and the flavors melded overnight like a dream. Maybe you’ve been there—rushing, improvising, and ending up with a dish that surprises even you. That’s the charm of this recipe: simple, forgiving, and downright delicious.
Each spoonful of this red white blue berry icebox cake brings a little celebration to the table. It’s that kind of dessert that makes you smile, whether you’re enjoying it on a sunny picnic blanket or at a laid-back family dinner. So, let me tell you—this isn’t just another layered dessert. It’s a sweet, creamy, fruity nod to summer days and star-spangled nights that I keep coming back to, again and again.
Why You’ll Love This Recipe
- Quick & Easy: Comes together in under 30 minutes—ideal for last-minute gatherings or when you want a fuss-free dessert.
- Simple Ingredients: No specialty items needed; pantry staples plus fresh berries are all it takes.
- Perfect for Patriotic Occasions: Great for Fourth of July, Memorial Day, or any summer celebration where you want a festive treat.
- Crowd-Pleaser: Kids love the layers, adults appreciate the fresh fruit and creamy texture—everyone asks for seconds.
- Unbelievably Delicious: The combo of crunchy cookies, airy whipped cream, and juicy berries feels like summer in every bite.
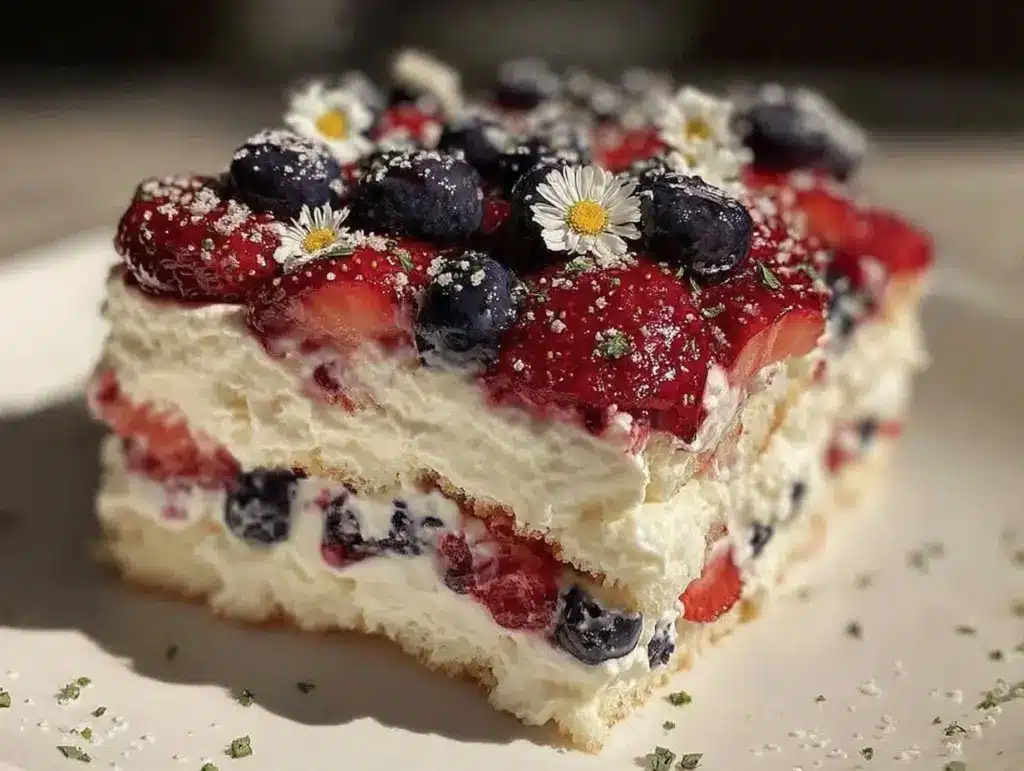
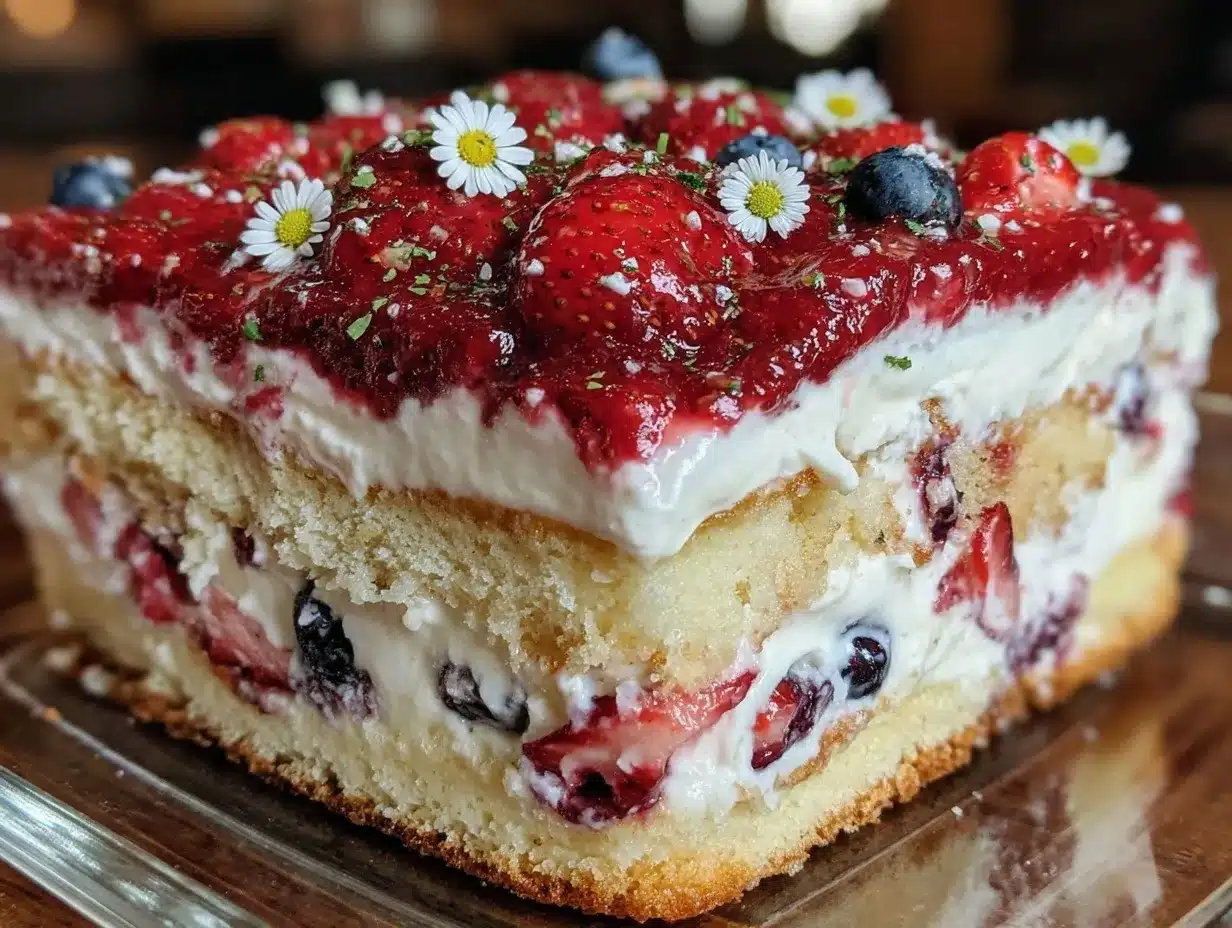
What sets this recipe apart is the layering technique. Instead of soggy cookies, the icebox method lets the cookies soften just enough overnight, creating a perfect balance of texture. Plus, blending a bit of cream cheese into the whipped cream adds a subtle tang that keeps it from being too sweet—trust me, I’ve tried it both ways! This isn’t just a red white blue dessert; it’s a carefully crafted mix of flavors and textures that feels special but never complicated.
Honestly, this recipe has been a hit at every party I’ve taken it to. It’s one of those desserts that makes people pause and say, “Wow, how did you make this?” without realizing how simple it actually is. You’ll want to keep this one in your recipe box, especially when you want something that looks stunning but lets you spend more time with your guests.
What Ingredients You Will Need
This red white blue berry icebox cake recipe uses simple, fresh ingredients to create bold flavors and satisfying textures without fuss. Most of these are pantry staples or easy to find at any grocery store, with fresh berries adding a seasonal, vibrant touch.
- For the Layers:
- Graham crackers or vanilla wafer cookies (about 30 cookies) – these add the crisp layers that soak up cream just right
- Heavy whipping cream (2 cups / 480 ml), cold – essential for fluffy, stable whipped cream
- Cream cheese (4 oz / 115 g), softened – adds richness and a slight tang to balance the sweetness
- Powdered sugar (1/2 cup / 60 g) – for gentle sweetness without graininess
- Vanilla extract (1 teaspoon) – brings warmth and depth to the cream mixture
- For the Berries:
- Fresh strawberries (1 cup / 150 g), sliced – choose firm, ripe berries for best flavor
- Fresh blueberries (1 cup / 150 g) – wash and dry carefully to avoid sogginess
- Fresh raspberries (1 cup / 120 g) – delicate and tart, they add brightness
- Optional:
- Fresh mint leaves for garnish – adds a lovely herbal note and a pop of green
- Fresh lemon zest (1 teaspoon) – sprinkle into the cream for a subtle citrus twist
For the best results, I recommend using full-fat cream cheese and heavy cream from brands like Land O’Lakes or Organic Valley, which whip up nicely and have a clean flavor. If you want a dairy-free version, swap the cream with coconut cream and use a plant-based cream cheese alternative, though the texture will be a bit different. During summer, swapping in fresh blackberries or even a handful of chopped cherries can add interesting pops of flavor.
Equipment Needed
- Medium mixing bowl – for whipping the cream and blending the cream cheese
- Electric hand mixer or stand mixer – crucial for achieving stiff, fluffy whipped cream without overdoing it
- Spatula – for folding ingredients gently and spreading layers evenly
- 9×9-inch (23×23 cm) square baking dish or similar container – for assembling the cake; glass or clear plastic works great to showcase the layers
- Measuring cups and spoons – for precise ingredient amounts
- Sharp knife – for slicing berries and cutting the finished cake
If you don’t have an electric mixer, a sturdy whisk and some elbow grease can do the job, but be prepared for a workout! I once tried making this by hand—let’s just say I earned my dessert that day. For budget-friendly options, plain metal mixing bowls and silicone spatulas work just as well as pricier tools. Just make sure your bowl is chilled before whipping cream to help it whip faster and hold its structure.
Preparation Method
- Prepare the Cream Mixture (10 minutes): In a chilled medium bowl, beat the softened cream cheese until smooth using an electric mixer set to medium speed. Add the powdered sugar and vanilla extract, mixing until fully combined and creamy. Keep an eye out for lumps—you want a silky texture here.
- Whip the Cream (5-7 minutes): In a separate cold bowl, pour the heavy whipping cream. Using clean beaters, whip the cream on high speed until soft peaks form (when you lift the beaters, the cream should hold a gentle peak but still be smooth). Be careful not to overwhip; otherwise, it turns grainy and starts to separate.
- Fold Together (2-3 minutes): Gently fold the whipped cream into the cream cheese mixture using a spatula. The goal is to keep it light and airy, so fold slowly and avoid deflating the cream. If you want, add lemon zest here for a subtle zing.
- Assemble the Cake (10 minutes): Spread a thin layer of the cream mixture on the bottom of your 9×9-inch dish. Arrange a single layer of graham crackers or vanilla wafers on top, breaking cookies gently to fill gaps but keeping them mostly whole. Spoon and spread about a third of the cream mixture evenly over the cookies.
- Add the Berries (5 minutes): Scatter a mix of sliced strawberries and raspberries over the cream layer, then add a few blueberries. Don’t pile too high—you want even coverage for balanced bites.
- Repeat Layers (5 minutes): Repeat the cookie layer, cream mixture, and berries two more times, finishing with a cream layer on top. For a pretty finish, arrange some whole berries and mint leaves as garnish.
- Chill Overnight (at least 6 hours): Cover the dish with plastic wrap and refrigerate overnight or for at least 6 hours. This step is key as it lets the cookies soften to a cake-like texture and the flavors marry.
- Serve (5 minutes): When ready, slice into squares with a sharp knife. Clean the knife between cuts for neat layers. Serve chilled, and enjoy the fresh, creamy, fruity goodness.
Pro tip: If the cream mixture feels too thick to spread easily, let it sit at room temperature for a few minutes before assembling. And if you find your cookies getting too soggy, reduce the chilling time next time or add a thin layer of melted white chocolate between layers for a moisture barrier.
Cooking Tips & Techniques
One trick I learned the hard way is to really chill your mixing bowls and beaters before whipping cream. Warm bowls can turn whipped cream into a sad puddle pretty quickly. Also, folding the whipped cream into the cream cheese slowly keeps those fluffy air bubbles intact, so your icebox cake ends up light, not dense.
Watch out for overwhipping cream—that’s a rookie mistake I’ve made more than once. The texture goes from dreamy to grainy fast. Stop whipping as soon as soft peaks form, then fold gently. When layering, don’t rush placing the cookies; gently pressing them avoids cracking but still lets them soften properly overnight.
Multitasking tip: While the cake chills, clean up your prep area and prep for serving. Having a chilled serving knife makes slicing easier too. And if you want to add a little sparkle, a dusting of powdered sugar or a drizzle of honey right before serving adds that extra touch of charm.
Lastly, if you’re short on time, a minimum of 4 hours in the fridge works, but the flavor and texture improve noticeably with longer chilling. Patience pays off here—you’ll thank me when that first bite melts in your mouth.
Variations & Adaptations
- Dietary Adjustments: For gluten-free, swap the graham crackers with gluten-free cookies like Schär’s butter cookies. For dairy-free, use coconut cream whipped to stiff peaks and dairy-free cream cheese alternatives.
- Seasonal Flavors: In fall, swap berries for sliced pears and a sprinkle of cinnamon between layers. Or in spring, try fresh peaches and a handful of chopped pistachios for crunch.
- Flavor Twists: Add a tablespoon of orange liqueur or lemon juice into the cream mixture for a citrus boost. You can also layer in crushed toasted almonds for texture contrast.
- Cooking Method Variations: Instead of an icebox cake, try layering in individual parfait glasses for a fun, portable option. It’s perfect for picnics or potlucks.
- Personal Variation: Once, I swapped out the raspberries for blackberries and added a swirl of homemade strawberry jam between layers—totally decadent and a lovely surprise for berry lovers.
Serving & Storage Suggestions
This red white blue berry icebox cake is best served chilled straight from the fridge. I like to garnish with a few fresh mint leaves and a dusting of powdered sugar just before serving for extra visual appeal. It pairs beautifully with a crisp glass of lemonade or iced tea, making it the perfect finish to a summery meal.
Store leftovers tightly covered in the refrigerator for up to 3 days. The flavors deepen over time, but the cookies can start to get a bit too soft after day two. If you want to freeze it, wrap it well and freeze for up to one month. Thaw overnight in the fridge before serving.
Reheating isn’t recommended; this dessert shines cold and creamy. Just remember, the best bites are those first few when the cream is still chilled and the berries are fresh and juicy.
Nutritional Information & Benefits
Each serving of this red white blue berry icebox cake contains approximately 250 calories, 15 grams of fat, 25 grams of carbohydrates, and 3 grams of protein. The fresh berries provide a good dose of vitamin C, fiber, and antioxidants, which support immune health and digestion.
Using cream cheese adds calcium and a bit of protein, while the whipped cream contributes fat that helps with satiety. This dessert is naturally gluten-free if you choose gluten-free cookies, and can be adapted for low-sugar diets by reducing powdered sugar or using sugar substitutes.
From a wellness standpoint, this cake offers a balanced treat—fresh fruit meets indulgent creaminess—making it a satisfying but not overwhelming dessert choice for summer festivities.
Conclusion
If you’re looking for a sweet treat that’s as easy to make as it is eye-catching, this red white blue berry icebox cake is your new go-to. Its layers of creamy, crunchy, and fruity goodness bring a festive spirit without any stress. I love how it feels both special and approachable, perfect for sharing with friends, family, or even enjoying solo on a quiet evening.
Feel free to play with the berries or add your favorite nuts or herbs to make it your own. Honestly, once you try it, you’ll find yourself making it not just for holidays but whenever you want a little taste of summer magic.
Give it a shot and let me know how your version turns out—I’m always excited to hear your twists and stories. Don’t forget to share this recipe if it brightens your day!
Here’s to sweet celebrations and simple pleasures.
FAQs
Can I make this icebox cake ahead of time?
Absolutely! It’s best made the day before to allow the cookies to soften and flavors to meld. Just keep it covered in the fridge.
What can I substitute for graham crackers?
Vanilla wafers, shortbread cookies, or gluten-free cookies all work well. Just choose ones with a neutral flavor that won’t overpower the cream and berries.
How long can I store leftover icebox cake?
Store leftovers in the refrigerator for up to 3 days. The texture is best within the first two days.
Can I use frozen berries?
Fresh berries are best for texture, but if using frozen, thaw and drain them well to avoid sogginess.
Is this recipe suitable for kids?
Yes! It’s a great kid-friendly dessert—no baking required, colorful, and naturally sweet with fruit.
Pin This Recipe!
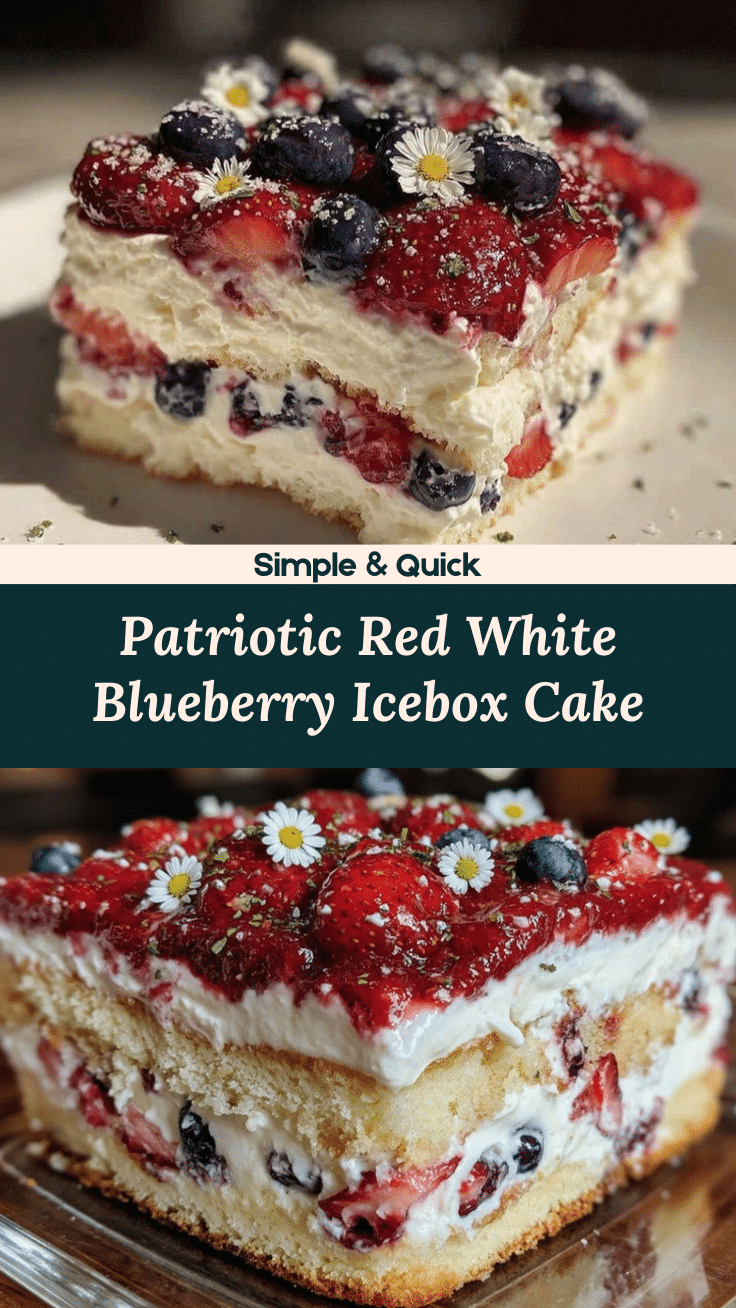
Delicious Red White Blue Berry Icebox Cake Recipe Easy Patriotic Layers

A quick and easy no-bake dessert featuring layers of whipped cream, cream cheese, fresh berries, and crisp cookies, perfect for patriotic celebrations and summer gatherings.
- Prep Time: 20 minutes
- Cook Time: 0 minutes
- Total Time: 6 hours 20 minutes
- Yield: 9 servings 1x
- Category: Dessert
- Cuisine: American
Ingredients
- About 30 graham crackers or vanilla wafer cookies
- 2 cups (480 ml) heavy whipping cream, cold
- 4 oz (115 g) cream cheese, softened
- 1/2 cup (60 g) powdered sugar
- 1 teaspoon vanilla extract
- 1 cup (150 g) fresh strawberries, sliced
- 1 cup (150 g) fresh blueberries
- 1 cup (120 g) fresh raspberries
- Optional: fresh mint leaves for garnish
- Optional: 1 teaspoon fresh lemon zest
Instructions
- Prepare the Cream Mixture (10 minutes): In a chilled medium bowl, beat the softened cream cheese until smooth using an electric mixer set to medium speed. Add the powdered sugar and vanilla extract, mixing until fully combined and creamy.
- Whip the Cream (5-7 minutes): In a separate cold bowl, pour the heavy whipping cream. Using clean beaters, whip the cream on high speed until soft peaks form.
- Fold Together (2-3 minutes): Gently fold the whipped cream into the cream cheese mixture using a spatula. Add lemon zest if desired.
- Assemble the Cake (10 minutes): Spread a thin layer of the cream mixture on the bottom of a 9×9-inch dish. Arrange a single layer of graham crackers or vanilla wafers on top. Spoon and spread about a third of the cream mixture evenly over the cookies.
- Add the Berries (5 minutes): Scatter a mix of sliced strawberries and raspberries over the cream layer, then add a few blueberries.
- Repeat Layers (5 minutes): Repeat the cookie layer, cream mixture, and berries two more times, finishing with a cream layer on top. Garnish with whole berries and mint leaves if desired.
- Chill Overnight (at least 6 hours): Cover the dish with plastic wrap and refrigerate overnight or for at least 6 hours.
- Serve (5 minutes): Slice into squares with a sharp knife. Serve chilled.
Notes
Chill mixing bowls and beaters before whipping cream to achieve better volume. Fold whipped cream gently into cream cheese mixture to keep it light and airy. If cream mixture is too thick to spread, let it sit at room temperature for a few minutes. Reduce chilling time if cookies get too soggy or add a thin layer of melted white chocolate between layers as a moisture barrier. Minimum chilling time is 4 hours but overnight is best for texture and flavor.
Nutrition
- Serving Size: 1 square (approx. 1/
- Calories: 250
- Fat: 15
- Carbohydrates: 25
- Protein: 3
Keywords: icebox cake, no-bake dessert, red white blue dessert, patriotic dessert, berry dessert, summer dessert, easy dessert, layered cake


