“You want spam with that?” my roommate joked as I stared at a sad fridge filled mostly with leftovers and a lonely container of kimchi. It was late—far too late to get anything fancy—and honestly, I was wiped out from the day’s chaos. I wanted something quick, something satisfying, but mostly something that felt a little special despite the bare pantry. So, I threw together crispy kimchi fried rice with spam and topped it with a sesame fried egg, almost as an afterthought. The sizzle of the rice hitting the pan was like music after a long day, and the aroma of the kimchi mingling with browned spam felt like a warm hug rather than just dinner.
What started as a simple, no-frills meal quickly became a favorite I turned to multiple times that week. That crispy edge on the rice, the salty-sweet bite of the spam, and the gooey sesame-kissed egg yolk melting into every bite—honestly, it’s the kind of dish that makes you pause amid the hustle and just enjoy. I never expected a late night kitchen scramble to produce something so comforting and crave-worthy. It stuck with me because it felt real and doable—no fuss, no fancy ingredients, just bold flavors and textures that hit the spot every single time.
That’s why this crispy kimchi fried rice with spam and sesame fried egg recipe remains a quiet favorite in my rotation—perfect for those moments when you want something delicious without the drama, yet still crave that little spark of joy in your meal.
Why You’ll Love This Crispy Kimchi Fried Rice with Spam and Sesame Fried Egg Recipe
After testing this recipe several times and tweaking it just right, here’s why it stands out from other fried rice dishes you might have tried:
- Quick & Easy: Ready in about 20 minutes, it’s awesome for busy weeknights or when you need a fast, hearty meal.
- Simple Ingredients: No need for exotic grocery runs—spam, kimchi, rice, and eggs are probably already hanging out in your kitchen.
- Perfect for Casual Gatherings: Whether it’s a laid-back dinner with friends or a solo snack, this dish fits the bill.
- Crowd-Pleaser: The balance of tangy kimchi and crispy spam consistently earns nods of approval, even from kimchi skeptics.
- Unbelievably Delicious: That crispy rice crust combined with the rich, runny yolk just hits all the right comfort-food notes.
What really sets this crispy kimchi fried rice apart is the technique of getting the rice perfectly crisp without drying it out, and the sesame fried egg that adds a nutty, silky richness. It’s not just fried rice; it’s fried rice with soul. I’ve found that using day-old rice and not overcrowding the pan makes all the difference. Plus, the spam’s caramelized edges give an unexpected depth that’s a game-changer.
Honestly, this recipe feels like comfort food reinterpreted—quick, flavorful, and satisfying without the heaviness. It’s the kind of meal that’s both familiar and exciting, perfect for winding down or impressing guests without breaking a sweat.
What Ingredients You Will Need
This recipe uses simple, wholesome ingredients that come together to deliver bold flavor and satisfying texture without fuss. Most of these are pantry staples, and substitutions are easy if needed.
- For the Fried Rice:
- 2 cups cooked jasmine rice (preferably day-old, about 400g) – helps achieve that perfect crispiness
- 1 cup kimchi, chopped (about 150g) – use your favorite brand; fermented well for tang and spice
- 1/2 cup spam, diced (about 75g) – I like Hormel for its balance of saltiness and texture
- 2 tablespoons vegetable oil or sesame oil – sesame oil adds nuttiness
- 1 small onion, finely chopped
- 2 cloves garlic, minced
- 1 tablespoon gochujang (Korean chili paste) – optional, for an extra kick
- 1 tablespoon soy sauce – low sodium if preferred
- 1 teaspoon sugar – balances the tang of kimchi
- 2 scallions, sliced (green parts only) – for freshness
- Sesame seeds, toasted – for garnish
- For the Sesame Fried Egg:
- 4 large eggs – room temperature preferred
- 1 tablespoon sesame oil
- Pinch of salt
If you’re feeling adventurous, swapping jasmine rice for brown rice works but may take longer to crisp. For a dairy-free version, the recipe is naturally free of dairy. If you want a vegetarian twist, try substituting the spam with firm tofu, pressed and pan-fried.
Equipment Needed
- A large non-stick or cast-iron skillet – crucial for achieving that coveted crispy rice texture without sticking
- A spatula or wooden spoon – for stirring and pressing the rice
- Sharp knife and cutting board – for prepping the spam, kimchi, and aromatics
- Small bowl – to beat eggs if you prefer them scrambled or for mixing sauces
- Optional: a fine-mesh strainer or colander – to drain excess kimchi juice if too wet
I personally swear by a well-seasoned cast-iron skillet for the best crust on fried rice, but if you don’t have one, a heavy-bottomed non-stick pan works just fine. A sturdy spatula helps press the rice down for that golden crisp, and a sharp knife makes chopping spam and kimchi a breeze. For those on a budget, a simple non-stick pan and wooden spoon combo is totally sufficient.
Preparation Method
- Prep your ingredients: Chop the kimchi into bite-sized pieces, dice the spam into small cubes, finely chop the onion, mince garlic, and slice the scallions. If your kimchi is very wet, drain it slightly to avoid soggy rice. This step should take about 10 minutes.
- Heat the pan: Place your skillet over medium-high heat and add 1 tablespoon of vegetable or sesame oil. When shimmering, add the diced spam. Cook until the edges are golden and slightly crispy, about 4-5 minutes. Remove the spam and set aside.
- Sauté aromatics: In the same pan, add the onion and garlic. Stir often, cooking until softened and fragrant, about 2-3 minutes. The kitchen will start smelling delicious here—don’t rush!
- Add kimchi: Toss the chopped kimchi into the pan. Stir-fry for 3 minutes to let the flavors mingle and the kimchi to caramelize a touch. Be mindful to keep the heat high enough to cook off moisture but not burn the garlic.
- Incorporate rice: Add the day-old rice, breaking up any clumps with your spatula. Spread the rice evenly in the pan, pressing gently to create contact with the surface for crisping. Let it cook undisturbed for 3-4 minutes. You should hear a gentle sizzle and see the rice develop a golden crust.
- Season: Drizzle soy sauce, sugar, and gochujang (if using) over the rice. Stir to combine, then spread again and let crisp for another 3 minutes. Return the spam to the pan, folding it in gently. This layering of flavors and textures is key.
- Add scallions and finish: Toss in the sliced scallions and sprinkle toasted sesame seeds. Give everything a final stir to distribute evenly. Taste and adjust seasoning if needed.
- Make the sesame fried egg: In a separate small skillet, heat sesame oil over medium heat. Crack eggs carefully, sprinkle a pinch of salt, and fry until whites are set but yolks remain runny (about 2-3 minutes). The nutty aroma from the sesame oil is irresistible here.
- Serve: Plate the crispy kimchi fried rice and top each serving with a warm sesame fried egg. Break the yolk and let it drizzle over the rice for that extra creamy richness.
Pro tip: Don’t overcrowd the pan when crisping rice; work in batches if needed. Using day-old rice is a game-changer for texture. If your rice is freshly cooked, spread it thin on a tray to cool and dry before frying. And remember, patience at the crisping stage is what makes this dish sing.
Cooking Tips & Techniques
Getting that perfect balance of crispy and tender in kimchi fried rice takes a bit of practice but is totally achievable without stress.
- Use day-old rice: Fresh rice tends to be too moist and clumpy. Leftover rice dries out slightly, making it ideal for frying and crisping.
- High heat is your friend: Cooking over medium-high heat encourages caramelization and the crispy crust without steaming the rice.
- Don’t stir constantly: Let the rice sit undisturbed for a few minutes during frying to develop crusty edges. Resist the urge to stir every second.
- Spam caramelization: Render out the fat and brown the edges well for the best flavor and texture contrast.
- Adjust kimchi moisture: If your kimchi is too juicy, drain it a little before adding to avoid sogginess. You want that tang and spice, but not a watery mess.
- Frying the egg: Sesame oil adds a gorgeous nutty aroma. Fry eggs sunny-side up with runny yolks for richness that melds beautifully with the rice.
- Timing multitasking: While the rice crisps, fry your eggs simultaneously to serve everything hot and fresh.
I learned the hard way that rushing the crisping step results in mushy fried rice. Letting the rice settle and brown patiently is worth every extra minute. Also, don’t skip the sesame oil for frying eggs—it’s a subtle detail that lifts the whole dish.
Variations & Adaptations
This crispy kimchi fried rice recipe is flexible and invites customization to suit your tastes or dietary needs.
- Vegetarian version: Replace spam with firm tofu, pressed and pan-fried until golden. Add mushrooms or extra veggies like bell peppers for bulk.
- Spice level adjustment: Omit gochujang for a milder dish or add extra if you like it fiery. A sprinkle of crushed red pepper flakes works too.
- Grain swaps: Try brown rice or even cauliflower rice for a lower-carb option. Adjust cooking time accordingly as cauliflower rice crisps faster.
- Protein variations: Beyond tofu, shredded chicken or leftover roasted pork can replace spam for a different protein profile.
- Seasonal twists: Swap kimchi for sauerkraut in winter for a tangy alternative or add fresh herbs like cilantro in summer.
Once, I added a spoonful of creamy peanut sauce as a drizzle over the rice for a funky fusion contrast that actually worked surprisingly well! Don’t be afraid to experiment a bit—the crispy kimchi fried rice base is forgiving and lends itself to playful tweaks.
Serving & Storage Suggestions
Serve your crispy kimchi fried rice hot, straight from the pan, topped with that luscious sesame fried egg. Presentation-wise, a scattering of extra scallions and sesame seeds adds a fresh pop and texture contrast.
This dish pairs beautifully with simple sides like steamed greens or a cool cucumber salad to balance the heat and richness. If you’re serving guests, a light soup or cheesy cornbread casserole can make a comforting meal.
Leftovers store well in an airtight container in the fridge for up to 3 days. To reheat, use a skillet over medium heat to refresh the crispiness rather than microwaving, which can make the rice soggy. Add a touch of oil to help revive the texture. The flavors often deepen overnight, making for an even tastier second-day meal.
Nutritional Information & Benefits
Per serving (serves 2): Approximately 450 calories, 18g protein, 50g carbohydrates, and 18g fat.
Kimchi brings probiotics and vitamin C, supporting digestion and immunity. Spam adds protein and a satisfying savory note, though it’s higher in sodium—balance with fresh veggies or greens. Using sesame oil provides heart-healthy fats and antioxidants.
This recipe fits well in a balanced diet and can be adapted for gluten-free needs by ensuring soy sauce is gluten-free. It’s a filling, flavorful meal that offers a good mix of macronutrients and gut-friendly ingredients thanks to the fermented kimchi.
Conclusion
This crispy kimchi fried rice with spam and sesame fried egg recipe is proof that simple pantry ingredients can become something memorable and deeply satisfying. It’s a dish that invites you to slow down just enough to enjoy the sizzle, the textures, and the layers of flavor that come together so effortlessly.
Feel free to adjust the spice, swap proteins, or toss in your favorite veggies—this recipe is as flexible as it is delicious. I love how every bite brings a familiar, cozy punch with just a little twist.
If you try this recipe, I’d love to hear how you make it your own or what variations you discover. Sharing food stories and tweaks is part of the fun, after all. Here’s to many crispy, comforting meals ahead!
Frequently Asked Questions
Can I use freshly cooked rice for kimchi fried rice?
Fresh rice tends to be too moist and sticky, which makes crisping difficult. If you only have freshly cooked rice, spread it on a baking sheet to cool and dry for at least 30 minutes before frying.
What’s the best way to get crispy rice without burning it?
Use a heavy-bottomed skillet, moderate to high heat, and press the rice gently into the pan. Let it cook undisturbed for several minutes so it can form a golden crust. Avoid stirring too often.
Can I make this vegan?
Yes! Replace spam with pan-fried tofu or mushrooms and skip the fried egg or use a vegan egg substitute.
How spicy is this dish?
The spice level depends on your kimchi and use of gochujang. You can adjust or omit gochujang to control heat.
How do I store leftovers?
Store in an airtight container in the fridge for up to 3 days. Reheat in a skillet with a little oil to regain crispiness instead of microwaving.
Pin This Recipe!
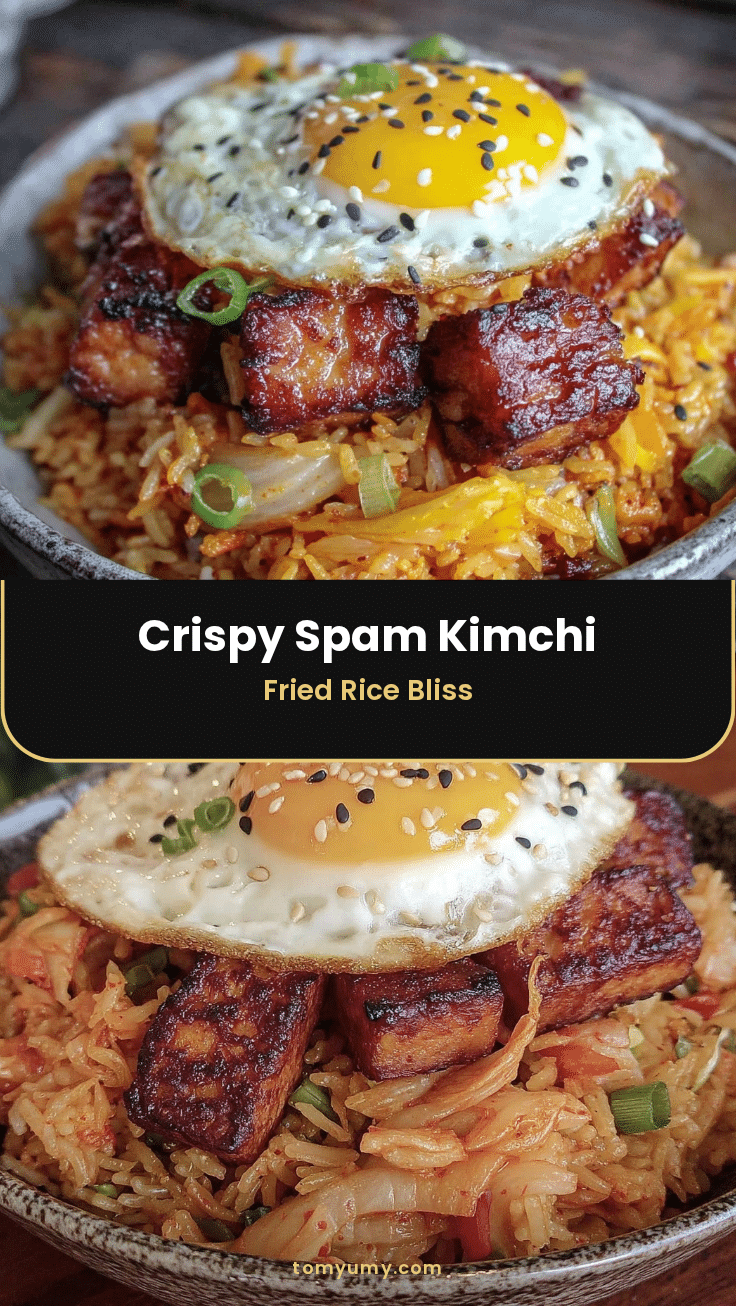
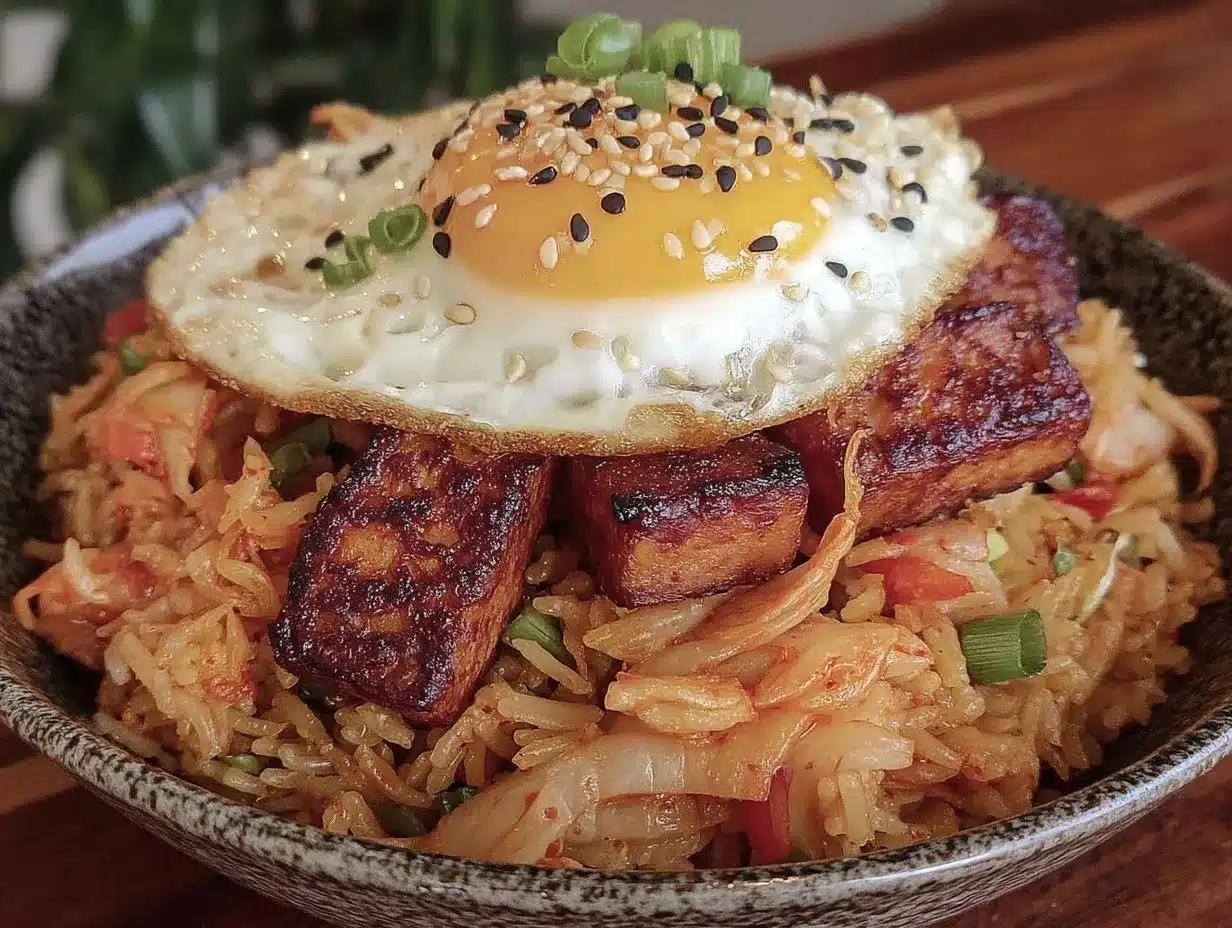
Crispy Kimchi Fried Rice with Spam and Sesame Fried Egg

A quick and satisfying fried rice dish featuring crispy day-old jasmine rice, tangy kimchi, caramelized spam, and topped with a nutty sesame fried egg. Perfect for busy weeknights or casual gatherings.
- Prep Time: 10 minutes
- Cook Time: 10 minutes
- Total Time: 20 minutes
- Yield: 2 servings 1x
- Category: Main Course
- Cuisine: Korean
Ingredients
- 2 cups cooked jasmine rice (preferably day-old, about 400g)
- 1 cup kimchi, chopped (about 150g)
- 1/2 cup spam, diced (about 75g)
- 2 tablespoons vegetable oil or sesame oil
- 1 small onion, finely chopped
- 2 cloves garlic, minced
- 1 tablespoon gochujang (optional)
- 1 tablespoon soy sauce
- 1 teaspoon sugar
- 2 scallions, sliced (green parts only)
- Sesame seeds, toasted (for garnish)
- 4 large eggs
- 1 tablespoon sesame oil (for frying eggs)
- Pinch of salt
Instructions
- Chop the kimchi into bite-sized pieces, dice the spam into small cubes, finely chop the onion, mince garlic, and slice the scallions. Drain kimchi if very wet to avoid soggy rice.
- Heat a large skillet over medium-high heat and add 1 tablespoon of vegetable or sesame oil. Add diced spam and cook until edges are golden and crispy, about 4-5 minutes. Remove and set aside.
- In the same pan, add onion and garlic. Cook until softened and fragrant, about 2-3 minutes.
- Add chopped kimchi and stir-fry for 3 minutes to caramelize slightly.
- Add day-old rice, breaking up clumps. Spread evenly and press gently to contact the pan. Cook undisturbed for 3-4 minutes until golden crust forms.
- Drizzle soy sauce, sugar, and gochujang (if using) over rice. Stir to combine, then spread again and let crisp for another 3 minutes.
- Return spam to the pan and fold in gently.
- Add sliced scallions and sprinkle toasted sesame seeds. Stir to distribute evenly and adjust seasoning if needed.
- In a separate small skillet, heat sesame oil over medium heat. Crack eggs, sprinkle with salt, and fry until whites are set but yolks remain runny, about 2-3 minutes.
- Serve fried rice topped with a sesame fried egg. Break yolk to drizzle over rice.
Notes
Use day-old rice for best crispiness. Do not overcrowd the pan when frying rice; work in batches if needed. Let rice sit undisturbed to develop a golden crust. Drain kimchi if too wet to avoid sogginess. Fry eggs in sesame oil for nutty aroma and richness. Reheat leftovers in a skillet with a little oil to restore crispiness.
Nutrition
- Serving Size: 1 serving (half of r
- Calories: 450
- Fat: 18
- Carbohydrates: 50
- Protein: 18
Keywords: kimchi fried rice, spam fried rice, sesame fried egg, quick dinner, Korean recipe, crispy fried rice, easy fried rice