“You won’t believe how this cake came to be,” my neighbor, Clara, said as she handed me a slice of her famous chocolate peanut butter bundt cake one chilly Thursday afternoon. Honestly, I was just stopping by to borrow some sugar, but the moment that rich aroma hit my nose, I forgot all about the sugar. It was like the warm hug I didn’t know I needed after a long day. Clara confessed she stumbled on this recipe while attempting a classic chocolate cake, but a missing ingredient and a dash of peanut butter transformed it into something unforgettable.
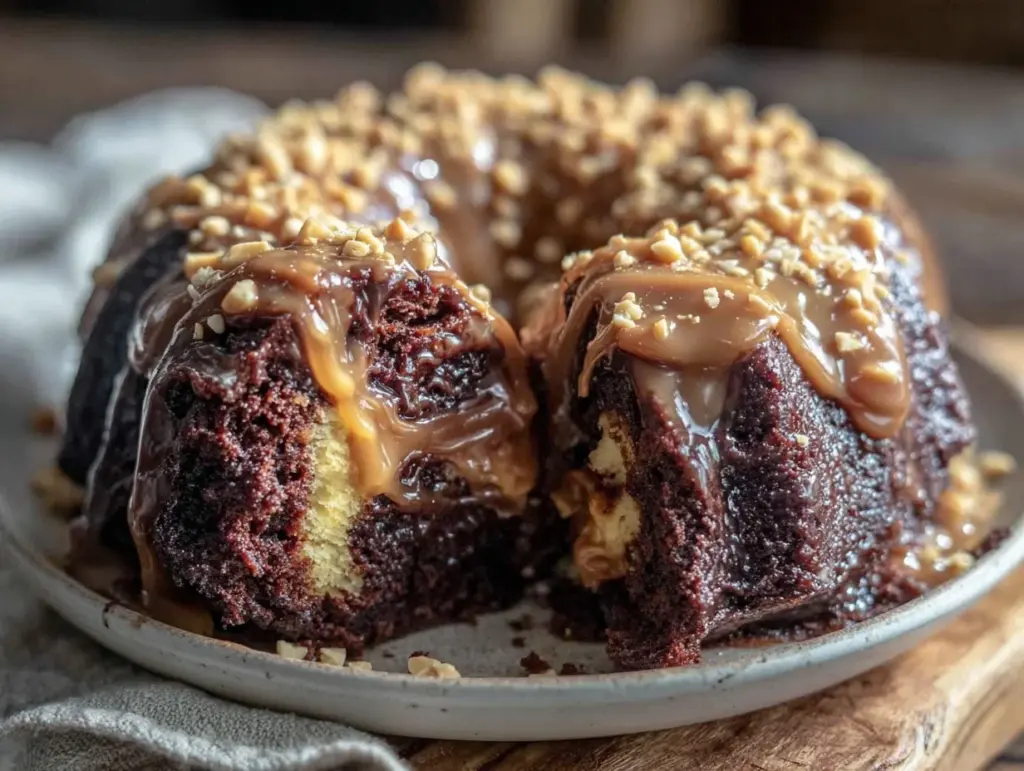
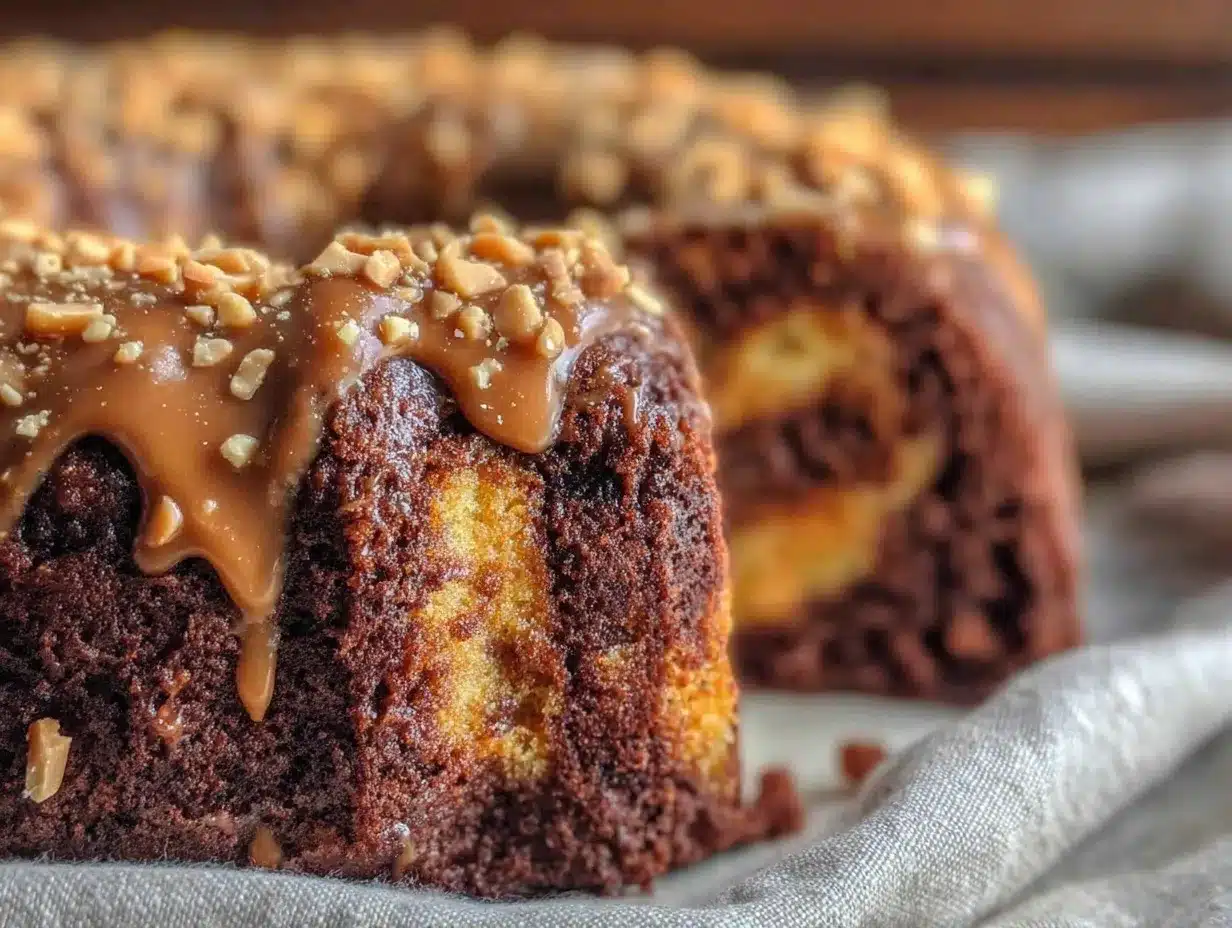
The texture was a perfect balance—moist, tender crumb with just enough density to hold the luscious glaze that pooled in the bundt’s crevices. You know that feeling when a bite melts in your mouth with a hint of nostalgia and surprise? Yep, that’s this cake. I made a mess trying to replicate it (flour everywhere, of course), but every bit of chaos was worth it. Maybe you’ve been there—scrambling in the kitchen, hoping your baking experiment doesn’t turn into a disaster. Yet, somehow, this cake has become my go-to for potlucks and cozy weekend treats.
What makes this chocolate peanut butter bundt cake so special isn’t just the combo of flavors but the way the rich glaze wraps around each slice like a silky blanket. It’s the kind of recipe that keeps showing up at family dinners, not because it’s fancy, but because it simply delivers comfort with a little twist. Let me tell you, once you try it, you’ll find yourself baking it again and again.
Why You’ll Love This Recipe
After countless trials (and a few burnt edges), this chocolate peanut butter bundt cake recipe has earned its spot in my baking hall of fame. Here’s why it might just become your favorite too:
- Quick & Easy: Comes together in under an hour, making it perfect for busy weeknights or last-minute dessert cravings.
- Simple Ingredients: No need for fancy or hard-to-find items—everything is probably sitting in your pantry right now.
- Perfect for Gatherings: Whether it’s a casual brunch or a holiday party, this cake steals the show without the stress.
- Crowd-Pleaser: Kids and adults alike rave about the peanut butter-chocolate combo, and the moist crumb keeps everyone coming back for seconds.
- Unbelievably Delicious: The rich glaze adds that extra oomph, making every slice feel indulgent but comforting.
What really sets this recipe apart is the way the peanut butter is folded into the batter, lending a subtle depth without overwhelming the chocolate. Plus, the glaze is neither too sweet nor too thin—it clings just right, creating a perfect finish. Honestly, it’s comfort food with a sophisticated twist, and it’s been my secret weapon for impressing guests without breaking a sweat.
What Ingredients You Will Need
This recipe uses simple, wholesome ingredients to deliver bold flavor and satisfying texture without the fuss. Most are pantry staples, and substitutions make it easy to adapt.
- For the Cake Batter:
- All-purpose flour – 2 ½ cups (310 grams)
- Unsweetened cocoa powder – ¾ cup (75 grams), sifted for smoothness
- Baking powder – 1 ½ teaspoons
- Baking soda – 1 teaspoon
- Salt – ½ teaspoon
- Granulated sugar – 1 ¾ cups (350 grams)
- Unsalted butter – ¾ cup (170 grams), softened (I recommend Kerrygold for creaminess)
- Large eggs – 3, room temperature
- Buttermilk – 1 cup (240 ml), or whole milk with 1 tablespoon lemon juice (adds tenderness)
- Natural creamy peanut butter – 1 cup (250 grams), well stirred (smooth texture works best)
- Pure vanilla extract – 2 teaspoons
- For the Rich Glaze:
- Powdered sugar – 1 ½ cups (180 grams), sifted
- Unsweetened cocoa powder – 2 tablespoons (15 grams)
- Natural creamy peanut butter – ¼ cup (60 grams)
- Whole milk – 3-4 tablespoons (45-60 ml), adjust for desired thickness
- Pure vanilla extract – ½ teaspoon
Ingredient tips: I prefer using Bob’s Red Mill cocoa powder for its deep chocolate flavor. If you want a dairy-free version, swap butter for coconut oil and use almond milk for the buttermilk substitute. For a gluten-free twist, try a 1:1 gluten-free flour blend.
Equipment Needed
- Bundt cake pan (10 to 12-cup capacity) – essential for that signature ring shape
- Electric mixer (stand or hand) – makes creaming butter and sugar a breeze
- Mixing bowls – at least two, one for dry and one for wet ingredients
- Sifter or fine mesh sieve – to ensure cocoa and flour are lump-free
- Measuring cups and spoons – for accuracy with dry and liquid ingredients
- Rubber spatula – perfect for folding and scraping batter
- Wire cooling rack – to cool the cake evenly and avoid sogginess
If you don’t have a bundt pan, a tube pan or even a well-greased loaf pan can work in a pinch, but the glaze pools best in bundt’s curves. When I first made this, I used a regular round pan — and honestly, it just wasn’t the same. Also, keeping your mixer beaters clean while switching between wet and dry ingredients saves time. A little maintenance tip: after baking, soak your bundt pan in warm soapy water to preserve the nonstick finish.
Preparation Method
- Preheat your oven to 350°F (175°C). Grease your bundt pan thoroughly with butter and dust lightly with flour to prevent sticking. This step is crucial because, trust me, no one wants a broken cake!
- Whisk together dry ingredients. In a large bowl, sift the all-purpose flour, unsweetened cocoa powder, baking powder, baking soda, and salt. Set aside. This ensures your batter is lump-free and airy.
- Cream butter and sugar. Using an electric mixer, beat the softened butter and granulated sugar on medium speed for about 3-4 minutes until light and fluffy. You’ll notice the texture becomes pale and smooth—that’s the magic starting point.
- Add eggs one at a time. Beat in each egg fully before adding the next. This helps maintain the emulsion and keeps the batter cohesive.
- Mix in peanut butter and vanilla. Add the natural creamy peanut butter and pure vanilla extract. Beat until well combined; the batter will have a rich, nutty aroma that’s hard to resist.
- Alternate adding dry ingredients and buttermilk. Begin and end with the dry mix, adding in 3 additions total. Beat on low speed after each addition just until incorporated. This prevents overmixing and keeps the cake tender.
- Pour batter into prepared pan. Scrape the bowl with a spatula to get every bit in. Smooth the top gently with the spatula.
- Bake for 50-60 minutes. Insert a toothpick into the thickest part. It should come out clean or with a few moist crumbs. Ovens vary, so start checking at 50 minutes.
- Cool in pan for 15 minutes. Let it rest before flipping onto a wire rack. This cooling time helps the cake set so it releases cleanly.
- Prepare the glaze. Whisk powdered sugar, cocoa powder, peanut butter, vanilla, and 3 tablespoons milk until smooth. Add more milk if needed for drizzle consistency.
- Drizzle glaze generously. Once the cake is completely cool, pour the glaze over the top, letting it cascade down the sides. The glaze thickens as it sets, so don’t wait too long!
Personal tip: When I first tried this, I forgot to check the oven temperature and ended up with a slightly drier crumb. Don’t be like me—an oven thermometer is worth it! Also, don’t rush the cooling stage; flipping too early can crack your cake.
Cooking Tips & Techniques
Getting this chocolate peanut butter bundt cake just right is all about technique and patience. Here are some tips from my kitchen escapades:
- Room Temperature Ingredients: Butter, eggs, and buttermilk should be at room temp. Cold ingredients can cause the batter to curdle or bake unevenly.
- Don’t Overmix: Once the dry ingredients go in, mix just enough to combine. Overmixing leads to a dense, tough cake—which nobody wants.
- Grease the Pan Well: Use softened butter and flour to coat the bundt pan, especially the crevices. Your first attempt might stick a bit, but with practice, you’ll nail it.
- Use Fresh Cocoa Powder: Stale cocoa powder can taste flat or bitter. Fresh powder gives a vibrant chocolate flavor that pairs perfectly with peanut butter.
- Glaze Consistency: If your glaze is too thick, thin with a teaspoon of milk at a time. Too thin? Add a bit more powdered sugar. The goal is a slow drizzle that sticks without pooling excessively.
- Timing and Multitasking: While the cake bakes, prep your glaze and clean up. This keeps the kitchen manageable and your patience intact.
Honestly, my biggest fail was skipping the sifting step—lumps in cocoa powder are sneaky! Also, I learned that letting the cake cool fully before glazing avoids a messy meltdown. Trust me, less cleanup means more cake!
Variations & Adaptations
This recipe is flexible and welcoming to tweaks, so here are some ways to put your own spin on it:
- Nut-Free Version: Replace peanut butter with sunflower seed butter and use a nut-free butter substitute. The cake still tastes rich and satisfying.
- Seasonal Fruit Twist: Fold in ½ cup (75 grams) of fresh or frozen raspberries before baking for a fruity pop that balances the richness.
- Mocha Magic: Add 1 tablespoon instant espresso powder to the dry ingredients for a subtle coffee kick that pairs beautifully with chocolate and peanut butter.
- Gluten-Free Adaptation: Swap all-purpose flour for a high-quality gluten-free blend like Cup4Cup, and add ½ teaspoon xanthan gum if your blend lacks it.
- Personal Favorite: I sometimes swirl melted peanut butter into the batter before pouring it into the pan for a marbled effect that’s as pretty as it is tasty.
Serving & Storage Suggestions
This cake shines best served at room temperature, allowing the rich glaze to soften and the flavors to meld beautifully. Presentation-wise, a dusting of powdered sugar or a handful of chopped peanuts on top adds a nice crunch and visual appeal.
Pair it with a cold glass of milk, a strong cup of coffee, or even a scoop of vanilla ice cream for an indulgent dessert experience. For brunch, it goes surprisingly well with fresh berries or a dollop of whipped cream.
To store, wrap the cake tightly in plastic wrap or keep it in an airtight container at room temperature for up to 3 days. For longer storage, freeze the cake (without glaze) wrapped in foil and plastic wrap for up to 2 months. Thaw overnight in the fridge, then add the glaze fresh before serving.
Reheating? A few seconds in the microwave (10-15 seconds) revives that just-baked warmth, but be careful not to melt the glaze too much. Over time, the flavors deepen, so leftovers can taste even better the next day (if they last that long!).
Nutritional Information & Benefits
This chocolate peanut butter bundt cake delivers more than just indulgent flavor. Each slice provides a satisfying mix of protein from peanut butter and energy from wholesome cocoa powder and flour. Here’s an estimate per slice (assuming 12 slices):
| Nutrient | Amount |
|---|---|
| Calories | 320 kcal |
| Fat | 18 g (mostly from peanut butter and butter) |
| Protein | 7 g |
| Carbohydrates | 32 g |
| Fiber | 3 g |
| Sugar | 20 g |
Keep in mind this isn’t a low-calorie treat, but it’s made with real ingredients—no artificial additives. The peanut butter adds heart-healthy fats and protein, while cocoa powder provides antioxidants. If you have a nut allergy, the nut-free variation keeps it safe and still delicious. From a wellness perspective, this cake is a reminder that treating yourself with quality ingredients can be part of a balanced lifestyle.
Conclusion
So, if you’re up for a cake that’s both familiar and a little unexpected, this chocolate peanut butter bundt cake is calling your name. It’s an easy recipe that’s forgiving enough for beginners yet satisfying enough for seasoned bakers. I love how it brings people together—whether it’s my neighbor Clara’s impromptu coffee visit or a family gathering—it’s always met with smiles and second helpings.
Feel free to customize it to match your taste or dietary needs. And hey, if you try the mocha twist or the fruity version, drop a comment and share your experience. Baking is about joyful experiments, after all!
Go ahead, bake this cake, and make some sweet memories. You deserve it.
FAQs
Can I make this cake ahead of time?
Absolutely! Bake it a day in advance, store it well wrapped at room temperature, and add the glaze just before serving for the freshest taste.
What if I don’t have buttermilk?
Use whole milk with 1 tablespoon of lemon juice or white vinegar added. Let it sit for 5 minutes before using.
How do I prevent the cake from sticking to the bundt pan?
Grease thoroughly with butter and dust with flour, making sure to get into all the pan’s crevices. You can also use a baking spray with flour for convenience.
Can I use crunchy peanut butter instead of creamy?
You can, but the batter and glaze might have a bit more texture. I prefer creamy for smoothness, but crunchy adds a nice surprise in every bite.
Is this cake suitable for freezing?
Yes, freeze the cooled cake (without glaze) wrapped tightly. Thaw in the fridge overnight and add glaze fresh before serving.
Pin This Recipe!
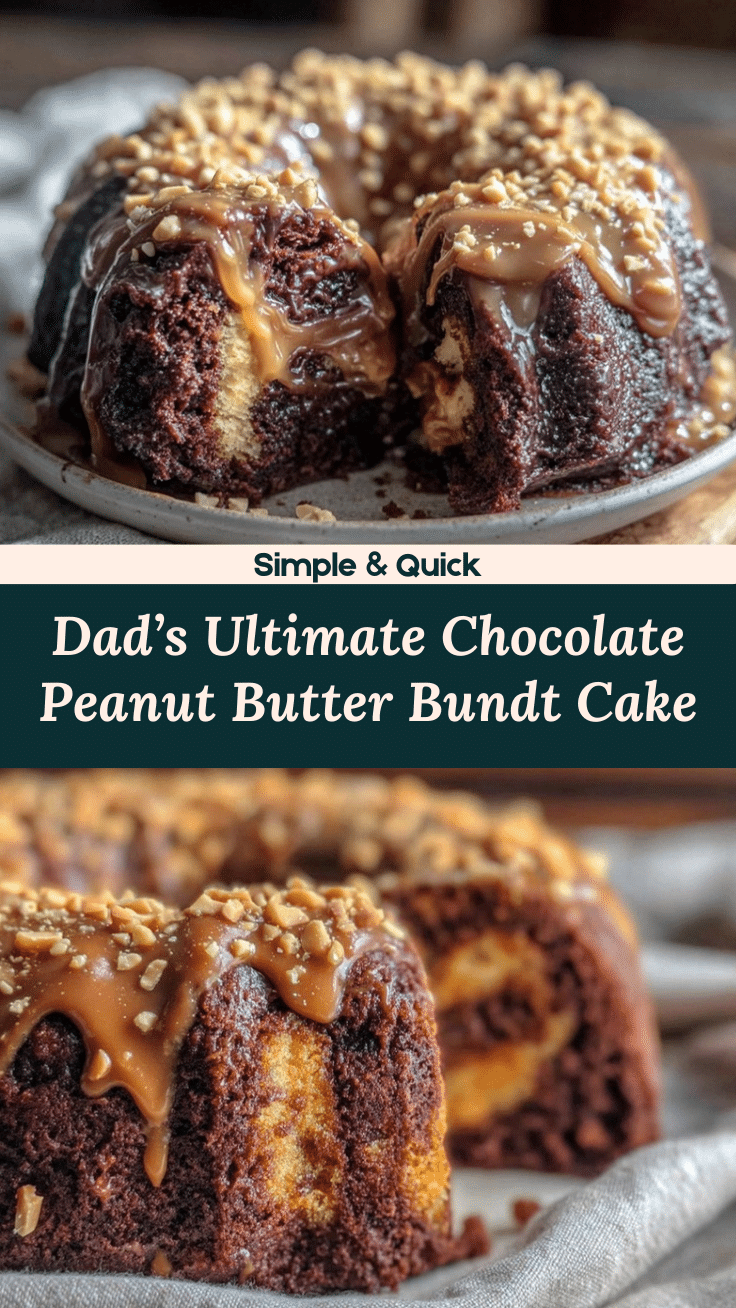
Favorite Chocolate Peanut Butter Bundt Cake
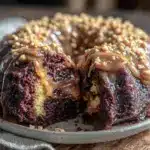
A moist and tender chocolate peanut butter bundt cake with a rich, silky glaze that delivers comfort with a sophisticated twist. Perfect for gatherings and easy to make with simple pantry ingredients.
- Prep Time: 15 minutes
- Cook Time: 50-60 minutes
- Total Time: 1 hour 15 minutes
- Yield: 12 servings 1x
- Category: Dessert
- Cuisine: American
Ingredients
- 2 ½ cups all-purpose flour (310 grams)
- ¾ cup unsweetened cocoa powder (75 grams), sifted
- 1 ½ teaspoons baking powder
- 1 teaspoon baking soda
- ½ teaspoon salt
- 1 ¾ cups granulated sugar (350 grams)
- ¾ cup unsalted butter (170 grams), softened
- 3 large eggs, room temperature
- 1 cup buttermilk (240 ml) or whole milk with 1 tablespoon lemon juice
- 1 cup natural creamy peanut butter (250 grams), well stirred
- 2 teaspoons pure vanilla extract
- For the glaze:
- 1 ½ cups powdered sugar (180 grams), sifted
- 2 tablespoons unsweetened cocoa powder (15 grams)
- ¼ cup natural creamy peanut butter (60 grams)
- 3–4 tablespoons whole milk (45–60 ml), adjust for desired thickness
- ½ teaspoon pure vanilla extract
Instructions
- Preheat your oven to 350°F (175°C). Grease your bundt pan thoroughly with butter and dust lightly with flour to prevent sticking.
- Whisk together dry ingredients: sift the all-purpose flour, unsweetened cocoa powder, baking powder, baking soda, and salt in a large bowl. Set aside.
- Using an electric mixer, beat the softened butter and granulated sugar on medium speed for about 3-4 minutes until light and fluffy.
- Beat in the eggs one at a time, fully incorporating each before adding the next.
- Add the natural creamy peanut butter and pure vanilla extract. Beat until well combined.
- Alternate adding the dry ingredients and buttermilk to the batter, beginning and ending with the dry mix. Mix on low speed just until incorporated after each addition.
- Pour the batter into the prepared bundt pan and smooth the top gently with a spatula.
- Bake for 50-60 minutes, checking at 50 minutes with a toothpick inserted into the thickest part; it should come out clean or with a few moist crumbs.
- Cool the cake in the pan for 15 minutes, then invert onto a wire cooling rack to cool completely.
- Prepare the glaze by whisking powdered sugar, cocoa powder, peanut butter, vanilla, and 3 tablespoons milk until smooth. Add more milk if needed for drizzle consistency.
- Once the cake is completely cool, drizzle the glaze generously over the top, allowing it to cascade down the sides.
Notes
Use room temperature ingredients for best results. Do not overmix after adding dry ingredients to keep the cake tender. Grease and flour the bundt pan thoroughly to prevent sticking. Fresh cocoa powder enhances flavor. Adjust glaze thickness with milk or powdered sugar as needed. An oven thermometer is recommended to ensure accurate baking temperature. Let the cake cool completely before glazing to avoid melting the glaze.
Nutrition
- Serving Size: 1 slice (1/12 of cak
- Calories: 320
- Sugar: 20
- Fat: 18
- Carbohydrates: 32
- Fiber: 3
- Protein: 7
Keywords: chocolate bundt cake, peanut butter cake, easy bundt cake, chocolate peanut butter dessert, rich glaze cake, moist bundt cake