Picture this: a beautifully crafted turkey-shaped centerpiece sitting on your holiday table, surrounded by crackers, veggies, and the warm laughter of friends and family. The aroma of the creamy, tangy cheese mixed with delicious herbs fills the air. The first time I made this Festive Turkey Cheese Ball, I knew it was something special. My kids were giggling at the adorable turkey design, and my guests couldn’t stop raving about its flavors. It’s one of those party dishes that’s so easy to put together but looks like you spent hours on it!
This recipe is my go-to for Thanksgiving and holiday gatherings. It’s the kind of dish that’s not just food—it’s a conversation starter. And honestly, who doesn’t love a cheese ball? It’s like a bite of creamy, cheesy goodness with a hint of fun and festivity. I’ve tested this recipe countless times to ensure it’s foolproof, and every time I serve it, I feel like I’ve hit the jackpot. You’re going to love adding this to your holiday menu—it’s guaranteed to be the star of the snack table!
Why You’ll Love This Recipe
- Easy to Make: You don’t need to be a professional chef to make this turkey cheese ball. It’s simple enough for anyone to whip up!
- Holiday Charm: The turkey design adds a festive touch to your table, making it perfect for Thanksgiving gatherings and holiday parties.
- A Crowd-Pleaser: Everyone loves a good cheese ball, and this one has a delightful mix of creamy, cheesy, and savory flavors.
- Customizable: You can tweak the seasonings and decorations to suit your taste and your holiday theme.
- Make-Ahead Friendly: Prepare it a day in advance and save yourself some stress on the big day.
What sets this recipe apart is its creative presentation. Instead of a plain cheese ball, you’ll transform it into a turkey-shaped masterpiece with just a few simple additions. The combination of cream cheese, cheddar, and herbs creates a flavor that’s sure to be a hit, while the turkey design will have everyone talking. Trust me, this isn’t just another cheese ball—it’s the ultimate holiday appetizer that brings joy and deliciousness together!
What Ingredients You Will Need
This recipe uses simple, everyday ingredients that come together to create a flavorful, festive centerpiece. Here’s what you’ll need:
- For the Cheese Ball:
- 2 (8 oz) packages of cream cheese, softened
- 2 cups shredded sharp cheddar cheese
- 1/4 cup chopped fresh parsley (optional, for freshness)
- 2 green onions, finely chopped
- 1/2 teaspoon garlic powder
- 1/2 teaspoon onion powder
- 1/4 teaspoon smoked paprika (for a subtle smoky kick)
- Salt and pepper to taste
- For Decorating the Turkey:
- Pretzel rods (for the tail feathers)
- Cheddar cheese slices (cut into feather shapes)
- Olives (for eyes)
- Red bell pepper (for the wattle)
- Mini pepperoni slices (for the body)
- 1 candy corn (for the beak)
- For Serving:
- Assorted crackers
- Fresh vegetable sticks like celery, carrots, and cucumber
Most of these ingredients are pantry staples or easy to grab during your regular grocery run. Feel free to swap some items based on your preference or dietary needs.
Equipment Needed
Here’s what you’ll need to make this Festive Turkey Cheese Ball:
- Mixing bowls
- Rubber spatula or wooden spoon
- Plastic wrap
- Butter knife or small spatula (for spreading)
- Sharp knife (for cutting decorations)
- Serving platter or board
If you don’t have a serving platter, a cutting board or even a large plate will work beautifully. When it comes to mixing, I recommend using a sturdy spoon or spatula—it makes combining the cheeses and herbs a breeze. And don’t worry if your knife skills aren’t perfect; imperfect feathers add character to your turkey!
Preparation Method
- In a large mixing bowl, combine the softened cream cheese, shredded cheddar, parsley, green onions, garlic powder, onion powder, smoked paprika, salt, and pepper. Mix until well combined. A rubber spatula works great here!
- Using your hands (pro tip: dampen them slightly to prevent sticking), shape the mixture into a large ball. Place it on a piece of plastic wrap and tightly wrap it. Refrigerate for at least 2 hours or overnight for best results. This step is crucial to firm up the cheese ball and make it easier to decorate.
- Once chilled, unwrap the cheese ball and place it on your serving platter. Smooth out any rough edges with a butter knife or spatula.
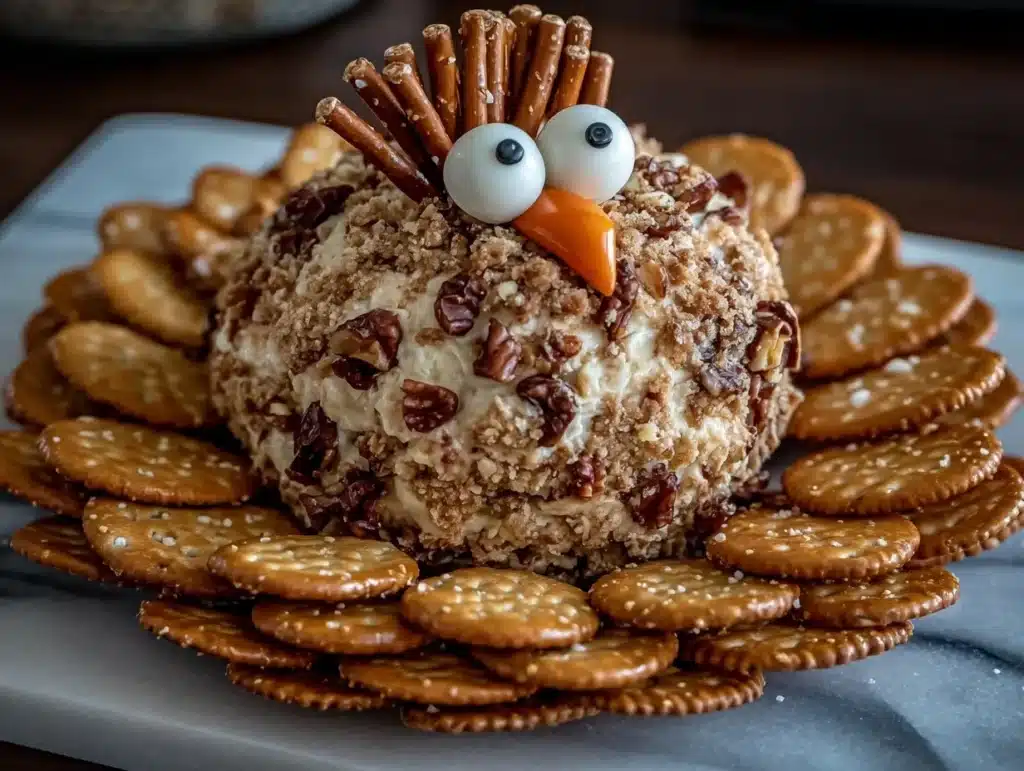
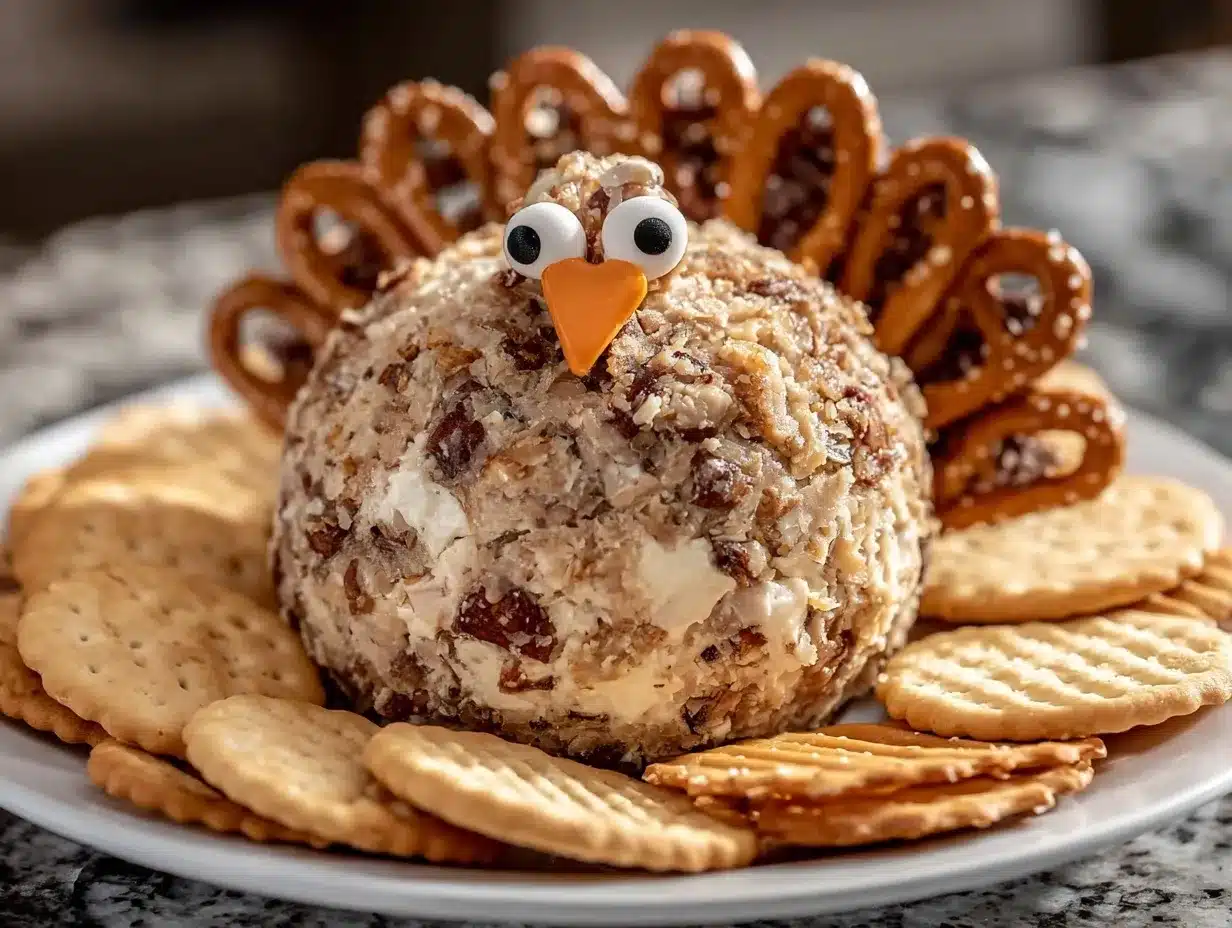
- Start decorating your turkey! Use pretzel rods as the tail feathers—stick them into the back of the cheese ball so they fan out. Arrange cheddar cheese slices cut into feather shapes around the pretzels for a pop of color.
- For the face of the turkey, use two olives for the eyes. Cut a small triangle from the candy corn to create the beak and attach it beneath the eyes. Slice a piece of red bell pepper into a small curved shape for the wattle and place it next to the beak.
- Finish the turkey by covering the remaining cheese ball surface with mini pepperoni slices. Press them gently into the cheese to create a cohesive look.
- Arrange crackers and vegetable sticks around the turkey for dipping and serve chilled.
Cooking Tips & Techniques
Here are some helpful tips to make sure your turkey cheese ball turns out perfect:
- Room Temperature Cheese: Make sure your cream cheese is fully softened before mixing. If it’s too cold, it won’t mix smoothly.
- Chill Time is Key: Don’t skip the refrigeration step. A firm cheese ball is much easier to shape and decorate.
- Get Creative: Don’t stress about perfection when decorating your turkey—it’s supposed to be fun! Add your personal flair with different toppings or colors.
- Prep Ahead: You can make the cheese ball and decorations a day ahead. Just store everything separately and assemble before serving.
- Keep It Cool: This cheese ball is best served chilled, so avoid leaving it out for too long on the serving table.
Remember, the key is to enjoy the process. Don’t rush through the decoration. It’s a great activity to do with kids or anyone who loves a creative challenge!
Variations & Adaptations
Looking to put your own spin on this Festive Turkey Cheese Ball? Here are some ideas:
- Seasonal Twist: Swap the cheddar cheese for a blend of gouda and parmesan for a richer flavor. Add chopped cranberries for a festive touch!
- Dietary Needs: Make it keto-friendly by using almond flour crackers or cucumber slices for serving. Use a dairy-free cream cheese and vegan cheddar for a plant-based option.
- Spicy Kick: Add a finely chopped jalapeño to the cheese mixture for a spicy twist, or use pepper jack cheese instead of cheddar.
- Different Shapes: Don’t feel limited to a turkey shape. You could make a wreath, a snowman, or even a Christmas tree for other occasions.
Feel free to experiment with different herbs or spices to suit your taste. Sometimes, I’ll add a dash of cumin or a sprinkle of chives—it’s all about making it your own!
Serving & Storage Suggestions
When it comes to serving the Festive Turkey Cheese Ball, presentation is everything! Here’s how to make it shine:
- Serving Temperature: Serve chilled for the best texture and flavor. Take it out of the fridge about 15 minutes before serving to soften slightly.
- Pairing Ideas: Serve with an assortment of crackers, pretzels, and fresh veggies like celery, carrots, and bell pepper slices. You could even add apple slices for a sweet twist.
- Storage Tips: Keep any leftovers in an airtight container in the refrigerator for up to 3-4 days. The flavors will continue to develop, making it just as delicious the next day!
- Reheating: There’s no need to reheat, but if you want to refresh the texture, give it a quick mix before serving again.
This cheese ball is ideal for sharing, and the cute turkey design makes it a festive centerpiece that everyone will love taking photos of!
Nutritional Information & Benefits
Here’s a breakdown of the nutritional highlights of the Festive Turkey Cheese Ball:
- Calories: Approximately 150 calories per serving (depends on portion size).
- Protein: High in protein thanks to the cream cheese and cheddar.
- Low-Carb Option: Easily adaptable for low-carb diets by serving with keto-friendly dippers.
- Key Ingredients: Parsley adds a boost of vitamins A, C, and K, while cheddar cheese provides calcium and protein.
- Allergen Alert: Contains dairy and may be cross-contaminated if crackers used aren’t gluten-free.
This recipe strikes a balance between indulgence and nutrition, making it a treat you can feel good about enjoying during the holidays.
Conclusion
If you’re looking for a holiday appetizer that’s equal parts delicious and adorable, this Festive Turkey Cheese Ball is it. Not only is it a showstopper centerpiece, but it’s also packed with flavor and fun to make. It’s the kind of recipe that brings family and friends together, sparking joy and laughter around the table.
Feel free to get creative with your turkey design—add your own personal touches and make it uniquely yours. I love this recipe because it’s so versatile, festive, and guaranteed to bring a smile to everyone’s face. Trust me, you’ll want to make this one every holiday season!
I’d love to hear how your turkey cheese ball turns out! Drop a comment below and share your tips, photos, or any fun variations you come up with. Happy holiday cooking!
FAQs
Can I make the cheese ball ahead of time?
Yes, you can make the cheese ball up to 1-2 days in advance. Store it in the refrigerator wrapped tightly in plastic wrap and decorate it just before serving.
What’s the best way to shape the cheese ball?
Dampen your hands with a bit of water or oil to prevent sticking, and gently shape the cheese mixture into a ball. Don’t worry if it’s not perfect—the decorations will cover any imperfections.
Can I freeze the cheese ball?
Yes, you can freeze the cheese ball before decorating. Wrap it tightly in plastic wrap and store it in an airtight container for up to a month. Thaw in the refrigerator before decorating and serving.
What crackers pair best with this cheese ball?
Any sturdy cracker works well! I recommend whole-grain crackers, buttery crackers, or even pretzel crisps. Veggie sticks like carrots and celery are also great options.
How do I make this recipe dairy-free?
Use dairy-free cream cheese and cheddar cheese alternatives. Brands like Daiya or Kite Hill offer great substitutes. Pair with gluten-free crackers or veggie sticks for an allergy-friendly option.
Pin This Recipe!
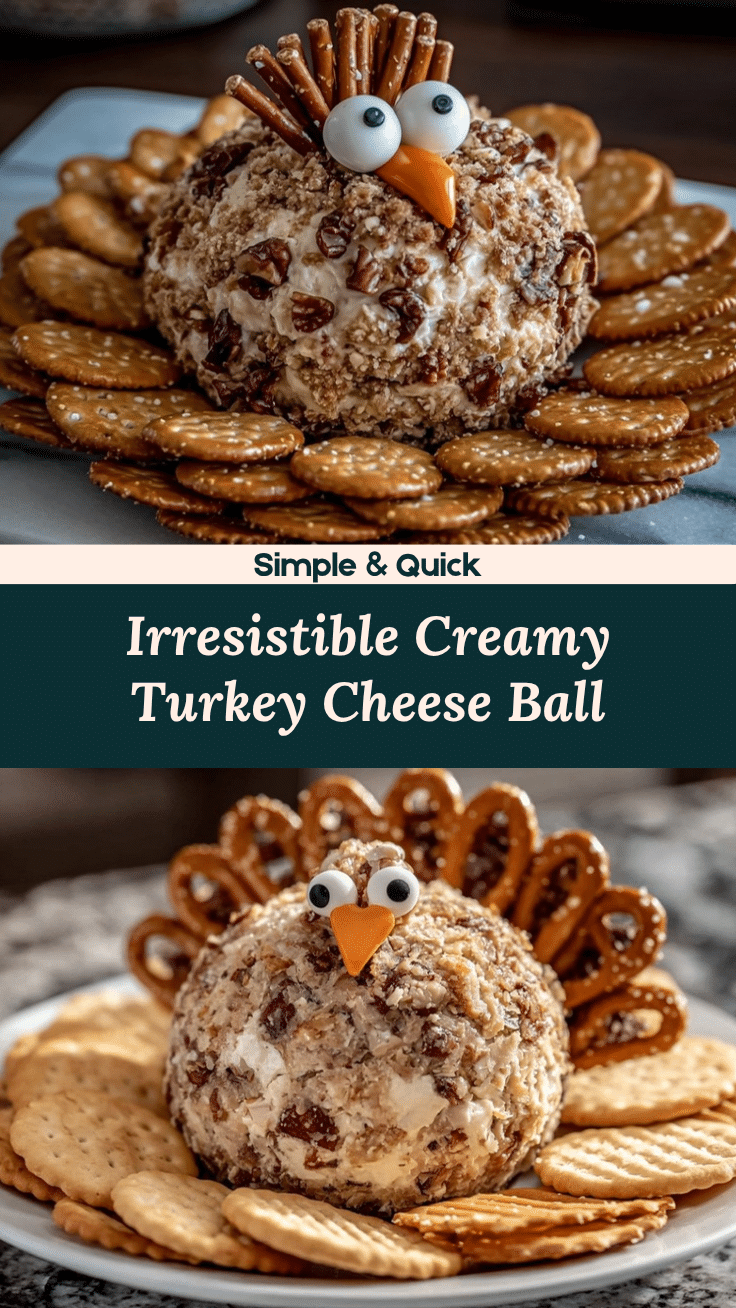
Festive Turkey Cheese Ball Recipe Perfect for Holidays

A festive turkey-shaped cheese ball that serves as a delicious centerpiece for holiday gatherings, combining creamy cheese and savory flavors with creative decorations.
- Prep Time: 15 minutes
- Cook Time: 2 hours (chilling time)
- Total Time: 2 hours 15 minutes
- Yield: 12 servings 1x
- Category: Appetizer
- Cuisine: American
Ingredients
- 2 (8 oz) packages of cream cheese, softened
- 2 cups shredded sharp cheddar cheese
- 1/4 cup chopped fresh parsley (optional, for freshness)
- 2 green onions, finely chopped
- 1/2 teaspoon garlic powder
- 1/2 teaspoon onion powder
- 1/4 teaspoon smoked paprika
- Salt and pepper to taste
- Pretzel rods (for the tail feathers)
- Cheddar cheese slices (cut into feather shapes)
- Olives (for eyes)
- Red bell pepper (for the wattle)
- Mini pepperoni slices (for the body)
- 1 candy corn (for the beak)
- Assorted crackers
- Fresh vegetable sticks like celery, carrots, and cucumber
Instructions
- In a large mixing bowl, combine the softened cream cheese, shredded cheddar, parsley, green onions, garlic powder, onion powder, smoked paprika, salt, and pepper. Mix until well combined.
- Using your hands, shape the mixture into a large ball. Place it on a piece of plastic wrap and tightly wrap it. Refrigerate for at least 2 hours or overnight.
- Once chilled, unwrap the cheese ball and place it on your serving platter. Smooth out any rough edges with a butter knife or spatula.
- Start decorating your turkey. Use pretzel rods as the tail feathers—stick them into the back of the cheese ball so they fan out. Arrange cheddar cheese slices cut into feather shapes around the pretzels.
- For the face of the turkey, use two olives for the eyes. Cut a small triangle from the candy corn to create the beak and attach it beneath the eyes. Slice a piece of red bell pepper into a small curved shape for the wattle and place it next to the beak.
- Finish the turkey by covering the remaining cheese ball surface with mini pepperoni slices. Press them gently into the cheese to create a cohesive look.
- Arrange crackers and vegetable sticks around the turkey for dipping and serve chilled.
Notes
[‘Make sure your cream cheese is fully softened before mixing for a smoother texture.’, ‘Refrigerate the cheese ball for at least 2 hours or overnight to firm it up for easier shaping and decorating.’, ‘Feel free to get creative with the decorations—imperfect shapes add character to your turkey design.’, ‘You can prepare the cheese ball and decorations a day ahead and assemble before serving.’, ‘Serve chilled for the best texture and flavor.’]
Nutrition
- Serving Size: 1/12 of the cheese b
- Calories: 150
- Sugar: 1
- Sodium: 150
- Fat: 12
- Saturated Fat: 7
- Carbohydrates: 2
- Protein: 5
Keywords: holiday appetizer, Thanksgiving recipe, cheese ball, festive turkey, party food, holiday centerpiece