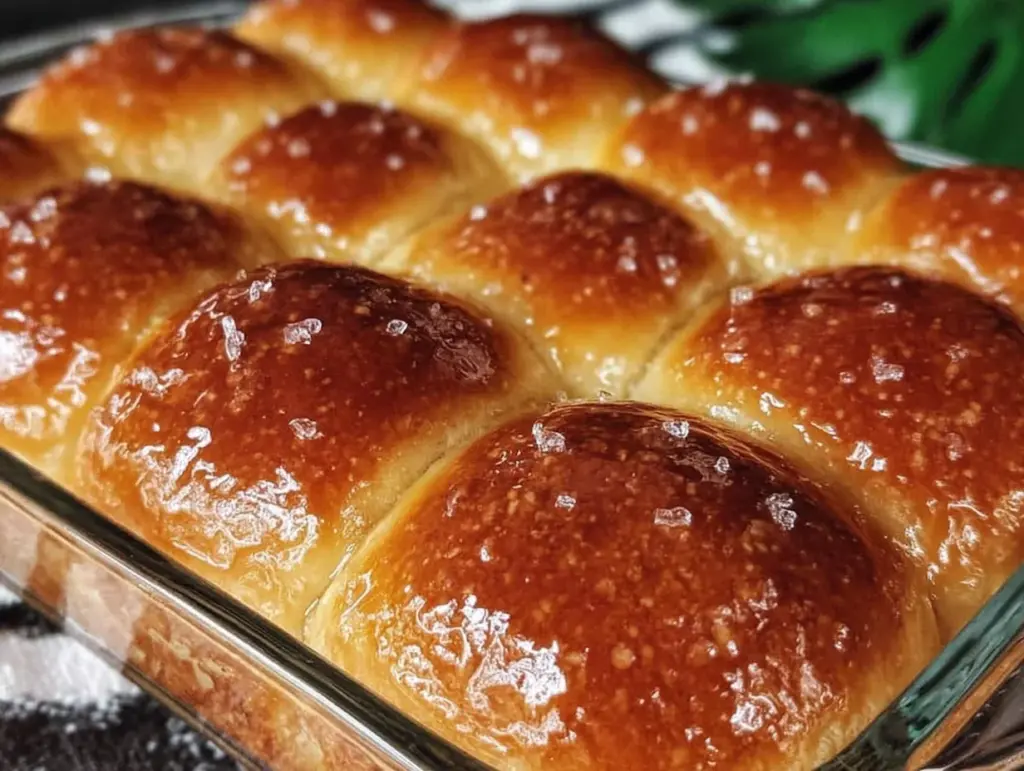
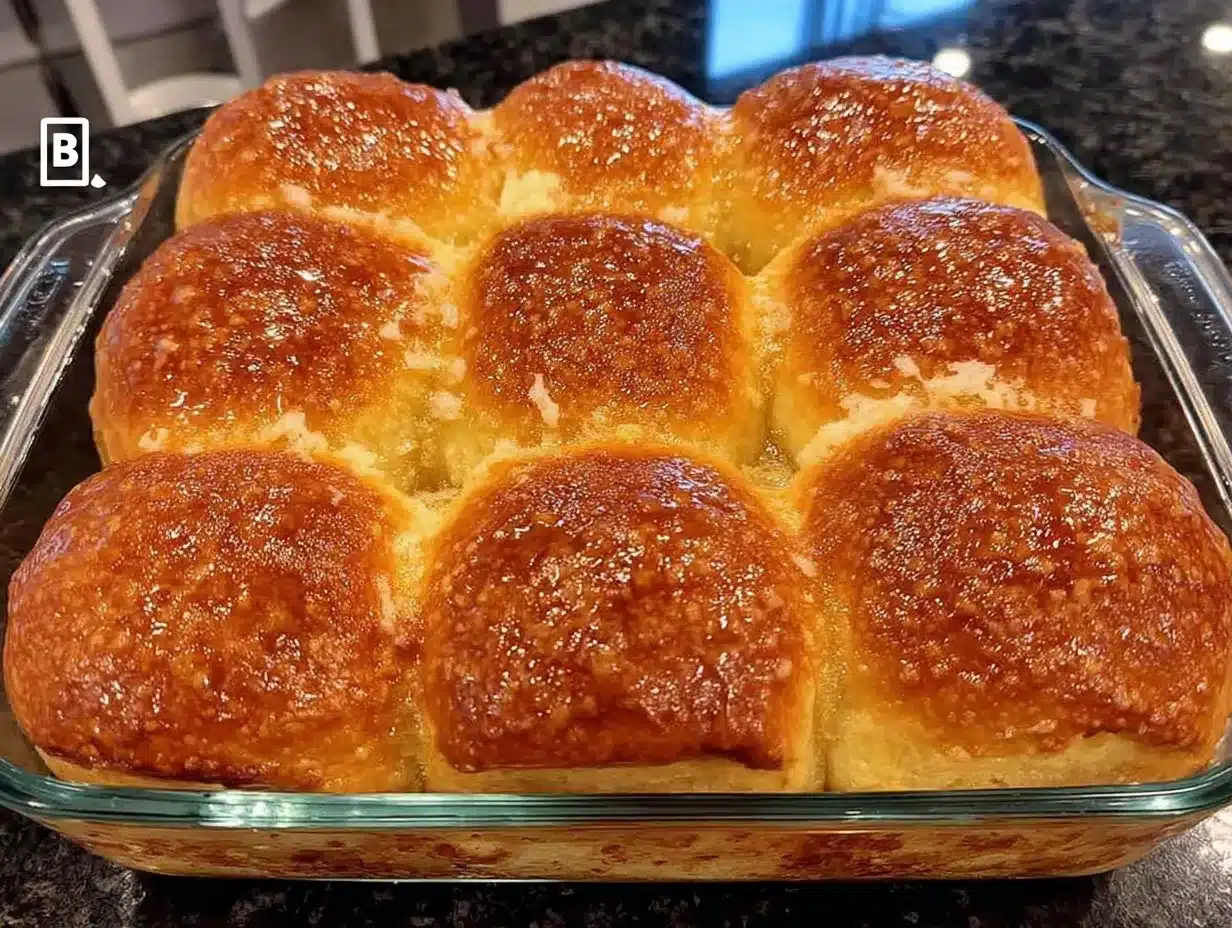
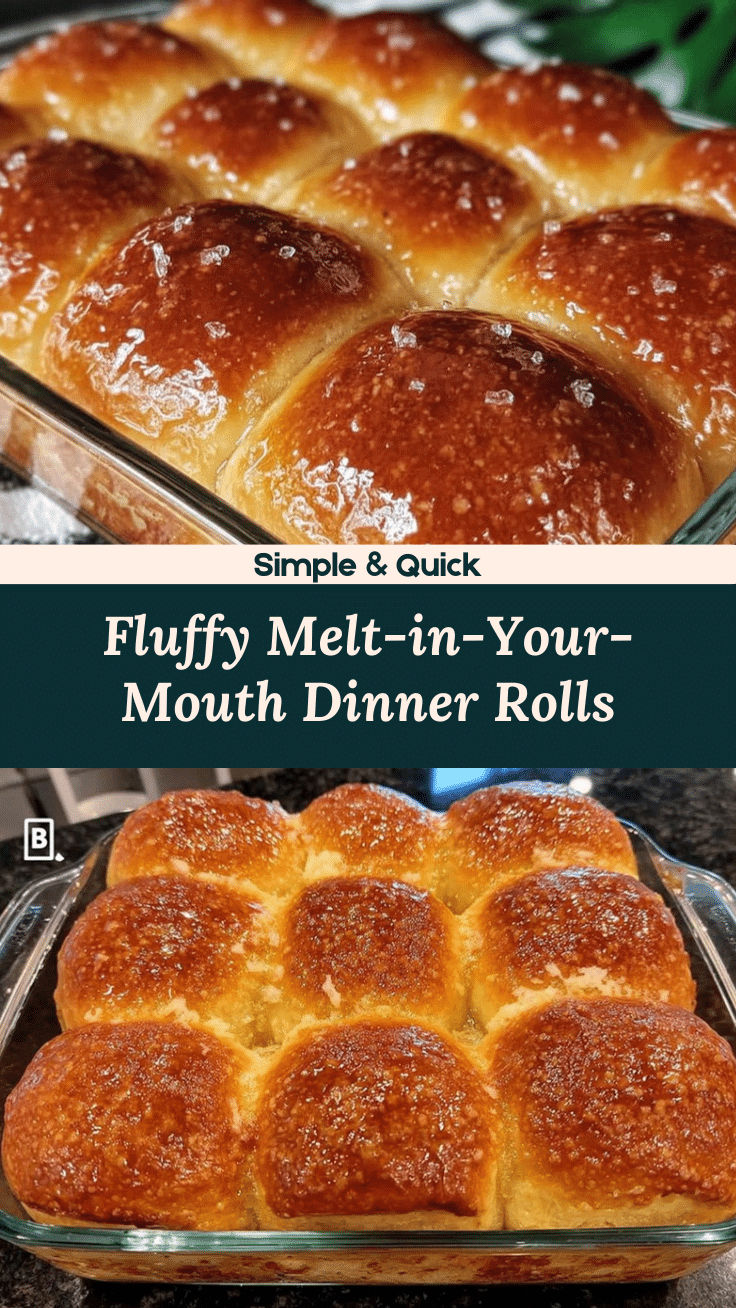
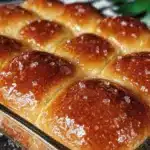
Imagine walking into your kitchen as the golden, buttery aroma of fluffy homemade dinner rolls floats through the air—honestly, it’s the kind of scent that stops you in your tracks. There’s something magical about seeing a batch of these best butter buns puff up in the oven, their tops turning that perfect shade of caramel brown. The first time I pulled a pan of these rolls out, I couldn’t help but feel giddy, like I’d just discovered the secret to pure comfort. I paused, took a deep breath, and knew I’d stumbled onto a recipe that was about to become a family legend.
Growing up, my grandma was famous for her pillowy dinner rolls—she’d make them for Sunday suppers, holiday feasts, and, honestly, any excuse she could find. She’d let me help shape the dough when I was knee-high to a grasshopper (my rolls were always a little wonky, but she never minded). Years later, when I tried to recreate her magic, I realized how much love goes into each batch. It’s not just about the ingredients—it’s about the warmth, the laughter, and the memories shared around the table.
Every time I make these fluffy homemade dinner rolls, folks can’t resist sneaking one off the cooling rack (even before the butter’s melted on top). My kids have developed stealthy skills just for this occasion, and let’s face it—I’m usually right there with them. These rolls are dangerously easy, deliver pure, nostalgic comfort, and brighten up any meal—whether it’s a potluck, a cozy weeknight dinner, or a holiday spread. If you want a recipe that feels like a warm hug and turns ordinary moments into something special, you’re going to want to bookmark this one. I’ve tested these more times than I’ll admit (in the name of research, of course), and now they’re a staple for family gatherings, gifting, and those nights when you just need a little extra comfort.
Why You’ll Love This Recipe
Let’s be real—there’s dinner rolls, and then there’s these fluffy homemade dinner rolls. Years of baking, a few kitchen mishaps, and lots of taste tests have taught me what makes butter buns truly unforgettable. Here’s what sets this recipe apart and why I always reach for it when I want something special but hassle-free:
- Quick & Easy: You’ll have warm, pillowy rolls in under 2 hours—perfect for last-minute cravings or when you forgot the bread for dinner.
- Simple Ingredients: No fancy flour or hard-to-find yeast. Everything is probably in your pantry right now.
- Perfect for Any Occasion: These buns shine at holiday dinners, weeknight meals, brunch spreads, or potlucks. They’re a guaranteed hit wherever you bring them.
- Crowd-Pleaser: Kids love them, adults rave about them, and picky eaters usually ask for seconds. I’ve never seen leftovers stick around for long.
- Unbelievably Delicious: The soft, slightly sweet interior and rich buttery crust make these rolls irresistible. They’re comfort food, plain and simple.
What makes these the best butter buns? For starters, I use a special mixing method that builds up the fluff factor (no dense bread here, thank you very much). The dough is soft, easy to handle, and forgiving—even if you’re not a bread-baking pro. A generous brush of melted butter on top? That’s my little trick for maximum flavor and that shiny, bakery-style finish.
This recipe isn’t just another roll—it’s the one that makes you pause after the first bite and savor every morsel. It’s comfort food that’s lighter and faster but never skimps on taste. You can impress your guests without breaking a sweat, or treat your family to homemade goodness on a busy weeknight. I’ve tweaked and tested until I found the fluffiest, most foolproof rolls, and I promise: you’ll taste the difference.
What Ingredients You Will Need
These fluffy homemade dinner rolls rely on a handful of straightforward ingredients to deliver that perfect buttery flavor and soft, cloud-like texture. Most are pantry staples, and you can swap a few things to fit your needs—no stress, no fuss.
- All-purpose flour (about 4 cups / 500g): The foundation of the rolls. I like King Arthur for consistent results, but any good quality flour works.
- Active dry yeast (2¼ tsp / 7g): This gets the dough rising and gives that classic bread flavor. Instant yeast works too—just skip the initial proofing step.
- Warm milk (1 cup / 240ml, about 100°F/38°C): Adds richness and helps the dough rise. You can use whole, 2%, or even almond milk for a dairy-free twist.
- Sugar (¼ cup / 50g): Gives a hint of sweetness and helps activate the yeast.
- Unsalted butter (¼ cup / 60g, melted plus 2 Tbsp / 30g for brushing): For both the dough and the signature buttery tops. You can use salted butter, but reduce the added salt a bit.
- Large eggs (1, room temperature): Makes the dough extra tender and helps bind everything together.
- Salt (1 tsp / 6g): Balances the sweetness and brings out the flavor.
- Optional:
- Egg wash (1 egg + 1 Tbsp milk): For extra shine on top.
- Sesame or poppy seeds: For a bakery-style finish.
Ingredient notes and tips:
- Milk: If you’re out of milk, water works in a pinch—it just won’t be quite as rich.
- Butter: For dairy-free, swap with vegan butter or coconut oil (the rolls will be a little different, but still tasty).
- Flour: You can use bread flour for chewier rolls, or a gluten-free blend for those sensitive to gluten (I’ve tried Bob’s Red Mill with success).
- Yeast: Make sure it’s fresh—old yeast means sad, flat buns. If you’re unsure, proof it before mixing.
- Eggs: If you’re egg-free, skip the egg and add an extra tablespoon of melted butter for richness.
These ingredients work together to create the best easy butter buns for any meal. You’ll notice the dough is soft and slightly sticky—that’s a good sign! If you’re mixing by hand, don’t be afraid to add a tiny bit more flour if things feel too wet, but resist the urge to overdo it. The magic is in the balance.
Equipment Needed
One of the things I love most about these fluffy homemade dinner rolls is how little equipment you need. No stand mixer? No problem—your hands are all you really need.
- Large mixing bowl: For combining ingredients and letting the dough rise. I’ve used everything from stainless steel to old ceramic bowls—whatever you’ve got works.
- Wooden spoon or dough whisk: Mixing up the dough is easier with a sturdy spoon. A dough whisk is a nice touch, but not required.
- Measuring cups and spoons: Precision matters with bread, so grab your favorite set. If you have a kitchen scale, that’s even better for accuracy.
- Baking pan (9×13-inch / 23x33cm): The classic choice for even rolls. You can also use two 8×8-inch pans or a round cake pan for a different look.
- Clean kitchen towel or plastic wrap: To cover the dough while it rises.
- Pastry brush: For that all-important butter glaze. If you’re out, use the back of a spoon or your fingers—it’s messy, but it works!
- Small saucepan: For melting butter, if you’re not using the microwave.
If you’re just starting out, don’t worry about fancy gadgets. I’ve had great results with thrift store pans and dollar-store spoons. For specialty equipment like dough whisks, just rinse them right after use—they’re easier to clean before dough dries. If you want to splurge, a silicone pastry brush is a game-changer (mine’s survived years of butter basting!).
Preparation Method
Ready to make the best easy butter buns? Follow these steps for perfectly fluffy homemade dinner rolls, every single time. I’ve included time estimates, troubleshooting notes, and sensory cues—so you know exactly what to expect at each stage.
-
Activate the yeast (5 minutes):
In a large bowl, combine 1 cup (240ml) warm milk (about 100°F/38°C) and 2¼ tsp (7g) active dry yeast. Add ¼ cup (50g) sugar and stir gently. Let sit for 5 minutes until the mixture looks frothy and smells pleasantly yeasty (if nothing happens, your yeast may be old—start over with fresh yeast). -
Mix the dough (10 minutes):
Once the yeast is bubbly, add ¼ cup (60g) melted butter, 1 large egg (room temperature), and 1 tsp (6g) salt. Stir to combine. Gradually add 4 cups (500g) all-purpose flour, mixing until a shaggy dough forms. Switch to your hands when it gets thick—dough should be soft and a bit sticky, but not wet. -
Knead the dough (8-10 minutes):
Turn dough out onto a lightly floured surface. Knead for about 8-10 minutes (or use a stand mixer with a dough hook for 6 minutes). Dough should become smooth, elastic, and slightly tacky. If it sticks to your hands, sprinkle on a teaspoon of flour at a time—don’t overdo it. -
First rise (60 minutes):
Place the dough back in your bowl, cover with a clean towel or plastic wrap, and let rise in a warm place until doubled, about 1 hour. It should look puffy and jiggle a bit when you nudge the bowl. If your kitchen is chilly, turn on your oven for 2 minutes, then turn it off and let the dough rise inside. -
Shape the rolls (10 minutes):
Punch down the dough gently to release air. Divide into 15 equal pieces (about 50g each). Roll each into a smooth ball and arrange in a greased 9×13-inch pan, leaving a little space between. Cover and let rise again for 30 minutes—rolls should almost touch but not be squished together. -
Preheat the oven (while second rise):
Set oven to 375°F (190°C). As rolls finish rising, they’ll look soft and pillowy. -
Bake (20-22 minutes):
Brush rolls lightly with egg wash (optional) for shine. Bake for 20-22 minutes until golden brown on top and a thermometer reads 190°F (88°C) in the center. If rolls brown too quickly, tent lightly with foil. -
Butter the buns (right after baking):
Remove from oven, and immediately brush tops with 2 Tbsp (30g) melted butter. Rolls should smell irresistible and look glossy. -
Cool and serve:
Let rolls cool for 10 minutes before serving. They’ll be soft, steamy, and melt-in-your-mouth delicious. If you can resist eating one right away, you’re stronger than me!
For extra efficiency: Measure ingredients before starting, and use your oven’s proof setting if you have one. If you notice dough isn’t rising, check your yeast’s expiration date. If rolls fall flat in the oven, it’s usually from over-proofing—next time, shorten the second rise by 5 minutes.
Cooking Tips & Techniques
After plenty of homemade dinner roll adventures (and a few flops), I’ve learned some tricks that guarantee the fluffiest butter buns every time. Here’s my best advice for success:
- Don’t rush the dough: Letting it rise fully is key for airiness. If your kitchen is cold, create a makeshift proofing box by placing your covered bowl near a warm oven or inside with the light on.
- Handle dough gently: When shaping rolls, don’t overwork. Just roll into balls with the palm of your hand—over-kneading at this stage can make buns tough.
- Watch your yeast: Always check expiration dates. If you’re unsure, proof the yeast with sugar and warm milk before mixing in other ingredients. Nothing’s sadder than waiting for dough that never rises!
- Bake until golden, not just “done”: Rolls should be deep golden on top and sound slightly hollow if tapped. Underbaking leads to doughy centers, so trust your eyes and nose.
- Butter immediately: Brushing on melted butter while rolls are hot helps lock in moisture and gives that craveable shine. Don’t skimp—this step sets these dinner rolls apart.
- Spacing matters: Leave a little room between rolls in the pan so they can puff up and bake evenly. Crowding leads to uneven cooking and dense edges.
- Multitasking tip: While dough rises, prep your dinner or set the table—you’ll feel like a kitchen pro. If you’re making rolls for a crowd, double the batch and use two pans.
I’ve learned (the hard way) that skipping the second rise makes rolls flat and chewy. Patience pays off! And if you forget to brush on butter, don’t worry—just melt a little extra and baste them as soon as you remember. These little tweaks make all the difference.
Variations & Adaptations
Once you’ve mastered these fluffy homemade dinner rolls, there’s a whole world of butter bun variations to keep things interesting. Here are some of my favorite ways to change them up:
- Whole wheat rolls: Swap half the all-purpose flour for whole wheat. Rolls will be a bit heartier, but still tender. Add an extra tablespoon of milk if dough feels dry.
- Garlic herb buns: Mix 1 Tbsp chopped fresh rosemary or thyme and 2 minced garlic cloves into the dough. Brush tops with garlic butter for a savory twist.
- Cheese-stuffed rolls: Tuck a cube of cheddar or mozzarella inside each dough ball before shaping. The melted cheese centers are a hit with kids (and adults, let’s be honest).
- Gluten-free option: Use a gluten-free bread flour blend. Rolls may bake up a bit differently, but they’ll still be soft and delicious. If you try this, add 1 tsp xanthan gum if your blend doesn’t include it.
- Vegan adaptation: Use plant-based milk and butter, and skip the egg—add 1 Tbsp flaxseed meal mixed with 3 Tbsp water as a binder.
I’ve made a cinnamon-sugar version for brunch by rolling the dough balls in cinnamon sugar before baking—pure breakfast bliss! Feel free to play with seeds, dried herbs, or even a sprinkle of sea salt on top for extra flavor. These buns are endlessly customizable for your table.
Serving & Storage Suggestions
The best way to enjoy these fluffy homemade dinner rolls? Fresh and warm, straight from the oven. But they’re delicious any time, and easy to store for later.
- Serving temperature: Serve rolls warm for maximum softness. If they’ve cooled, a quick 5-minute reheat in a 300°F (150°C) oven brings back the fresh-baked feel.
- Presentation: Arrange rolls in a bread basket lined with a pretty napkin for cozy family dinners or on a wooden board for Pinterest-worthy holiday spreads. A drizzle of honey or herb butter on the side looks gorgeous.
- Pairings: These buns are perfect with soups (chicken noodle is my favorite), hearty stews, or alongside roast chicken. For brunch, serve with scrambled eggs and fresh fruit.
- Storage: Cool rolls completely, then store in an airtight container at room temperature for up to 2 days. For longer storage, freeze rolls in a freezer bag up to 2 months—thaw and warm before serving.
- Reheating: Wrap rolls in foil and bake at 300°F (150°C) for 10 minutes, or microwave for 10-15 seconds each (watch so they don’t get rubbery).
- Flavor development: Rolls taste richer the next day as flavors meld. They’re great for making mini sandwiches with leftovers!
Honestly, I’ve hidden a few rolls in the freezer just so I can enjoy a “fresh” bun weeks later—it’s my secret stash for rainy days.
Nutritional Information & Benefits
Here’s a quick look at the estimated nutrition for these fluffy homemade dinner rolls (per roll, assuming 15 per batch):
- Calories: ~160
- Carbohydrates: ~25g
- Protein: ~4g
- Fat: ~4g
- Sugar: ~3g
Key ingredient benefits:
- Milk: Adds calcium and protein for bone health.
- Eggs: Boost the protein, making these buns a bit more filling.
- Butter: Provides rich flavor—swap for plant-based options if you’re watching cholesterol.
If you need gluten-free or dairy-free, see the substitutions above. Main allergens are wheat, milk, eggs, and butter. I like knowing exactly what’s in my bread—no preservatives, just wholesome ingredients. Baking from scratch makes me feel good about what I’m serving my family!
Conclusion
There’s a reason these fluffy homemade dinner rolls have become my go-to for family meals and special gatherings—they deliver comfort, flavor, and that irresistible fresh-baked aroma every single time. They’re easy enough for beginners, but impressive enough for holiday spreads. You can tweak them to suit your tastes, dietary needs, or whatever’s in your pantry (no stress, just good bread!).
Honestly, I love these best butter buns because they bring people together—they’re the kind of food that makes you linger at the table, sharing stories and reaching for “just one more.” If you try them, leave a comment, share your own twists, or tag me with your creations. I’d love to hear how you make these rolls part of your own family traditions.
So go ahead—whip up a batch, make a memory, and let these buns bring a little extra warmth into your kitchen. You deserve it!
Frequently Asked Questions
How do I know if my yeast is still good?
Check the expiration date, and always proof your yeast in warm milk with sugar. If it gets foamy in 5 minutes, you’re good to go! If nothing happens, try a fresh packet.
Can I make these dinner rolls ahead of time?
Absolutely! Shape the rolls, cover, and refrigerate overnight. Let them come to room temperature and rise for 30 minutes before baking the next day.
Can I freeze homemade dinner rolls?
Yes—cool completely, wrap tightly, and freeze up to 2 months. Thaw and reheat in the oven for best results. They taste almost as good as fresh!
What’s the best way to get perfectly shaped rolls?
Weigh the dough pieces for uniform rolls, and use the palm of your hand to roll each ball on a lightly floured surface. Don’t worry if they’re not perfect—they’ll bake up beautifully anyway.
Can I use whole wheat flour for this recipe?
Yes, you can replace up to half the all-purpose flour with whole wheat. Add a tablespoon of extra milk if needed to keep the dough soft. Whole wheat adds a nutty flavor and extra fiber!
Pin This Recipe!
Fluffy Homemade Dinner Rolls – Best Easy Butter Buns
These fluffy homemade dinner rolls are soft, buttery, and irresistibly delicious. Quick and easy to make, they’re perfect for family dinners, holiday feasts, or any occasion that calls for comforting, fresh-baked bread.
- Prep Time: 25 minutes
- Cook Time: 22 minutes
- Total Time: 1 hour 47 minutes
- Yield: 15 rolls 1x
- Category: Bread
- Cuisine: American
Ingredients
- 4 cups all-purpose flour (500g)
- 2 1/4 teaspoons active dry yeast (7g)
- 1 cup warm milk (240ml, about 100°F)
- 1/4 cup sugar (50g)
- 1/4 cup unsalted butter (60g), melted, plus 2 tablespoons (30g) for brushing
- 1 large egg, room temperature
- 1 teaspoon salt (6g)
- Optional: 1 egg + 1 tablespoon milk for egg wash
- Optional: Sesame or poppy seeds for topping
Instructions
- In a large bowl, combine warm milk and active dry yeast. Add sugar and stir gently. Let sit for 5 minutes until frothy.
- Add melted butter, egg, and salt to the yeast mixture. Stir to combine.
- Gradually add flour, mixing until a shaggy dough forms. Switch to hands when dough thickens; it should be soft and slightly sticky.
- Turn dough onto a lightly floured surface and knead for 8-10 minutes until smooth and elastic.
- Place dough back in the bowl, cover, and let rise in a warm place until doubled, about 1 hour.
- Punch down dough gently. Divide into 15 equal pieces and roll each into a ball. Arrange in a greased 9×13-inch pan, leaving space between rolls.
- Cover and let rise again for 30 minutes until rolls are puffy and nearly touching.
- Preheat oven to 375°F (190°C).
- Brush rolls with egg wash if desired. Bake for 20-22 minutes until golden brown and a thermometer reads 190°F in the center.
- Remove from oven and immediately brush tops with melted butter.
- Let rolls cool for 10 minutes before serving.
Notes
For best results, let dough rise fully and handle gently when shaping. Use fresh yeast for optimal rise. Rolls can be made ahead and refrigerated overnight before baking. For variations, try whole wheat flour, garlic herbs, or cheese-stuffed centers. Rolls freeze well for up to 2 months.
Nutrition
- Serving Size: 1 roll
- Calories: 160
- Sugar: 3
- Sodium: 150
- Fat: 4
- Saturated Fat: 2
- Carbohydrates: 25
- Fiber: 1
- Protein: 4
Keywords: dinner rolls, butter buns, homemade bread, easy rolls, fluffy rolls, holiday bread, comfort food, yeast rolls