“Did you ever just open your pantry, spot some flour and yeast, and think, ‘Maybe I can pull off pita bread tonight’? That was me on a hectic Wednesday evening when I was craving something fresh and homemade but too wiped to tackle complicated dough. Honestly, I was skeptical about no-knead anything—sounds too good to be true, right? But I gave it a shot, and wow, those puffy pockets puffed up like magic, soft and airy, perfect for stuffing with whatever I could grab in the fridge.
What really got me was how the smell of baking bread filled the apartment, wiping away that day’s stress in an instant. I remember telling my roommate, “You don’t have to be a bread wizard for this,” as I pulled the golden pitas from the oven. They had that perfect balance of chewiness and fluffiness — not too thick, not too thin — just right for scooping up dips or wrapping falafel. It stuck with me because it’s so approachable: no fancy gadgets, no hours of hands-on work, just a few simple ingredients and a little patience.
It’s kind of funny how something so straightforward can feel like a small victory after a long day. Now, whenever I want a comforting, fresh bread fix without the fuss, I reach for this easy no-knead pita bread recipe. It’s become my go-to for weekend lunches or quick dinners. And it’s nice knowing I can whip up pitas that rival the ones from my favorite Mediterranean spot — but fresher and made with love (and zero stress!).
That quiet moment of pulling apart a warm, fluffy pita, seeing the perfect pocket inside, and tasting that soft crumb is why this recipe has its place in my kitchen — a little reminder that homemade doesn’t have to be complicated.
Why You’ll Love This Recipe
This fluffy homemade pita bread with easy no-knead dough is a gem for anyone who loves fresh bread but hates the fuss. After making it a handful of times, I can say it really fits the bill for busy cooks and casual bakers alike. Here’s why it’s worth your time:
- Quick & Easy: You mix the dough in minutes, then let it rest while you get on with other things. No kneading, no stress, and it bakes up in about 5 minutes per batch.
- Simple Ingredients: Flour, yeast, water, salt, and a touch of olive oil — all pantry staples you probably already have. No need for specialty flours or additives.
- Perfect for Any Occasion: Whether you’re assembling sandwiches for lunch, hosting a casual dinner, or just craving a fresh snack, these pitas fit right in.
- Crowd-Pleaser: Kids, adults, even picky eaters love these soft, fluffy pockets. They’re great for stuffing with everything from grilled veggies to cheesy corn casseroles or even making quick pita pizzas.
- Unbelievably Delicious: The texture and flavor feel homemade but with the ease of store-bought convenience. That slight chew and puffiness make every bite satisfying.
What makes this recipe stand out is the no-knead approach paired with a short rise time that still delivers those signature pita pockets. I’ve tried other pita recipes that require hours of kneading or complicated folding, but this one saves time without compromising texture or flavor. Plus, the olive oil in the dough adds a subtle richness that keeps the bread tender.
This recipe isn’t just good bread—it’s the kind that makes you pause and savor, perfect for weekend mornings or a midweek reset when you want something cozy yet fuss-free.
What Ingredients You Will Need
This recipe uses simple, wholesome ingredients to deliver bold flavor and satisfying texture without the fuss. Most of these are pantry staples, and if you need to swap something out, I’ve got you covered below.
- All-purpose flour: 3 cups (360g) – I prefer King Arthur for consistent texture, but any good-quality all-purpose works.
- Active dry yeast: 2 teaspoons (about 7g) – Gives the dough that lovely rise and puff.
- Lukewarm water: 1 1/4 cups (300ml) – The warmth wakes up the yeast without killing it.
- Salt: 1 1/2 teaspoons – Enhances flavor and balances the dough.
- Olive oil: 2 tablespoons – Adds tenderness and a subtle fruity note.
Substitution tips: For gluten-free, swap all-purpose flour with a gluten-free blend that includes xanthan gum. Use instant yeast instead of active dry yeast if you want to skip the proofing step, just reduce water slightly. If you prefer a dairy-free option, this recipe is naturally free from dairy, so you’re good to go!
Depending on the season, I sometimes add a teaspoon of honey or sugar to feed the yeast, especially in colder months, but it’s optional. When I’m feeling adventurous, tossing in some za’atar or garlic powder into the dough adds an exciting flavor twist.
Equipment Needed
- Large mixing bowl: For combining and resting the dough. Glass or stainless steel works great.
- Measuring cups and spoons: Accuracy helps, especially with yeast and salt.
- Wooden spoon or spatula: To mix the dough without getting your hands too messy.
- Kitchen towel or plastic wrap: For covering the dough during resting.
- Rolling pin: Essential for shaping the pita rounds evenly.
- Heavy-bottomed skillet or cast iron pan: For cooking the pitas on the stovetop. A cast iron skillet gives a nice even heat and char, but a nonstick pan works if you don’t have one.
- Baking sheet: For resting the dough balls and stacking finished pitas.
If you don’t have a rolling pin, a sturdy glass bottle can work in a pinch. I’ve also used a pizza stone in the oven for baking pitas, but stovetop cooking is faster and gives a lovely puff. Keeping your skillet well-seasoned makes a difference in preventing sticking—trust me, I’ve learned that the hard way!
Preparation Method
- Activate the yeast (5 minutes): In your large mixing bowl, combine the lukewarm water and active dry yeast. Stir gently and let it sit until foamy and bubbly on top. If it doesn’t foam within 5 minutes, your yeast might be old or water too hot/cold.
- Mix the dough (3 minutes): Add the all-purpose flour, salt, and olive oil to the yeast mixture. Stir with a wooden spoon until it forms a shaggy, sticky dough. Don’t worry if it looks rough and sticky; that’s exactly what you want.
- Let it rest (1 to 1.5 hours): Cover the bowl with a kitchen towel or plastic wrap. Leave it in a warm spot to rise until doubled in size and bubbly. This slow fermentation is what gives the pita its airy texture.
- Divide and shape (10 minutes): Lightly flour your work surface. Turn the dough out and gently deflate it. Divide into 8 equal portions (about 90g/3 oz each). Roll each piece into a smooth ball, then use a rolling pin to flatten each into a 6-inch (15cm) circle, about 1/4 inch (6mm) thick.
- Preheat the pan (5 minutes): Heat your cast iron skillet or heavy pan over medium-high heat. It needs to be hot enough that the dough sizzles on contact but not so hot it burns.
- Cook the pitas (2-3 minutes per side): Place one pita on the skillet. After about 30 seconds, you’ll see bubbles forming. Flip after 1-2 minutes when the bottom has golden spots. The pita should puff up, creating that signature pocket. Flip again if needed to get both sides nicely browned.
- Keep warm and serve: Stack cooked pitas on a plate and cover with a clean towel to keep soft and warm. Repeat with remaining dough.
Tips: If your pita doesn’t puff, it might be too thick or the pan temperature is off. Try rolling thinner or adjusting heat. Also, don’t press down on the pita while cooking—that deflates the pocket.
Cooking Tips & Techniques
Making pita bread might sound intimidating, but a few tricks make it foolproof. First, patience during the resting phase is key. I’ve rushed this step before, and the bread turned out dense. Letting the dough double in size gives the yeast time to work its magic, leading to softness and puffiness.
Temperature control on the skillet is another biggie. Too hot, and the outside burns before the inside cooks; too cool, and the pita won’t puff. I usually test with one pita first and adjust heat accordingly. Also, flipping the pita multiple times helps develop even browning and that light char you find in bakery versions.
Don’t shy away from the no-knead method. I was surprised how sticky the dough felt before resting, but it transforms beautifully after rising. This hands-off approach means less mess and less time spent at the counter—ideal when you want fresh bread without the workout.
One time, I tried making these pitas with whole wheat flour, which made the dough heavier and less puffy. A mix of half all-purpose and half whole wheat works better if you want more fiber without sacrificing fluffiness.
And here’s a multitasking tip: While the dough rests, I often prepare a quick cucumber-tomato salad or whip up some hummus (which goes perfectly inside these pitas). If you enjoy baking sweets too, the peanut butter French silk pie is a delicious crowd-pleaser to have afterward!
Variations & Adaptations
This pita bread recipe is a fantastic base you can tweak to suit your tastes or dietary needs.
- Herbed Pitas: Add 1 teaspoon dried oregano, thyme, or za’atar to the dry ingredients for an aromatic touch. Great for Mediterranean-inspired meals.
- Whole Wheat Blend: Substitute half the all-purpose flour with whole wheat flour for a nuttier flavor and more fiber. Expect a slightly denser but still fluffy pita.
- Gluten-Free Version: Use a gluten-free baking blend with xanthan gum. The texture will be a bit different but still tasty. Let the dough rest a bit longer to hydrate properly.
- Baked Instead of Skillet: For larger batches, bake at 475°F (245°C) on a preheated pizza stone for 3-4 minutes. This method yields slightly crispier pitas but still puffy.
- Stuffed Pitas: Before cooking, try adding a sprinkle of feta or olives on one half of the rolled dough, fold gently, and bake for a cheesy twist.
Once, I made a garlic and parsley version inspired by a local Middle Eastern bakery, which was a hit at a family gathering. Experimenting with flavors is part of the fun and makes this pita recipe truly your own.
Serving & Storage Suggestions
Serve these warm pitas fresh from the skillet for the best texture. They’re perfect for stuffing with grilled meats, falafel, fresh veggies, or spreading with dips like hummus or tzatziki. I like to tear them into chunks for dipping into stews or sauces, too.
If you need to store them, wrap cooled pitas tightly in plastic wrap and place in an airtight container. They keep well for up to 3 days at room temperature or about a week in the fridge. For longer storage, freeze them separated by parchment paper in a resealable bag for up to 3 months.
To reheat, pop frozen or refrigerated pitas in a hot skillet for about 30 seconds per side or wrap in foil and warm in a 350°F (175°C) oven for 10 minutes. Avoid microwaving as it can make them chewy and tough.
Flavors actually deepen a bit after resting, so day-old pitas can taste even better warmed up. Pair with fresh salads or sides like jalapeño mac and cheese for a comforting meal that’s easy to put together.
Nutritional Information & Benefits
Each fluffy pita (about 60g) roughly contains:
| Calories | Carbohydrates | Protein | Fat | Fiber |
|---|---|---|---|---|
| 160 kcal | 32g | 5g | 2.5g | 1g |
Key ingredients like olive oil contribute heart-healthy fats, and using all-purpose flour keeps the bread light and easy to digest. You can make this recipe gluten-free by using appropriate flour blends. It’s naturally free from dairy and nuts, which makes it allergy-friendly.
Homemade pita bread beats store-bought options that often contain preservatives or added sugars. Plus, controlling the ingredients means you avoid unnecessary additives and enjoy fresh, wholesome bread anytime.
Conclusion
This fluffy homemade pita bread with easy no-knead dough is a small kitchen triumph that anyone can pull off. It’s simple enough for busy weeknights but satisfying enough to make you feel like a seasoned baker. The recipe’s flexibility lets you customize it to your taste and dietary needs, while the no-knead method keeps things low-fuss.
For me, it’s more than just bread—it’s the kind of recipe that makes a meal feel special without hours in the kitchen. I hope you find the same comfort and joy in making and sharing these pitas as I do. If you try this recipe, I’d love to hear how you customize it or what fillings you enjoy most!
Happy baking and savor those fluffy pockets!
FAQs
How do I know if my pita dough is ready to cook?
After resting, the dough should be doubled in size and bubbly. When rolled out, it should be soft but not sticky. If it feels too dense, let it rest a bit longer.
Why didn’t my pita bread puff up?
Common reasons include dough rolled too thick, pan not hot enough, or pressing down on the dough while cooking. Make sure your skillet is preheated and avoid flattening the pita during cooking.
Can I prepare the dough ahead of time?
Yes! You can refrigerate the dough overnight after the first rise. Bring it back to room temperature before dividing and rolling out.
What is the best flour to use for pita bread?
All-purpose flour works best for a soft, fluffy pita. You can mix with whole wheat flour for added nutrition but it may affect puffiness.
Can I bake pita bread in the oven instead of the skillet?
Absolutely. Use a preheated pizza stone or baking sheet at 475°F (245°C) and bake for 3-4 minutes. The pita will puff but might be a bit less chewy than stovetop versions.
Pin This Recipe!
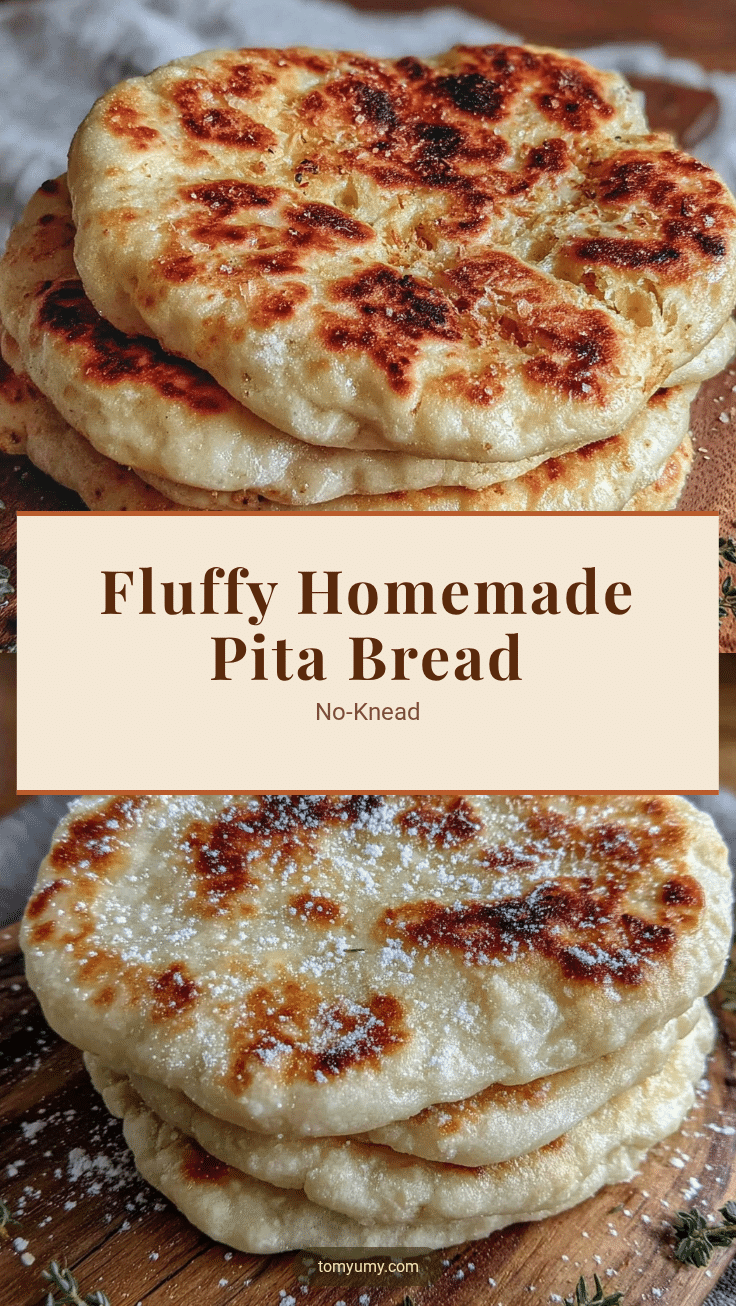
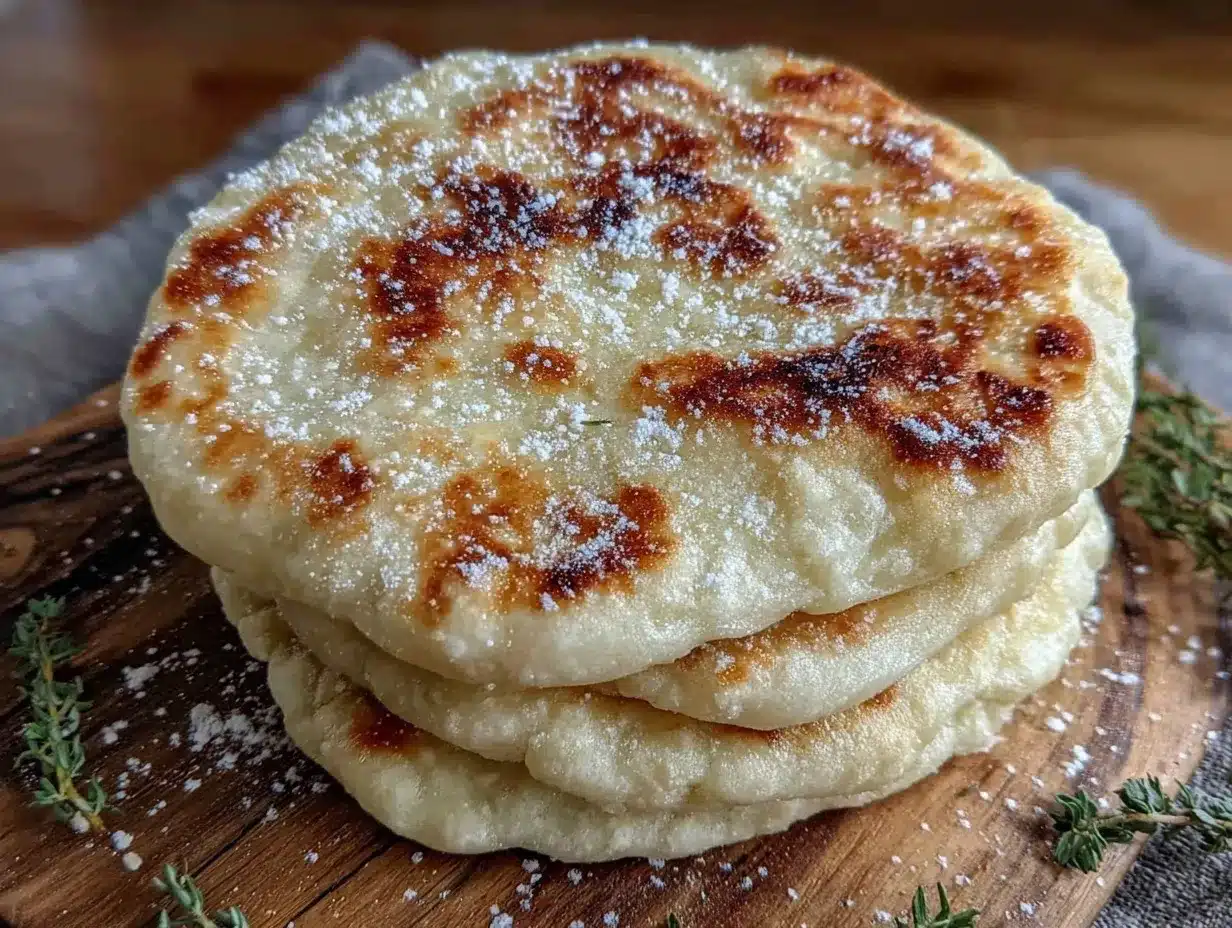
Fluffy Homemade Pita Bread Recipe with Easy No-Knead Dough Step-by-Step

This fluffy homemade pita bread uses an easy no-knead dough method that produces soft, airy pockets perfect for stuffing or dipping. Simple ingredients and minimal hands-on time make it ideal for busy cooks.
- Prep Time: 10 minutes
- Cook Time: 20 minutes
- Total Time: 1 hour 40 minutes
- Yield: 8 servings 1x
- Category: Bread
- Cuisine: Mediterranean
Ingredients
- 3 cups (360g) all-purpose flour
- 2 teaspoons (7g) active dry yeast
- 1 1/4 cups (300ml) lukewarm water
- 1 1/2 teaspoons salt
- 2 tablespoons olive oil
Instructions
- Activate the yeast: In a large mixing bowl, combine lukewarm water and active dry yeast. Stir gently and let sit until foamy and bubbly, about 5 minutes.
- Mix the dough: Add all-purpose flour, salt, and olive oil to the yeast mixture. Stir with a wooden spoon until a shaggy, sticky dough forms.
- Let it rest: Cover the bowl with a kitchen towel or plastic wrap and leave in a warm spot to rise until doubled in size and bubbly, about 1 to 1.5 hours.
- Divide and shape: Lightly flour your work surface. Turn out the dough and gently deflate it. Divide into 8 equal portions (about 3 oz or 90g each). Roll each into a smooth ball, then flatten each into a 6-inch (15cm) circle about 1/4 inch (6mm) thick using a rolling pin.
- Preheat the pan: Heat a cast iron skillet or heavy-bottomed pan over medium-high heat until hot enough that dough sizzles on contact.
- Cook the pitas: Place one pita on the skillet. After about 30 seconds, bubbles will form. Flip after 1-2 minutes when the bottom has golden spots. The pita should puff up creating a pocket. Flip again if needed to brown both sides.
- Keep warm and serve: Stack cooked pitas on a plate and cover with a clean towel to keep soft and warm. Repeat with remaining dough.
Notes
If pita doesn’t puff, try rolling thinner or adjusting pan heat. Avoid pressing down on the pita while cooking to preserve the pocket. Dough can be refrigerated overnight after first rise and brought back to room temperature before shaping. For gluten-free, use a gluten-free flour blend with xanthan gum and allow longer resting time. Baking option: bake on a preheated pizza stone at 475°F for 3-4 minutes for crispier pitas.
Nutrition
- Serving Size: 1 pita (about 60g)
- Calories: 160
- Fat: 2.5
- Carbohydrates: 32
- Fiber: 1
- Protein: 5
Keywords: pita bread, homemade pita, no-knead bread, easy pita recipe, fluffy pita, Mediterranean bread, quick bread recipe