“You know that feeling when you’re trying to impress guests but also want something light, fresh, and a little fancy? That’s exactly how these mini lemon curd pavlovas came into my life. It was a late Saturday afternoon, and I had promised my neighbor, Jen, a dessert for her impromptu garden party. I had no time to make a complicated cake, and honestly, I forgot to buy anything from the store. As I rummaged through my pantry, I spotted a jar of homemade lemon curd I’d made weeks ago and some fresh berries from the farmer’s market. A quick brainstorm turned into a delightful little experiment, and what came out was this crowd-pleasing, tangy-sweet pavlova that looked like it belonged in a pastry shop window.
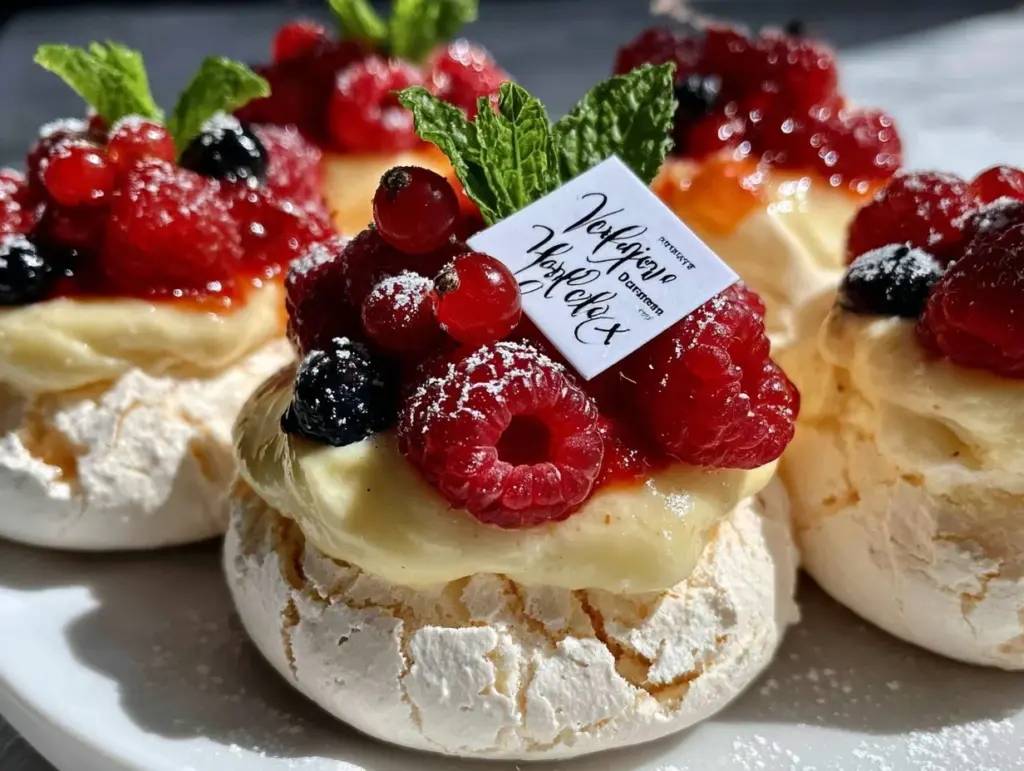
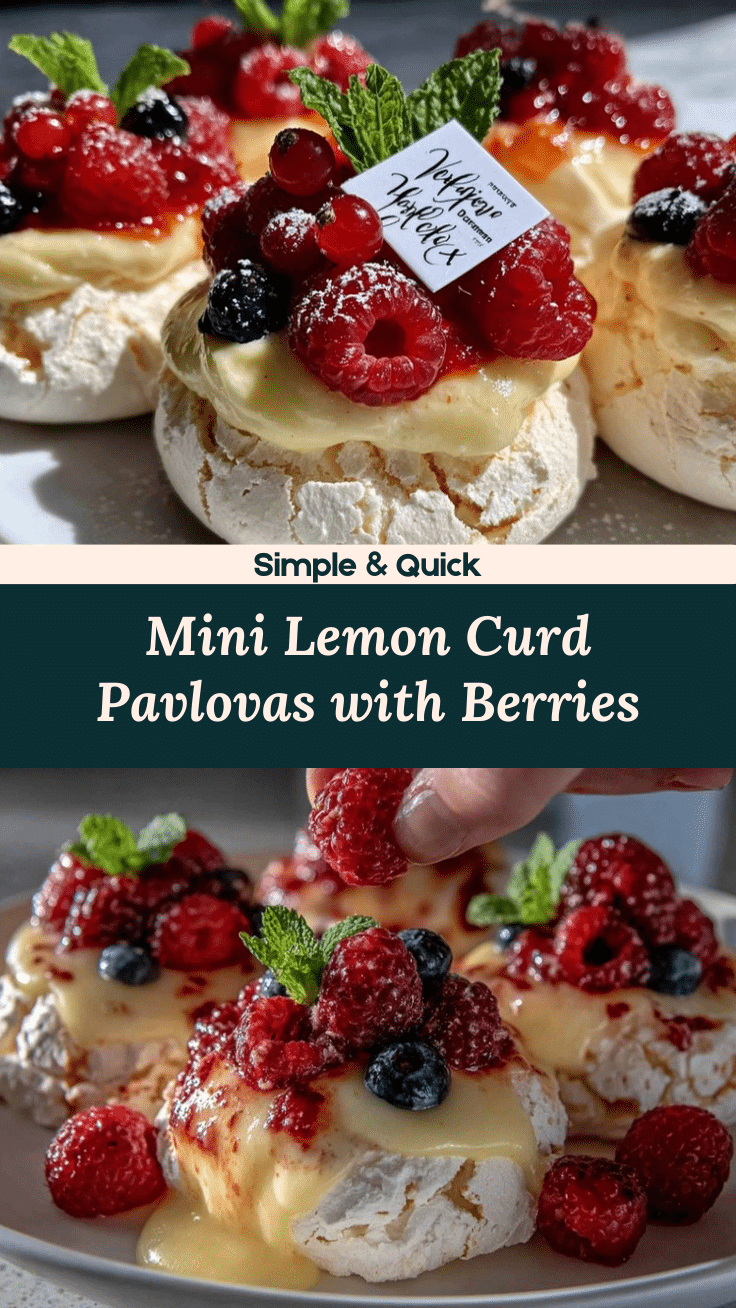
That day, I learned something important: dessert doesn’t have to be complicated to be memorable. These mini lemon curd pavlovas are crisp on the outside, marshmallow-soft inside, and topped with the brightness of lemon and the freshness of berries and mint. I mean, who doesn’t love a dessert that tastes like sunshine and feels like a little celebration? Maybe you’ve been there too—wanting that perfect balance of sweet and tart, light but satisfying. Honestly, this recipe has stuck with me ever since, and I keep making it whenever I want to wow without stress.
Why You’ll Love This Recipe
After testing dozens of pavlova recipes and tweaks, this mini lemon curd pavlova version is my absolute favorite because it nails the texture and flavor combo every time. Here’s why you’ll want to keep it in your dessert arsenal:
- Quick & Easy: These mini pavlovas come together in under an hour, making them perfect for last-minute gatherings or a sweet treat after dinner.
- Simple Ingredients: You don’t need a long shopping list—just basics like eggs, sugar, lemon curd, and fresh berries. No fancy pastry skills required.
- Perfect for Entertaining: Whether it’s brunch, summer parties, or cozy dinners, these bite-sized beauties steal the show without you breaking a sweat.
- Crowd-Pleaser: Kids love the sweetness, adults adore the tartness, and the mint adds a refreshing note that surprises everyone.
- Unbelievably Delicious: The crisp exterior cracking to reveal a soft, chewy center paired with zesty lemon curd and juicy berries is pure bliss.
What sets this apart? I’ve found that whipping the egg whites to just the right stiffness and folding in a touch of cornstarch keeps the pavlovas stable but tender. Plus, spooning on fresh lemon curd instead of plain whipped cream adds a brightness that’s irresistible. Honestly, it’s the kind of dessert that makes you close your eyes after the first bite and say, “Yep, that’s the one.”
What Ingredients You Will Need
This recipe uses simple, wholesome ingredients that work together to create bold flavor and a satisfying texture without fuss. Most of these you’ll likely have on hand or can find easily at your local market.
- For the Pavlova Base:
- 4 large egg whites, at room temperature (helps with volume)
- 1 cup (200 g) caster sugar (superfine sugar for smooth meringue)
- 1 teaspoon white vinegar (stabilizes the meringue)
- 1 teaspoon cornstarch (adds a tender chewiness)
- 1/2 teaspoon vanilla extract (for subtle sweetness)
- For the Topping:
- 1 cup (240 ml) lemon curd (store-bought or homemade; I like Bonne Maman for a reliable jarred option)
- 1 cup mixed fresh berries (strawberries, blueberries, raspberries—choose whatever’s fresh and in season)
- Fresh mint leaves, roughly chopped or whole for garnish
Pro tip: If you want a dairy-free version, swap out lemon curd for a coconut yogurt lemon topping or a dairy-free lemon cream. Also, if you can’t find caster sugar, pulse granulated sugar in a blender for a few seconds to get a finer texture.
Equipment Needed
- Electric mixer or stand mixer with whisk attachment (whipping those egg whites by hand is a workout!)
- Baking sheet lined with parchment paper or a silicone baking mat (prevents sticking and helps with even baking)
- Large mixing bowl (glass or metal preferred for stability)
- Spoon or small ice cream scoop (for portioning the mini pavlovas evenly)
- Cooling rack (to let your pavlovas cool completely without sogginess)
- Optional: Zester or fine grater (if you want to add fresh lemon zest for extra flavor)
If you don’t have a stand mixer, a handheld electric mixer works just fine. Also, silicone mats are my favorite because they’re reusable and make cleanup easier, but parchment paper is perfectly fine and budget-friendly. Just make sure your mixing bowl is clean and grease-free to get the best egg white peaks!
Preparation Method
- Preheat the oven: Set your oven to 250°F (120°C). Line a baking sheet with parchment paper or a silicone mat. This low temperature is key for drying out the pavlovas without browning.
- Whip the egg whites: In a clean, dry bowl, beat the 4 egg whites on medium speed until soft peaks form (about 2-3 minutes). This means when you lift the whisk, the peaks gently fold over.
- Add sugar gradually: Increase speed to high and add caster sugar one tablespoon at a time, whipping well after each addition. This slow addition ensures the sugar dissolves completely and gives a glossy meringue. This step takes about 7-8 minutes. The meringue should be stiff and shiny, and if you rub a bit between your fingers, it shouldn’t feel gritty.
- Fold in stabilizers: Sprinkle cornstarch and vinegar over the meringue, then gently fold them in with a spatula along with vanilla extract. Be careful not to deflate the mixture—fold lightly until just combined.
- Shape the pavlovas: Use a spoon or small ice cream scoop to place dollops of meringue onto the baking sheet, spacing them about 2 inches (5 cm) apart. Use the back of the spoon to create a slight well in the center of each—this will hold your lemon curd and berries later.
- Bake low and slow: Place the tray in the oven and bake for 1 hour 15 minutes. The pavlovas should be crisp on the outside but still soft and marshmallowy in the center. Avoid opening the oven door during baking to prevent cracks.
- Cool completely: Turn off the oven, prop the door open slightly, and let the pavlovas cool inside for another hour. This gradual cooling helps avoid sudden temperature changes that cause cracking. Once completely cool, transfer to a wire rack.
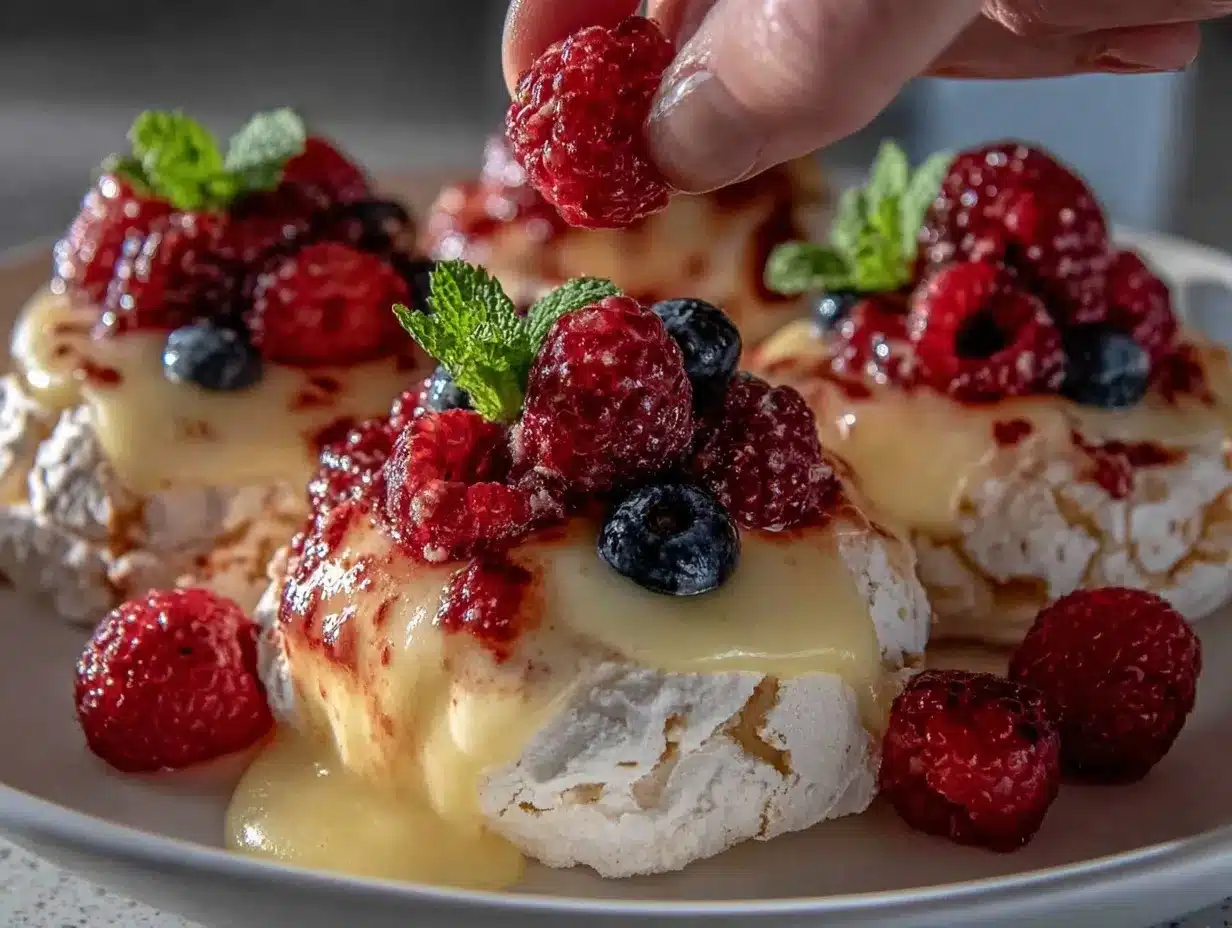
- Add toppings: Just before serving, spoon a generous teaspoon of lemon curd into each pavlova’s center. Top with fresh berries and garnish with mint leaves for a pop of color and freshness.
Quick tip: If your lemon curd is very thick, soften it slightly by warming in a bowl over hot water for a few minutes. And if your pavlovas crack a bit, don’t worry—that’s part of their rustic charm!
Cooking Tips & Techniques
Getting pavlovas just right can feel tricky, but with a few tricks up your sleeve, you’ll nail it every time.
- Room temperature eggs: I always separate eggs a few hours ahead and let the whites come to room temp. They whip up to a higher volume and stabilize better.
- Super clean bowl: Any trace of grease or yolk in your mixing bowl can stop the whites from whipping properly. I usually wipe the bowl with a little vinegar or lemon juice before starting.
- Gradual sugar addition: Adding sugar too fast can cause the meringue to collapse or be gritty. Patience here pays off big time.
- Low and slow baking: Resist the urge to crank the oven up. Pavlovas need gentle drying rather than browning. If your oven runs hot, consider lowering the temp by 10-15°F (5-8°C).
- Avoid humidity: Pavlovas don’t like humid days—they can get sticky. If it’s damp outside, try baking early in the morning when it’s cooler and drier.
- Cooling is key: Cooling gradually in the oven prevents sudden cracks and keeps the texture perfect. It’s a small step that makes a huge difference.
- Use cornstarch: This little addition keeps the center chewy without making the meringue too soft or wet.
Honestly, I’ve had my share of flat pavlovas and cracked disasters, but these tips have saved me more times than I can count. And if you ever get impatient, just remember—good things come to those who wait in pavlova baking.
Variations & Adaptations
This recipe is super flexible, so you can tailor it to your tastes or dietary needs.
- Seasonal fruit swaps: Instead of berries, try sliced kiwi, mango, or stone fruits like peaches in summer for a tropical twist.
- Chocolate lover’s pavlova: Fold a tablespoon of cocoa powder into the meringue for a subtle chocolate flavor. Top with whipped cream and shaved dark chocolate.
- Gluten-free and vegan options: Pavlova is naturally gluten-free, which is great news. For vegan, try an aquafaba meringue (chickpea water) following similar whipping and baking methods.
- Herb infusions: Add finely chopped basil or lavender to the berry topping for a floral note that surprises guests.
- Personal trial: I once tried lemon thyme instead of mint, and it was fantastic—adds a savory edge that pairs beautifully with the sweet curd.
Serving & Storage Suggestions
These mini lemon curd pavlovas are best served fresh at room temperature or slightly chilled. The contrast of crisp, soft, tangy, and sweet is at its peak then.
- Presentation: Arrange pavlovas on a pretty platter with extra mint sprigs and a dusting of powdered sugar for that bakery feel.
- Pairings: Serve with a cup of Earl Grey tea or a crisp glass of Prosecco for a delightful afternoon or evening treat.
- Storage: Pavlovas don’t keep well once topped—store baked, cooled meringues separately in an airtight container at room temperature for up to 2 days.
- Leftovers: If you have leftover lemon curd or berries, keep them refrigerated in sealed containers for up to 3 days.
- Reheating: Avoid reheating pavlovas—they lose their texture. Instead, bake fresh and assemble when ready to serve.
- Flavor notes: The lemon curd’s tartness keeps the dessert feeling fresh; over time, the pavlova shell can soften if stored with toppings, so best to assemble last minute.
Nutritional Information & Benefits
Each mini lemon curd pavlova offers a light treat with moderate sugar and plenty of fresh fruit’s natural vitamins. Here’s a rough estimate per serving (one mini pavlova):
| Calories | ~150 kcal |
|---|---|
| Protein | 2 g |
| Fat | 0.1 g (mostly from lemon curd) |
| Carbohydrates | 35 g (mostly sugars) |
| Fiber | 1-2 g (from berries) |
Key benefits? Egg whites provide protein without fat, and berries add antioxidants and vitamin C. Lemon curd, while sweet, contains real lemon juice and zest, giving a boost of vitamin C and bright flavor without artificial additives. This dessert fits nicely into gluten-free diets and can be adjusted for lower sugar by using sugar substitutes in meringue and curd.
Conclusion
Mini lemon curd pavlovas are my go-to when I want a dessert that looks impressive but feels light and fresh. They strike the perfect balance between sweet and tart, crisp and soft, simple and special. I encourage you to try making these little delights your own—swap berries, add herbs, or try different citrus curds.
Honestly, every time I make them, I remember that sunny afternoon with Jen’s party and how something simple can become a favorite. So grab those eggs, some sugar, and that jar of lemon curd sitting in your fridge. You’re about to create magic that’s as fun to make as it is to eat.
If you do try this recipe, please share your twists and stories—I’d love to hear what you come up with. Happy baking and happy tasting!
FAQs
Can I make the pavlova bases ahead of time?
Yes! The meringue bases can be baked and stored in an airtight container at room temperature for up to 2 days. Just add the lemon curd and berries right before serving.
What if I don’t have lemon curd?
You can substitute with whipped cream mixed with lemon zest and a little powdered sugar or try a dairy-free lemon topping like coconut yogurt with lemon juice.
Why did my pavlova crack?
Cracks often happen if the oven temperature is too high or if the pavlova cools too quickly. Leaving the pavlovas to cool slowly in the oven with the door ajar helps reduce cracking.
Can I use frozen berries for the topping?
Frozen berries can work but thaw and drain them well to avoid soggy pavlovas. Fresh berries are best for texture and flavor.
How do I know when my egg whites are whipped enough?
Look for stiff, glossy peaks that stand straight up when you lift the whisk. The mixture should be smooth and not grainy, and sugar should be fully dissolved.
Pin This Recipe!
Perfect Mini Lemon Curd Pavlovas

These mini lemon curd pavlovas are crisp on the outside, marshmallow-soft inside, topped with bright lemon curd and fresh berries for a light, fresh, and elegant dessert.
- Prep Time: 15 minutes
- Cook Time: 1 hour 15 minutes
- Total Time: 1 hour 30 minutes
- Yield: 12 mini pavlovas 1x
- Category: Dessert
- Cuisine: Australian
Ingredients
- 4 large egg whites, at room temperature
- 1 cup (200 g) caster sugar (superfine sugar)
- 1 teaspoon white vinegar
- 1 teaspoon cornstarch
- 1/2 teaspoon vanilla extract
- 1 cup (240 ml) lemon curd (store-bought or homemade)
- 1 cup mixed fresh berries (strawberries, blueberries, raspberries)
- Fresh mint leaves, roughly chopped or whole for garnish
Instructions
- Preheat the oven to 250°F (120°C). Line a baking sheet with parchment paper or a silicone mat.
- In a clean, dry bowl, beat the 4 egg whites on medium speed until soft peaks form (about 2-3 minutes).
- Increase speed to high and add caster sugar one tablespoon at a time, whipping well after each addition until stiff and glossy peaks form (about 7-8 minutes).
- Sprinkle cornstarch and vinegar over the meringue, then gently fold in with vanilla extract until just combined.
- Use a spoon or small ice cream scoop to place dollops of meringue onto the baking sheet, spacing about 2 inches apart. Create a slight well in the center of each.
- Bake for 1 hour 15 minutes until crisp outside and soft inside. Avoid opening the oven door during baking.
- Turn off the oven, prop the door open slightly, and let pavlovas cool inside for 1 hour. Then transfer to a wire rack to cool completely.
- Just before serving, spoon a teaspoon of lemon curd into each pavlova center. Top with fresh berries and garnish with mint leaves.
Notes
Use room temperature egg whites for better volume. Ensure mixing bowl is grease-free. Add sugar gradually to avoid gritty meringue. Bake low and slow to prevent browning. Cool pavlovas gradually in the oven to avoid cracks. Pavlovas are best assembled just before serving to maintain crispness. For dairy-free, substitute lemon curd with coconut yogurt lemon topping.
Nutrition
- Serving Size: 1 mini pavlova
- Calories: 150
- Fat: 0.1
- Carbohydrates: 35
- Fiber: 1.5
- Protein: 2
Keywords: mini pavlova, lemon curd pavlova, fresh berry dessert, easy pavlova recipe, light dessert, summer dessert, gluten-free dessert