Introduction
Picture this: the warm aroma of cinnamon, nutmeg, and cloves filling your kitchen as tiny golden pies bake to perfection in the oven. It’s the kind of smell that makes you pause, close your eyes, and smile—a sensory hug that screams Thanksgiving. These mini pumpkin pies are not just adorable; they’re packed with the rich, creamy goodness you love in pumpkin pie but in perfectly portioned bites.
The first time I made these, it was purely out of necessity. My regular-sized pie didn’t stand a chance with my family—they wanted their dessert to-go, so I thought, “Why not make it portable?” And let me tell you, it was a game-changer. My kids kept sneaking them off the cooling rack, and even my husband, who claims he’s not a “pumpkin guy,” couldn’t stop eating them. Honestly, I wish I’d thought of this years ago.
Whether you’re hosting Thanksgiving or just looking for a sweet treat to brighten up your dessert table, these mini pumpkin pies are your answer. They’re dangerously easy to make, totally customizable, and perfect for gifting—or keeping all to yourself. Trust me, this recipe is a keeper, and you might just find yourself making these all year long.
Why You’ll Love This Recipe
- Perfectly Portion-Controlled: No more messy slices—each pie is a perfect single serving.
- Quick Assembly: Comes together in under an hour, making it ideal for busy holiday prep.
- Minimal Ingredients: Uses pantry staples like canned pumpkin, eggs, and spices. No need for a special shopping trip!
- Kid-Friendly: Both fun to make and eat—your little ones will love helping out.
- Customizable: Easily adapt the recipe for gluten-free or dairy-free diets.
- Irresistibly Delicious: The creamy pumpkin filling paired with a buttery crust creates a heavenly flavor and texture combo.
What makes these mini pumpkin pies stand out? It’s all in the details. The filling has the perfect balance of spices, and the buttery crust holds its shape beautifully. Plus, they’re easy to transport, making them ideal for potlucks or family gatherings. They’re not just good—they’re the kind of dessert that your guests will ask for again next year.
And let’s be real, there’s something so satisfying about holding your own tiny pie. It’s the perfect mix of nostalgia and indulgence, and it’s sure to be a crowd-pleaser at any Thanksgiving table.
What Ingredients You Will Need
This recipe uses simple, wholesome ingredients to deliver that classic pumpkin pie flavor we all know and love. You probably have most of these items already in your kitchen!
- Premade pie crusts: Save time with store-bought crusts, or make your own from scratch for extra flair.
- Canned pumpkin puree: Make sure it’s plain pumpkin puree, not pumpkin pie filling.
- Sweetened condensed milk: Adds creaminess and sweetness without the need for sugar.
- Large eggs: Room temperature eggs work best for a smooth filling.
- Pumpkin pie spice: A blend of cinnamon, nutmeg, ginger, and cloves—pre-made or mix your own!
- Salt: Just a pinch to balance the sweetness and enhance the flavor.
- Vanilla extract: Optional, but adds depth to the flavor.
- Whipped cream: For topping—make your own or use store-bought.
If you’re missing an ingredient, don’t worry. You can substitute heavy cream for sweetened condensed milk (just add a bit of sugar), or replace pumpkin pie spice with your favorite fall spice blend. Gluten-free pie crusts work beautifully here, and if you need a dairy-free option, opt for coconut condensed milk and whipped coconut cream.
Equipment Needed
- 12-cup muffin tin: Essential for making perfectly portioned mini pies.
- Rolling pin: To roll out your pie dough, if you’re making it from scratch.
- Pastry cutter: Or use a knife or glass rim to cut out circles from your pie crust.
- Mixing bowls: At least two—one for the filling and one for any whipped topping prep.
- Whisk: For mixing the pumpkin filling until smooth and creamy.
- Cooling rack: Helps the pies cool evenly once they’re out of the oven.
If you don’t have a muffin tin, you can use ramekins or small tart pans. For rolling out the dough, a wine bottle works as a great alternative to a rolling pin in a pinch—trust me, I’ve been there!
Preparation Method
- Preheat the oven: Set your oven to 375°F (190°C). Lightly grease your muffin tin.
- Prepare the pie crust: Roll out your pie dough on a floured surface to about 1/8-inch thickness. Use a 3-4 inch round cutter (or the rim of a glass) to cut out circles.
- Fit the crusts: Gently press each circle of dough into the muffin tin cups, making sure they’re snug against the walls. Trim any excess dough if needed.
- Mix the filling: In a mixing bowl, whisk together the canned pumpkin puree, sweetened condensed milk, eggs, pumpkin pie spice, salt, and vanilla extract until smooth.
- Fill the crusts: Pour the pumpkin mixture into the prepared crusts, filling each about ¾ full.
- Bake: Place the muffin tin in the oven and bake for 20-25 minutes, or until the filling is set and a toothpick inserted into the center comes out clean.
- Cool: Allow the mini pies to cool in the tin for about 10 minutes, then transfer them to a cooling rack. Let them cool completely before topping.
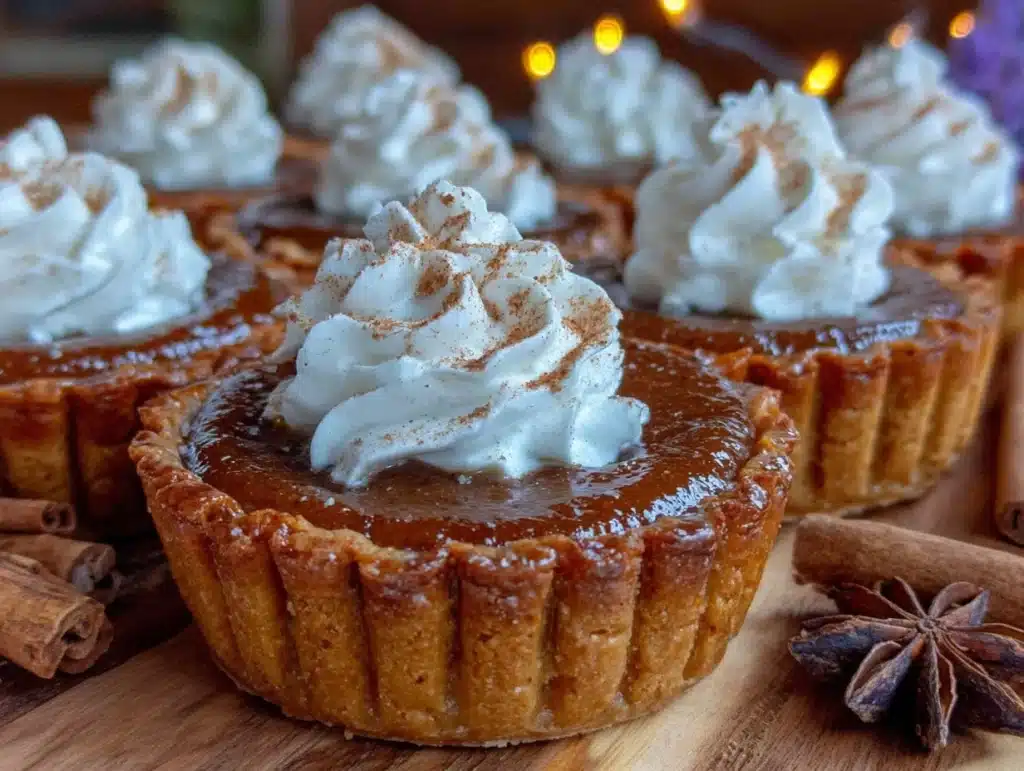
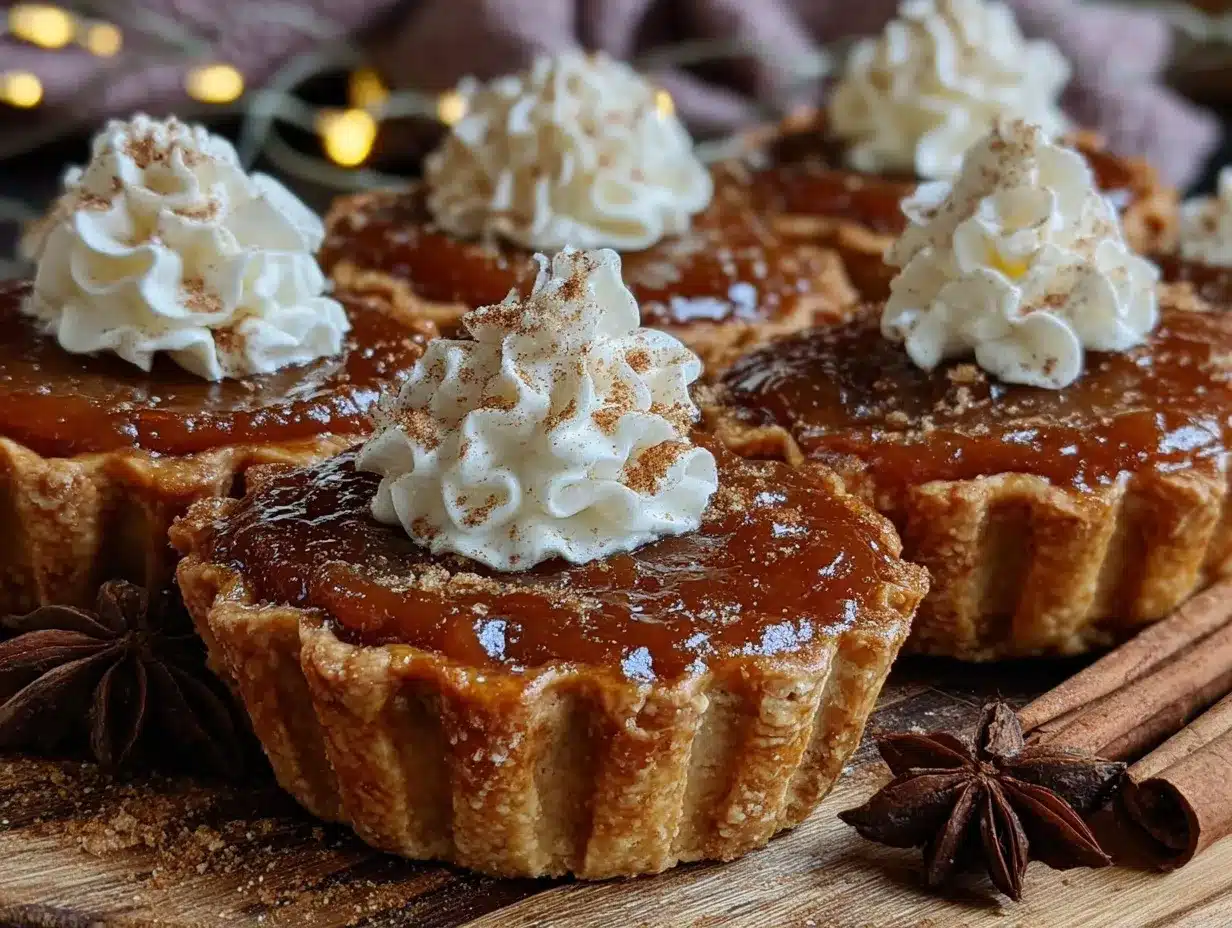
- Top and serve: Add a dollop of whipped cream to each pie and sprinkle with a dash of cinnamon or nutmeg for extra flair.
Pro tip: If the dough feels sticky while rolling, pop it in the fridge for 10 minutes before trying again. And don’t worry if your crusts aren’t perfect—these pies are all about charm!
Cooking Tips & Techniques
- Don’t overfill: Leave a little room for the filling to rise while baking.
- Chill the dough: If your pie crust gets too soft, refrigerate it for 10-15 minutes before rolling it out.
- Use a toothpick test: Insert a toothpick into the center of a pie to check if the filling is set—it should come out clean.
- Prep ahead: Make the filling a day in advance and store it in the fridge until ready to assemble.
- Customize the spice blend: Add extra cinnamon or a pinch of cardamom for a unique twist.
My biggest mistake the first time? Overworking the dough. Remember to handle it gently to keep it flaky and tender. And don’t rush the cooling process—it really helps the pies hold their shape.
Variations & Adaptations
- Gluten-Free Option: Swap the pie crust with a gluten-free version, or use crushed gluten-free cookies mixed with melted butter as a base.
- Dairy-Free Alternative: Replace sweetened condensed milk with coconut milk and use dairy-free whipped topping.
- Spice it Up: Experiment with chai spice or add a hint of orange zest to the filling for a citrusy twist.
If you prefer a less sweet option, reduce the amount of sweetened condensed milk and add a tablespoon of maple syrup for a hint of natural sweetness. I once swapped pumpkin puree for sweet potato puree, and it was a hit!
Serving & Storage Suggestions
Serve these mini pumpkin pies slightly chilled or at room temperature with a generous dollop of whipped cream. If you’re feeling fancy, drizzle them with caramel sauce or sprinkle crushed pecans on top for added texture.
Pair these pies with a hot cup of coffee or spiced apple cider for the ultimate fall dessert experience.
To store, place the pies in an airtight container in the refrigerator for up to 3 days. For longer storage, freeze them—wrap each pie individually in plastic wrap and place them in a freezer-safe bag. When ready to enjoy, thaw them in the fridge overnight and reheat in the oven at 350°F (175°C) for about 10 minutes.
Nutritional Information & Benefits
Each mini pumpkin pie contains approximately:
- Calories: 150
- Fat: 6g
- Carbohydrates: 20g
- Protein: 3g
Pumpkin is a nutritional powerhouse, packed with vitamins A and C, fiber, and antioxidants. The spices used—like cinnamon and nutmeg—may help support digestion and boost immunity. With the use of mini portions, these pies are great for satisfying your sweet tooth without overindulging.
Conclusion
These perfect mini pumpkin pies are everything you want in a Thanksgiving dessert—easy, delicious, and absolutely adorable. Whether you’re looking to impress your guests or simply treat yourself, this recipe is a winner. Plus, they’re so versatile you can tweak them to suit your preferences or dietary needs.
I love these pies because they bring back memories of family gatherings and the joy of sharing food that warms the soul. They’ve become a staple in my holiday baking, and I know they’ll win a spot in your heart too.
Give this recipe a try, and let me know how it goes in the comments below! Don’t forget to share your twists and tips—who knows, your variation might just inspire someone else’s perfect Thanksgiving dessert.
FAQs
Can I use fresh pumpkin instead of canned?
Yes, you can! Just roast the pumpkin, scoop out the flesh, and puree it until smooth. Make sure to drain any excess water before using.
Can I make these mini pumpkin pies ahead of time?
Absolutely! You can bake them a day or two in advance and store them in the refrigerator. Just add whipped cream right before serving.
What if I don’t have a muffin tin?
No problem! Use ramekins or small tart pans instead. The bake time may vary slightly, so keep an eye on them.
Can I freeze these mini pies?
Yes, they freeze beautifully. Wrap each pie individually in plastic wrap and store them in a freezer-safe bag for up to two months.
How can I make these pies healthier?
Use a homemade whole wheat crust, swap sweetened condensed milk with unsweetened almond milk, and reduce the sugar content by adding natural sweeteners like honey or maple syrup.
Pin This Recipe!
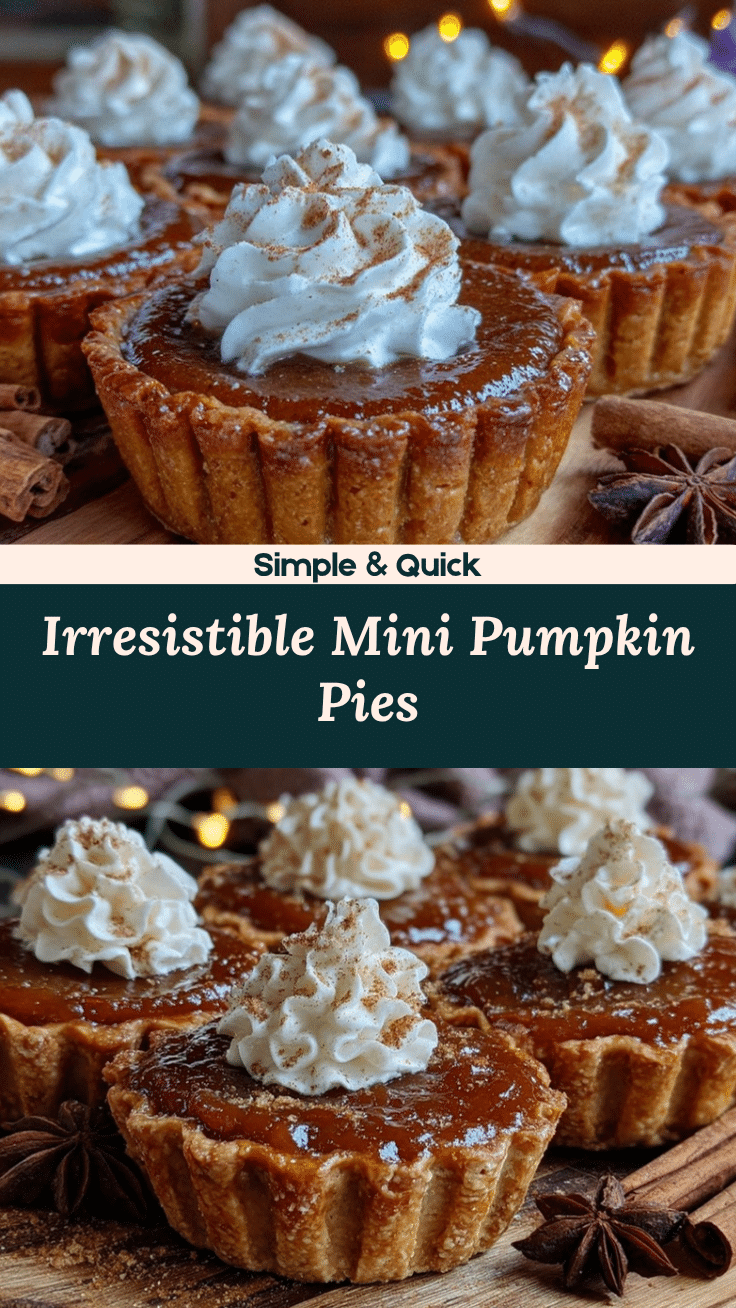
Perfect Mini Pumpkin Pies Recipe for Easy Thanksgiving Dessert

These mini pumpkin pies are packed with rich, creamy goodness in perfectly portioned bites. They’re easy to make, customizable, and perfect for Thanksgiving or any occasion.
- Prep Time: 15 minutes
- Cook Time: 25 minutes
- Total Time: 40 minutes
- Yield: 12 servings
- Category: Dessert
- Cuisine: American
Ingredients
- Premade pie crusts
- Canned pumpkin puree
- Sweetened condensed milk
- Large eggs
- Pumpkin pie spice
- Salt
- Vanilla extract
- Whipped cream
Instructions
- Preheat the oven to 375°F (190°C). Lightly grease your muffin tin.
- Roll out your pie dough on a floured surface to about 1/8-inch thickness. Use a 3-4 inch round cutter (or the rim of a glass) to cut out circles.
- Gently press each circle of dough into the muffin tin cups, making sure they’re snug against the walls. Trim any excess dough if needed.
- In a mixing bowl, whisk together the canned pumpkin puree, sweetened condensed milk, eggs, pumpkin pie spice, salt, and vanilla extract until smooth.
- Pour the pumpkin mixture into the prepared crusts, filling each about ¾ full.
- Place the muffin tin in the oven and bake for 20-25 minutes, or until the filling is set and a toothpick inserted into the center comes out clean.
- Allow the mini pies to cool in the tin for about 10 minutes, then transfer them to a cooling rack. Let them cool completely before topping.
- Add a dollop of whipped cream to each pie and sprinkle with a dash of cinnamon or nutmeg for extra flair.
Notes
[‘Don’t overfill the crusts to leave room for the filling to rise while baking.’, ‘Chill the dough for 10-15 minutes if it gets too soft.’, ‘Use a toothpick test to check if the filling is set—it should come out clean.’, ‘Make the filling a day in advance and store it in the fridge until ready to assemble.’, ‘Customize the spice blend by adding extra cinnamon or a pinch of cardamom.’]
Nutrition
- Serving Size: 1 mini pie
- Calories: 150
- Fat: 6
- Carbohydrates: 20
- Protein: 3
Keywords: mini pumpkin pies, Thanksgiving dessert, easy pumpkin pie recipe, holiday baking, portion-controlled dessert, kid-friendly dessert