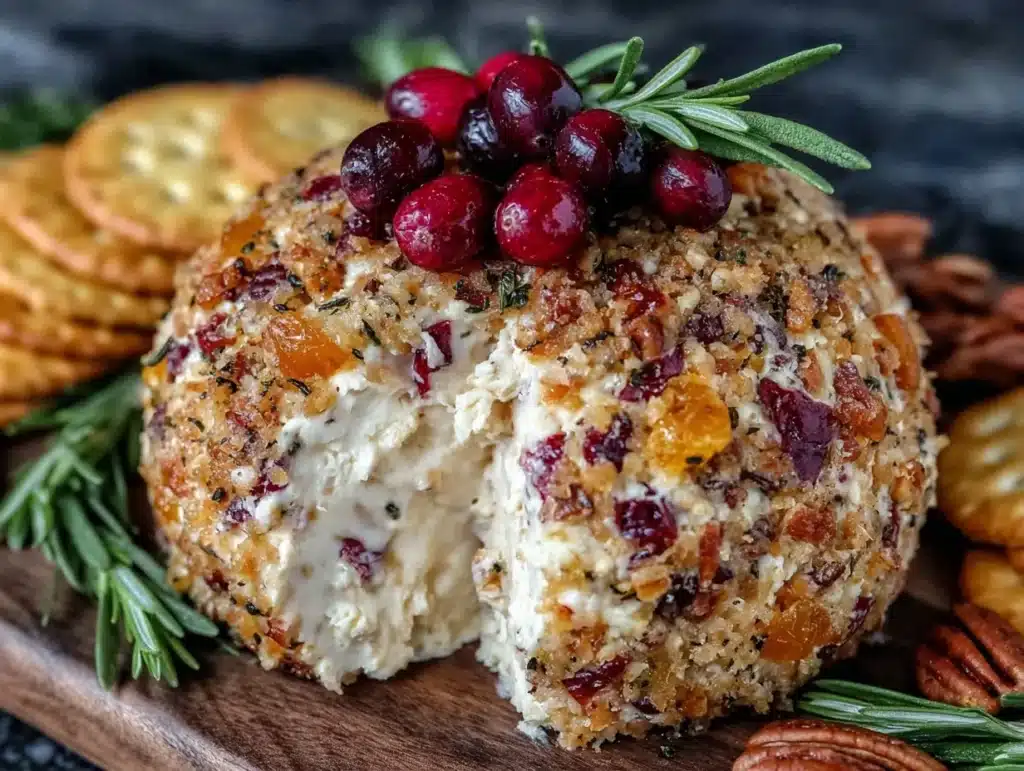
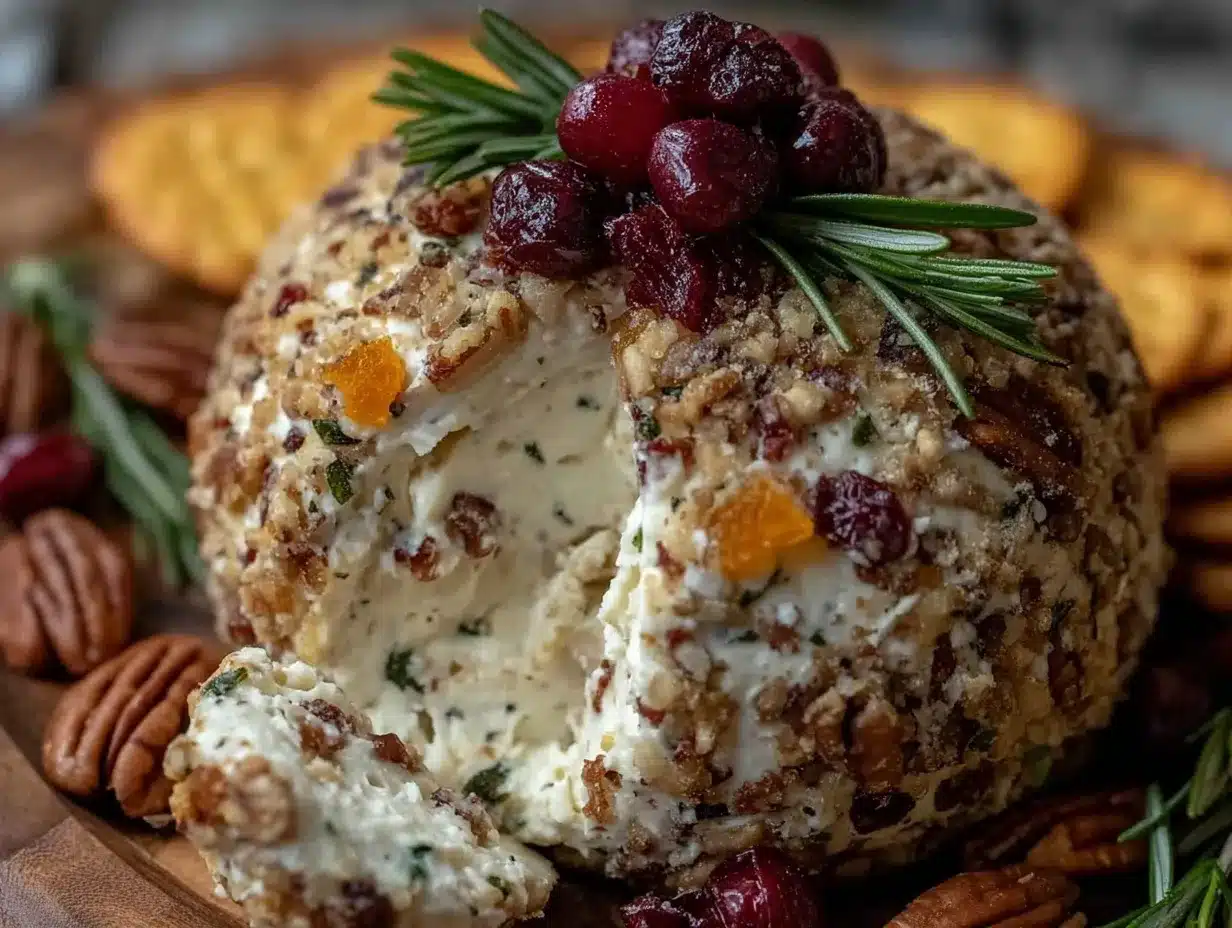
Let me paint you a picture: the aroma of freshly roasted nuts mingling with the tangy scent of cream cheese, and the irresistible crunch of crackers as you scoop up a luscious, creamy bite of the most mouthwatering cheese ball you’ve ever tasted. That’s the magic of this perfect Thanksgiving Cheese Ball. The first time I made it, I remember the look on my family’s faces as they hovered around the appetizer table, sneaking bites before dinner was even served. It’s the kind of recipe that instantly feels like a warm hug—a crowd-pleaser that deserves a spot at every holiday gathering.
Years ago, on a chilly November afternoon, I stumbled upon the idea of creating my own cheese ball while flipping through my grandmother’s old recipe cards. She would make a cheese ball every Thanksgiving, and it was always the star of the appetizer spread—a savory, creamy centerpiece that had everyone chatting and laughing around the table. Now, I’ve taken that nostalgic inspiration and crafted my own twist on this classic. It’s so good, it’ll make you wonder why you didn’t try it sooner.
This recipe has been thoroughly tested (in the name of research, of course), and it’s become a family favorite for gatherings, gifting, and even snacking on lazy weekends. Trust me, you’re going to want to make this cheese ball a permanent fixture on your Thanksgiving table. The mix of flavors, the ease of preparation, and the joy it brings when served—it’s a recipe worth bookmarking for years to come.
Why You’ll Love This Recipe
- Quick & Easy: This cheese ball comes together in just 15 minutes of prep time, making it a stress-free addition to your Thanksgiving spread.
- Simple Ingredients: You won’t need any fancy or hard-to-find groceries—everything is likely already in your fridge or pantry.
- Perfect for Thanksgiving: This cheese ball is festive, delicious, and the ultimate appetizer to kick off your holiday meal.
- Crowd-Pleaser: Kids and adults alike will love the creamy, savory flavors with a hint of crunch. Plus, it’s visually stunning when served!
- Unbelievably Delicious: A perfect balance of smooth cream cheese, sharp cheddar, and crunchy pecans creates a flavor explosion in every bite.
What sets this recipe apart is the attention to detail. The blend of cheeses, the flavorful mix-ins, and the fresh herbs make this cheese ball stand out. I’ve tested every ingredient combination to ensure it’s just right—trust me when I say this version is a winner. Whether you’re hosting a big family dinner or a cozy gathering with friends, this cheese ball is guaranteed to impress.
What Ingredients You Will Need
This recipe uses simple, accessible ingredients to create a cheese ball that’s bursting with flavor. Here’s what you’ll need:
- For the base:
- 8 oz cream cheese, softened (full-fat works best for the richest flavor)
- 1 cup sharp cheddar cheese, shredded (I recommend freshly shredded cheese for optimal taste)
- 2 tbsp sour cream (adds a tangy creaminess)
- For the flavor mix-ins:
- 1/4 cup green onions, finely chopped
- 1/4 cup parsley, finely chopped (fresh herbs bring vibrant flavor)
- 1/2 tsp garlic powder (adds depth)
- 1/4 tsp smoked paprika (optional, but adds a lovely smoky note)
- Salt and pepper to taste
- For the coating:
- 1 cup pecans, finely chopped (toasted for extra crunch and flavor)
- 1/4 cup dried cranberries, chopped (adds a pop of sweetness and color)
Feel free to make adjustments based on your preferences or what you have on hand. For example, you can swap parsley for chives or use walnuts instead of pecans.
Equipment Needed
You don’t need any fancy gadgets to make this cheese ball—just a few basic tools:
- Mixing bowls (medium and large)
- Rubber spatula (for mixing and scraping)
- Plastic wrap (for shaping and chilling the cheese ball)
- Sharp knife (for chopping herbs, nuts, and cranberries)
- Serving platter (to beautifully display your cheese ball)
If you don’t have plastic wrap, parchment paper works as a great alternative. And if you want to save time, a food processor can quickly chop your nuts and cranberries.
Preparation Method
- Mix the base: In a medium mixing bowl, combine the softened cream cheese, shredded cheddar cheese, and sour cream. Use a rubber spatula to mix until smooth and creamy.
- Add the flavor: Stir in green onions, parsley, garlic powder, smoked paprika, and a pinch of salt and pepper. Make sure everything is evenly incorporated.
- Shape the cheese ball: Lay a sheet of plastic wrap on your countertop. Scoop the cheese mixture onto the center of the wrap. Gather the edges of the plastic wrap around the cheese mixture and gently shape it into a ball. Don’t worry if it’s not perfect—rustic is charming!
- Chill: Place the wrapped cheese ball in the refrigerator for at least 1-2 hours to firm up. This step is crucial for the flavors to meld together.
- Prepare the coating: While the cheese ball is chilling, combine the chopped pecans and dried cranberries in another bowl. Mix until evenly distributed.
- Coat the cheese ball: Remove the cheese ball from the fridge and unwrap it. Roll it gently in the pecan and cranberry mixture, pressing lightly to ensure the coating sticks.
- Serve: Place the finished cheese ball on a serving platter surrounded by your favorite crackers, pretzels, or veggie sticks, and let everyone dig in!
Pro tip: If the cheese ball is too soft while you’re trying to shape it, pop it in the freezer for 10-15 minutes to firm up.
Cooking Tips & Techniques
- Room temperature ingredients: Make sure your cream cheese is softened to room temperature before mixing. This ensures a smooth and creamy texture without any lumps.
- Use fresh ingredients: Fresh herbs like parsley or chives make a big difference in flavor. They add brightness and balance to the richness of the cheese.
- Toast the nuts: Toasting the pecans enhances their flavor and adds a delightful crunch to the cheese ball. Just toss them in a dry skillet over medium heat for a few minutes until fragrant.
- Chill for flavor: Letting the cheese ball rest in the fridge for an hour or more before serving allows all the flavors to meld together beautifully.
- Make ahead: You can prepare the cheese ball up to two days ahead of time. Just wait to coat it until right before serving for best results.
Don’t skip the chilling step—it’s the secret to achieving a firm, sliceable cheese ball that doesn’t fall apart when served. And trust me, toasting the nuts is worth the extra effort for that added depth of flavor!
Variations & Adaptations
One of the best things about this recipe is how versatile it is. You can easily adapt it to suit dietary needs or different flavor preferences:
- Make it spicy: Add chopped jalapeños or a dash of hot sauce to the cheese mixture for a kick of heat.
- Gluten-free option: Serve with gluten-free crackers or fresh veggies like celery, cucumber slices, and bell pepper strips.
- Seasonal twist: Swap the dried cranberries for chopped dried apricots or figs for a festive winter flavor.
- Nuts-free variation: Leave out the pecans and coat the cheese ball in chopped fresh herbs instead, like parsley or dill.
- Customize the cheese: Try swapping sharp cheddar for gouda, pepper jack, or even blue cheese for a unique flavor profile.
I’ve tried adding a sprinkle of everything bagel seasoning to the outer coating, and it was a hit! Don’t be afraid to experiment to suit your taste buds.
Serving & Storage Suggestions
When it comes to serving this Thanksgiving Cheese Ball, presentation is key. Place it on a beautiful platter surrounded by an assortment of crackers, pretzels, and fresh veggies. It’s best enjoyed at room temperature, so let it sit out for about 15 minutes before serving.
Leftovers? Not a problem! Wrap the remaining cheese ball tightly in plastic wrap and store it in the refrigerator for up to 5 days. To serve again, let it come to room temperature for the best texture. If you’re thinking of freezing it, you can do so before adding the coating. Wrap it well and store it in an airtight container for up to a month. Thaw in the fridge overnight, then coat and serve.
As the flavors meld together over time, the cheese ball only gets better. Trust me, it’s just as delicious on day five as it was on day one!
Nutritional Information & Benefits
This cheese ball is packed with flavor and offers a combination of nutrients:
- Estimated Calories: Approximately 120 calories per serving (based on 1 oz serving size)
- Protein-Rich: Thanks to the cream cheese and cheddar, this recipe provides a good source of protein.
- Healthy fats: The pecans offer heart-healthy fats and a satisfying crunch.
- Gluten-Free: As long as you pair it with gluten-free crackers or veggies, this recipe is naturally gluten-free.
- Allergen Note: Contains dairy and nuts—consider alternatives if serving guests with allergies.
While this cheese ball is indulgent, there’s joy in savoring a little holiday treat. Plus, the fresh herbs and nuts provide some nutritional benefits to balance the decadence.
Conclusion
This perfect Thanksgiving Cheese Ball recipe is a must-try for your holiday celebrations. With its creamy texture, bold flavors, and beautiful presentation, it’s sure to become a family favorite. The best part? It’s easy to make, customizable, and guaranteed to impress your guests.
So, what are you waiting for? Give this recipe a try, and let me know how it turns out in the comments below. I’d love to hear about your variations and how you made it your own. Happy Thanksgiving, and may your holiday table be filled with laughter, love, and delicious food!
FAQs
Can I make the cheese ball ahead of time?
Absolutely! You can prepare the cheese ball up to two days in advance. Just store it in the refrigerator and add the coating right before serving.
What crackers go best with a cheese ball?
Any sturdy cracker works well! Try Ritz, water crackers, or even pretzel chips for a salty crunch. Veggie sticks are also a great gluten-free option.
Can I freeze the cheese ball?
Yes, you can freeze the cheese ball before adding the coating. Wrap it tightly in plastic wrap and store in an airtight container for up to one month. Thaw it in the fridge overnight before coating and serving.
What can I use instead of pecans?
Walnuts or almonds make great substitutes, or you can use seeds like sunflower seeds for a nut-free alternative.
How do I make this recipe dairy-free?
Swap the cream cheese with a dairy-free alternative and use a vegan shredded cheese. You can also substitute sour cream with dairy-free coconut yogurt.
Pin This Recipe!
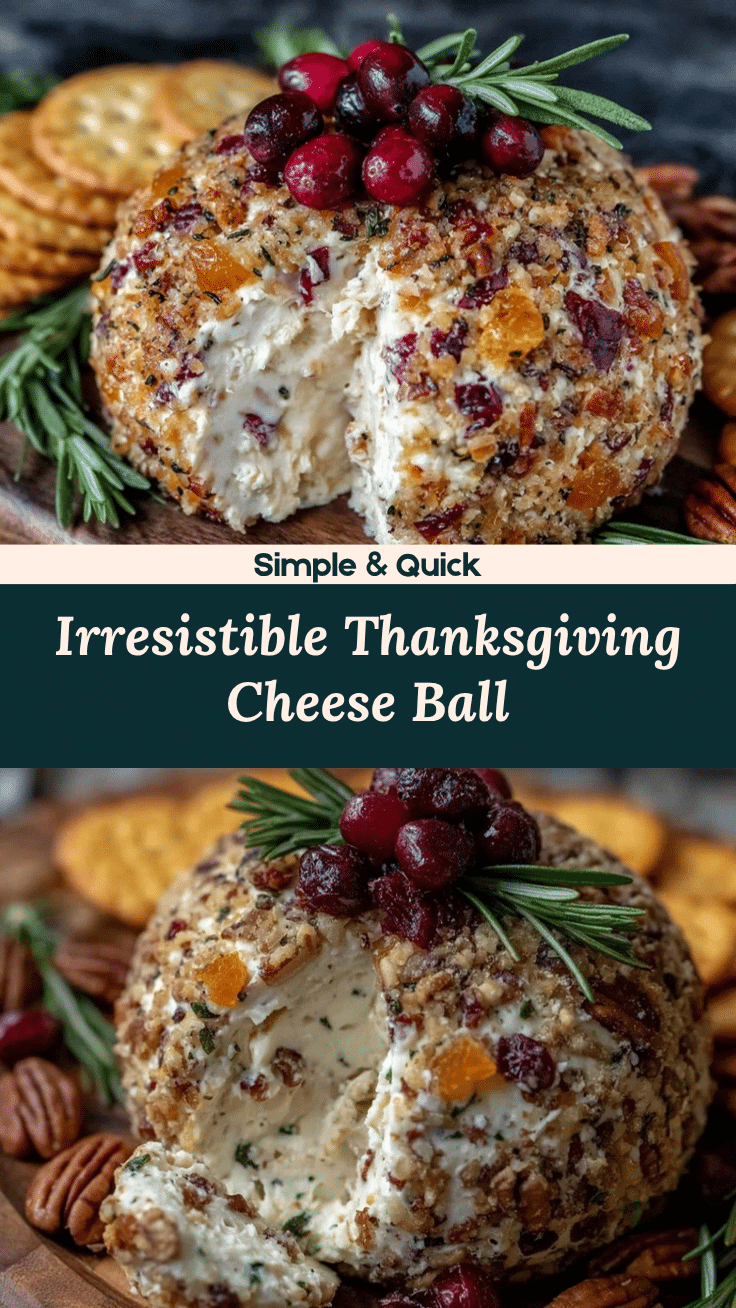
Perfect Thanksgiving Cheese Ball Recipe You’ll Love

A creamy, savory cheese ball with a hint of crunch, perfect for Thanksgiving gatherings and holiday celebrations.
- Prep Time: 15 minutes
- Cook Time: None
- Total Time: 1 hour 15 minutes
- Yield: 10 servings 1x
- Category: Appetizer
- Cuisine: American
Ingredients
- 8 oz cream cheese, softened
- 1 cup sharp cheddar cheese, shredded
- 2 tbsp sour cream
- 1/4 cup green onions, finely chopped
- 1/4 cup parsley, finely chopped
- 1/2 tsp garlic powder
- 1/4 tsp smoked paprika
- Salt and pepper to taste
- 1 cup pecans, finely chopped
- 1/4 cup dried cranberries, chopped
Instructions
- In a medium mixing bowl, combine softened cream cheese, shredded cheddar cheese, and sour cream. Mix until smooth and creamy.
- Stir in green onions, parsley, garlic powder, smoked paprika, and a pinch of salt and pepper. Mix until evenly incorporated.
- Lay a sheet of plastic wrap on the countertop. Scoop the cheese mixture onto the center of the wrap. Gather the edges of the plastic wrap around the cheese mixture and gently shape it into a ball.
- Place the wrapped cheese ball in the refrigerator for at least 1-2 hours to firm up.
- Combine chopped pecans and dried cranberries in another bowl. Mix until evenly distributed.
- Remove the cheese ball from the fridge and unwrap it. Roll it gently in the pecan and cranberry mixture, pressing lightly to ensure the coating sticks.
- Place the finished cheese ball on a serving platter surrounded by crackers, pretzels, or veggie sticks, and serve.
Notes
[‘Make sure cream cheese is softened to room temperature for a smooth texture.’, ‘Toast the pecans for enhanced flavor and crunch.’, ‘Chill the cheese ball for at least an hour to allow flavors to meld.’, ‘Prepare the cheese ball up to two days in advance, but coat it right before serving.’]
Nutrition
- Serving Size: 1 oz
- Calories: 120
- Sugar: 2
- Sodium: 150
- Fat: 10
- Saturated Fat: 5
- Carbohydrates: 4
- Fiber: 1
- Protein: 4
Keywords: Thanksgiving, cheese ball, appetizer, holiday recipe, easy recipe, crowd-pleaser, festive, creamy, savory