Pumpkin Pie Marshmallow Treats
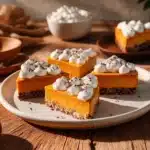
The warm, cozy flavors of pumpkin pie meet gooey marshmallow goodness in this irresistible fall treat. Perfect for Halloween parties, Thanksgiving gatherings, or a cozy autumn dessert.
- Prep Time: 10 minutes
- Cook Time: 10 minutes
- Total Time: 20 minutes
- Yield: 12 servings 1x
- Category: Dessert
- Cuisine: American
Ingredients
Scale
- 6 tablespoons unsalted butter
- 10 ounces mini marshmallows
- 1/3 cup pumpkin puree
- 1 tablespoon pumpkin pie spice
- 1 teaspoon vanilla extract
- 6 cups rice cereal
- Optional toppings: white chocolate drizzle, crushed graham crackers, extra pumpkin pie spice
Instructions
- Line a 9×13-inch baking dish with parchment paper and lightly grease with butter or non-stick spray.
- In a large saucepan over medium heat, melt 6 tablespoons of unsalted butter until fully melted and bubbly.
- Stir in 10 ounces of mini marshmallows and continue stirring until completely melted and smooth.
- Reduce the heat to low and add 1/3 cup of pumpkin puree. Stir gently until well incorporated.
- Add 1 tablespoon of pumpkin pie spice and 1 teaspoon of vanilla extract. Stir until everything is evenly distributed.
- Remove the saucepan from heat and quickly fold in 6 cups of rice cereal. Mix until the cereal is fully coated with the marshmallow mixture.
- Pour the mixture into your prepared baking dish and press it down evenly using a spatula or greased hands.
- Allow the treats to cool for at least 30 minutes at room temperature.
- Optional: Once set, drizzle with melted white chocolate or sprinkle crushed graham crackers for extra flair.
- Cut into squares and serve.
Notes
[‘Keep the heat low when melting marshmallows to prevent burning or stickiness.’, ‘Use fresh marshmallows for best texture.’, ‘Grease your tools lightly with butter or cooking spray to prevent sticking.’, ‘Customize the spice level by adding more pumpkin pie spice if desired.’, ‘Allow the treats to cool completely before slicing to ensure they hold their shape.’]
Nutrition
- Serving Size: 1 square
- Calories: 130
- Sugar: 12
- Fat: 5
- Carbohydrates: 22
- Protein: 1
Keywords: Pumpkin Pie, Marshmallow Treats, Fall Dessert, No-Bake Recipe, Kid-Friendly