It is 11:45 PM on Thanksgiving Eve, and the house is finally quiet. The turkey is resting under its foil tent in the oven, warm and heavy with promise, but the real panic is happening in the sink. I am staring at a colander of blanched green beans that have gone slightly limp in the cold water. You know that feeling? The one where you realize you made too much work for yourself because you wanted everything to be perfect. Honestly, it is a terrible feeling.
For years, I treated green bean casserole like an afterthought. I would just dump a can of soup over some frozen beans and call it a day. It was fine, I guess. But it wasn’t memorable. It was just another green thing on the plate next to the mashed potatoes. Then, last year, I decided to try something different. I wanted a creamy make-ahead thanksgiving green bean casserole that could survive the chaos of the morning of.
I remember standing there, stirring a roux on low heat while the dog whined for scraps. The smell of thyme and nutmeg filled the kitchen, sharp and grounding. It wasn’t about impressing anyone. It was about taking control of one small part of the holiday. I wanted something that tasted like it had been simmering all day, even though it was actually made in just an hour.
This recipe changed how I do Thanksgiving. It takes the stress out of the day-of cooking. You can make it the night before, pop it in the fridge, and then just bake it while you are carving the bird. It is creamy, it is rich, and it actually tastes like real food. That night, eating the first bite, I realized I had finally solved the green bean problem.
Why You’ll Love This Recipe
Let’s face it, holiday cooking is a lot of pressure. You want every dish to shine, but you also want to spend time with your family, not staring at a stove. This creamy make-ahead thanksgiving green bean casserole is the answer to that dilemma. It is not just another side dish; it is a test of experience and trust. I have tested this recipe over a dozen times to get the texture just right. It is not the soggy, salty mess you might remember from high school cafeteria days.
Here is why this version stands out from the crowd:
- Zero Morning-Of Stress: The biggest benefit is the make-ahead aspect. You can assemble the entire casserole the night before. This means your oven space is free for the turkey or stuffing, and you are not rushing around at 4 PM.
- Real Ingredients, Real Flavor: No condensed soups here. We are making a fresh roux with butter and flour, adding cream cheese for tang, and using fresh thyme. It tastes like a restaurant dish, not a grocery store can.
- Perfect Texture Balance: The secret is in the blanching and the topping. The beans stay crisp-tender, and the crispy fried onions on top provide that essential crunch that contrasts with the creamy interior. It is the best of both worlds.
- Crowd-Pleaser Guaranteed: Even the people who claim they don’t like green beans will ask for seconds. The creaminess masks any bitterness, and the savory flavor profile appeals to everyone from kids to grandparents.
- Comfort Food Reimagined: It feels indulgent but is actually quite manageable. It is the kind of dish that makes you close your eyes and sigh after the first bite. It is pure comfort.
What makes this recipe different is the addition of cream cheese and a touch of Dijon mustard. The cream cheese adds a velvety richness that regular milk or cream can’t achieve. The mustard adds a hidden depth of flavor that wakes up the palate. It is a technique that professional chefs use but home cooks often overlook. This isn’t just a recipe; it is a strategy for a better holiday.
What Ingredients You Will Need
This recipe relies on simple, high-quality ingredients to deliver bold flavor. You do not need to run to a specialty store for anything exotic. Most of these items are likely already in your pantry or fridge. The key is to choose the best versions of these staples.
For the Casserole Base
- Fresh Green Beans: 2 pounds. Look for bright green, firm beans. Snap off the woody ends. Fresh beans have a much better texture than frozen ones, though you can use high-quality frozen if you are in a bind.
- Unsalted Butter: 4 tablespoons. I prefer using a high-quality European butter for its richer flavor. It helps build the roux base.
- All-Purpose Flour: 4 tablespoons. This is the thickening agent. Make sure it is fresh for the best results.
- Heavy Cream: 1 cup. Do not substitute with milk if you want this luxurious texture. The fat content is crucial for the creaminess.
- Full-Fat Cream Cheese: 8 ounces, softened. This is the secret ingredient. It adds tang and thickness. I recommend using Philadelphia brand for consistency.
- Garlic: 3 cloves, minced. Fresh garlic is non-negotiable. Powdered garlic just does not have the same punch.
- Dijon Mustard: 1 tablespoon. It adds a subtle zing that cuts through the richness. Grey Poupon or Maille works well.
- Fresh Thyme: 1 tablespoon, leaves stripped. Fresh herbs make a huge difference. Dried thyme can be used, but use half the amount.
- Nutmeg: 1/4 teaspoon, freshly grated. If you have a whole nutmeg, grate it yourself. It is aromatic and warm.
- Salt and Black Pepper: To taste. Use kosher salt for better control over seasoning.
For the Topping
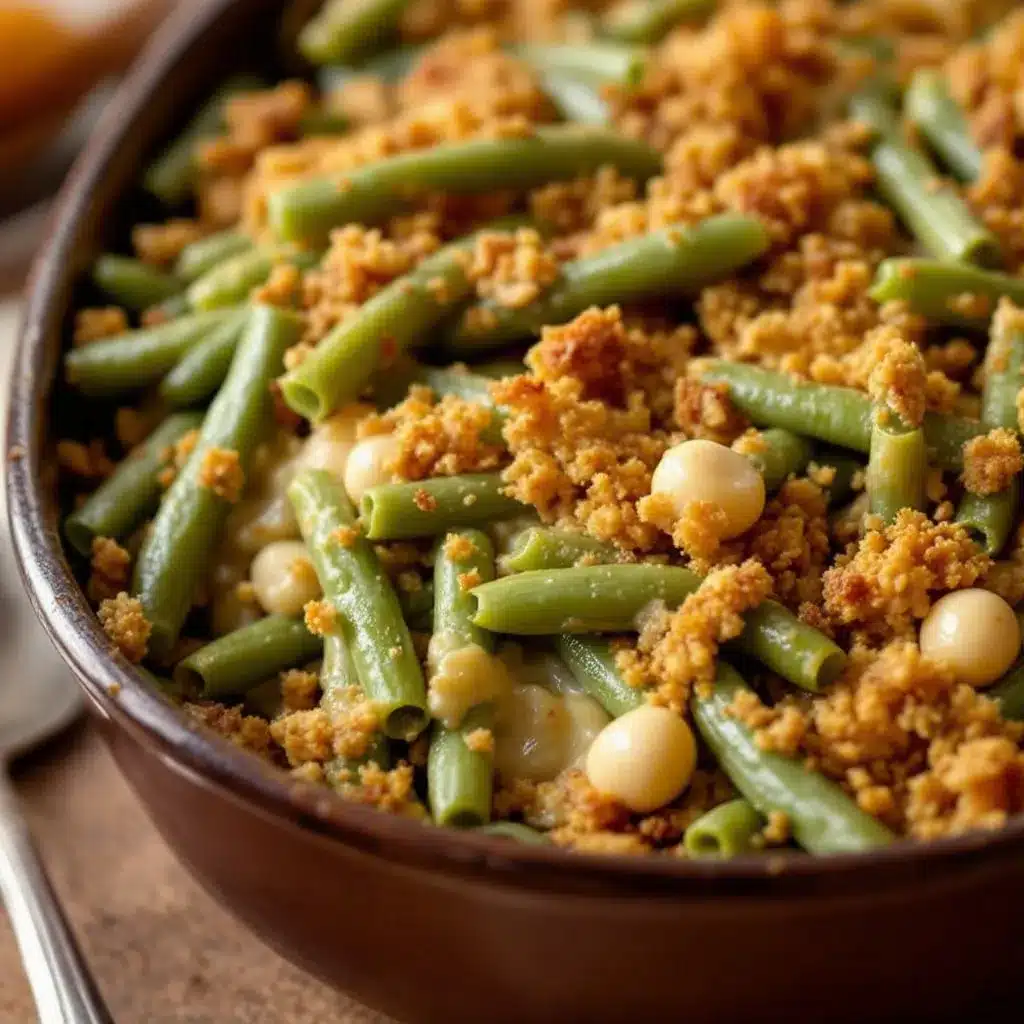
- Fried Onions: 1.5 cups. Most people buy the canned kind (like French’s). They are crispy and flavorful. You can make your own, but for a make-ahead dish, the canned ones hold up better to reheating.
- Extra Butter: 1 tablespoon, melted. This helps the onions brown slightly in the oven.
If you need to substitute, you can use almond milk instead of heavy cream for a lighter version, but the texture will be thinner. For the cream cheese, you can use a block of goat cheese for a sharper tang, but it will change the flavor profile significantly.
Equipment Needed
You do not need any fancy gadgets to make this dish. The right tools just make the process smoother. Here is what you will need:
- Large Dutch Oven or Heavy-Bottomed Pot: This is essential for blanching the green beans evenly. A pot with a tight lid helps keep the color bright green. I use a Le Creuset, but any heavy pot works.
- Colander: For draining the beans and shocking them in ice water. A large, sturdy colander prevents overflow.
- Medium Saucepan: Used for making the roux and sauce. A non-stick or enameled cast iron pan is best to prevent burning.
- 9×13 Inch Baking Dish: A standard glass or ceramic baking dish works perfectly. Glass allows you to see the browning on the bottom.
- Whisk: A good silicone whisk helps incorporate the flour into the butter without lumps.
- Sharp Knife and Cutting Board: For trimming the green beans. A sharp knife makes quick work of the ends.
If you do not have a Dutch oven, a large skillet works for blanching, just be careful not to overcrowd the pan. For the baking dish, a metal pan will give you crispier edges, while glass gives you more even heating. I usually stick to glass for peace of mind.
Preparation Method
Let’s get into the nitty-gritty of making this casserole. It is easier than it looks, and the steps are straightforward. Here is how you do it.
- Prep the Green Beans (10 minutes): Start by washing the green beans thoroughly. Trim off the stem ends. You can leave them whole or cut them in half, depending on your preference. I like leaving them whole for a nicer presentation, but half-length beans are easier to eat. Bring a large pot of salted water to a boil. The water should taste like the sea.
- Blanch the Beans (3-5 minutes): Add the green beans to the boiling water. Cook them for about 3 to 5 minutes. You want them to be bright green and tender-crisp, not mushy. This is crucial. If you overcook them now, they will be soft later.
- Shock the Beans (2 minutes): While the beans are cooking, prepare a bowl of ice water. As soon as the time is up, transfer the beans from the boiling water to the ice bath. This stops the cooking process immediately and locks in that vibrant green color. Let them sit for a couple of minutes, then drain well. Pat them dry with a paper towel if you have time. Excess water can make the sauce runny.
- Make the Roux (5 minutes): In a medium saucepan, melt the 4 tablespoons of butter over medium heat. Once the foam subsides, add the flour. Whisk constantly for about 2 minutes. You want the mixture to turn a light golden color and smell nutty. Do not let it burn. This cooks out the raw flour taste.
- Build the Sauce (5 minutes): Slowly pour in the heavy cream while whisking constantly. This prevents lumps. Add the minced garlic, Dijon mustard, thyme, nutmeg, salt, and pepper. Whisk until smooth. Let it simmer gently for 2-3 minutes until it thickens slightly. It should coat the back of a spoon.
- Incorporate Cream Cheese (3 minutes): Reduce the heat to low. Add the softened cream cheese in chunks. Whisk until it is completely melted and incorporated into the sauce. The sauce will become very thick and creamy. Taste and adjust seasoning. It should be savory and rich.
- Combine and Assemble (5 minutes): Add the blanched green beans to the sauce. Stir gently to coat every bean. Pour the mixture into your prepared 9×13 baking dish. Spread it out evenly.
- Add the Topping: In a small bowl, mix the fried onions with the melted butter. Sprinkle this mixture evenly over the top of the casserole. Press it down slightly so it sticks.
- Cool and Cover: Let the casserole cool to room temperature. Once cool, cover tightly with plastic wrap and then foil. It is now ready to be refrigerated for up to 24 hours.
Cooking Tips & Techniques
There are a few tricks I have learned over the years that make a huge difference in the final result. First, do not skip the blanching step. Boiling raw beans in the sauce will result in mushy, flavorless green beans. Blanching ensures they cook evenly and retain their texture.
Another common mistake is adding the cream cheese too quickly. If the sauce is too hot, the cream cheese can separate and become grainy. Keep the heat low when adding the cream cheese. If you see lumps, just keep whisking. It will come together.
When it comes to the topping, do not skimp on the fried onions. They are the soul of this dish. But be careful not to burn them during baking. If your oven runs hot, you might want to cover the top with foil for the first half of the baking time, then remove it to crisp up the onions.
Also, consider the size of your beans. If they are very thick, score them lightly with a knife before blanching. This helps them cook more evenly. And always taste your sauce before combining it with the beans. It should be slightly saltier than you think, as the beans will dilute the flavor.
Multitasking is key here. While the beans are blanching, start your sauce. While the sauce simmers, prep your onions. This keeps the process moving smoothly and reduces stress.
Variations & Adaptations
While this recipe is perfect as is, you can tweak it to fit your needs. Here are a few variations I have tried.
Vegetarian/Vegan Option: You can substitute the butter with vegan butter and the cream cheese with a plant-based alternative. Use oat milk or soy milk instead of heavy cream. The texture might be slightly different, but the flavor will still be great. I tried almond milk once, but it was too thin. Stick to oat or soy for best results.
Gluten-Free: Simply swap the all-purpose flour with a 1:1 gluten-free flour blend. Make sure your fried onions are certified gluten-free, as some brands use wheat flour in the breading.
Spicy Kick: Add a pinch of cayenne pepper or red pepper flakes to the sauce. It adds a subtle heat that pairs well with the creamy texture. This is great if you like a little zing with your comfort food.
Bacon Addition: For a smoky flavor, add cooked, crumbled bacon to the mixture. This pairs well with the onions. It turns it into a more hearty dish.
I once tried adding sun-dried tomatoes for a Mediterranean twist. It was interesting, but not quite traditional. Stick to the classic flavors for Thanksgiving, unless you want to surprise your guests.
Serving & Storage Suggestions
This casserole is best served hot and fresh from the oven. The topping should be golden brown and crispy. It pairs wonderfully with sweet potato cranberry gratin and roasted turkey. The contrast of flavors is delightful.
For storage, you can keep the assembled, unbaked casserole in the refrigerator for up to 24 hours. When you are ready to bake it, you may need to add 10-15 minutes to the baking time since it is coming from the fridge. Cover it with foil to prevent the onions from burning, then uncover to crisp up.
Leftovers can be stored in an airtight container in the refrigerator for up to 3 days. To reheat, warm it in the oven at 350°F for 15-20 minutes. You can also reheat individual portions in the microwave, but the topping will lose its crunch. If you want to keep the crunch, reheat in the oven.
The flavors actually develop overnight, making it even better the next day. It is a great dish for using up leftovers.
Nutritional Information & Benefits
While this is a rich dish, green beans are a nutritious vegetable. They are high in fiber, Vitamin K, and Vitamin C. The cream cheese and heavy cream add fat and calories, so moderation is key. Each serving contains approximately 350 calories, with 25g of fat and 15g of carbohydrates.
If you are watching your sodium, be mindful of the salt in the fried onions. You can reduce the added salt in the sauce to compensate. This dish is not suitable for low-sodium diets without significant modifications.
From a wellness perspective, this dish provides comfort and satisfaction. It is important to enjoy holiday foods without guilt. Balance is key. Enjoy this as part of a larger meal.
Conclusion
This creamy make-ahead thanksgiving green bean casserole is a game-changer. It takes the stress out of the holiday and delivers a dish that is both delicious and impressive. I love this recipe because it allows me to be present with my family instead of being stuck in the kitchen.
I encourage you to try it and make it your own. Add some bacon, swap the herbs, or change the topping. The possibilities are endless. Share your adaptations in the comments below. I love hearing how you tweak recipes.
Thank you for reading. Happy Thanksgiving!
FAQs
Can I use frozen green beans for this recipe?
Yes, you can use frozen green beans, but fresh ones are preferred for the best texture. If using frozen, do not thaw them before blanching. Just drop them into the boiling water for a slightly longer time.
How far in advance can I make this casserole?
You can assemble it up to 24 hours in advance. Keep it covered in the refrigerator. Do not bake it until you are ready to serve.
Can I freeze this casserole?
It is not recommended to freeze the assembled casserole with the fried onions. The texture of the onions will become soggy. You can freeze the sauce and beans separately, but the texture may change.
What can I use instead of heavy cream?
You can use half-and-half for a lighter version, but the sauce will be thinner. Whole milk is not recommended as it will not provide the same richness.
Why are my green beans mushy?
This usually happens if they are overcooked during blanching or if they are baked for too long. Make sure to shock them in ice water and check for doneness before baking.
Pin This Recipe!
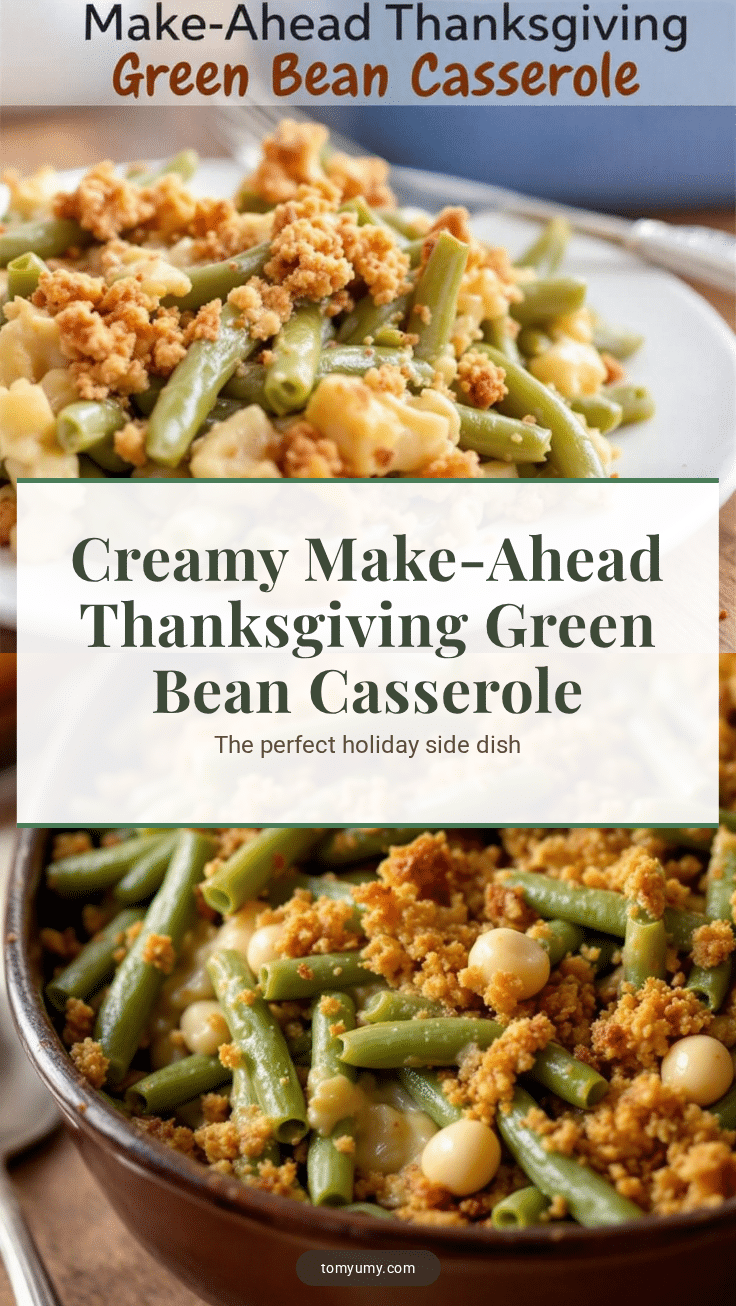
Creamy Make-Ahead Thanksgiving Green Bean Casserole

A stress-free, creamy green bean casserole made with a fresh roux, cream cheese, and crispy fried onions. Perfect for Thanksgiving, this dish can be assembled the night before to save time on the day of the holiday.
- Prep Time: 25 minutes
- Cook Time: 25 minutes
- Total Time: 50 minutes
- Yield: 8 servings 1x
- Category: Side Dish
- Cuisine: American
Ingredients
- 2 pounds fresh green beans
- 4 tablespoons unsalted butter (divided)
- 4 tablespoons all-purpose flour
- 1 cup heavy cream
- 8 ounces full-fat cream cheese, softened
- 3 cloves garlic, minced
- 1 tablespoon Dijon mustard
- 1 tablespoon fresh thyme leaves
- 1/4 teaspoon freshly grated nutmeg
- Salt and black pepper to taste
- 1.5 cups fried onions (canned)
- 1 tablespoon melted butter (for topping)
Instructions
- Prep the green beans by washing them and trimming off the stem ends. Bring a large pot of salted water to a boil.
- Blanch the green beans in the boiling water for 3-5 minutes until bright green and tender-crisp.
- Prepare a bowl of ice water. Transfer the blanched beans to the ice bath to stop the cooking process. Drain and pat dry.
- In a medium saucepan, melt 4 tablespoons of butter over medium heat. Add the flour and whisk constantly for 2 minutes until light golden and nutty.
- Slowly pour in the heavy cream while whisking to prevent lumps. Add garlic, Dijon mustard, thyme, nutmeg, salt, and pepper. Simmer for 2-3 minutes until thickened.
- Reduce heat to low and add the softened cream cheese. Whisk until completely melted and incorporated. Taste and adjust seasoning.
- Add the blanched green beans to the sauce and stir to coat. Pour into a 9×13 inch baking dish.
- Mix the fried onions with the remaining 1 tablespoon of melted butter and sprinkle evenly over the casserole.
- Let cool to room temperature, then cover tightly with plastic wrap and foil. Refrigerate for up to 24 hours.
- To serve, bake uncovered at 350°F for 20-25 minutes (add 10-15 minutes if baking from cold) until hot and bubbly.
Notes
Do not skip the blanching step to ensure beans retain texture. Shock in ice water to lock in color. If baking from the fridge, add 10-15 minutes to baking time. Cover with foil if onions are browning too quickly.
Nutrition
- Serving Size: 1 cup
- Calories: 350
- Sugar: 4
- Sodium: 450
- Fat: 25
- Saturated Fat: 15
- Carbohydrates: 15
- Fiber: 3
- Protein: 6
Keywords: Thanksgiving, green bean casserole, make-ahead, holiday side dish, creamy, comfort food, vegetarian