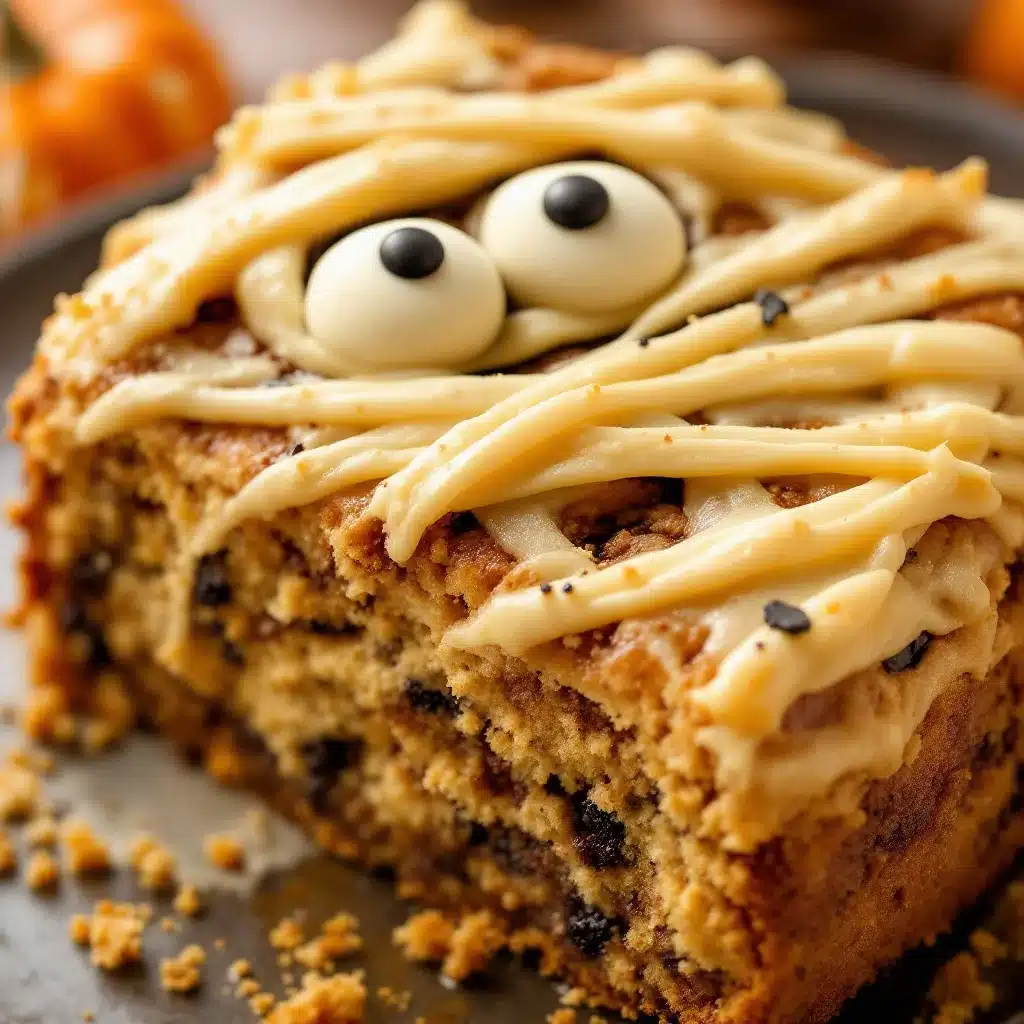
Third time this month and the white chocolate strips still look like they were applied by a toddler with a tremor. I know, I know. It’s supposed to be a neat, spooky decoration. It’s supposed to be Instagram-ready. But here I am, standing in my kitchen at 11 PM on a Tuesday, scraping dried mummy bandages off my fingers with a butter knife, wondering why I keep doing this to myself.
It started as a simple idea. Halloween is coming, right? Kids want treats that look scary but taste like sugar. So I made the Spooky Soft Mummy Halloween Cookie Cake. Just one. But then I tasted it. That soft, chewy center. The slight crunch of the edges. The way the white chocolate melts just enough to become a gooey, sweet ribbon.
I couldn’t stop. I made it again on Thursday. Then again last night. My husband looked at me like I was hiding something. Maybe I was. Maybe I was hiding the fact that I’d already eaten half the batch before it even cooled. The obsession isn’t about the spooky aesthetic, though that helps. It’s about the texture. It’s about that specific moment when you pull a warm cookie straight from the oven, and it’s still too hot to touch, but you do it anyway because you need to know if it’s done.
I’ve tried different flours. I’ve tried chilling the dough for an hour. I’ve tried using real chocolate chips instead of white chocolate melts. Nothing works quite like this version. The dough is sticky. It’s messy. It requires a spatula that’s seen better days. And honestly? That’s the best part. It feels like real baking. Not the polished, perfect kind you see on TV. The kind where you get flour in your hair and sugar on your shirt.
By the third time, I finally got the strips straight. Well, mostly straight. They still wobble a bit. They still look a little crooked. But that’s what makes them charming. They’re not perfect. They’re just right. And if you’re looking for a treat that’s easy to make, fun to decorate, and tastes like pure comfort, this is the one. Trust me. You’ll want to make it too. Maybe even three times.
Why You’ll Love This Recipe
Let’s be real for a second. Most cookie cakes are dry. They’re hard. They taste like cardboard left out in the sun for a week. This Spooky Soft Mummy Halloween Cookie Cake is different. I’ve tested this recipe at least a dozen times, tweaking the butter ratio and the baking powder amount, because I refuse to serve anything less than perfect to my family. And this? This is the winner.
- Quick & Easy: You don’t need to be a professional baker to pull this off. The dough comes together in under 15 minutes. No fancy techniques, no tempering chocolate, no waiting around for hours. Just mix, press, bake, and decorate. Perfect for those busy weeknights when you want something homemade but don’t have all day.
- Simple Ingredients: You likely have everything you need in your pantry right now. Flour, sugar, butter, eggs, white chocolate. Nothing exotic. Nothing hard to find. This isn’t a recipe that requires a trip to three different specialty stores. It’s straightforward, wholesome, and reliable.
- Perfect for Halloween Parties: Whether you’re hosting a trick-or-treat event, a classroom party, or just a cozy night in with the kids, this cookie cake is a showstopper. It’s big enough to share, cute enough to impress, and delicious enough to keep everyone coming back for seconds.
- Crowd-Pleaser: Kids love the spooky look. Adults love the soft, chewy texture. I’ve served this to picky eaters who usually turn their noses up at anything with a face on it, and they went back for thirds. It’s a guaranteed hit.
- Unbelievably Delicious: The combination of buttery sugar cookie dough and sweet white chocolate is next-level comfort food. It’s not too sweet, not too salty. It’s just right. The texture is soft and cake-like in the center, with a slight crisp on the edges. It’s the kind of treat that makes you close your eyes after the first bite and just sigh.
What makes this recipe stand out from the rest? It’s the balance. A lot of cookie cakes are too dense. This one is light. It’s airy. The addition of a bit of cornstarch (a trick I learned from years of baking failures) keeps it tender. And the white chocolate strips? They’re not just decoration. They melt into the dough, adding pockets of sweetness that tie everything together. This isn’t just another Halloween treat. It’s your new go-to. It’s the kind of recipe that becomes a tradition. You’ll make it every year. And every year, you’ll wonder how you ever lived without it.
What Ingredients You Will Need
This recipe relies on a few key ingredients to create that signature soft, chewy texture. You don’t need anything fancy, but quality matters. Especially with the butter and the chocolate. I’ve used generic brands before, and let me tell you, it makes a difference. Here’s what you’ll need to get started.
- All-Purpose Flour: 2 ½ cups. This is the base. Don’t use self-rising flour unless you adjust the baking powder. I recommend King Arthur Brand for consistent results. It has a bit more protein, which helps with structure without making the cookie tough.
- Unsalted Butter: 1 cup (2 sticks), softened. This is crucial. Softened means cool to the touch but squishable. Not melted. Melted butter makes the cookies spread too much and lose their soft texture. Room temperature butter creams better with the sugar, creating those air pockets that make the cake light.
- Granulated Sugar: 1 cup. White sugar gives that classic sugar cookie flavor and helps with the slight crisp on the edges. If you want a chewier texture, you can swap half of this for brown sugar, but I stick to white for the clean taste.
- Light Brown Sugar: ½ cup. This adds moisture and a hint of molasses flavor. It’s what keeps the center soft. Don’t skip this. It’s the secret weapon in this recipe.
- Eggs: 2 large eggs, room temperature. Again, room temperature is key. Cold eggs can shock the butter and cause the dough to break. If you forget to take them out, just crack them into a bowl of warm water for a minute. They’ll come up to speed.
- Vanilla Extract: 2 teaspoons. Real vanilla, please. The artificial stuff tastes chemical and bitter. It clashes with the butter. I use Nielsen-Massey or pure Madagascar vanilla. It makes a huge difference in the final flavor profile.
- Baking Powder: 1 ½ teaspoons. This is the leavening agent. It helps the cake rise slightly. Make sure it’s not expired. Old baking powder won’t work, and you’ll end up with a flat, dense disk. A quick test? Drop a little in hot water. If it fizzes, you’re good.
- Salt: ½ teaspoon. Salt isn’t just for flavor. It balances the sweetness. Without it, the cookie tastes one-dimensional. A little salt makes the butter and vanilla pop.
- Cornstarch: 1 tablespoon. This is the texture hack. It inhibits gluten formation, keeping the cookie soft and tender. It’s the difference between a crunchy cookie and a soft cake. Don’t skip it.
- White Chocolate Chips or Melts: 1 ½ cups. For the mummy strips, you’ll need white chocolate. Chips work, but melts are easier to pipe or drizzle. I prefer Ghirardelli white chocolate chips for baking into the dough, and white chocolate melting wafers for the decoration. They melt smoother and don’t seize as easily.
If you’re allergic to dairy, you can use vegan butter and dairy-free white chocolate. It won’t be exactly the same, but it’ll still be good. For a gluten-free option, swap the all-purpose flour for a 1:1 gluten-free blend. I’ve tried Bob’s Red Mill, and it works well. Just make sure to let the dough rest for 10 minutes before baking to let the gums hydrate.
Equipment Needed
You don’t need a lot of fancy gear for this recipe. Most of what you need is probably already in your kitchen. Here’s what I recommend.
- 9-Inch Round Springform Pan: This is the best option because it allows you to remove the cookie cake easily without breaking it. If you don’t have one, a regular 9-inch round cake pan works too, but you’ll need to line it well with parchment paper. Just be careful when slicing it out.
- Stand Mixer or Hand Mixer: Creaming the butter and sugar by hand is possible, but it’s a workout. A stand mixer with the paddle attachment makes this step quick and easy. If you’re using a hand mixer, be prepared to mix for about 3-4 minutes to get it light and fluffy.
- Rubber Spatula: You’ll need this to fold in the flour and scrape down the sides of the bowl. A flexible spatula is best because it gets into the corners and ensures you don’t waste any dough.
- Parchment Paper: Line your pan with parchment paper. This prevents sticking and makes cleanup a breeze. I always grease the parchment paper too, just to be safe. Butter works better than cooking spray here.
- Ziploc Bags: For the white chocolate strips, you’ll need small ziploc bags. Cut a tiny corner off the bag to use as a piping bag. It’s cheaper and easier than buying a special piping tip.
- Offset Spatula: This is great for spreading the dough evenly in the pan. It helps you get those smooth edges. If you don’t have one, a regular spatula works, but it’s trickier.
If you’re on a budget, skip the springform pan for now. A regular pan is fine. Just make sure to grease it thoroughly. And don’t buy expensive piping bags. The ziploc bag trick works just as well. The key is patience. Take your time when spreading the dough. It doesn’t need to be perfect, but it does need to be even.
Preparation Method
- Preheat and Prep: Start by preheating your oven to 350°F (175°C). This is important. If your oven is too cold, the cookie won’t bake properly. If it’s too hot, the edges will burn before the center is done. While it heats, line your 9-inch springform pan with parchment paper. Grease it lightly with butter or non-stick spray. Set aside.
- Cream the Butter and Sugars: In a large mixing bowl, add the softened unsalted butter, granulated sugar, and light brown sugar. Using a stand mixer on medium-high speed (or a hand mixer), beat this mixture for about 2-3 minutes. You want it to become light, fluffy, and pale in color. This step incorporates air, which helps the cookie cake rise. If you’re doing this by hand, it’ll take longer. About 5-7 minutes. Get your arms ready.
- Add Eggs and Vanilla: Once the butter mixture is fluffy, add the two large eggs and the vanilla extract. Mix on low speed until just combined. Scrape down the sides of the bowl with a rubber spatula to ensure everything is mixed evenly. Don’t overmix here. You just want the eggs incorporated. Overmixing can make the cookies tough.
- Combine Dry Ingredients: In a separate medium bowl, whisk together the all-purpose flour, baking powder, salt, and cornstarch. This ensures that the leavening agents are evenly distributed. If you skip this, you might get pockets of baking powder that taste bitter.
- Combine Wet and Dry: Gradually add the dry ingredients to the wet ingredients. Mix on low speed until the flour is just incorporated. Stop mixing as soon as you see no more streaks of flour. Overmixing at this stage develops gluten, which makes the cookie cake chewy in a bad way (like a bagel) rather than a good way (like a cookie). It should come together in a soft, slightly sticky dough.
- Press into Pan: Transfer the dough to your prepared springform pan. Use your hands or a spatula to press it evenly into the bottom. Start from the center and work your way out. You want the dough to be about ½ inch thick. If it’s too thick in the middle, it won’t bake evenly. If it’s too thin on the edges, it’ll burn. Try to keep it uniform.
- Bake: Place the pan in the preheated oven and bake for 18-22 minutes. The edges should be lightly golden, but the center should still look soft and slightly underdone. It will continue to cook as it cools. Do not overbake. If you wait until the center is firm, it will be dry and crumbly. Take it out when it looks 90% done.
- Cool Completely: Let the cookie cake cool in the pan for about 10 minutes. Then, carefully release the springform ring. Transfer the cake to a wire rack to cool completely. This step is crucial. If you try to decorate it while it’s warm, the white chocolate will melt and slide off. It needs to be room temperature.
- Melt White Chocolate: Once the cake is cool, melt the white chocolate chips or melts. You can do this in the microwave in 30-second intervals, stirring in between, or in a double boiler over low heat. Stir until smooth. If it’s too thick, add a teaspoon of vegetable oil or shortening to thin it out. This makes it easier to pipe.
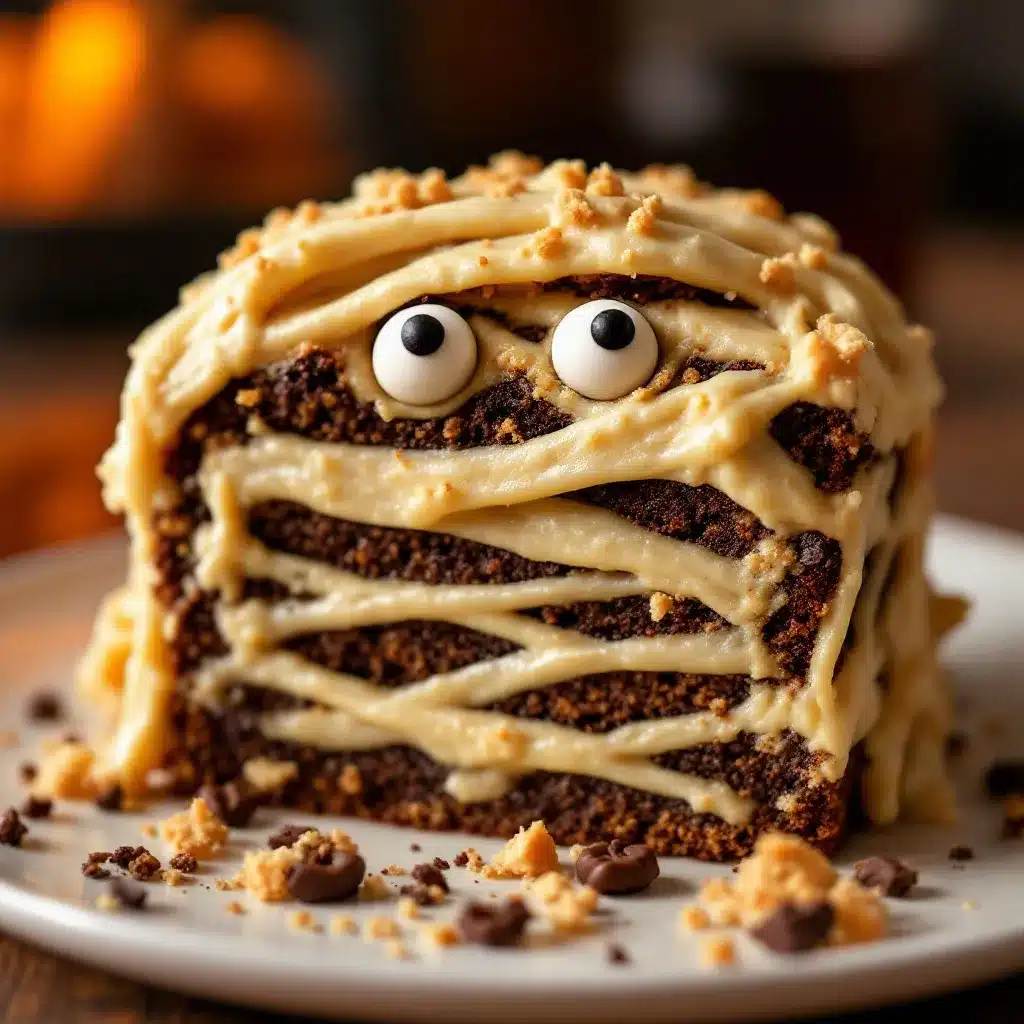
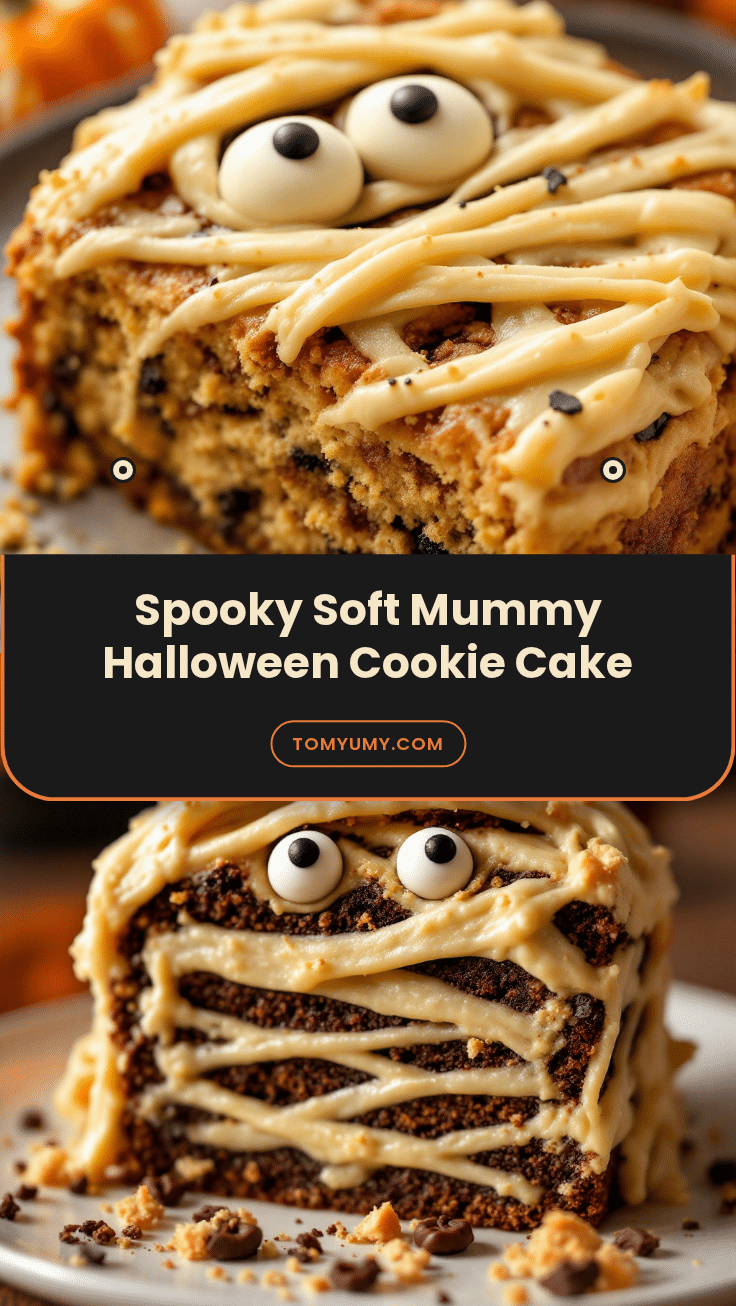
- Decorate: Transfer the melted white chocolate to a small ziploc bag. Cut a tiny corner off the bottom. Pipe horizontal strips across the cookie cake, leaving small gaps between the strips to mimic mummy bandages. You can also pipe eyes and a mouth if you want. Let the chocolate set at room temperature or in the fridge for 15 minutes. Once set, slice and serve.
Cooking Tips & Techniques
Here’s where I share the lessons I’ve learned the hard way. Because let’s face it, baking is a science, and sometimes you fail. A lot.
- Butter Temperature is Key: I can’t stress this enough. If your butter is too soft (melting), your cookies will spread into flat puddles. If it’s too hard (cold), they’ll be dense and hard. Aim for room temperature. You should be able to press your finger into it and leave a clean indent without it squishing like water.
- Don’t Overmix the Dough: This is the most common mistake. Once you add the flour, mix until it just comes together. Any more than that, and you’re developing gluten. The result? Tough cookies. You want soft, tender cakes. Less is more.
- Underbake Slightly: I know it’s scary. You want to make sure it’s cooked. But for soft cookie cakes, underbaking is your friend. The center should look slightly soft when you take it out. It will firm up as it cools. If you bake it until the center is firm, it’ll be dry. Trust the process.
- Cool Completely Before Decorating: I’ve made the mistake of decorating warm cookies before. The chocolate melts. It slides off. It’s a mess. You end up with a white chocolate puddle on the counter and a sad, naked cookie. Let it cool. Use a fan if you’re impatient. But wait.
- Use a Ziploc Bag for Piping: You don’t need fancy piping tips. A small ziploc bag with a tiny corner cut off works perfectly. It gives you control over the thickness of the strips. If you want thicker bandages, cut a bigger hole. If you want thinner ones, cut a smaller hole. Practice on a piece of parchment paper first to get the hang of it.
- Storage is Important: Store the cookie cake in an airtight container at room temperature for up to 3 days. If you live in a humid climate, keep it in the fridge. But let it come to room temperature before serving. Cold cookie cake isn’t as good. The texture changes. It becomes harder. Room temperature is best.
Variations & Adaptations
While the classic mummy look is my favorite, there are plenty of ways to twist this recipe. Here are a few ideas.
- Green Mummy: Add a drop or two of green food coloring to the white chocolate before piping. It gives a zombie-like effect. Spooky and fun. Kids love it.
- Orange Mummy: Swap the white chocolate for orange chocolate melts. It looks like a pumpkin with bandages. Or just use orange food coloring in the white chocolate. Very festive.
- Gluten-Free: Use a 1:1 gluten-free flour blend. I’ve tested this with Bob’s Red Mill and King Arthur, and both work well. Just make sure to let the dough rest for 10 minutes before baking to allow the flour to hydrate. The texture will be slightly more crumbly, but still delicious.
- Dairy-Free: Use vegan butter and dairy-free white chocolate. Miyoko’s Creamery makes a great vegan butter that works well in baking. For the chocolate, Enjoy Life or Green & Black’s have good options. The flavor might be slightly different, but it’ll still be a hit.
- Chocolate Chip Mummy: Add 1 cup of chocolate chips to the dough before baking. It adds pockets of chocolate that melt into the cookie. Very rich and decadent. I like this version for adults who want a bit more depth.
One variation I tried was adding a cream cheese filling. I spread a layer of sweetened cream cheese in the center of the dough before pressing it into the pan. It was good, but it made the cookie cake heavier. If you want a lighter texture, stick to the plain version. But if you like rich, creamy treats, give it a try.
Serving & Storage Suggestions
When it’s time to serve, this cookie cake is best at room temperature. It’s soft, chewy, and the white chocolate is just set. If you serve it warm, the chocolate might be too soft. If you serve it cold, it’ll be hard. Room temperature is the sweet spot.
For presentation, place the cookie cake on a wooden board or a platter. Add some mini pumpkins, candy corn, or black and orange sprinkles around it for a festive touch. It looks great in photos, which is always a bonus.
For serving, cut it into squares or triangles. It’s easy to share. Pair it with a glass of cold milk or a cup of hot coffee. The contrast of the warm cookie and cold milk is classic. Or try it with a scoop of vanilla ice cream for an extra treat.
If you have leftovers, store them in an airtight container at room temperature for up to 3 days. If you live in a hot or humid climate, store it in the fridge. But let it come to room temperature before serving. Cold cookie cake isn’t as good. You can also freeze the cookie cake for up to 2 months. Wrap it tightly in plastic wrap and then in aluminum foil. Thaw it at room temperature before serving. The texture might change slightly, but it’ll still be tasty.
Over time, the flavors develop. The first day is great, but the second day is often better. The sugars have time to crystallize slightly, making the cookie chewier. The white chocolate also sets harder, making it easier to cut. If you’re making it for a party, consider making it a day in advance.
Nutritional Information & Benefits
While this is definitely a treat, it’s not all bad. Here’s a rough estimate of the nutritional information per serving (assuming 12 servings).
- Calories: 350-400 calories per serving.
- Fat: 18g (mostly from butter and chocolate).
- Carbs: 45g (sugar and flour).
- Protein: 4g.
- Fiber: 1g.
The main benefits come from the butter and eggs, which provide some protein and healthy fats. The white chocolate adds calcium, though it’s also high in sugar. If you’re watching your sugar intake, you can reduce the sugar in the dough by ¼ cup. It won’t affect the texture too much, but it will make it less sweet.
For those with dietary restrictions, this recipe can be adapted to be gluten-free or dairy-free. As mentioned earlier, use a 1:1 gluten-free flour blend and vegan butter. For the white chocolate, use dairy-free melts. It’s not exactly the same, but it’s a good option for those with allergies.
From a wellness perspective, this cookie cake is a comfort food. It’s not going to make you feel guilty, but it’s also not a health food. Enjoy it in moderation. Pair it with a healthy snack or a piece of fruit to balance out the meal. And remember, food is meant to be enjoyed. Don’t stress over the calories. Just enjoy the taste.
Conclusion
This Spooky Soft Mummy Halloween Cookie Cake is more than just a cookie. It’s a fun, easy, and delicious treat that’s perfect for Halloween. It’s soft, chewy, and decorated with cute white chocolate mummy bandages. It’s easy to make, requires simple ingredients, and tastes amazing. Whether you’re making it for a party, a school event, or just a cozy night in, this recipe is a winner.
I encourage you to try it. Experiment with different colors, add some chocolate chips, or make it gluten-free. Make it your own. And when you do, I’d love to hear how it turned out. Leave a comment below with your thoughts. Did you like the classic version? Did you try a variation? Share your photos on social media and tag me. I love seeing what you create.
Happy baking. And don’t forget to save your leftovers. They’re usually better the next day.
FAQs
Can I use a square pan instead of a round one?
Yes, you can use an 8×8 square pan. Just reduce the baking time by 2-3 minutes. Keep an eye on it to make sure it doesn’t overbake. The edges might brown faster, so you can cover them with foil if needed.
Why did my cookie cake spread too much?
This usually happens if the butter was too soft or if the dough wasn’t chilled. Make sure your butter is room temperature, not melted. If you’re in a warm kitchen, chill the dough for 15 minutes before baking. This helps the cookies hold their shape.
Can I freeze the cookie cake before decorating?
Yes, you can freeze the baked cookie cake before decorating. Wrap it tightly in plastic wrap and then in aluminum foil. Thaw it at room temperature before decorating. This is useful if you’re making it in advance for a party.
What if I don’t have a springform pan?
You can use a regular round cake pan. Just line it well with parchment paper and grease it thoroughly. When you’re ready to serve, you’ll need to cut the cookie cake in the pan and lift it out with the parchment paper. It’s a bit trickier, but it works.
How long does the white chocolate take to set?
At room temperature, it takes about 15-20 minutes to set. If you’re in a hurry, you can put it in the fridge for 5-10 minutes. Just make sure it’s fully set before you cut it. Otherwise, the chocolate will smear.
Pin This Recipe!
Spooky Soft Mummy Halloween Cookie Cake
A soft, chewy sugar cookie cake decorated with white chocolate mummy bandages. This easy-to-make treat is perfect for Halloween parties and features a tender center with slightly crisp edges.
- Prep Time: 15 minutes
- Cook Time: 22 minutes
- Total Time: 37 minutes
- Yield: 12 servings 1x
- Category: Dessert
- Cuisine: American
Ingredients
- 2 ½ cups All-Purpose Flour
- 1 cup (2 sticks) Unsalted Butter, softened
- 1 cup Granulated Sugar
- ½ cup Light Brown Sugar
- 2 large Eggs, room temperature
- 2 teaspoons Vanilla Extract
- 1 ½ teaspoons Baking Powder
- ½ teaspoon Salt
- 1 tablespoon Cornstarch
- 1 ½ cups White Chocolate Chips or Melts
Instructions
- Preheat oven to 350°F (175°C). Line a 9-inch springform pan with parchment paper and grease lightly.
- In a large mixing bowl, cream the softened butter, granulated sugar, and light brown sugar on medium-high speed for 2-3 minutes until light and fluffy.
- Add the eggs and vanilla extract. Mix on low speed until just combined, scraping down the sides of the bowl.
- In a separate bowl, whisk together the flour, baking powder, salt, and cornstarch.
- Gradually add the dry ingredients to the wet ingredients. Mix on low speed until just incorporated; do not overmix.
- Press the dough evenly into the prepared pan, aiming for a uniform ½-inch thickness.
- Bake for 18-22 minutes until edges are lightly golden but the center still looks soft.
- Cool in the pan for 10 minutes, then release the springform ring. Transfer to a wire rack to cool completely.
- Melt the white chocolate chips or melts in 30-second intervals in the microwave or using a double boiler until smooth.
- Transfer melted chocolate to a small ziploc bag with a corner cut off. Pipe horizontal strips across the cooled cookie cake to resemble mummy bandages.
- Let the chocolate set at room temperature or in the fridge for 15 minutes before slicing and serving.
Notes
Ensure butter is softened but not melted to prevent spreading. Do not overmix the dough to maintain a tender texture. Underbake slightly for a soft center, as it will firm up while cooling. Cool completely before decorating to prevent the chocolate from melting. Store in an airtight container at room temperature for up to 3 days.
Nutrition
- Serving Size: 1 slice
- Calories: 375
- Sugar: 30
- Sodium: 150
- Fat: 18
- Saturated Fat: 11
- Carbohydrates: 45
- Fiber: 1
- Protein: 4
Keywords: Halloween, cookie cake, mummy cookies, white chocolate, easy dessert, fall treats, sugar cookie