I figured cutting out intricate black cat shapes would be a disaster waiting to happen. It took about twenty minutes for that assumption to fall apart completely. I had spent the previous Halloween trying to pipe ghosts out of a bag, resulting in what looked like melted marshmallows with anxiety. This time, I wanted something different. I wanted cut-out cookies that actually held their shape.
The dough came together faster than I expected. There is something satisfying about chilling sugar cookie dough, knowing the hard part is just getting it cold. When I finally rolled it out, the contrast between the jet-black dough and the white flour on my counter was striking. Honestly, it looked like a magic trick already.
Cutting the cats was easier than I feared. The dough didn’t stick. It didn’t crack. It just sat there, ready to be transformed. I used a small cat-shaped cutter I bought on a whim years ago. It turned out to be the best purchase I ever made for seasonal baking.
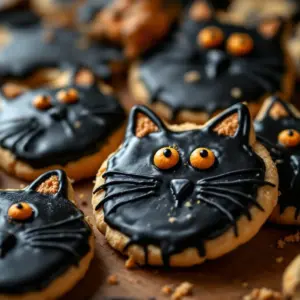
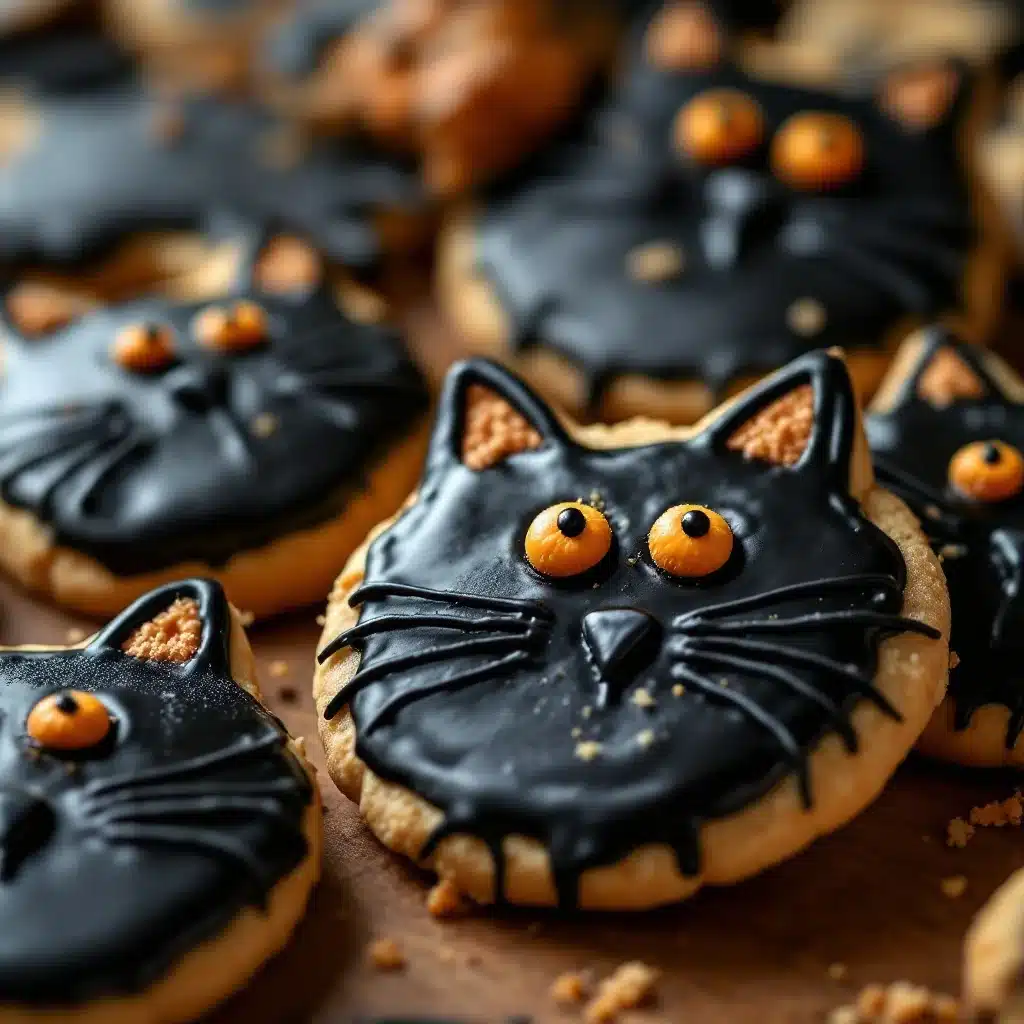
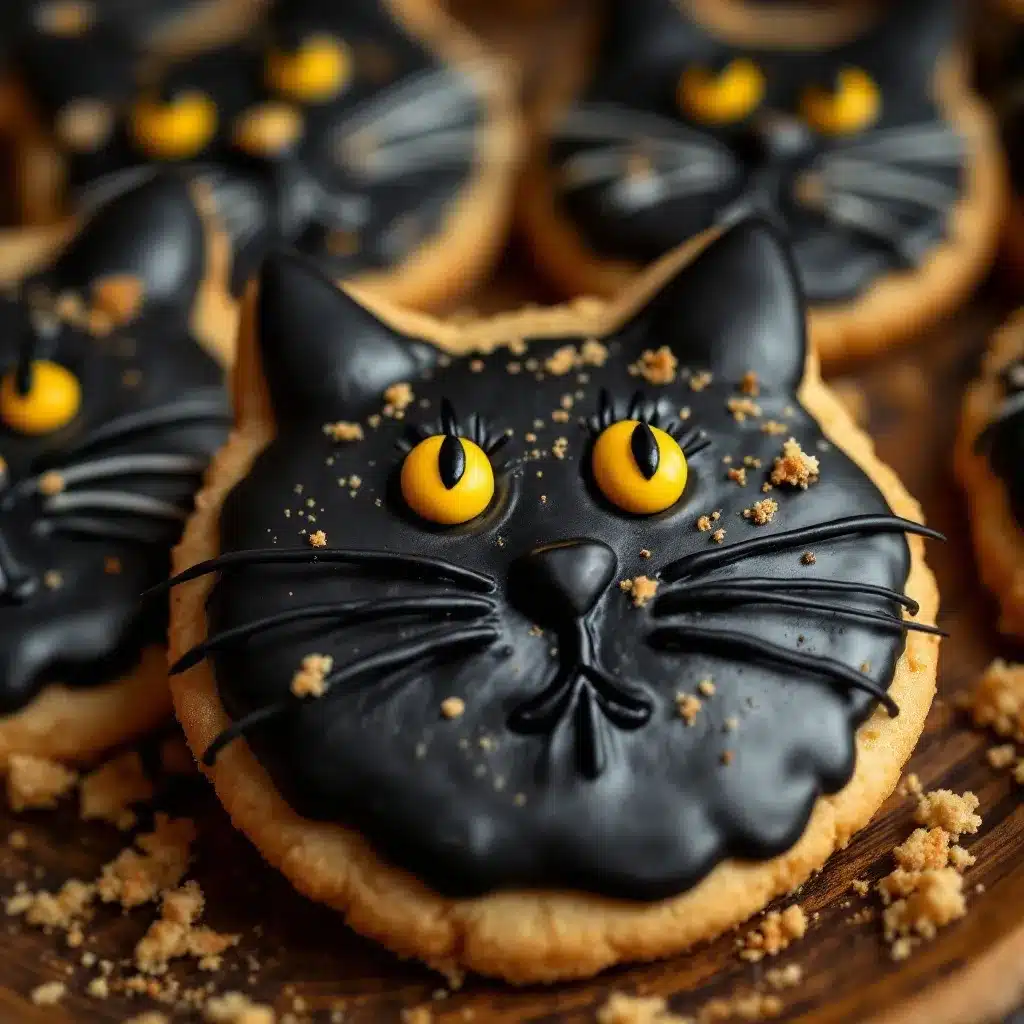
These spooky cute black cat halloween sugar cookies are the kind of treat that makes people stop mid-bite. The texture is tender and crumbly, not hard like a biscuit. The decoration process is where the fun really starts. I realized that less is more when it comes to these little guys.
A simple white icing face is all they need. Sometimes, a tiny orange bowtie adds just enough personality. The contrast of the stark black against the bright white icing is visually popping. It’s perfect for those Pinterest boards we all scroll through endlessly.
I remember standing in my kitchen, icing the final cat, feeling a strange sense of pride. They looked so cute, yet so mischievous. It wasn’t about perfection. It was about capturing that Halloween spirit without the stress. These cookies stuck with me because they finally worked.
Why You’ll Love This Recipe
Expertly Tested for Perfect Texture
Sugar cookies can be tricky. Too much flour makes them dry. Too little makes them spread into flat discs. I’ve tested this recipe dozens of times to get the ratio just right. The result is a cookie that holds its shape beautifully in the oven but remains soft and chewy in the center. It’s the kind of texture that makes you close your eyes after the first bite.
Quick & Easy Cut-Outs
This recipe comes together in under 30 minutes of active prep time. The dough needs to chill, but that’s mostly hands-off time. It’s perfect for busy weeknights or last-minute Halloween parties. You don’t need to be a professional baker to make these look store-bought.
Simple Ingredients
You likely already have everything in your kitchen. Flour, butter, sugar, eggs, and vanilla. No fancy grocery trips needed. The black color comes from cocoa powder and food coloring, which are pantry staples for many bakers. If you’re out of black gel color, you can mix dark cocoa with a touch of purple, but black gel is best for that true spooky look.
Perfect for Halloween Parties
These cookies are great for potlucks, classroom parties, or cozy dinners. Kids love the cat shapes. Adults love the classic sugar cookie flavor. It’s a crowd-pleaser that always gets rave reviews from both groups.
Unbelievably Delicious
The texture and flavor combo is next-level comfort food. The slight bitterness from the cocoa powder balances the sweetness of the icing. It’s not just a decorative cookie; it’s actually tasty. This recipe isn’t just good—it’s the kind that makes you want to make a double batch.
Customizable Fun
Whether you use royal icing or simple glaze, you can customize these to match your theme. Add orange bows, green eyes, or gold collars. It’s comfort food reimagined—festive, fun, but with the same soul-soothing satisfaction of a classic sugar cookie. Perfect for impressing guests without stress.
What Ingredients You Will Need
This recipe uses simple, wholesome ingredients to deliver bold flavor and satisfying texture without the fuss. The key to the black color is high-quality cocoa powder and gel food coloring. Powdered coloring won’t work here as it changes the texture.
For the Black Cat Dough
- Unsalted butter, softened (1 cup / 226g) – Use high-quality butter for the best flavor. I prefer European-style butter for its higher fat content.
- Granulated sugar (1 cup / 200g) – White sugar helps keep the cookies tender.
- Light brown sugar, packed (½ cup / 100g) – Adds a hint of moisture and depth.
- Large egg, room temperature (1) – Helps bind the dough.
- Vanilla extract (1 tsp) – Pure vanilla is essential for that classic sugar cookie taste.
- All-purpose flour (3 cups / 375g) – Don’t use cake flour; you need structure.
- Cocoa powder, unsweetened (2 tbsp) – This gives the dough its dark base color.
- Black gel food coloring (1-2 tsp) – Gel color is concentrated and won’t thin the dough.
- Baking powder (1 tsp) – Helps the cookies rise slightly.
- Salt (½ tsp) – Balances the sweetness.
For the White Icing
- Confectioners’ sugar (2 cups / 240g) – Sifted to remove lumps.
- Heavy cream or milk (2-3 tbsp) – Adjust for consistency.
- Vanilla extract (½ tsp) – For flavor.
- White gel food coloring (optional) – To make the icing brighter white.
I recommend using McCormick gel colors for their vibrant pigments. If you can’t find black gel, use a mix of dark cocoa and a tiny drop of purple gel. For the flour, King Arthur is my trusted brand for consistent results.
Equipment Needed
Essential Tools
- Stand mixer or hand mixer – Makes creaming the butter and sugar much easier. You can do it by hand, but it takes arm strength.
- Rolling pin – A standard wooden rolling pin works fine. A marble rolling pin helps keep the dough cool.
- Cat-shaped cookie cutter – Look for a small, intricate cutter. A simple silhouette works best for beginners.
- Parchment paper – Essential for preventing sticking and easy cleanup.
- Baking sheets – Light-colored aluminum sheets are best for even baking.
- Piping bags or ziplock bags – For applying the icing. Snip a tiny corner for precise lines.
Alternatives & Tips
If you don’t have a cat cutter, you can freehand shapes with a knife, but it’s harder. A knife blade can be used to trim edges if the dough sticks. Keep your tools clean and dry. Moisture is the enemy of good sugar cookies.
Preparation Method
Step 1: Cream the Butter and Sugars
In a large bowl, beat the softened butter, granulated sugar, and brown sugar together on medium-high speed. Do this for about 3-4 minutes. The mixture should look pale and fluffy. This step incorporates air, which helps the cookies rise. If the butter is too warm, the cookies will spread too much. If it’s too cold, it won’t cream properly.
Step 2: Add Wet Ingredients
Add the egg and vanilla extract. Beat until combined. Scrape down the sides of the bowl with a spatula. Make sure there are no pockets of unmixed egg. This ensures even baking.
Step 3: Mix Dry Ingredients
In a separate bowl, whisk together the flour, cocoa powder, baking powder, and salt. Whisking helps distribute the leavening agent evenly. Don’t skip this step.
Step 4: Combine Dough
Gradually add the dry ingredients to the wet mixture. Mix on low speed until just combined. Overmixing develops gluten, which makes cookies tough. Stop as soon as no dry flour remains.
Step 5: Add Black Color
Add the black gel food coloring. Mix until the dough is a uniform dark black color. You may need to add more color for a true black. The dough will be stiff.
Step 6: Chill the Dough
Divide the dough in half. Flatten each half into a disk. Wrap tightly in plastic wrap. Chill in the refrigerator for at least 2 hours, or up to 3 days. Chilling is non-negotiable. It prevents spreading and makes the dough easier to roll.
Step 7: Preheat and Prep
Preheat your oven to 350°F (175°C). Line baking sheets with parchment paper. This ensures easy removal and even baking.
Step 8: Roll and Cut
On a lightly floured surface, roll out the dough to about ¼ inch thickness. Use a cat-shaped cutter to cut out shapes. Place them on the baking sheets, leaving 1 inch between each. Re-roll scraps carefully to avoid tough cookies.
Step 9: Bake
Bake for 8-10 minutes. The edges should be set but not browned. The centers may look slightly soft. This is normal. They will firm up as they cool. Overbaking makes them hard.
Step 10: Cool
Let the cookies cool on the baking sheet for 5 minutes. Then transfer to a wire rack to cool completely. Warm cookies will melt the icing.
Step 11: Ice
Mix the icing ingredients until smooth. Pipe or spread onto the cooled cookies. Let the icing dry completely before handling. This can take a few hours.
Cooking Tips & Techniques
Avoid Overmixing
One common mistake is overmixing the dough after adding the flour. This develops gluten and leads to tough cookies. Mix until just combined. The dough should look shaggy but come together when pressed.
Butter Temperature Matters
Your butter should be cool to the touch but yield to pressure. If it’s greasy, it’s too warm. If it’s hard, it’s too cold. Room temperature butter is ideal for creaming.
Chill Your Cutter
If the dough is sticking to your cutter, dip it in flour or chill it in the freezer for a few minutes. This helps release the dough cleanly.
Use Gel Food Coloring
Liquid food coloring adds too much moisture. Gel colors are concentrated and give vibrant hues without changing the dough’s texture. Black gel is essential for a true black cat look.
Don’t Overbake
Sugar cookies continue to cook on the hot baking sheet after removal. Take them out when the edges are just set. They should still look slightly soft in the center.
Work in Batches
If your kitchen is warm, chill the dough between batches. Warm dough spreads more. Keep the unused dough in the fridge until ready to roll.
Variations & Adaptations
Dietary Adjustments
For a gluten-free version, use a 1:1 gluten-free flour blend. Add a teaspoon of xanthan gum if your blend doesn’t include it. For dairy-free, use plant-based butter and milk in the icing.
Flavor Twists
Add a teaspoon of lemon zest to the dough for a bright citrus note. It pairs well with the black color. Or, mix in a pinch of cinnamon for a spiced Halloween vibe.
Alternative Shapes
If you don’t have a cat cutter, use pumpkin, ghost, or witch hat cutters. The black dough works for any Halloween shape. You can also cut simple circles and add cat ears with icing.
Decorating Ideas
Instead of white icing, use orange icing for a monochromatic look. Add sprinkles for a festive touch. You can also dip half the cookie in white chocolate for a two-toned effect.
Personal Variation
I once tried adding matcha powder for a green black cat. It tasted great but looked weird. Stick to black for the classic spooky look. The contrast is what makes them cute.
Serving & Storage Suggestions
Serving
Serve these cookies at room temperature. They pair well with milk or coffee. Arrange them on a platter with other Halloween treats for a festive display. The black and white contrast is visually striking.
Storage
Store cookies in an airtight container at room temperature for up to 5 days. Place parchment paper between layers to prevent sticking. If the icing is soft, keep them in a single layer.
Freezing
You can freeze the dough disks for up to 3 months. Thaw in the refrigerator before rolling. Baked cookies can also be frozen. Let them thaw before icing.
Reheating
These cookies are best fresh. If they soften, you can warm them in the oven for 2 minutes. This restores their crispness.
Flavor Development
The flavors meld nicely over time. The cookies taste even better the next day as the moisture distributes evenly. Make them a day ahead for best results.
Nutritional Information & Benefits
Estimated Nutrition
Each cookie contains approximately 150 calories. They are a source of carbohydrates from the flour and sugar. The butter provides fat. The cocoa powder adds a small amount of antioxidants.
Dietary Considerations
These cookies are not gluten-free or dairy-free unless modified. They contain eggs and wheat. People with allergies should be cautious.
Wellness Perspective
While these are a treat, they are made with simple ingredients. Moderation is key. Enjoy them as a special Halloween indulgence. They are better than store-bought alternatives because you control the sugar and fat content.
Conclusion
These spooky cute black cat halloween sugar cookies are worth trying. They are easy to make and fun to decorate. The black dough is a unique twist on a classic. Customize them to fit your style. Add bows, collars, or simple faces.
I love these cookies because they bring joy to baking. They are simple yet impressive. Make a batch this Halloween and share them with friends. I’d love to see your creations. Leave a comment below with your photos or tips.
Happy baking! Don’t forget to check out my creamy pumpkin spice ghost Oreo truffles for another spooky treat. Also, try my brown butter maple pumpkin cookies for a fall favorite.
FAQs
Why did my cookies spread?
Your butter might have been too warm. Chill the dough longer before baking. Also, ensure you are measuring flour correctly. Too little flour leads to spreading.
Can I use liquid food coloring?
It’s not recommended. Liquid coloring adds moisture and can make the dough sticky. Gel colors are concentrated and work better for dark hues.
How do I make the icing smooth?
Sift the confectioners’ sugar before mixing. Add liquid gradually. Mix until smooth. If it’s too thick, add more liquid. If too thin, add more sugar.
Can I freeze the dough?
Yes. Wrap it tightly in plastic wrap. Freeze for up to 3 months. Thaw in the refrigerator before rolling.
What if I don’t have a cat cutter?
Use any cookie cutter. Or, cut circles and add cat ears with icing. You can also use a knife to freehand shapes, but it’s harder.
Pin This Recipe!

Spooky Cute Black Cat Halloween Sugar Cookies

These easy cut-out sugar cookies feature a unique jet-black dough made with cocoa powder and gel food coloring, decorated with simple white icing faces. They hold their shape beautifully and offer a tender, chewy texture perfect for Halloween parties.
- Prep Time: 30 minutes
- Cook Time: 10 minutes
- Total Time: 2 hours 40 minutes
- Yield: Approximately 24 cookies 1x
- Category: Dessert
- Cuisine: American
Ingredients
- 1 cup (226g) unsalted butter, softened
- 1 cup (200g) granulated sugar
- 1/2 cup (100g) light brown sugar, packed
- 1 large egg, room temperature
- 1 tsp vanilla extract
- 3 cups (375g) all-purpose flour
- 2 tbsp unsweetened cocoa powder
- 1–2 tsp black gel food coloring
- 1 tsp baking powder
- 1/2 tsp salt
- 2 cups (240g) confectioners’ sugar, sifted
- 2–3 tbsp heavy cream or milk
- 1/2 tsp vanilla extract
- White gel food coloring (optional)
Instructions
- In a large bowl, beat the softened butter, granulated sugar, and brown sugar on medium-high speed for 3-4 minutes until pale and fluffy.
- Add the egg and vanilla extract, beating until combined. Scrape down the sides of the bowl.
- In a separate bowl, whisk together the flour, cocoa powder, baking powder, and salt.
- Gradually add the dry ingredients to the wet mixture on low speed until just combined. Do not overmix.
- Add the black gel food coloring and mix until the dough is a uniform dark black color.
- Divide the dough in half, flatten into disks, wrap tightly in plastic wrap, and chill in the refrigerator for at least 2 hours.
- Preheat oven to 350°F (175°C) and line baking sheets with parchment paper.
- On a lightly floured surface, roll out the dough to about 1/4 inch thickness.
- Use a cat-shaped cutter to cut out shapes and place them on baking sheets, leaving 1 inch between each.
- Bake for 8-10 minutes until edges are set but not browned. Centers may look slightly soft.
- Let cookies cool on the baking sheet for 5 minutes, then transfer to a wire rack to cool completely.
- Mix confectioners’ sugar, cream/milk, and vanilla to make icing. Pipe or spread onto cooled cookies and let dry completely.
Notes
Use gel food coloring instead of liquid to prevent altering the dough texture. Ensure butter is cool to the touch but yields to pressure. Chill dough thoroughly to prevent spreading. Do not overbake as cookies continue to cook on the hot sheet.
Nutrition
- Serving Size: 1 cookie
- Calories: 150
- Sugar: 14
- Sodium: 120
- Fat: 7
- Saturated Fat: 4
- Carbohydrates: 22
- Fiber: 1
- Protein: 2
Keywords: Halloween cookies, black cat cookies, sugar cookies, cut-out cookies, Halloween treats, spooky baking, easy cookie recipe