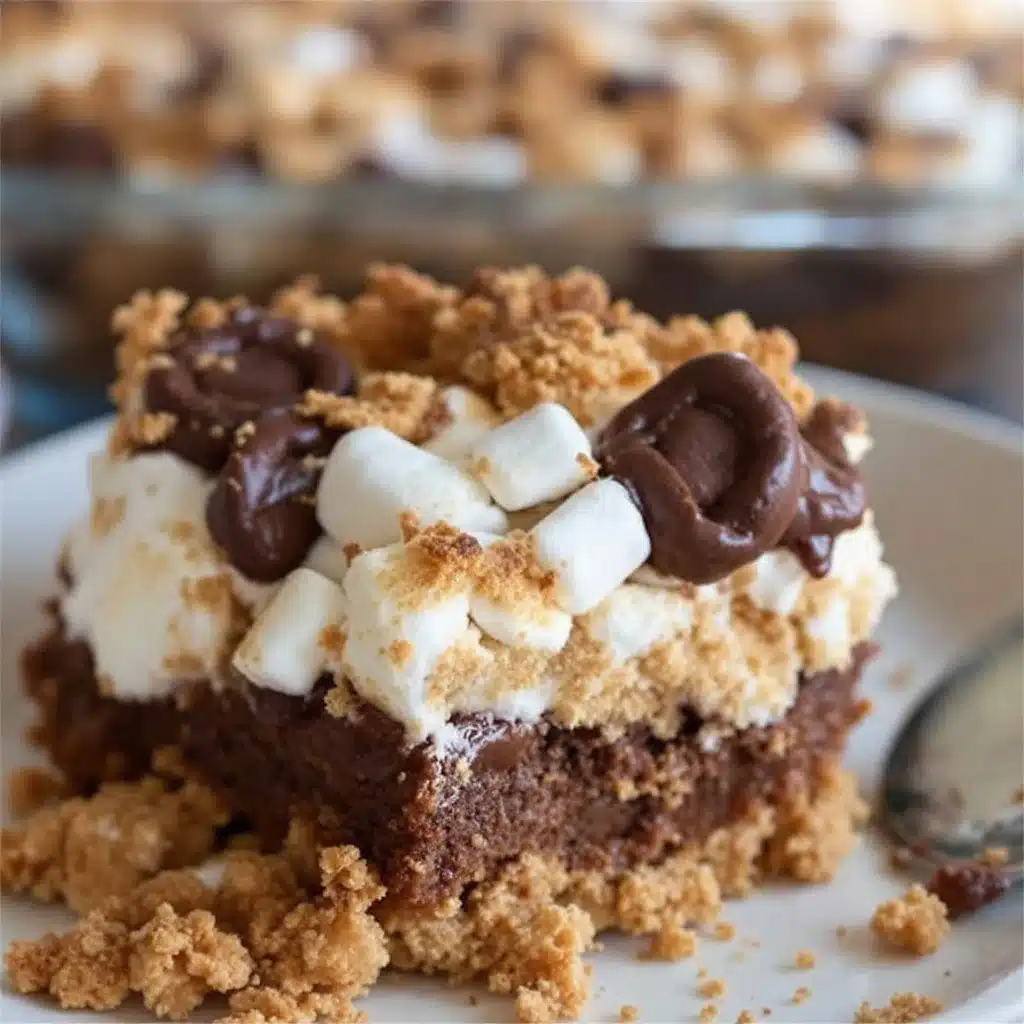
I did not trust graham crackers and whipped cream to hold up as a proper dessert. Honestly, I thought stacking dry cookies and cool cream sounded like a mistake until I pulled it from the fridge after a long day of grilling.
My husband had just dragged the picnic table into the backyard, sweating through his shirt, when he asked what was for dessert. I looked at the pantry. I saw a box of graham crackers, a tub of whipped topping, and a bag of chocolate chips. I shrugged. It was either that or nothing.
I layered the crackers with the cream and sprinkled chocolate on top. I didn’t think much of it. I just assumed it would be soggy within an hour. We drove to the park, set up the blanket, and opened the container. The smell was immediate. It smelled like campfire nights, but cleaner.
I took a bite. The cracker had softened just right. It wasn’t mushy. It was chewy. The chocolate had melted slightly into the cream, creating these little pockets of flavor. I looked at my husband. He was already reaching for seconds.
I knew right then that this no-bake s’mores icebox cake for picnics was going to be a staple. It requires zero oven time. You just stack it and wait. The heat of the day doesn’t ruin it; it actually helps the layers meld together.
I used to worry about bringing delicate desserts to outdoor events. This one is sturdy. It travels well. It feeds a crowd without me needing to stress about burns or timing. I stopped thinking of it as a “hack” and started respecting it as a serious treat.
Now, whenever I see a box of graham crackers, I smile. I know what’s coming next. It’s the easiest way to get that campfire taste without the smoke in your hair.
Why You’ll Love This No-Bake S’mores Icebox Cake
This recipe is not just another quick dessert. It is a tested, crowd-pleasing method that delivers the classic s’mores flavor without the hassle of roasting marshmallows over a fire. I have made this dozens of times for different gatherings, and it always comes out consistent. Here is why it stands out from the rest.
- Quick & Easy: This comes together in under 15 minutes of active prep. You just layer, chill, and serve. It is perfect for busy weeknights or last-minute cravings when you need something sweet fast.
- Simple Ingredients: No fancy grocery trips needed. You likely already have graham crackers, chocolate chips, and whipped topping in your kitchen. It uses pantry staples to create a gourmet feel.
- Perfect for Picnics: Unlike custard-based pies that can spoil in the heat, this cake holds up beautifully in a cooler or on a picnic table. It is the ideal companion for outdoor summer events.
- Crowd-Pleaser: It always gets rave reviews from kids and adults alike. The familiar flavors of campfire treats are universally loved, making it a safe bet for large groups.
- Unbelievably Delicious: The texture and flavor combo is next-level comfort food. The cracker softens into a cake-like layer, while the chocolate adds a rich contrast that is hard to resist.
What makes this recipe different from the rest is the simplicity of the method. Many s’mores recipes try to replicate the toasted marshmallow with brown sugar or broiling, which can be messy and inconsistent. This version relies on the natural moisture of the whipped topping to soften the crackers, creating a uniform texture that is creamy yet substantial.
It is not just good. It is the kind of dessert that makes you close your eyes after the first bite. It captures the essence of a summer evening by the fire, but without the bugs or the burn risk. It is comfort food reimagined—easier, faster, but with the same soul-soothing satisfaction. It is perfect for impressing guests without stress, or turning a simple meal into something memorable.
What Ingredients You Will Need
This recipe uses simple, wholesome ingredients to deliver bold flavor and satisfying texture without the fuss. You do not need high-end specialty items. Standard grocery store brands work perfectly fine here. The key is quality in the basics, especially the chocolate.
- Graham Crackers: Standard honey graham crackers are the foundation. Look for a box that is fresh and not stale. The crackers need to be sturdy enough to hold the cream but soft enough to absorb moisture. I prefer the standard rectangular sheets, but you can break them in half if you prefer smaller bites.
- Whipped Topping: A 12-ounce tub of frozen whipped topping, thawed, is the traditional choice. It provides a light, airy structure. You can use a dairy-free alternative if needed, but the texture will be slightly denser. I recommend brands like Cool Whip for their stability in warm weather.
- Chocolate Chips: Semi-sweet chocolate chips are my go-to. They provide a slight bitterness that balances the sweetness of the crackers and cream. You can also use mini chocolate chips for easier distribution, or chop up a few chocolate bars for larger, gooier chunks. Avoid baking chips that are designed to hold their shape in the oven, as they won’t melt as nicely.
- Optional: Mini Marshmallows: While not strictly necessary for the classic s’mores vibe, adding a handful of mini marshmallows between layers can boost the nostalgia factor. They will soften in the fridge and add a chewy texture. If you skip them, the cake is still delicious.
For the best results, ensure your whipped topping is fully thawed but still cold. If it is too warm, it may deflate when you fold in the chocolate. The chocolate chips should be at room temperature so they do not harden the cream immediately upon contact.
If you want to get fancy, you can mix a teaspoon of vanilla extract into the whipped topping for extra aroma. However, the classic trio of graham, chocolate, and cream speaks for itself. You can also swap semi-sweet chocolate for milk chocolate if you have a sweeter tooth.
Equipment Needed
You do not need any special gadgets to make this cake. A few basic kitchen tools are all you need to get the job done.
- 9×13 Inch Baking Dish: A glass or ceramic baking dish is ideal. Glass allows you to see the layers as they set, which is satisfying. If you only have metal, that works too, just be careful when slicing.
- Mixing Bowl: A large bowl is needed to fold the chocolate chips into the whipped topping. Make sure it is big enough to accommodate the volume of the whipped cream without spilling.
- Spatula: A silicone spatula is best for folding. It helps you mix the chocolate evenly without deflating the whipped topping. A wooden spoon can work, but be gentle.
- Knife: A sharp chef’s knife is useful for breaking graham crackers if your dish is smaller than the crackers. It also helps for slicing the final cake into neat squares.
If you do not have a large baking dish, you can use a 9-inch round springform pan or even a large casserole dish. The shape does not matter as much as the surface area. A wider dish will result in thinner layers, which might set faster. A deeper dish will take longer to chill.
I keep a dedicated spatula for whipped cream tasks because it is easier to clean. If you are making this for a picnic, consider packing the cake in the baking dish itself if it is sturdy. Otherwise, transfer it to a travel container once it is set.
Preparation Method
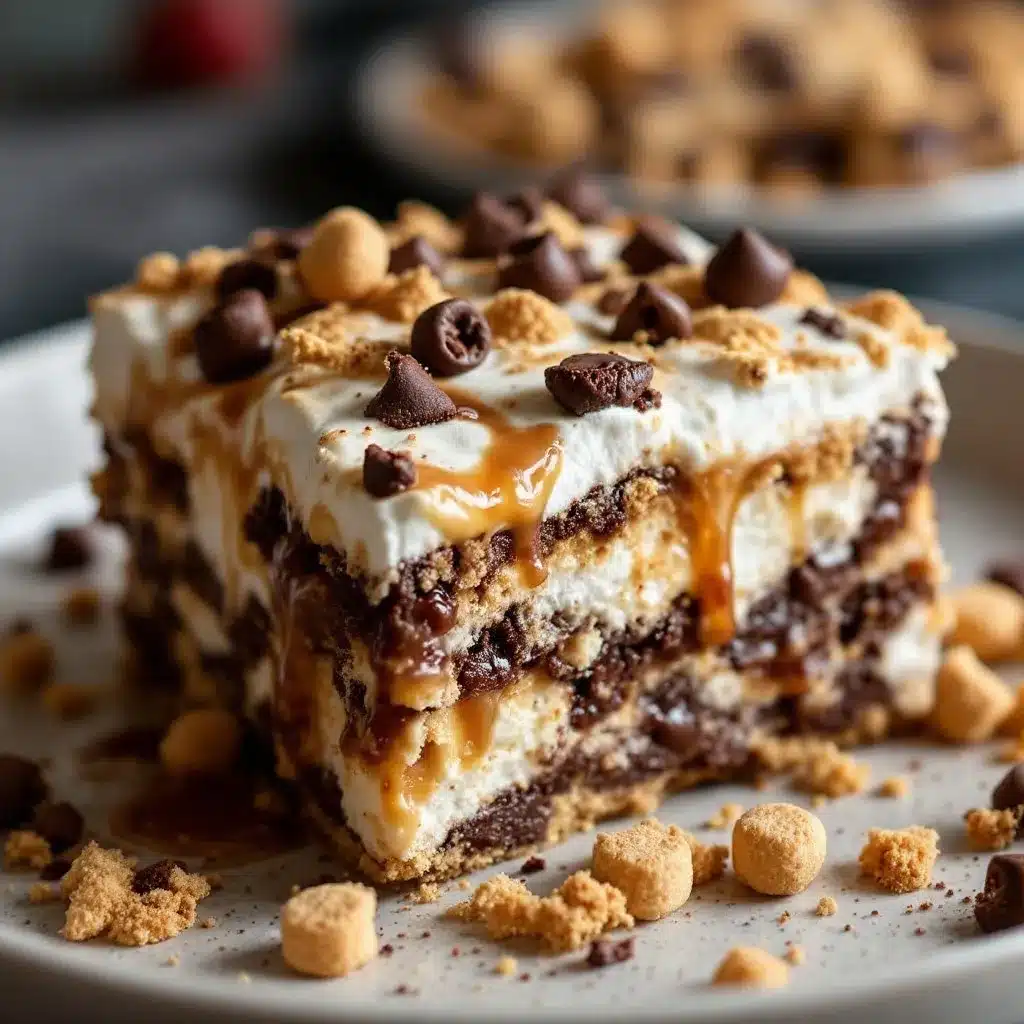
Making this no-bake s’mores icebox cake for picnics is straightforward. Follow these steps carefully to ensure the layers set properly and the flavors meld well.
- Prepare the Dish: Start by lightly greasing your 9×13 inch baking dish with cooking spray or a thin layer of butter. This prevents sticking and makes serving easier. It takes about 1 minute.
- Thaw the Whipped Topping: If using frozen whipped topping, let it sit at room temperature for 10-15 minutes until it is soft enough to stir but still cold. Do not microwave it, as it can melt into liquid. You want a fluffy consistency. This step is crucial for the texture.
- Mix the Chocolate: Pour the thawed whipped topping into a large mixing bowl. Add 1 to 1.5 cups of semi-sweet chocolate chips. Gently fold the chips into the cream using a spatula. Be careful not to overmix. You want to distribute the chocolate evenly while keeping the air in the cream. This takes about 3 minutes.
- Layer the First Cracker Row: Break the graham crackers into pieces that fit your baking dish. Lay down a single, tight layer of crackers at the bottom. Do not leave gaps. If the crackers are too big, break them in half or quarters to create a solid base. This is the foundation of your cake.
- Add the Cream Layer: Spread half of the chocolate-whipped cream mixture over the first layer of crackers. Use the back of your spatula to smooth it out. Try to get the cream into the corners and edges. Aim for an even thickness. This takes about 2 minutes.
- Layer the Second Cracker Row: Add another layer of graham crackers on top of the cream. Again, ensure there are no gaps. The crackers should sit flat and snug against each other. This creates the structural integrity of the cake.
- Add the Remaining Cream: Spread the rest of the whipped cream mixture over the second cracker layer. Smooth the top evenly. You can use the spatula to create gentle swirls on top for a decorative look. This takes about 2 minutes.
- Top with Crackers: Add a final layer of graham crackers. This top layer protects the cream and gives the cake a finished appearance. Press them down gently so they adhere to the cream. Sprinkle the remaining chocolate chips over the top layer for extra crunch and visual appeal.
- Chill the Cake: Cover the dish tightly with plastic wrap or aluminum foil. Place it in the refrigerator for at least 4 hours, but overnight is best. This long chilling time allows the crackers to soften completely and absorb the moisture from the cream, turning into a cake-like texture. This step takes patience but is worth it.
- Slice and Serve: Once chilled, remove the plastic wrap. Use a sharp knife to cut the cake into squares. Wipe the knife between cuts for clean edges. Serve cold. Enjoy your creation!
Pro Tip: If you are taking this to a picnic, let it sit out for 10-15 minutes before serving. This slightly softens the chocolate chips and makes the texture even creamier.
Cooking Tips & Techniques
Getting the texture right is the most important part of this recipe. Here are some tips from my experience to ensure success.
- Don’t Skip the Chill Time: I know it is tempting to eat it right away. Resist the urge. The crackers need time to soften. If you eat it too soon, you will have hard crackers and runny cream. Four hours is the minimum, but 8-12 hours is ideal.
- Fold, Don’t Stir: When mixing the chocolate chips into the whipped topping, use a folding motion. Lift from the bottom and turn over. Stirring vigorously will deflate the cream, resulting in a dense, heavy cake instead of a light, airy one.
- Break Crackers Properly: If your graham crackers are too large for your dish, break them before layering. Do not try to force a whole sheet into a smaller dish, as it will break unevenly and leave gaps. Gaps let the cream leak through, ruining the layers.
- Use Room Temperature Chocolate: If your chocolate chips are cold from the fridge, they might harden the cream too quickly. Let them sit on the counter for a few minutes before mixing. This ensures they distribute evenly without seizing the cream.
- Keep it Cold: Since this is a no-bake dessert, temperature control is key. Keep it refrigerated until the moment you are ready to serve. If it gets too warm, the structure will collapse. This is especially important for picnics.
I once made this cake on a hot day and forgot to cover it properly. The top layer dried out and became hard. Always cover your cake tightly with plastic wrap that touches the surface of the cream. This prevents a skin from forming and keeps the moisture locked in.
Another lesson I learned is to taste the whipped topping before mixing. If it is very sweet, you might want to use less sugar or more bitter chocolate. Balance is key to a great s’mores flavor profile.
Variations & Adaptations
While the classic version is delicious, you can tweak this recipe to suit different tastes or dietary needs. Here are a few ideas I have tried.
- Gluten-Free Option: Use gluten-free graham crackers. Many brands make great versions that hold up well in this recipe. Just check the ingredient list to ensure they are sturdy enough to layer.
- Dairy-Free Version: Substitute the whipped topping with a dairy-free whipped cream alternative. Coconut cream, chilled and whipped, is a great option for a richer, heavier texture. Use dairy-free chocolate chips to keep it fully vegan.
- Peanut Butter Twist: Add a layer of peanut butter cups or a drizzle of peanut butter between the cream layers. This adds a salty, nutty flavor that pairs beautifully with the chocolate and graham crackers. It is similar to the flavor profile of a creamy peanut butter French silk pie.
- Marshmallow Boost: Add a layer of mini marshmallows between the cream and crackers. This adds a chewy texture and enhances the s’mores experience. You can also toast the marshmallows lightly before adding them for a caramelized flavor.
- Caramel Drizzle: Drizzle salted caramel sauce over the top layer before chilling. This adds a sweet, salty crunch that elevates the dessert. It pairs well with the chocolate chips for a more complex flavor.
I also tried adding a layer of crushed Oreos for a “Cookies and Cream” variation. It was good, but I preferred the classic graham cracker texture. The honey flavor of the crackers complements the chocolate better than the sweet cookie flavor of Oreos.
If you want a fruitier twist, you can add a layer of sliced strawberries or raspberries. The acidity cuts through the sweetness of the cream and chocolate. It is a refreshing change from the traditional recipe.
Serving & Storage Suggestions
This cake is best served chilled. The cold temperature enhances the creamy texture and keeps the chocolate firm.
- Serving Temperature: Serve straight from the refrigerator. If you are having a picnic, keep the cake in a cooler with ice packs until you are ready to eat. This ensures it stays firm and safe to eat.
- Complementary Dishes: This dessert pairs well with grilled meats or light salads. The sweetness balances out savory main courses. You can also serve it with a cup of hot coffee or tea for a cozy evening treat.
- Storage Instructions: Store leftovers in the refrigerator, covered tightly with plastic wrap or in an airtight container. It will keep well for up to 3 days. Do not freeze this cake, as the whipped topping may separate and become grainy upon thawing.
- Reheating: Do not reheat this cake. It is meant to be eaten cold. If the cream becomes too soft, simply place it back in the fridge for 30 minutes to firm up.
- Flavor Development: The flavors meld and deepen over time. The second day, the crackers are even softer and the chocolate is more integrated. Some people prefer it on the second day over the first.
For presentation, cut the cake into neat squares and serve on small plates. You can garnish with a few extra chocolate chips or a mint leaf for a pop of color. It looks elegant enough for a dinner party but casual enough for a backyard BBQ.
If you are bringing it to a potluck, consider bringing extra napkins and forks. This cake disappears quickly. People love that it is easy to eat with a spoon or fork, and the layers hold together well.
Nutritional Information & Benefits
This dessert is rich and indulgent, so it is best enjoyed in moderation. Here is a general overview of the nutritional profile per serving (assuming 12 servings).
- Calories: Approximately 250-300 calories per slice, depending on the brand of whipped topping and chocolate used.
- Fat: High in fat due to the whipped topping and chocolate. Most of this is saturated fat from the dairy and cocoa butter.
- Carbohydrates: Moderate carbohydrate content from the graham crackers and sugar in the whipped topping and chocolate.
- Protein: Low protein content. This is primarily a treat rather than a balanced meal.
The graham crackers provide some fiber, especially if you use whole wheat versions. The chocolate chips offer small amounts of antioxidants, particularly if you use semi-sweet or dark chocolate.
This recipe is not suitable for those with gluten or dairy allergies unless substitutions are made. It is also high in sugar, so those monitoring their intake should be cautious.
Personally, I view this as a special occasion dessert. It is a treat that brings joy and nostalgia. The balance of textures and flavors makes it satisfying, which often means you need less to feel full. Enjoy it mindfully and savor the moment.
Conclusion
This no-bake s’mores icebox cake for picnics is a game-changer for outdoor desserts. It is easy to make, travels well, and tastes amazing. I love that it requires no baking, which means less heat in the kitchen on hot days.
I encourage you to try this recipe and customize it to your liking. Add peanut butter, marshmallows, or different chocolates. Make it your own.
I love this recipe because it brings back memories of camping trips, but with the convenience of modern ingredients. It is a perfect blend of old and new.
Please share your results in the comments below. Let me know how you like it and any variations you try. If you make it, take a photo and share it online. I would love to see your creations.
Enjoy this sweet, creamy, chocolatey delight at your next gathering. It is sure to be a hit.
FAQs
Can I use homemade whipped cream instead of store-bought?
Yes, you can use homemade whipped cream. However, it may not hold its shape as well as stabilized whipped topping. You can add a tablespoon of powdered sugar or a bit of gelatin to stabilize it. The texture will be richer but slightly denser.
How long does this cake need to chill?
It needs to chill for at least 4 hours, but overnight is best. The crackers need time to soften and absorb the moisture from the cream. If you rush it, the crackers will be hard and unpleasant to eat.
Can I freeze this cake?
It is not recommended to freeze this cake. The whipped topping can separate and become grainy when thawed. The texture will change significantly. It is best stored in the refrigerator for up to 3 days.
What kind of chocolate chips work best?
Semi-sweet chocolate chips are the best choice. They provide a nice balance of sweetness and bitterness. You can also use milk chocolate for a sweeter taste or dark chocolate for a more intense flavor. Mini chips are easier to distribute evenly.
Can I make this in a different size dish?
Yes, you can use a 9-inch round pan or a smaller dish. Adjust the number of layers accordingly. A smaller dish will result in thicker layers, which may take longer to chill. Keep an eye on the texture to ensure the crackers soften properly.
Pin This Recipe!
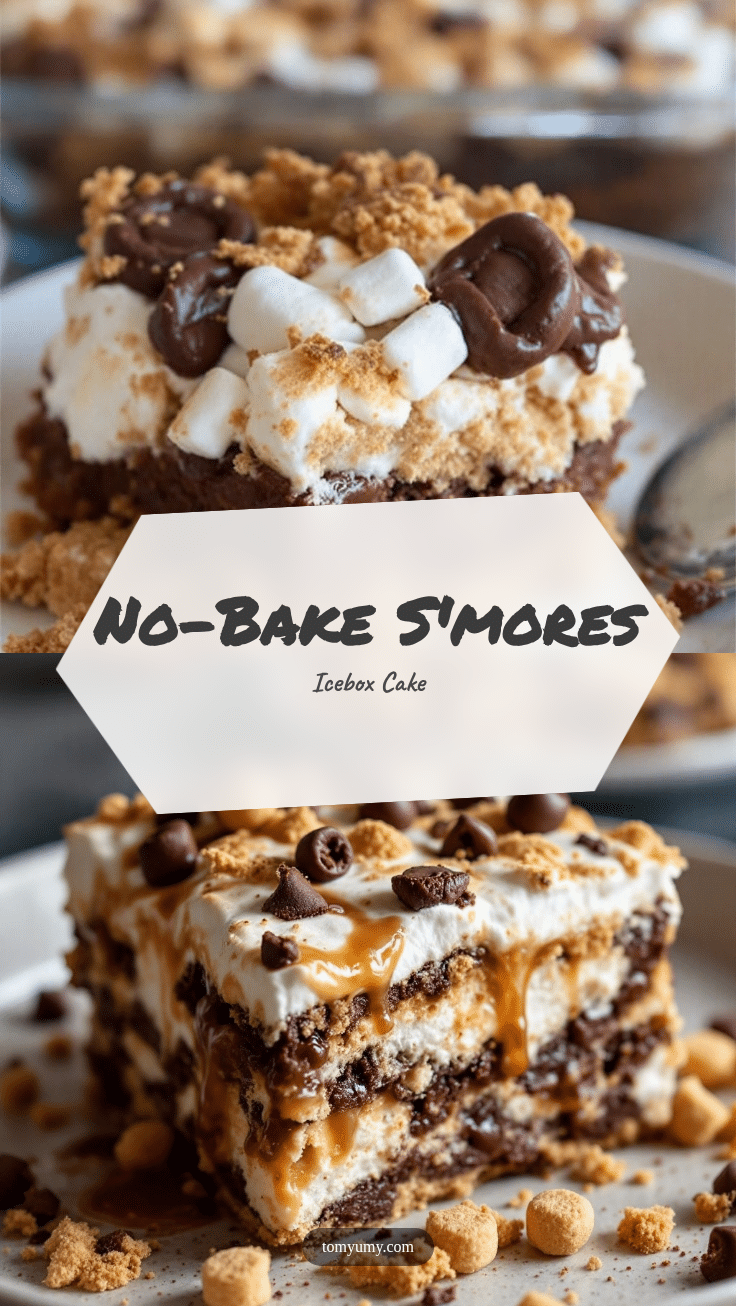
No-Bake Smores Icebox Cake: 5-Ingredient Picnic Dessert
A simple, crowd-pleasing no-bake dessert that layers graham crackers, whipped topping, and chocolate chips. It requires zero oven time and travels perfectly for picnics.
- Prep Time: 15 minutes
- Cook Time: 0 minutes
- Total Time: 4 hours 15 minutes
- Yield: 12 servings 1x
- Category: Dessert
- Cuisine: American
Ingredients
- 1 box standard honey graham crackers
- 12-ounce tub frozen whipped topping, thawed
- 1 to 1.5 cups semi-sweet chocolate chips
- Optional: 1 cup mini marshmallows
- Optional: 1 teaspoon vanilla extract
- Cooking spray or butter for greasing dish
Instructions
- Lightly grease a 9×13 inch baking dish with cooking spray or butter.
- Thaw the whipped topping at room temperature for 10-15 minutes until soft but still cold.
- Pour the thawed whipped topping into a large mixing bowl and gently fold in the chocolate chips (and vanilla if using) using a spatula.
- Break graham crackers to fit the dish and lay down a single, tight layer at the bottom.
- Spread half of the chocolate-whipped cream mixture evenly over the first cracker layer.
- Add a second layer of graham crackers, ensuring no gaps.
- Spread the remaining whipped cream mixture over the second cracker layer.
- Add a final layer of graham crackers on top and press gently.
- Sprinkle remaining chocolate chips over the top layer.
- Cover tightly with plastic wrap or foil and refrigerate for at least 4 hours, preferably overnight.
- Slice into squares and serve cold.
Notes
Do not skip the chill time; crackers need at least 4 hours to soften. Fold the chocolate into the cream gently to avoid deflating the whipped topping. Keep the cake cold until serving to maintain structure. For picnics, let it sit out for 10-15 minutes before serving to soften the chocolate slightly.
Nutrition
- Serving Size: 1 square slice
- Calories: 275
- Sugar: 20
- Sodium: 150
- Fat: 18
- Saturated Fat: 10
- Carbohydrates: 28
- Fiber: 1
- Protein: 2
Keywords: no-bake dessert, s'mores, icebox cake, picnic dessert, graham crackers, whipped cream, chocolate chips, easy dessert, summer dessert, crowd-pleaser