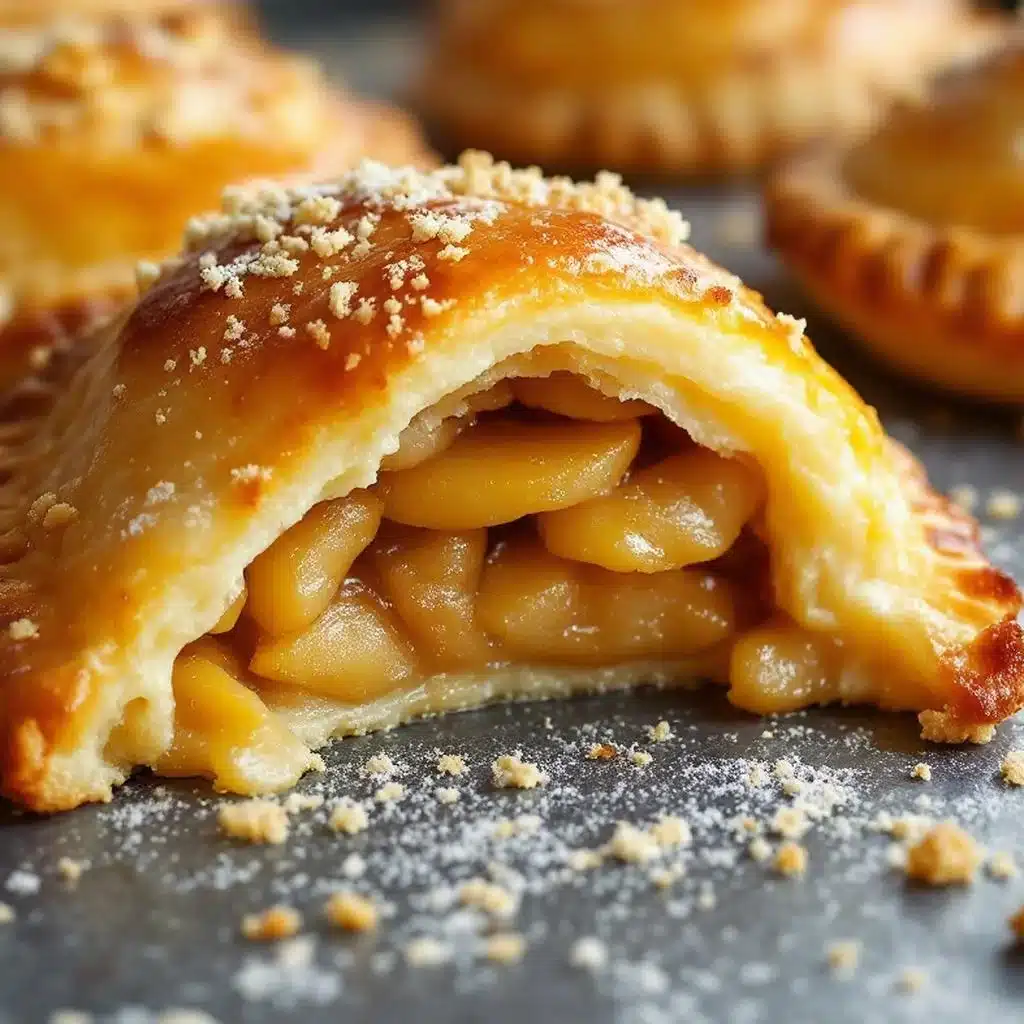
For a while, I just accepted that Halloween desserts weren’t going to taste like actual comfort food. They were usually just sugar, red dye, and disappointment. You know the type. Plastic spiders, fondant ghosts that were too hard to chew, or those little fruit snacks that stick to your roof. I wanted something that felt festive but didn’t require a degree in pastry engineering to assemble. My kids would beg for something spooky, but I’d end up making the same old cookie sheets over and over again. It was tedious. The cleanup was worse.
Then I remembered those old hand pies from my college days. Simple, messy, and delicious. I started wondering if I could wrap that concept in something fun. Not scary-fun, just cute-fun. The idea of strips of dough coming together to form a little mummy holding an apple felt right. It’s playful without being childish. It uses ingredients I already had in the pantry. No special molds. No expensive equipment. Just a pie sheet and some patience.
Honestly, I was skeptical at first. Would the dough hold its shape? Would the apple get soggy? I made a batch one rainy October afternoon. The kitchen smelled like cinnamon and butter before the oven even finished preheating. When I pulled them out, the strips were golden and puffed up just enough. They looked like little edible characters sitting on the pan. My kids didn’t ask if they were hard to make. They just asked for seconds.
That was the moment I knew. This wasn’t just another Halloween gimmick. It was a way to bring warmth to a holiday that often feels cold and commercial. The recipe stuck because it’s forgiving. If a strip looks a little messy, it just looks like a bandage. If the apple fills are a bit juicy, it’s just extra flavor. It’s the kind of baking that lets you relax. You don’t have to be perfect. You just have to show up with some dough and a knife.
Why You’ll Love This Recipe
Let’s be honest, baking with kids can be a disaster waiting to happen. Flour everywhere, dough stuck to the ceiling, and a general sense of chaos. These Easy One-Pan Mummy Apple Hand Pies solve that problem in the best way possible. They are designed to be handled. The strips of dough are easy for small hands to roll and place. It turns baking into a game rather than a chore. You get to watch them create their own little mummy characters, and they get to eat the evidence afterward. It’s a win-win situation that keeps the peace in the kitchen.
Here is why this recipe has earned a permanent spot in my fall rotation:
- Quick & Easy: You can have these from fridge to oven in under 45 minutes. No long rise times or complex laminating processes. Just roll, fill, and bake. It’s perfect for those busy weeknights when you need a dessert that feels homemade but requires zero stress.
- Simple Ingredients: You likely already have everything in your kitchen. Puff pastry (or pie crust), apples, cinnamon, and sugar. No fancy grocery trips needed. If you have a box of frozen dough, even better. This recipe works with whatever you can find.
- Perfect for Halloween Parties: These are the ultimate finger food. They are small enough to eat while trick-or-treating or handing out candy. They don’t melt in your hands like ice cream, and they don’t crumble everywhere like traditional cookies. They are sturdy, portable, and visually striking.
- Crowd-Pleaser: Even the pickiest eaters love these. The apple filling is familiar and sweet, while the mummy shape adds an element of fun. Kids love the novelty, and adults appreciate the flaky, buttery texture. It’s a flavor combo that works for all ages.
- Unbelievably Delicious: The texture is next-level comfort food. The pastry gets crispy and golden around the edges, while the inside stays tender. The apples cook down into a soft, spiced jam that contrasts beautifully with the flaky crust. It’s warm, cozy, and slightly nostalgic.
What makes this different from other hand pies is the presentation. Most apple hand pies are just folded over and sealed. These are wrapped. The visual impact is immediate. But beyond the looks, the technique is foolproof. Using store-bought puff pastry or a simple pie crust ensures consistent results every time. You don’t need to worry about the dough shrinking or tearing. The strips hold their shape beautifully in the oven. It’s the kind of recipe that gives you confidence. You feel like a pro baker, but you didn’t have to do any of the hard work.
What Ingredients You Will Need
This recipe relies on a few key components to deliver that perfect balance of sweet, tart, and flaky. The beauty of this dish is that it doesn’t require exotic spices or hard-to-find items. It’s built on pantry staples that work together to create a rich, autumnal flavor profile. Whether you are using fresh apples from the orchard or canned filling, the result is consistently good.
- Puff Pastry or Pie Crust: This is the foundation. I recommend using high-quality frozen puff pastry for the lightest, flakiest result. Thaw it according to the package directions. If you prefer a more traditional texture, a double pie crust works well too. Look for brands like Pepperidge Farm for reliable quality. (Adds the essential buttery layers.)
- Firm Apples: You need apples that can hold their shape during baking. Granny Smith apples are the gold standard here because they are tart and firm. Honeycrisp or Braeburn are also excellent choices if you prefer a sweeter note. Avoid Red Delicious, as they turn mushy too quickly. (Provides structure and tartness.)
- Unsalted Butter: Melted butter is brushed over the dough strips before baking. This helps them turn golden brown and adds richness. Use high-fat butter for the best flavor. (Adds richness and color.)
- Granulated Sugar: This sweetens the apple filling and helps create a slight caramelization on the crust. You can substitute with brown sugar for a deeper, molasses-like flavor, but white sugar keeps the classic look. (Sweetens and caramelizes.)
- Ground Cinnamon: The star spice of fall. Use freshly ground cinnamon if you have it, as it has a more potent aroma. Pre-ground is fine, but make sure it’s not old. (Adds warmth and aroma.)
- Ground Nutmeg: Just a pinch goes a long way. It adds a subtle depth that complements the cinnamon without overpowering it. (Adds depth.)
- Lemon Juice: A splash of fresh lemon juice prevents the apples from browning and adds a bright acidity that balances the sweetness. (Prevents browning and adds brightness.)
- Vanilla Extract: A teaspoon of pure vanilla extract enhances the overall flavor profile. Avoid imitation vanilla if possible. (Enhances flavor.)
- Optional: Powdered Sugar: For a dusting of “snow” on the mummies. This is purely for decoration and adds a touch of sweetness. (Adds visual appeal.)
If you are making this for guests with dietary restrictions, you can easily swap the butter for a dairy-free alternative. The puff pastry can also be found in vegan varieties at most grocery stores. The apple filling remains the same. For a gluten-free option, look for a gluten-free puff pastry sheet. The texture might be slightly denser, but the flavor will still be fantastic. I’ve tried using almond flour in the crust before, but it changes the texture too much for this specific design. Stick to standard pastry for the best results.
Equipment Needed
You don’t need a fancy kitchen to make these. In fact, keeping it simple is part of the appeal. Here is what you’ll need to get the job done without a headache.
- Baking Sheet: A standard 13×18 inch rimmed baking sheet is perfect. Line it with parchment paper for easy cleanup. This prevents sticking and makes removing the hand pies a breeze.
- Pastry Brush: A silicone brush is ideal for brushing the melted butter over the dough. It’s easy to clean and doesn’t shed bristles into your food. A regular bristle brush works too, but silicone is more durable.
- Sharp Knife or Pizza Cutter: You need a sharp tool to cut the dough into strips. A pizza cutter makes quick work of the pastry, especially if it’s cold and firm. A sharp chef’s knife works well for cutting the apples.
- Mixing Bowl: A medium-sized bowl for tossing the apples with sugar, cinnamon, and lemon juice. Any non-reactive bowl will do.
- Measuring Spoons: Standard measuring spoons for the spices. Precision isn’t critical here, but having them on hand helps.
If you don’t have a pizza cutter, a pair of kitchen scissors can work in a pinch. Just be careful not to cut the parchment paper. For the apples, a paring knife is best for peeling and coring. If you’re short on space, you can do everything in one bowl. It’s messy, but efficient. I usually keep a damp cloth nearby to wipe up any spills quickly. The dough can get sticky, and keeping your workspace clean makes the assembly process much smoother.
Preparation Method
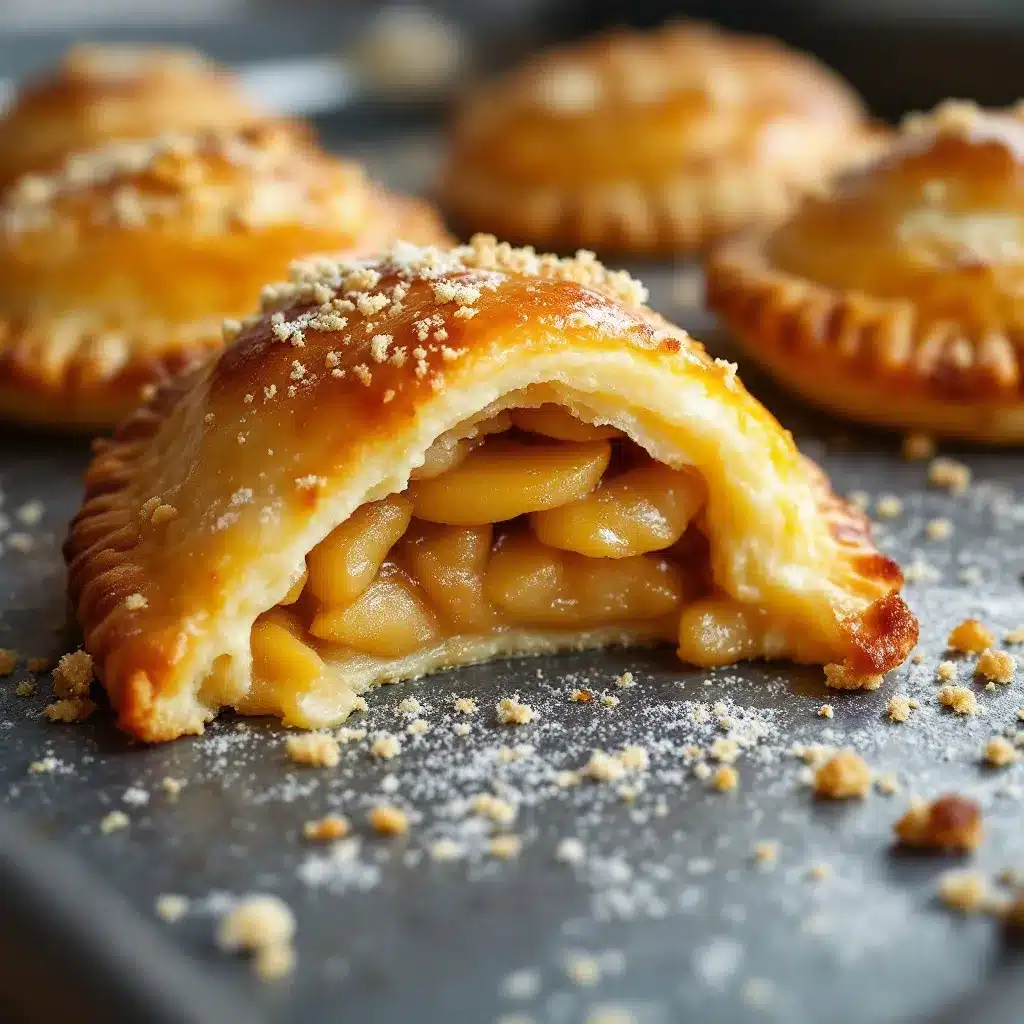
Making these hand pies is straightforward, but there are a few steps that require attention to detail. Let’s break it down so you can get it right the first time.
- Prep the Dough (5 minutes): Take your puff pastry or pie crust out of the fridge and let it sit at room temperature for about 10-15 minutes. It should be pliable but still cold. If it’s too warm, it will tear. If it’s too cold, it will crack. Roll it out on a lightly floured surface to about 1/8 inch thickness. Cut it into 1-inch wide strips. You should get about 8-10 strips per sheet. (Time: 5 mins)
- Prep the Apples (10 minutes): Peel, core, and dice the apples into small, uniform cubes. About 1/2 inch pieces work best. They need to fit inside the dough strips without bursting them. Toss the diced apples in a bowl with the granulated sugar, cinnamon, nutmeg, and lemon juice. Let them sit for a few minutes to release some juices. (Time: 10 mins)
- Assemble the Mummies (15 minutes): Place a strip of dough on your counter. Put a generous spoonful of the apple mixture in the center, leaving about an inch of space on each end. Carefully roll the dough over the filling to create a small packet. Use a fork to crimp the edges and seal them tightly. Repeat with the remaining strips and filling. (Time: 15 mins)
- Create the Mummy Look (10 minutes): Take the remaining dough strips (or cut more if needed) and lay them across the sealed hand pies. These are the “bandages.” Press the ends gently to secure them. You can leave some gaps to show the apple filling peeking through, which adds to the rustic look. (Time: 10 mins)
- Bake (20-25 minutes): Preheat your oven to 400°F (200°C). Place the assembled hand pies on the prepared baking sheet. Brush the tops generously with melted butter. Bake for 20-25 minutes, or until the pastry is golden brown and puffed up. Keep an eye on them during the last few minutes to prevent burning. (Time: 25 mins)
- Cool and Serve (10 minutes): Let the hand pies cool on the baking sheet for at least 10 minutes. The filling will be extremely hot right out of the oven, so be careful. Dust with powdered sugar if desired. Serve warm. (Time: 10 mins)
If the dough starts to tear while you’re rolling, don’t panic. Just patch it with a small piece of dough. It will seal up in the oven. If the apple filling is too wet, add a tablespoon of flour or cornstarch to the mixture before assembling. This will thicken it up and prevent a soggy bottom.
Cooking Tips & Techniques
I’ve made my fair share of baking disasters, and these hand pies taught me a few hard lessons. The biggest mistake people make is using apples that are too large. If the chunks are too big, they won’t cook evenly, and the dough will burst. Small, uniform pieces are key. Also, don’t skip the lemon juice. It’s not just for flavor; it stops the apples from turning brown while you’re assembling the pies. If you wait too long, they’ll look unappetizing.
Another tip is to keep the dough cold. If it gets too warm and soft, it will lose its flakiness. If you’re working in a hot kitchen, put the dough back in the fridge for 5 minutes before rolling. It’s worth the wait. Also, when you brush the butter on top, make sure you cover every part of the exposed dough. This ensures even browning. If you miss a spot, it might stay pale and raw-tasting.
Timing is everything. Don’t overcrowd the baking sheet. Give each mummy enough space to expand. If they’re too close, they’ll stick together and lose their shape. And finally, let them cool. I know it’s tempting to bite into one immediately, but the filling is like lava. Give it 10 minutes, and you’ll be rewarded with a perfect texture.
Variations & Adaptations
While the classic apple cinnamon flavor is my favorite, these hand pies are incredibly versatile. Here are a few ways to mix it up:
- Cherry Almond: Swap the apples for chopped cherries and add a teaspoon of almond extract to the filling. It’s a sophisticated twist that feels fancy but is just as easy to make.
- Pumpkin Spice: Use canned pumpkin puree mixed with pumpkin pie spice and a little sugar. Add a cream cheese drizzle after baking for a fall-inspired treat.
- Chocolate Hazelnut: Spread a thin layer of Nutella on the dough before adding the apples. It’s a rich, indulgent version that kids will love.
For a gluten-free version, use a gluten-free puff pastry sheet. The texture will be slightly different, but it will still taste great. If you’re watching your sugar intake, you can use a sugar substitute like erythritol. It behaves similarly to sugar in baking. You can also add a pinch of cardamom to the apple filling for a unique aromatic flavor. I once tried adding a dash of bourbon to the apples, and it was amazing. It adds a deep, complex note that pairs well with the cinnamon.
Serving & Storage Suggestions
These hand pies are best served warm, right out of the oven. They pair wonderfully with a scoop of vanilla ice cream or a dollop of whipped cream. If you have any leftover caramel apple pie bombs, you can use the same serving suggestions. They also go well with a cup of hot cider or coffee.
To store leftovers, let them cool completely and place them in an airtight container. They will keep in the refrigerator for up to 3 days. Reheat them in the oven at 350°F for 5-10 minutes to restore the crispiness. You can also freeze them unbaked. Just assemble the pies, freeze them on a baking sheet until solid, and then transfer them to a freezer bag. Bake them directly from frozen, adding 5-10 minutes to the baking time. The flavors actually develop more over time, so they taste great even the next day.
Nutritional Information & Benefits
Each hand pie contains approximately 250 calories, with a good balance of carbohydrates from the apples and pastry. The apples provide fiber and vitamin C, making this a slightly healthier treat than most cookies. The cinnamon has anti-inflammatory properties, which is a nice bonus. However, since the pastry is made with butter, the saturated fat content is moderate. It’s best enjoyed as an occasional treat rather than a daily snack. For those with gluten intolerance, the gluten-free adaptations make this recipe accessible to more people. It’s a way to include everyone at the table without compromising on taste.
Conclusion
These Easy One-Pan Mummy Apple Hand Pies are more than just a Halloween dessert. They are a way to bring joy to the kitchen and share a moment with loved ones. The simplicity of the recipe makes it accessible, while the fun presentation makes it memorable. I love that they allow for creativity and customization. Whether you stick to the classic apple or try a new flavor, the result is always delicious. I encourage you to try this recipe and make it your own. Share your creations with friends and family, and don’t forget to leave a comment with your thoughts. Happy baking!
FAQs
Can I use frozen apples?
Yes, but you need to thaw and drain them first. Excess moisture can make the dough soggy. Pat them dry with a paper towel before mixing with the spices.
How do I prevent the dough from sticking?
Lightly flour your work surface and the rolling pin. Also, keep the dough cold. If it starts to stick, pop it back in the fridge for a few minutes.
Can I make these ahead of time?
Absolutely. You can assemble them and freeze them unbaked. When you’re ready to bake, just add a few minutes to the cooking time.
What is the best apple for this recipe?
Granny Smith apples are the best choice because they hold their shape and provide a tart contrast to the sweet dough. Honeycrisp is a good alternative.
Can I use pie filling instead of fresh apples?
Yes, but it might be too sweet. You can reduce the added sugar in the recipe if you use pre-made pie filling. Just make sure it’s not too runny.
Pin This Recipe!

Easy One-Pan Mummy Apple Hand Pies

A festive and forgiving Halloween dessert featuring flaky puff pastry wrapped around spiced apple filling to resemble little mummies. Quick to assemble and perfect for baking with kids.
- Prep Time: 40 minutes
- Cook Time: 25 minutes
- Total Time: 65 minutes
- Yield: 8-10 hand pies 1x
- Category: Dessert
- Cuisine: American
Ingredients
- 1 sheet puff pastry or pie crust (thawed if frozen)
- 2–3 firm apples (such as Granny Smith, Honeycrisp, or Braeburn), peeled, cored, and diced into 1/2 inch cubes
- 2 tablespoons granulated sugar (or brown sugar)
- 1 teaspoon ground cinnamon
- 1/4 teaspoon ground nutmeg
- 1 tablespoon lemon juice
- 1 teaspoon vanilla extract
- 2 tablespoons unsalted butter, melted
- Powdered sugar, for dusting (optional)
Instructions
- Preheat oven to 400°F (200°C) and line a 13×18 inch rimmed baking sheet with parchment paper.
- Roll out the puff pastry or pie crust on a lightly floured surface to about 1/8 inch thickness. Cut into 1-inch wide strips (yielding 8-10 strips per sheet).
- In a mixing bowl, toss the diced apples with granulated sugar, cinnamon, nutmeg, lemon juice, and vanilla extract. Let sit for a few minutes.
- Place a strip of dough on a counter. Spoon a generous amount of apple mixture into the center, leaving an inch of space on each end.
- Roll the dough over the filling to create a packet and crimp edges tightly with a fork to seal.
- Cut additional strips of dough to use as ‘bandages.’ Lay them across the sealed hand pies, pressing ends gently to secure. Leave some gaps for a rustic look.
- Place assembled hand pies on the prepared baking sheet, ensuring space between them for expansion.
- Brush the tops generously with melted butter.
- Bake for 20-25 minutes until the pastry is golden brown and puffed up.
- Cool on the baking sheet for at least 10 minutes before serving. Dust with powdered sugar if desired.
Notes
Keep the dough cold to ensure flakiness. If the apple filling is too wet, add a tablespoon of flour or cornstarch to thicken it. Do not overcrowd the baking sheet. For a gluten-free option, use gluten-free puff pastry. For dairy-free, use vegan butter and pastry.
Nutrition
- Serving Size: 1 hand pie
- Calories: 250
- Sugar: 18
- Sodium: 150
- Fat: 12
- Saturated Fat: 6
- Carbohydrates: 35
- Fiber: 3
- Protein: 3
Keywords: Halloween dessert, apple hand pies, mummy pies, puff pastry recipe, easy baking, fall treats, kid-friendly recipes