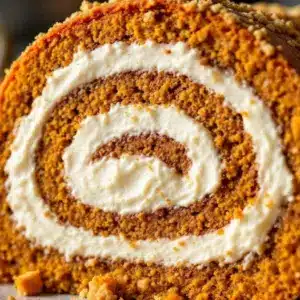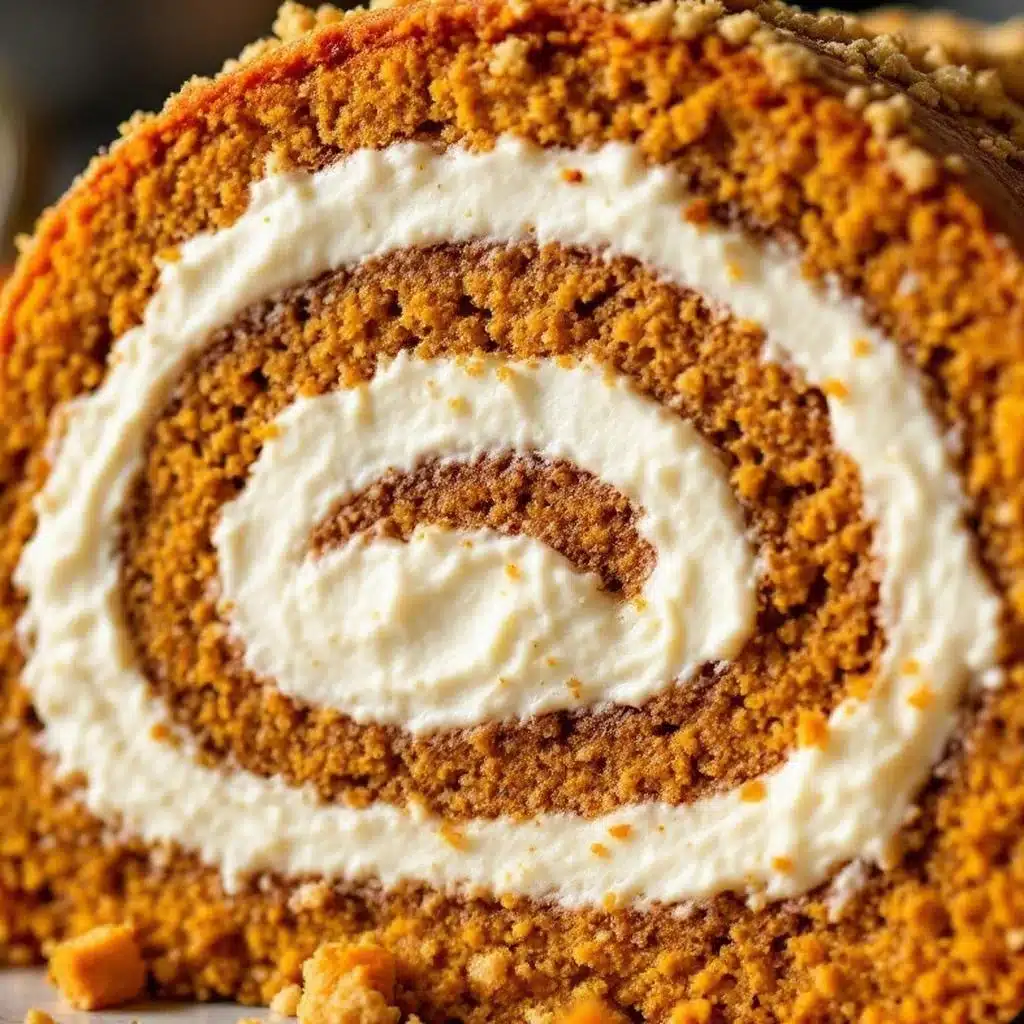
The clock is ticking toward November and the kitchen smells like cinnamon and regret. I want a pumpkin roll. Not the store-bought kind that arrives in a plastic tube with a filling that tastes like sugar water and sadness, but the real deal. You know the one. The one with the delicate sponge cake that yields to the slightest pressure and the tangy cream cheese filling that cuts through the spice with precision. I have the pumpkin puree. I have the cream cheese. I have the spices. But I don’t have the patience for rolling it wrong. Again.
Let’s face it, rolling a cake is a gamble. One wrong move and you have a sticky mess on your counter and a broken spirit in your heart. I spent years trying to perfect this. I’ve had cakes crack. I’ve had fillings leak out the sides like a bad secret. I’ve even tried rolling it while it was still warm, which was a mistake I will never repeat. Honestly, the first time I got it right, I didn’t even tell anyone. I just stood there in my apron, staring at the perfect spiral on the cutting board, feeling like I’d solved a complex equation.
This recipe isn’t just about dessert. It’s about that quiet moment of victory when the cake rolls up smoothly, tight but not tight enough to burst, and the filling stays exactly where it belongs. It’s the kind of dessert that makes people stop talking at the dinner table. They just stare. Then they take a bite. Then they ask for the recipe. I’ve made this for holidays, for potlucks, and for random Tuesdays when I needed something that felt special but didn’t require a degree in pastry arts. It’s become my go-to because it balances ease with elegance. You get all the credit, but the kitchen stays mostly clean. That’s the real magic here.
Why You’ll Love This Recipe
This classic pumpkin roll with cream cheese filling isn’t just another fall dessert; it’s a test of trust between you and your oven. After years of tweaking ratios and testing different rolling techniques, I’ve landed on a version that is forgiving yet impressive. Here is why this specific recipe stands out from the crowd:
- Quick & Easy: While it requires some attention, the actual hands-on time is minimal. The cake comes together in under 30 minutes, making it perfect for busy weeknights or last-minute holiday prep. You aren’t spending hours at the stove.
- Simple Ingredients: You likely already have everything in your kitchen. Flour, sugar, eggs, pumpkin puree, cream cheese, and spices. No fancy grocery trips or obscure ingredients that will sit in your pantry forever.
- Perfect for Holidays: Whether it’s Thanksgiving, Christmas, or a cozy autumn brunch, this dessert fits every occasion. It looks sophisticated on a platter but is simple enough to make during a chaotic family gathering.
- Crowd-Pleaser: I have served this to people who claim they don’t like pumpkin, and they always come back for seconds. The balance of sweet and tangy is universally loved by both kids and adults.
- Unbelievably Delicious: The texture is the star here. The cake is light and airy, almost like a cloud, while the filling is dense and rich. It’s comfort food reimagined—healthier than a heavy pie, but with the same soul-soothing satisfaction.
What makes this recipe different is the rolling technique. Most recipes tell you to roll it while warm, but they don’t explain the dusting of powdered sugar correctly. If you don’t use enough sugar, it sticks. If you use too little, it cracks. This method uses a towel dusted generously with sugar to guide the roll, ensuring the cake sets in the right shape without tearing. It’s a small detail that makes a massive difference. It’s not just a pumpkin cake; it’s a carefully engineered spiral of flavor. It’s the kind of dessert that makes you close your eyes after the first bite and remember why you started baking in the first place. It turns a simple afternoon into a memorable event without the stress of complex techniques.
What Ingredients You Will Need
This recipe relies on simple, wholesome ingredients to deliver bold flavor and satisfying texture without the fuss. The beauty of a pumpkin roll is that it doesn’t require high-end specialty items. You just need to pay attention to the quality of what you buy. Here is what you need to gather:
For the Cake:
- Granulated Sugar: 1 cup. Provides sweetness and structure. I prefer standard white sugar for the cleanest flavor.
- Eggs: 3 large eggs, room temperature. This is crucial. Cold eggs won’t whip properly, and the cake will be dense. Let them sit on the counter for 30 minutes before you start.
- Pumpkin Puree: 1 cup. Do not use pumpkin pie filling. Use 100% pure pumpkin. I recommend Libby’s or a high-quality canned brand for consistent moisture content.
- All-Purpose Flour: 1 cup. Standard flour works best. If you need a gluten-free option, use a 1:1 gluten-free flour blend, but know the texture might be slightly different.
- Baking Powder: 1 teaspoon. Helps the cake rise and stay light.
- Baking Soda: 1 teaspoon. Reacts with the acidity in the pumpkin to create lift.
- Salt: 1/2 teaspoon. Balances the sweetness.
- Cinnamon: 1 teaspoon. The backbone of the flavor.
- Ginger: 1/2 teaspoon. Adds a subtle warmth.
- Cloves: 1/4 teaspoon. Use ground cloves; they add that classic holiday spice note without being overpowering.
- Confectioners’ Sugar: 1 cup. For dusting the towel. This prevents sticking and adds a decorative touch.
For the Cream Cheese Filling:
- Cream Cheese: 8 ounces, softened. Use full-fat brick cream cheese, not the spreadable kind in a tub. The tub version has too much air and water, which will make the filling runny. I recommend Philadelphia for best texture.
- Butter: 1/2 cup, softened. Unsalted butter is best so you can control the saltiness.
- Confectioners’ Sugar: 2 cups. Sifted to avoid lumps in the creamy filling.
- Vanilla Extract: 1 teaspoon. Pure vanilla makes a huge difference in flavor depth.
- Cinnamon: 1/2 teaspoon. Just a hint to tie the filling to the cake.
If you want to get fancy, you can add a pinch of nutmeg to the filling, but keep it simple. The star is the pumpkin. If you are looking for a lighter option, you can swap half the butter for Greek yogurt, but the traditional version is richer and holds its shape better when sliced.
Equipment Needed
You don’t need a fancy kitchen to make this, but having the right tools helps. Here is what you need:
- 15×10 Inch Jelly Roll Pan: This specific size is important. If you use a 9×13 pan, the cake will be too thick and won’t roll properly. If you use a smaller pan, it will bake too fast and dry out. A standard jelly roll pan is the sweet spot.
- Parchment Paper: Essential for lining the pan. It ensures the cake releases easily and doesn’t stick to the metal.
- Mixing Bowls: One large bowl for the dry ingredients and one for the wet. A medium bowl for the filling.
- Electric Mixer: A hand mixer or stand mixer is highly recommended. Whipping the eggs and sugar by hand is exhausting and rarely gets the right volume. You need those eggs to triple in size.
- Wire Cooling Rack: To cool the cake evenly. Placing it directly on a counter can trap heat and make the bottom soggy.
- Clean Kitchen Towel: This is your secret weapon. It must be lint-free. A flour sack towel is ideal because it doesn’t shed fibers onto your cake.
- Offset Spatula: For spreading the filling evenly. A regular spatula works, but an offset one gives you better control over the thin layer.
If you don’t have a jelly roll pan, you can use a standard baking sheet, but you will need to fold up the edges to create a rim. Just make sure the cake batter doesn’t overflow. Also, keep your mixer bowls clean and grease-free. Even a tiny bit of oil or yolk in the egg whites can prevent them from whipping up properly.
Preparation Method
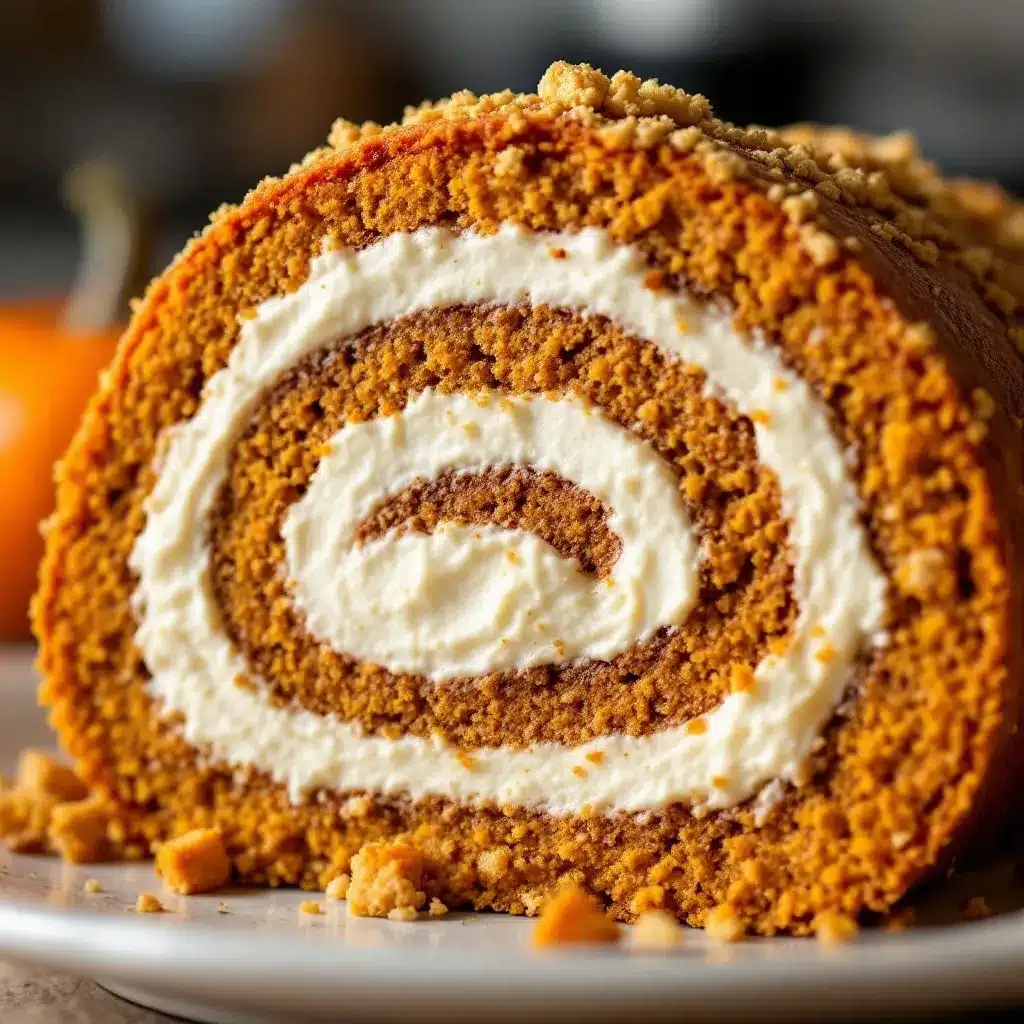
Let’s get into the nitty-gritty. This process is straightforward if you follow the steps carefully.
- Prep the Pan and Oven (5 minutes): Preheat your oven to 375°F (190°C). Line your 15×10 inch jelly roll pan with parchment paper. Grease the parchment lightly with butter or non-stick spray. This ensures the cake doesn’t stick, even if you forget to grease the parchment later. Dust the parchment with a little flour, tapping out the excess.
- Mix Dry Ingredients (2 minutes): In a medium bowl, whisk together the flour, baking powder, baking soda, salt, cinnamon, ginger, and cloves. Whisking ensures the spices are distributed evenly so you don’t get a spicy bite in one corner and a bland one in another.
- Whip Eggs and Sugar (3-4 minutes): In a large bowl, beat the eggs and granulated sugar on high speed. This is the most important step. Beat until the mixture is pale, thick, and triples in volume. This should take about 3-4 minutes with an electric mixer. The mixture should leave a ribbon trail when you lift the beaters. If it doesn’t, keep beating. This air is what makes the cake light.
- Combine Wet and Dry (2 minutes): Reduce mixer speed to low. Gradually add the dry ingredients to the egg mixture, alternating with the pumpkin puree. Start and end with the dry ingredients. Mix just until combined. Do not overmix, or the cake will become tough. The batter should be smooth and thick.
- Bake the Cake (12-14 minutes): Spread the batter into the prepared pan. Use a spatula to get it into the corners. Bake for 12-14 minutes. The cake is done when it springs back to the touch and the edges pull away slightly from the pan. Do not overbake. A dry cake will crack when you roll it. It should look golden brown.
- The Initial Roll (5 minutes): While the cake bakes, lay out a clean kitchen towel on a flat surface. Generously dust the towel with confectioners’ sugar. As soon as the cake comes out of the oven, run a knife around the edges to loosen it. Invert the cake onto the sugared towel. Peel off the parchment paper carefully. Starting from the short end, roll the cake up loosely with the towel inside. Let it cool completely on a wire rack. This sets the shape so it doesn’t crack later.
- Make the Filling (5 minutes): While the cake cools, beat the softened cream cheese and butter until smooth. Add the confectioners’ sugar, vanilla, and cinnamon. Beat until creamy and smooth. If it looks too thick, add a teaspoon of milk. If too thin, add a little more sugar.
- Fill and Roll Again (5 minutes): Unroll the cooled cake carefully. Spread the filling evenly over the surface, leaving a small border at the edges. Carefully roll the cake back up, this time without the towel. Place it seam-side down on a serving platter. Refrigerate for at least 2 hours, or overnight, to set the shape.
Cooking Tips & Techniques
I’ve made enough mistakes to fill a cookbook, so let me save you some time. The biggest failure point is the rolling. When you first roll the cake (with the towel), do it loosely. You are training the cake to curl, not crushing it. If you roll it too tight while hot, it will set in a tight ball and be impossible to unroll later.
Another tip is to let the cake cool completely before unrolling. If you try to unroll it while it’s even slightly warm, it will tear. Patience is key here. Also, when you spread the filling, don’t go all the way to the edges. Leave a quarter-inch border. This acts as a seal to keep the filling from oozing out when you slice it.
If your cake cracks when you unroll it, don’t panic. Just fill it anyway. The cracks will be hidden by the filling. It happens to the best of us. Just make sure your cream cheese is truly softened. If it’s cold, you’ll get lumps in the filling, and nobody wants that. Room temperature ingredients are non-negotiable for a smooth texture.
Variations & Adaptations
While the classic version is king, there are ways to tweak this recipe to fit your needs or tastes.
- Gluten-Free Option: Swap the all-purpose flour for a high-quality gluten-free 1:1 blend. Add a teaspoon of xanthan gum if your blend doesn’t include it. This helps mimic the elasticity of wheat flour.
- Dairy-Free: Use vegan butter and dairy-free cream cheese blocks (not the tub kind). Note that the texture might be slightly softer, so chill the cake longer before slicing.
- Maple Flavor: Swap half the granulated sugar for maple sugar and add a teaspoon of maple extract to the filling. This pairs beautifully with the pumpkin.
- Spice Variation: Add a pinch of cardamom or allspice to the cake batter for a more complex spice profile. It’s subtle but adds depth.
- Chocolate Twist: Add 2 tablespoons of cocoa powder to the dry ingredients for a pumpkin chocolate roll. It’s a surprising and delicious combination.
I once tried adding chopped pecans to the filling, and it was a hit. The crunch added a nice contrast to the soft cake. If you want to get fancy, you can drizzle melted chocolate over the top after it’s chilled.
Serving & Storage Suggestions
This dessert is best served chilled. The cold temperature helps the filling set and makes slicing cleaner. Use a sharp knife to get neat slices. Wipe the knife clean between cuts for a polished look.
For storage, keep the pumpkin roll in the refrigerator. It will last up to 5 days covered tightly with plastic wrap or in an airtight container. The flavors actually meld and improve after a day, so making it ahead is a great idea. If you need to freeze it, wrap the entire roll tightly in plastic wrap and then in foil. It can be frozen for up to 2 months. Thaw it in the refrigerator overnight before serving.
You can also make individual portions by cutting the roll into pinwheels and serving them in small cups. This is great for parties because it prevents messy slicing. Pair this with a cup of hot tea or coffee to balance the sweetness. It’s also a nice contrast to the savory dishes on a holiday table.
Nutritional Information & Benefits
This recipe is a treat, so enjoy it in moderation. Each slice contains approximately 350 calories. The pumpkin adds a boost of Vitamin A and fiber, which is a nice bonus for a dessert. The cream cheese provides calcium and protein, though it is also high in saturated fat.
For those watching their sugar intake, you can reduce the sugar in the filling by 1/4 cup without significantly affecting the texture. The cake itself is not gluten-free or dairy-free by default, so those with allergies should use the substitutions mentioned earlier. Overall, it’s a balanced dessert that feels indulgent but isn’t overwhelmingly heavy compared to a slice of pie.
Conclusion
Making a classic pumpkin roll with cream cheese filling is a rewarding experience. It takes a bit of care, but the result is worth every minute. It’s a dessert that brings people together and creates memories. I hope you try this recipe and find your own version of success. Don’t be afraid to experiment with spices or toppings. Make it your own.
If you make this, I’d love to hear how it turned out. Leave a comment below with your tips or questions. Share your photos on social media and tag me. Let’s celebrate baking together. This recipe is a staple for a reason, and I think you’ll love it as much as I do. Happy baking!
Frequently Asked Questions
Why did my pumpkin roll crack?
Cracking usually happens if the cake is overbaked or if you roll it while it’s too hot. Make sure to bake it just until it springs back, and let it cool completely before unrolling and refilling.
Can I make this ahead of time?
Yes! This recipe actually tastes better the next day. You can make it 1-2 days in advance and store it in the refrigerator. It freezes well too, for up to 2 months.
Can I use pumpkin pie filling instead of pure pumpkin?
No. Pumpkin pie filling already contains sugar and spices, which will throw off the balance of your recipe. Always use 100% pure pumpkin puree.
How do I prevent the filling from leaking?
Leave a small border of cake exposed around the edges when you spread the filling. This acts as a seal. Also, make sure the filling is thick and not too runny.
What kind of towel should I use?
Use a lint-free kitchen towel, like a flour sack towel. Regular dish towels can shed lint onto the cake, which is hard to remove once it’s baked.
Pin This Recipe!
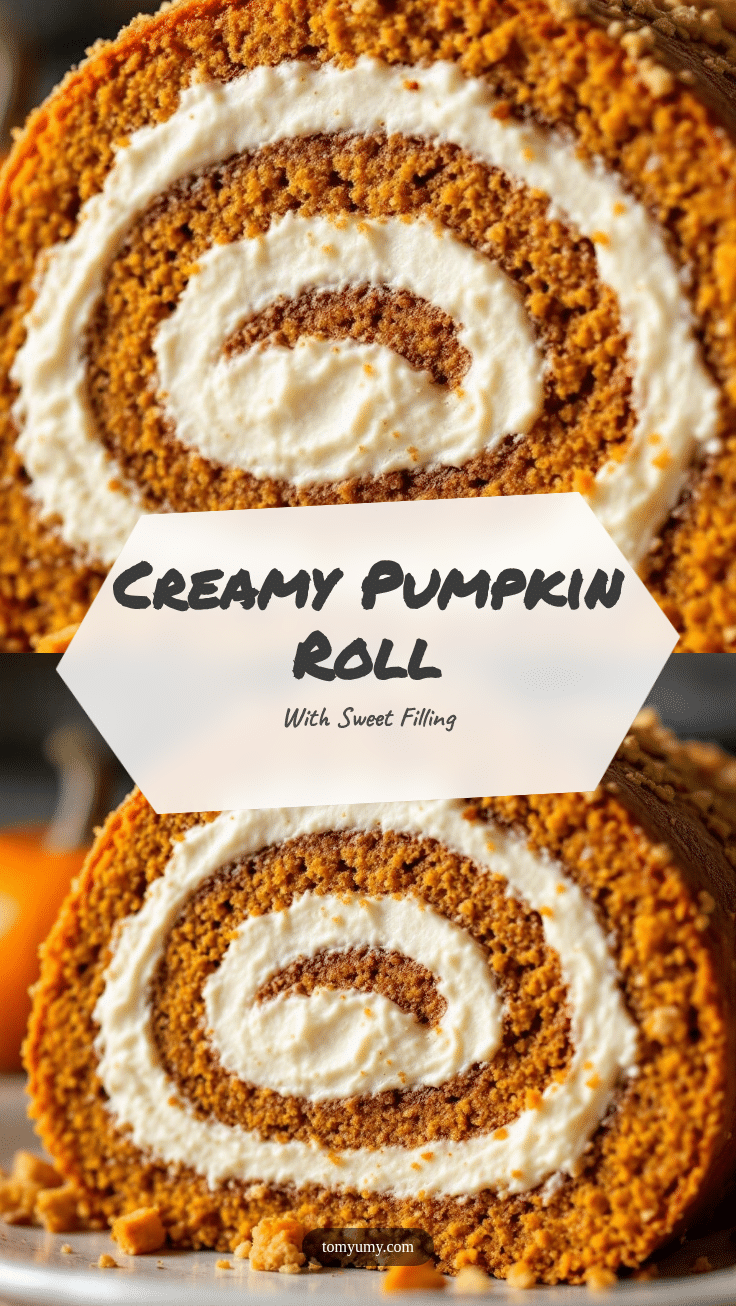
Classic Pumpkin Roll: Easy Cream Cheese Filling Recipe
A delicate pumpkin sponge cake rolled with a tangy, rich cream cheese filling. This recipe uses a specific rolling technique with a sugared towel to prevent cracking, resulting in an elegant and crowd-pleasing fall dessert.
- Prep Time: 30 minutes
- Cook Time: 14 minutes
- Total Time: 45 minutes
- Yield: 12 servings 1x
- Category: Dessert
- Cuisine: American
Ingredients
- 1 cup granulated sugar
- 3 large eggs, room temperature
- 1 cup 100% pure pumpkin puree
- 1 cup all-purpose flour
- 1 teaspoon baking powder
- 1 teaspoon baking soda
- 1/2 teaspoon salt
- 1 teaspoon cinnamon
- 1/2 teaspoon ginger
- 1/4 teaspoon ground cloves
- 1 cup confectioners’ sugar (for dusting towel)
- 8 ounces full-fat brick cream cheese, softened
- 1/2 cup unsalted butter, softened
- 2 cups confectioners’ sugar, sifted
- 1 teaspoon vanilla extract
- 1/2 teaspoon cinnamon
Instructions
- Preheat oven to 375°F (190°C). Line a 15×10 inch jelly roll pan with parchment paper, grease lightly, and dust with flour.
- In a medium bowl, whisk together flour, baking powder, baking soda, salt, cinnamon, ginger, and cloves.
- In a large bowl, beat eggs and granulated sugar on high speed for 3-4 minutes until pale, thick, and tripled in volume.
- Reduce mixer speed to low. Gradually add dry ingredients to egg mixture, alternating with pumpkin puree, starting and ending with dry ingredients. Mix just until combined.
- Spread batter into prepared pan. Bake for 12-14 minutes until cake springs back to the touch.
- While cake bakes, lay a lint-free kitchen towel on a flat surface and dust generously with confectioners’ sugar.
- As soon as cake comes out of oven, loosen edges with a knife and invert onto the sugared towel. Peel off parchment paper.
- Starting from the short end, roll the cake up loosely with the towel inside. Let cool completely on a wire rack.
- While cake cools, beat cream cheese and butter until smooth. Add 2 cups confectioners’ sugar, vanilla, and 1/2 teaspoon cinnamon. Beat until creamy.
- Unroll cooled cake carefully. Spread filling evenly, leaving a small border at edges.
- Roll cake back up without the towel. Place seam-side down on a serving platter.
- Refrigerate for at least 2 hours or overnight to set before slicing.
Notes
Ensure eggs are at room temperature for proper whipping. Do not use pumpkin pie filling; use 100% pure pumpkin puree. The initial roll with the towel sets the shape and prevents cracking later. Leave a border when spreading filling to prevent leaking. For gluten-free, use a 1:1 gluten-free flour blend. For dairy-free, use vegan butter and dairy-free cream cheese blocks.
Nutrition
- Serving Size: 1 slice
- Calories: 350
- Sugar: 38
- Sodium: 250
- Fat: 18
- Saturated Fat: 11
- Carbohydrates: 42
- Fiber: 1
- Protein: 4
Keywords: pumpkin roll, cream cheese filling, fall dessert, holiday baking, pumpkin cake, easy dessert, Thanksgiving dessert