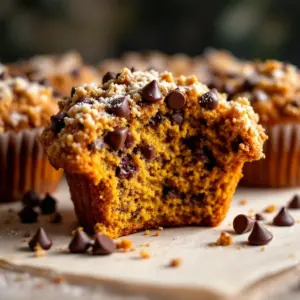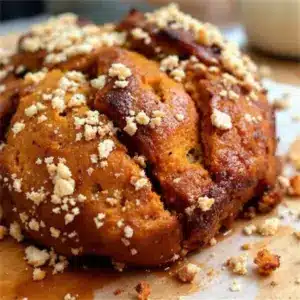
6:15 a.m. on a gray Saturday in November, and the only thing I want is a pair of warm brown sugar pumpkin scones.
The house is still quiet. That specific, heavy silence that only exists before the rest of the world wakes up. Outside, the wind is rattling the windowpane just enough to remind you why you’re glad you’re inside. I don’t turn on the overhead lights. The morning sun is weak, filtered through the bare branches of the oak tree in the front yard, casting long, pale shadows across the kitchen counter.
I like this time. The prep work feels less like cooking and more like a ritual. There’s something grounding about measuring flour into a bowl when the rest of the world is asleep. It’s slow. It’s deliberate. You know, it’s not about getting it done quickly. It’s about the process. The cold butter cutting into the flour. The smell of cinnamon starting to rise from the mixing bowl.
People often rush through breakfast. They grab coffee, maybe a granola bar, and head out the door. But honestly, there is a profound comfort in taking twenty minutes to make something from scratch. These scones aren’t just food. They are a pause button. They are the reason I look forward to weekends during the coldest months.
I remember the first time I made this specific recipe. It was raining. I had burned the previous batch because I was distracted by a phone call. The kitchen smelled like charred sugar. I almost threw them out. But I didn’t. I scraped the burnt bits off and tried again, slower this time. I paid attention. I listened to the dough. And that second batch changed everything for me.
Now, when I pull the tray out of the oven, the golden crust crackling slightly as it cools, I feel a quiet sense of satisfaction. It’s not loud. It doesn’t need to be. It just is. And for a few minutes, before the day gets loud, everything is exactly as it should be.
Why You’ll Love This Recipe
Let’s be honest for a second. Most pumpkin baked goods are disappointing. They are often too dense, too sweet, or they taste like they are trying too hard to be something they aren’t. I’ve tested dozens of pumpkin scone recipes over the years. Some were too cake-like. Others were dry as dust. This version? It’s the result of years of tweaking, failing, and finally getting it right. It’s not just a recipe; it’s a lesson in balance.
Here is why these brown sugar pumpkin scones have become a staple in my kitchen:
- Quick & Easy: You can have these from start to finish in under 45 minutes. No overnight proofing. No complicated techniques. Just mix, shape, and bake. It’s perfect for those busy Saturday mornings when you want something homemade but don’t have hours to spare.
- Simple Ingredients: You likely already have everything you need in your pantry. Flour, sugar, baking powder, pumpkin puree, butter, and spices. No trip to a specialty store is required. It’s wholesome, simple baking at its best.
- Perfect for Fall Brunch: These scones are the ultimate autumn centerpiece. They pair beautifully with a hot cup of coffee or a spiced chai latte. They feel festive without being overly complicated to serve to guests.
- Crowd-Pleaser: I’ve served these to picky eaters and seasoned bakers alike. Everyone loves the combination of sweet brown sugar and warm spices. The texture is tender yet sturdy enough to hold a dollop of cream cheese.
- Unbelievably Delicious: The texture is the key here. Crisp on the outside, soft and moist on the inside. The brown sugar creates a slight caramelization that adds depth, making every bite rich and satisfying.
What makes this recipe different is the ratio of wet to dry ingredients. Many recipes fail because they use too much pumpkin, turning the scone into a mushy blob. I use a precise amount of puree and balance it with a touch of heavy cream. This ensures the scones hold their shape but remain tender. It’s a technique I learned after burning several batches of dense, heavy discs. Now, they rise properly and have that bakery-quality crumb.
This isn’t just another pumpkin recipe. It’s the kind of baked good that makes you close your eyes after the first bite. It’s comfort food reimagined—simpler, faster, but with the same soul-soothing satisfaction. Whether you are hosting a brunch or just treating yourself, these scones deliver.
What Ingredients You Will Need
This recipe relies on high-quality, simple ingredients to deliver bold flavor and satisfying texture without the fuss. You don’t need fancy flours or obscure spices. The magic is in the balance. I recommend using room temperature ingredients whenever possible, especially the butter and dairy, as they incorporate more evenly into the dough.
- All-Purpose Flour (2 ½ cups / 315g): The base of the scone. Don’t substitute with cake flour unless you want a much softer, more delicate crumb. All-purpose gives that classic scone structure. Spoon and level it for accuracy.
- Baking Powder (1 tablespoon): Fresh baking powder is crucial. If yours is old, your scones won’t rise. I always keep a fresh can in the pantry. Check the expiration date before you start.
- Salt (1 teaspoon): Essential for balancing the sweetness. Use fine sea salt for even distribution.
- Pumpkin Puree (1 cup / 245g): Not pumpkin pie filling! Make sure you use 100% pure pumpkin. I prefer Libby’s or a high-quality organic brand. It should be thick and not watery. If yours is runny, drain it in a cheesecloth for 15 minutes.
- Unsalted Butter (½ cup / 115g, cold): This is the most important ingredient for flakiness. Keep it cold. Cube it and keep it in the fridge until the moment you use it. Cold butter creates steam pockets in the oven, which leads to those beautiful layers.
- Brown Sugar (½ cup / 100g, packed): Dark or light brown sugar both work, but dark adds a deeper molasses flavor that complements the pumpkin. It also helps with the caramelized crust.
- Heavy Cream (¼ cup / 60ml): Adds richness and tenderness. Buttermilk can be used for a tangier flavor, but heavy cream gives a softer crumb.
- Large Egg (1 large, room temperature): Acts as the binder. Room temperature egg incorporates easier into the dough.
- Pumpkin Pie Spice (2 teaspoons): A mix of cinnamon, ginger, nutmeg, and cloves. If you don’t have a blend, make your own: 1 tsp cinnamon, ½ tsp ginger, ¼ tsp nutmeg, ¼ tsp allspice.
- Granulated Sugar (2 tablespoons): For the topping. Mix with a pinch of cinnamon for a crunchy, sweet crust.
I personally prefer using European-style butter for the highest fat content, which yields the flakiest results. If you are dairy-free, you can substitute the butter with a high-quality vegan butter stick and the heavy cream with full-fat coconut cream. The texture will be slightly different, but still delicious.
Equipment Needed
You don’t need a lot of fancy gear to make these scones. A few basic tools will get the job done perfectly.
- Large Mixing Bowl: A wide bowl makes it easier to cut in the butter. I use a stainless steel bowl because it stays cool.
- Pastry Blender or Fork: To cut the cold butter into the flour. A pastry blender is faster, but a fork works fine if you have the patience.
- Ruler or Measuring Tape: This is a pro tip. Measuring your dough before cutting ensures even baking. I measure 3 inches from the edge for perfect uniformity.
- Baking Sheet: Line it with parchment paper or a silicone baking mat. Parchment is cheaper and easier to replace. Silicone mats are great for even heating.
- Pastry Brush: For brushing the tops with cream and sprinkling sugar. A small silicone brush works well.
- Cooling Rack: Essential for preventing soggy bottoms. Let the scones breathe after baking.
If you don’t have a pastry blender, two knives used in a scissoring motion work just as well. I also recommend keeping your equipment cold. If your bowl warms up too much, your butter will melt prematurely. A chilled bowl helps maintain that flaky texture.
Preparation Method
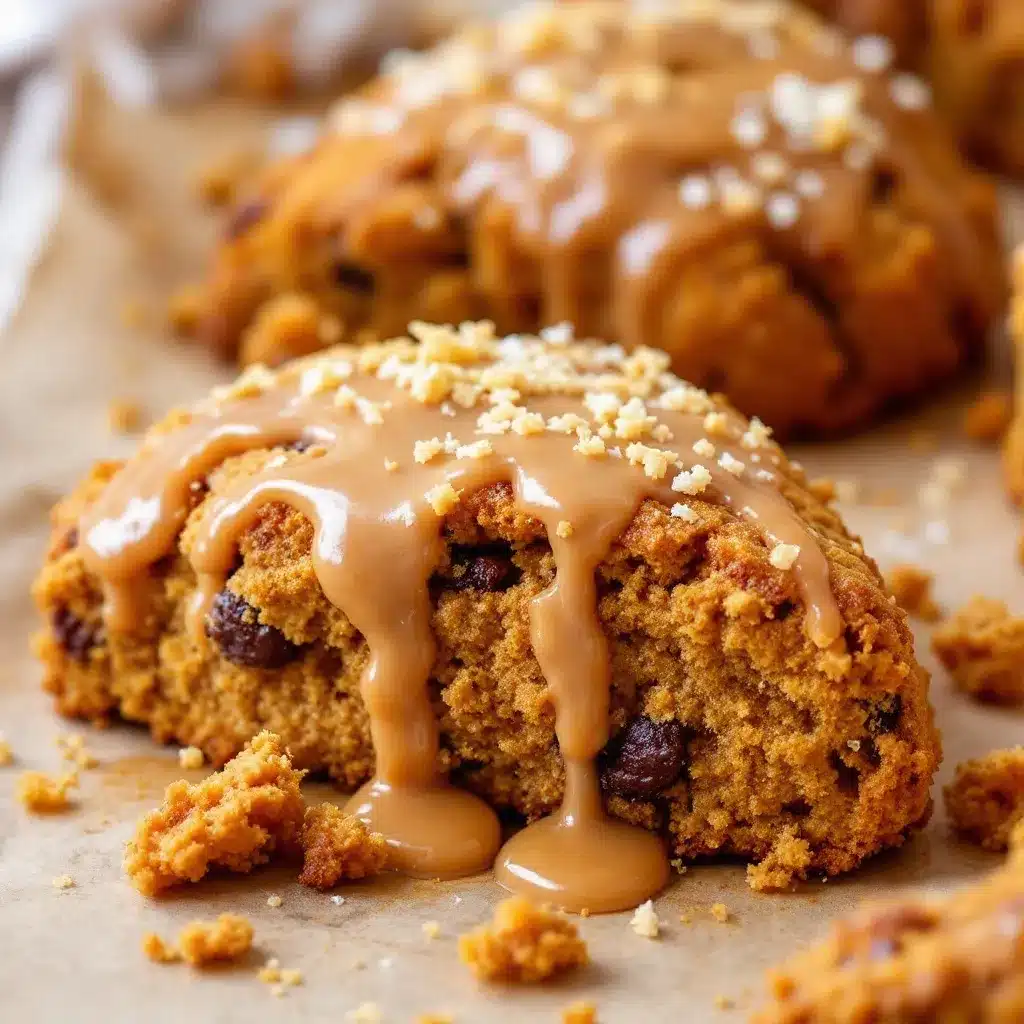
Follow these steps carefully. Precision matters in baking, especially with scones.
- Preheat and Prep (5 minutes): Preheat your oven to 400°F (200°C). Line a large baking sheet with parchment paper. This step is crucial. If the oven isn’t hot enough, the scones will spread instead of rising.
- Mix Dry Ingredients (2 minutes): In your large bowl, whisk together the flour, baking powder, salt, and pumpkin pie spice. Make sure there are no lumps of baking powder. Whisk until uniform.
- Cut in the Butter (3 minutes): Add the cold, cubed butter to the flour mixture. Use a pastry blender or your fingers to cut the butter into the flour. You want pea-sized pieces. Don’t overwork it. If the butter melts, stop and put the bowl in the fridge for 10 minutes. This is the most critical step for flakiness.
- Add Wet Ingredients (2 minutes): In a separate small bowl, whisk together the pumpkin puree, heavy cream, and egg. Pour this mixture into the dry ingredients. Use a fork or spatula to gently fold it in. Stop as soon as the dough comes together. It should look shaggy and dry. Do not knead it. Overmixing leads to tough scones.
- Shape the Dough (3 minutes): Turn the dough out onto a lightly floured surface. Gently press it into a rectangle about 1 inch thick. You want to be gentle. Handle the dough as little as possible. If it’s sticky, add a tiny dusting of flour, but don’t overdo it.
- Cut the Scones (2 minutes): Cut the rectangle into 8 equal triangles. Use a sharp knife or a dough scraper. Press straight down. Do not twist the knife, as this seals the edges and prevents rising. Place them on the baking sheet, spaced 2 inches apart.
- Add Topping (1 minute): Brush the tops lightly with a little extra heavy cream. This helps the sugar adhere and promotes browning. Sprinkle generously with the brown sugar and cinnamon mixture. Don’t skimp on the sugar; it’s part of the flavor profile.
- Bake (18-22 minutes): Place in the oven. Bake for 18-22 minutes. The scones are done when they are golden brown on top and firm to the touch. If they look like they are browning too fast, cover them loosely with foil.
- Cool (10 minutes): Let them cool on the baking sheet for 5 minutes, then transfer to a wire rack. Let them cool for another 5 minutes before eating. They are very delicate when hot.
Watch the baking time closely. Every oven is different. I usually check mine at 18 minutes. If they are done, take them out. If not, give them another minute or two.
Cooking Tips & Techniques
Here are some secrets I’ve learned over the years to ensure your scones turn out perfectly every time.
- Keep Everything Cold: I cannot stress this enough. Cold butter, cold bowl, cold hands. If your kitchen is warm, work quickly. Or chill your butter cubes in the freezer for 10 minutes before starting.
- Don’t Overmix: This is the #1 mistake home bakers make. When you add the wet ingredients, mix only until combined. Lumps are okay. In fact, they are good. They create pockets of steam for a lighter texture.
- Handle Gently: When shaping the dough, press it gently. Don’t roll it out with a rolling pin unless you want dense biscuits. Hand-shaping preserves the air pockets.
- Use a Sharp Knife: A dull knife will crush the dough. Use a sharp chef’s knife or a bench scraper. Cut straight down. No twisting.
- Check Your Oven Temperature: Oven temperatures can be inaccurate. Invest in an oven thermometer. If your oven runs hot, your scones will burn on the outside before cooking inside.
- Let Them Cool Properly: Scones continue to cook slightly after being removed from the oven. Letting them rest on the rack allows steam to escape, keeping the bottom crisp.
I once made scones using warm butter because I was in a rush. They were flat, dense, and tasted like heavy bread. I learned my lesson that day. Slow down. Respect the ingredients.
Variations & Adaptations
While the classic brown sugar pumpkin flavor is amazing, there are plenty of ways to customize these scones.
- White Chocolate Chip: Add ½ cup of white chocolate chips to the dough. The sweetness pairs beautifully with the pumpkin spice. Fold them in gently after adding the wet ingredients.
- PECAN WALNUT: Stir in ½ cup of chopped toasted pecans or walnuts. This adds a nice crunch and nutty flavor. It’s great for a more rustic, hearty scone.
- MAPLE GLAZE: After baking, drizzle a simple glaze made from powdered sugar, maple syrup, and a splash of milk over the cooled scones. It adds a nice shine and extra sweetness.
- GLUTEN-FREE: Use a 1:1 gluten-free flour blend. Add ¼ teaspoon of xanthan gum if your blend doesn’t include it. The texture will be slightly more crumbly but still delicious.
- DAIRY-FREE: Substitute butter with vegan butter sticks. Use coconut cream or oat milk instead of heavy cream. The flavor will be slightly different but still satisfying.
I often add a pinch of cardamom to my pumpkin spice blend. It adds a floral, aromatic note that elevates the recipe. Try experimenting with different spices to find your favorite combination.
Serving & Storage Suggestions
These scones are best served warm, but they are also delicious at room temperature.
- Serving: Serve with a dollop of whipped cream or a slice of cream cheese. A hot cup of coffee or tea is the perfect companion. I also like to serve them with a side of crispy bacon for a savory-sweet contrast.
- Storage: Store leftover scones in an airtight container at room temperature for up to 2 days. They may lose some crispness, but they will still be soft and moist.
- Freezing: You can freeze baked scones for up to 3 months. Wrap them tightly in plastic wrap and then in foil. Thaw at room temperature or reheat in the oven at 350°F for 10 minutes.
- Reheating: To restore freshness, reheat in the oven or toaster oven. Microwave heating can make them chewy, so avoid it if possible.
- Flavors Over Time: The spices continue to meld over the first 24 hours. Scones eaten the next day often taste even better than fresh ones.
For the best experience, slice them in half and toast them lightly before serving. It brings back that crisp exterior.
Nutritional Information & Benefits
While these scones are a treat, they do offer some nutritional benefits.
- Pumpkin: Rich in Vitamin A, fiber, and antioxidants. It adds moisture without adding excessive calories.
- Whole Grains: Using all-purpose flour provides energy. You can swap in whole wheat flour for added fiber, though the texture will be denser.
- Portion Control: One scone is a reasonable serving size. They are rich and satisfying, so you won’t need to eat many.
- Dietary Notes: Contains gluten, dairy, and eggs. Not suitable for vegans or those with allergies. Gluten-free and dairy-free adaptations are available.
I enjoy these scones as a mindful treat. They are not a health food, but they are made with simple, recognizable ingredients. Moderation is key.
Conclusion
Making brown sugar pumpkin scones is more than just baking. It’s a way to slow down and enjoy the season. These scones are tender, spiced, and sweet. They are easy to make and impressive to serve. I hope you try this recipe and find your own quiet ritual in the kitchen.
Feel free to customize them with nuts, chocolate, or glazes. Make them your own. If you do try this recipe, I’d love to hear how it turned out. Leave a comment below or share a photo on social media. Tag me so I can see your creations!
Happy baking. May your kitchen smell like autumn and your heart feel warm.
Frequently Asked Questions
Can I use canned pumpkin pie filling instead of pure pumpkin puree?
No. Pumpkin pie filling contains added sugars and spices, which will throw off the balance of the recipe. Always use 100% pure pumpkin puree from a can or fresh.
Why did my scones turn out flat?
This usually happens if the butter was too warm or if the dough was overmixed. Ensure your butter is cold and handle the dough gently. Also, check that your baking powder is fresh.
Can I freeze the scone dough before baking?
Yes. Shape the scones, place them on the baking sheet, and freeze until solid. Then transfer to a bag. Bake directly from frozen, adding 2-3 minutes to the baking time.
What is the best way to store leftover scones?
Store them in an airtight container at room temperature for up to 2 days. For longer storage, freeze them. Reheat in the oven to restore crispness.
Can I make these scones gluten-free?
Yes. Use a 1:1 gluten-free flour blend. The texture may be slightly more crumbly, but they will still be delicious. Ensure your baking powder and spices are certified gluten-free.
Pin This Recipe!

Cozy Brown Sugar Pumpkin Scones: Easy Fall Breakfast

These tender, flaky brown sugar pumpkin scones are the perfect fall breakfast or brunch treat. With a crisp caramelized exterior and a soft, moist interior, they come together in under 45 minutes using simple pantry ingredients.
- Prep Time: 15 minutes
- Cook Time: 22 minutes
- Total Time: 45 minutes
- Yield: 8 servings 1x
- Category: Breakfast
- Cuisine: American
Ingredients
- 2 ½ cups (315g) All-Purpose Flour
- 1 tablespoon Baking Powder
- 1 teaspoon Salt
- 1 cup (245g) Pumpkin Puree
- ½ cup (115g) Unsalted Butter, cold and cubed
- ½ cup (100g) Brown Sugar, packed
- ¼ cup (60ml) Heavy Cream
- 1 large Egg, room temperature
- 2 teaspoons Pumpkin Pie Spice
- 2 tablespoons Granulated Sugar (for topping)
- Pinch of Cinnamon (for topping)
Instructions
- Preheat oven to 400°F (200°C) and line a large baking sheet with parchment paper.
- In a large mixing bowl, whisk together the flour, baking powder, salt, and pumpkin pie spice until uniform.
- Add the cold, cubed butter to the dry ingredients. Use a pastry blender or your fingers to cut the butter into the flour until the mixture resembles pea-sized pieces. Do not overwork.
- In a separate small bowl, whisk together the pumpkin puree, heavy cream, and egg.
- Pour the wet mixture into the dry ingredients. Gently fold with a fork or spatula until the dough just comes together and looks shaggy. Do not knead.
- Turn the dough out onto a lightly floured surface. Gently press it into a rectangle about 1 inch thick.
- Cut the rectangle into 8 equal triangles using a sharp knife. Place scones on the baking sheet, spaced 2 inches apart.
- Brush the tops lightly with a little extra heavy cream and sprinkle generously with the granulated sugar mixed with a pinch of cinnamon.
- Bake for 18-22 minutes, or until golden brown on top and firm to the touch.
- Let scones cool on the baking sheet for 5 minutes, then transfer to a wire rack to cool for another 5 minutes before serving.
Notes
Keep all ingredients, especially butter, as cold as possible for flaky scones. Do not overmix the dough. If your pumpkin puree is watery, drain it in a cheesecloth for 15 minutes. Scones are best served warm but can be stored at room temperature for 2 days or frozen for up to 3 months.
Nutrition
- Serving Size: 1 scone
- Calories: 280
- Sugar: 18
- Sodium: 250
- Fat: 12
- Saturated Fat: 7
- Carbohydrates: 38
- Fiber: 2
- Protein: 4
Keywords: pumpkin scones, fall breakfast, brown sugar scones, easy baking, autumn recipes, brunch ideas, pumpkin spice