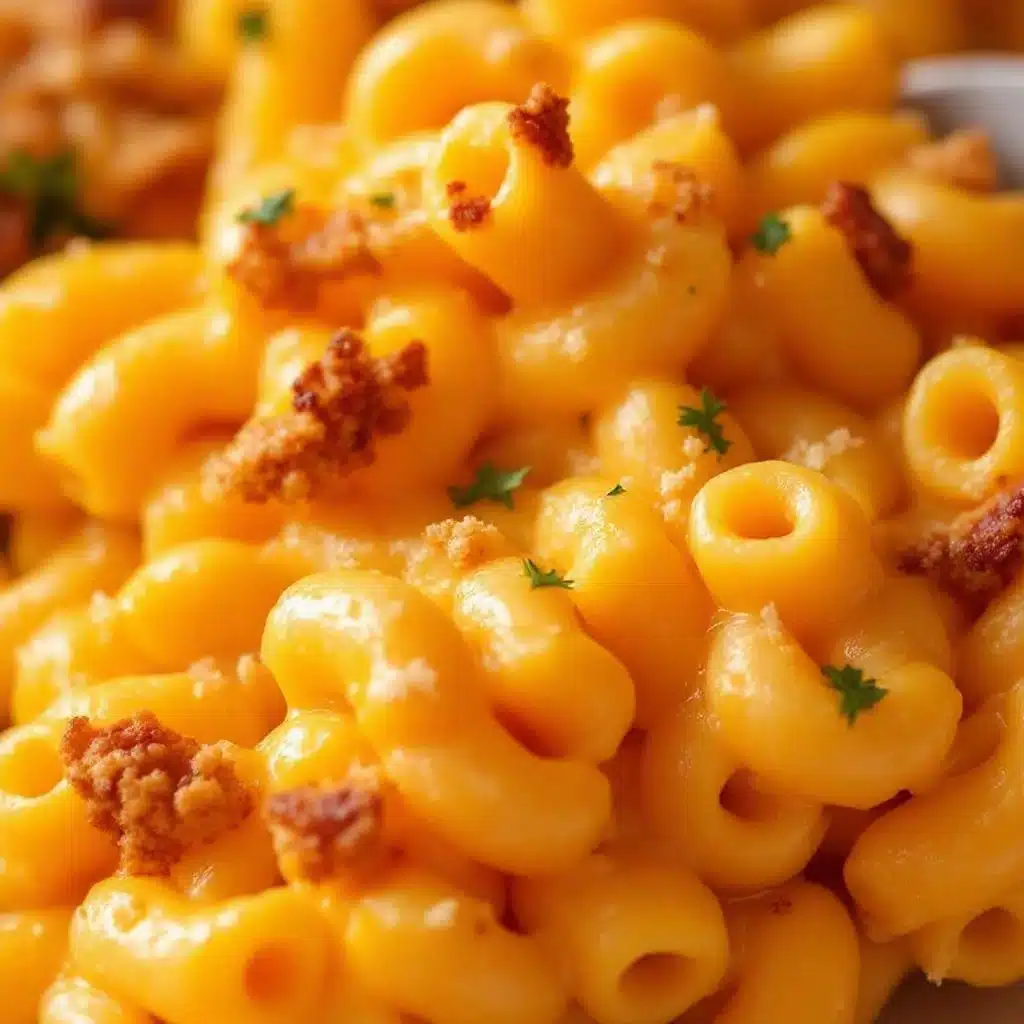
I walked into the kitchen expecting to scrape the last bits of cheese from the bottom of the baking dish. Instead, I found an empty pan and a plate that my teenager had already rinsed out of habit. It is honestly kind of insulting to my culinary ego, but I will take it. That is the quiet victory of a good weeknight dinner. The kind where you don’t even have to announce that food is ready because everyone is already digging in.
This creamy baked butternut squash mac and cheese didn’t start as a health food experiment. It started because I had a giant squash that was taking up too much counter space and a craving for comfort that didn’t involve heavy cream. I wanted something that felt indulgent but didn’t leave me feeling sluggish. The result was a sauce so velvety that people assume there is a roux and a cup of heavy cream hiding in there. There isn’t. Not really. The squash does the heavy lifting.
I remember the first time I made this. I was skeptical about blending roasted vegetables into a cheese sauce. It sounded like a puree masquerading as a meal. But the moment I tasted the first forkful, I was converted. The sweetness of the squash balances the sharpness of the cheddar perfectly. It’s savory, it’s rich, and it has a depth that regular mac and cheese just doesn’t have.
Now, it’s a staple in our rotation. It’s the recipe people text me about when they are hosting potlucks or just need a hug on a plate. It’s not fancy. It doesn’t require a dozen ingredients you can’t pronounce. It just works. And honestly, seeing that empty pan is the best reward I could ask for.
Why You’ll Love This Recipe
This isn’t just another vegetable side dish hiding in pasta. It is the main event. The reason this recipe stands out is the texture. Most people think adding vegetables to mac and cheese makes it watery or grainy. Not this version. By roasting the squash first, we caramelize the natural sugars and concentrate the flavor. Then, when it gets blended with the cheese and a splash of pasta water, it creates an emulsion that clings to every noodle. It is silky, smooth, and absolutely next-level comfort food.
Here is what makes this dish a winner in my book:
- Quick & Easy: If you buy pre-cut squash or use a microwave to soften it quickly, you can have this on the table in under 30 minutes. It is perfect for those busy weeknights when you are hungry but don’t want to spend hours in the kitchen.
- Simple Ingredients: You likely already have everything you need. Butternut squash, elbow macaroni, cheddar cheese, and a few pantry staples. No fancy grocery trips needed for this one.
- Perfect for Potlucks: This travels well. It stays warm in a crockpot if you are bringing it to a gathering, and it doesn’t separate like some dairy-heavy sauces do.
- Crowd-Pleaser: Even the pickiest eaters who claim they “don’t like squash” will devour this. The flavor is subtle and savory, not sweet like a pie. It’s the kind of dish that gets you asked for the recipe immediately.
- Unbelievably Delicious: The combination of roasted squash and sharp cheddar creates a flavor profile that is complex yet familiar. It feels like a gourmet restaurant dish but tastes like home.
What makes this different from the rest? It is the technique. Most recipes just boil the squash and mash it. We roast it. Roasting brings out a nutty, earthy depth that boiling simply cannot achieve. Plus, using a bit of nutmeg and garlic powder adds a warmth that ties everything together. It’s not just mac and cheese with a vegetable thrown in. It is a reimagined classic that is healthier, faster, and has just as much soul-soothing satisfaction.
What Ingredients You Will Need
This recipe relies on wholesome, simple ingredients to deliver bold flavor and satisfying texture without the fuss. The star is, of course, the squash, but the supporting cast is equally important for creating that perfect creamy sauce. You don’t need expensive specialty items, but quality matters, especially with the cheese.
- Butternut Squash: One medium squash, peeled and cubed. Roasting it first is non-negotiable for the best flavor. If you are in a huge rush, you can microwave the cubes until tender, but roasting adds that caramelized edge. Look for a squash that feels heavy for its size.
- Elbow Macaroni: About 8 ounces. You can use gluten-free pasta if needed, but standard egg noodles hold up well to the sauce. Avoid thin pasta as it can get mushy.
- Sharp Cheddar Cheese: 1.5 cups, freshly grated. I recommend using a block of cheese and grating it yourself. Pre-shredded cheese contains anti-caking agents that prevent it from melting smoothly, leading to a grainy sauce. Aged sharp cheddar provides the best punch of flavor.
- Milk: 1/2 cup of whole milk or unsweetened almond milk. Whole milk adds richness, but almond milk keeps it lighter if you prefer. Room temperature milk blends better than cold milk.
- Garlic: 2 cloves, minced. Fresh garlic is key here. It adds a savory backbone that balances the sweetness of the squash. Do not use powder unless you are in a pinch.
- Butter: 2 tablespoons of unsalted butter. This helps to create a slight roux if you want extra thickness, but mostly it adds richness to the sauce.
- Nutmeg: A generous pinch. Nutmeg is the secret weapon in squash dishes. It enhances the natural earthiness without making the dish taste like dessert.
- Salt and Black Pepper: To taste. Remember that the cheese is already salty, so taste before adding extra salt.
- Breadcrumbs (Optional): 1/4 cup of panko or regular breadcrumbs mixed with a little melted butter. This adds a crucial crunch on top, contrasting with the soft, creamy interior.
If you want to switch things up, you can swap the cheddar for a mild gouda or gruyère for a more sophisticated flavor. For a vegan version, nutritional yeast and cashew cream work surprisingly well, though the texture will be slightly different.
Equipment Needed
You don’t need a fancy kitchen to make this. A few basic tools will get you through this recipe without any stress.
- Baking Sheet: A standard rimmed baking sheet is essential for roasting the squash. Make sure it is large enough to hold the cubes in a single layer. Crowding the pan will steam the squash instead of roasting it, which we want to avoid.
- Food Processor or Blender: This is the most important tool. A high-speed blender like a Vitamix will give you the smoothest sauce, but a standard food processor works just fine. You need something powerful enough to break down the roasted squash into a silky puree.
- Large Pot: For boiling the pasta. Make sure it is big enough to hold the water and pasta with room to stir.
- 9×13 Baking Dish: If you plan to bake the mac and cheese until bubbly and golden. This is optional but recommended for that crispy top layer.
- Microplane or Grater: For grating your cheese. Again, this ensures smooth melting.
If you don’t have a blender, you can use an immersion blender directly in the pot, though it takes a bit more effort to get it perfectly smooth. Keep your equipment clean as you go; this recipe moves fast, and you will thank yourself later.
Preparation Method
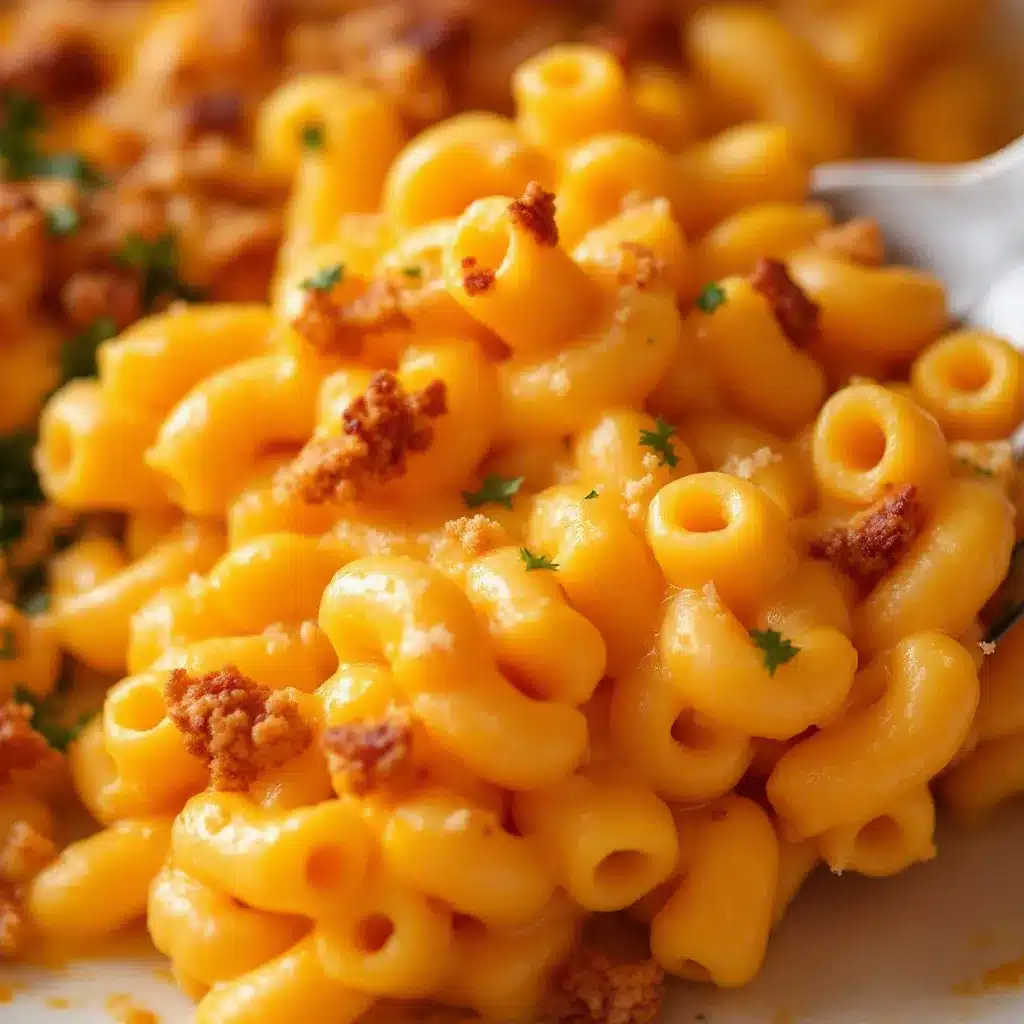
Let’s get into the nitty-gritty. This process is straightforward, but attention to detail makes the difference between good and great.
- Roast the Squash: Preheat your oven to 400°F (200°C). Peel the butternut squash and remove the seeds. Cube the flesh into 1-inch pieces. Toss them with a little olive oil, salt, and pepper. Spread them out on the baking sheet in a single layer. Roast for 20-25 minutes until tender and slightly caramelized at the edges. Let them cool for a few minutes. This step takes about 30 minutes total including prep and cooling.
- Boil the Pasta: While the squash roasts, bring a large pot of salted water to a boil. Add the elbow macaroni and cook according to package directions until al dente. Reserve 1 cup of the starchy pasta water before draining. This water is liquid gold for the sauce.
- Blend the Sauce Base: In a food processor or blender, combine the roasted squash, softened butter, minced garlic, nutmeg, salt, and pepper. Blend until completely smooth. If it is too thick to blend, add a splash of the reserved pasta water. You want a thick, smooth puree.
- Melt the Cheese: In a large saucepan or the same pot you boiled the pasta in, warm the milk over low heat. Add the blended squash mixture and stir to combine. Slowly add the grated cheddar cheese, stirring constantly until melted and smooth. Do not let the sauce boil vigorously, or the cheese might break. This takes about 5 minutes.
- Combine: Add the drained pasta to the cheese sauce. Toss gently to coat every noodle. If the sauce is too thick, add more reserved pasta water, one tablespoon at a time, until it reaches your desired consistency.
- Bake (Optional): Transfer the mixture to a greased 9×13 baking dish. Sprinkle the buttered breadcrumbs on top if using. Bake at 350°F (175°C) for 15-20 minutes until the top is golden and the edges are bubbly. This step adds texture and warms the dish through.
- Serve: Let it cool for 5 minutes before serving. This allows the sauce to thicken slightly and makes it easier to plate. Enjoy!
Cooking Tips & Techniques
I have made this recipe enough times to know where things can go wrong. Here are some pro tips to ensure success.
First, don’t skip the roasting. Boiling the squash makes it watery. The water has to be cooked off later, which dilutes the flavor. Roasting concentrates the sweetness and creates a richer sauce base. It is worth the extra ten minutes.
Second, grate your own cheese. I know it is tedious. I hate it. But pre-shredded cheese is coated in cellulose to prevent clumping. That coating stops the cheese from melting properly. You end up with little chunks of cheese in your sauce instead of a smooth, creamy emulsion. It is a small effort that pays off massively.
Third, control the heat when melting the cheese. If you crank up the heat, the proteins in the cheese tighten up and squeeze out the fat, resulting in a greasy, grainy sauce. Keep it on low to medium-low heat and stir often. Patience is key here.
Also, reserve that pasta water. The starch in the water helps the sauce cling to the noodles. If the sauce looks too thick or pasty after mixing, add a splash of the water. It instantly loosens it up and makes it silky.
Finally, let it rest. When you take a hot mac and cheese out of the oven, it is very loose. Letting it sit for 5-10 minutes allows the sauce to set slightly. It makes for cleaner servings and a better mouthfeel.
Variations & Adaptations
This recipe is a canvas. You can tweak it to fit your dietary needs or flavor preferences.
- Gluten-Free: Simply swap the elbow macaroni for a gluten-free brand. Most brown rice or corn-based pastas work well. Just be careful not to overcook them, as they can get mushy faster than wheat pasta.
- Dairy-Free: Use olive oil instead of butter. Swap the milk for unsweetened almond or oat milk. For the cheese, use a high-quality vegan cheddar shreds. Nutritional yeast can also be added for a cheesy, umami flavor. It won’t be exactly the same, but it is still delicious.
- Spicy Kick: Add a teaspoon of smoked paprika or a dash of cayenne pepper to the sauce. If you like heat, stir in some diced jalapeños or a spoonful of chipotle peppers in adobo sauce. This pairs surprisingly well with the sweetness of the squash.
- Protein Boost: Stir in some cooked bacon bits, grilled chicken, or white beans. Bacon adds a smoky crunch that complements the cheese perfectly. I often use leftover bacon from my crispy bacon wrapped asparagus bundles to add this extra savory layer.
I also like to add a handful of spinach or kale at the end. The residual heat wilts the greens, adding color and nutrients without changing the flavor profile. It’s a great way to sneak in more vegetables for picky eaters.
Serving & Storage Suggestions
This mac and cheese is best served warm. It pairs beautifully with a simple green salad dressed with a lemon vinaigrette. The acidity of the salad cuts through the richness of the cheese. You can also serve it with roasted Brussels sprouts or grilled chicken for a complete meal.
For storage, let the mac and cheese cool completely before transferring it to an airtight container. It will keep in the refrigerator for up to 4 days. The sauce will thicken in the fridge, which is normal.
To reheat, add a splash of milk or water to the pasta before warming it. Microwave it in 30-second intervals, stirring in between, until heated through. You can also reheat it in a skillet over low heat, adding a little liquid to loosen the sauce.
If you want to freeze it, do so before baking. Assemble the dish, cover tightly with foil, and freeze. When ready to eat, thaw in the fridge overnight and bake as directed. The texture may be slightly softer after freezing, but the flavor remains excellent.
Nutritional Information & Benefits
This dish is a great balance of comfort and nutrition. Butternut squash is packed with vitamin A, fiber, and antioxidants. It supports eye health and boosts the immune system. The cheese provides protein and calcium, which are essential for bone health.
Compared to traditional mac and cheese, this version has less saturated fat if you use a lighter cheese or less butter. It is also lower in calories per serving due to the volume of vegetables. However, it is still indulgent, so enjoy it in moderation.
For those watching their carb intake, you can swap half the pasta for cauliflower florets. This reduces the carbohydrate load while keeping the creamy texture. It is a flexible recipe that can adapt to your wellness goals.
Conclusion
This creamy baked butternut squash mac and cheese is more than just a meal. It is a reminder that healthy eating doesn’t have to be boring. It is comforting, satisfying, and surprisingly easy to make. I love this recipe because it brings warmth to the table without weighing you down. It is the kind of dish that feels like a hug.
I encourage you to try it and make it your own. Add your favorite herbs, swap the cheese, or top it with crispy onions. The base is solid, but the variations are endless. Once you taste the difference that roasting makes, you will never go back to plain mac and cheese.
Please share your results with me! I love seeing how you adapt these recipes. Leave a comment below with your favorite variation or tell me how your family liked it. And if you have friends who love comfort food, share this recipe with them. They will thank you later.
Frequently Asked Questions
Can I use frozen butternut squash?
Yes, you can use frozen cubed butternut squash. However, it will release more water during cooking. Make sure to thaw and drain it well before blending, or your sauce might be too thin. Roasting it fresh is still the best option for flavor.
Why is my mac and cheese grainy?
This usually happens if the cheese was pre-shredded or if the heat was too high when melting. Always grate your own cheese and melt it over low heat. Stirring constantly helps create a smooth emulsion.
Can I make this ahead of time?
Yes, you can prepare the squash and blend the sauce a day in advance. Store the sauce in the fridge. When ready to serve, warm the sauce, mix with cooked pasta, and bake as directed. This can actually help the flavors meld together.
What kind of cheese is best?
Sharp cheddar is the classic choice because its strong flavor stands up to the mild squash. You can also mix in gruyère or fontina for extra creaminess and depth. Avoid mild cheddar as it can taste flat.
Is this recipe gluten-free?
The base recipe is gluten-free if you use gluten-free pasta. Make sure to check the labels on your cheese and breadcrumbs, as some brands may contain hidden gluten. Using certified gluten-free breadcrumbs ensures safety for those with celiac disease.
Pin This Recipe!
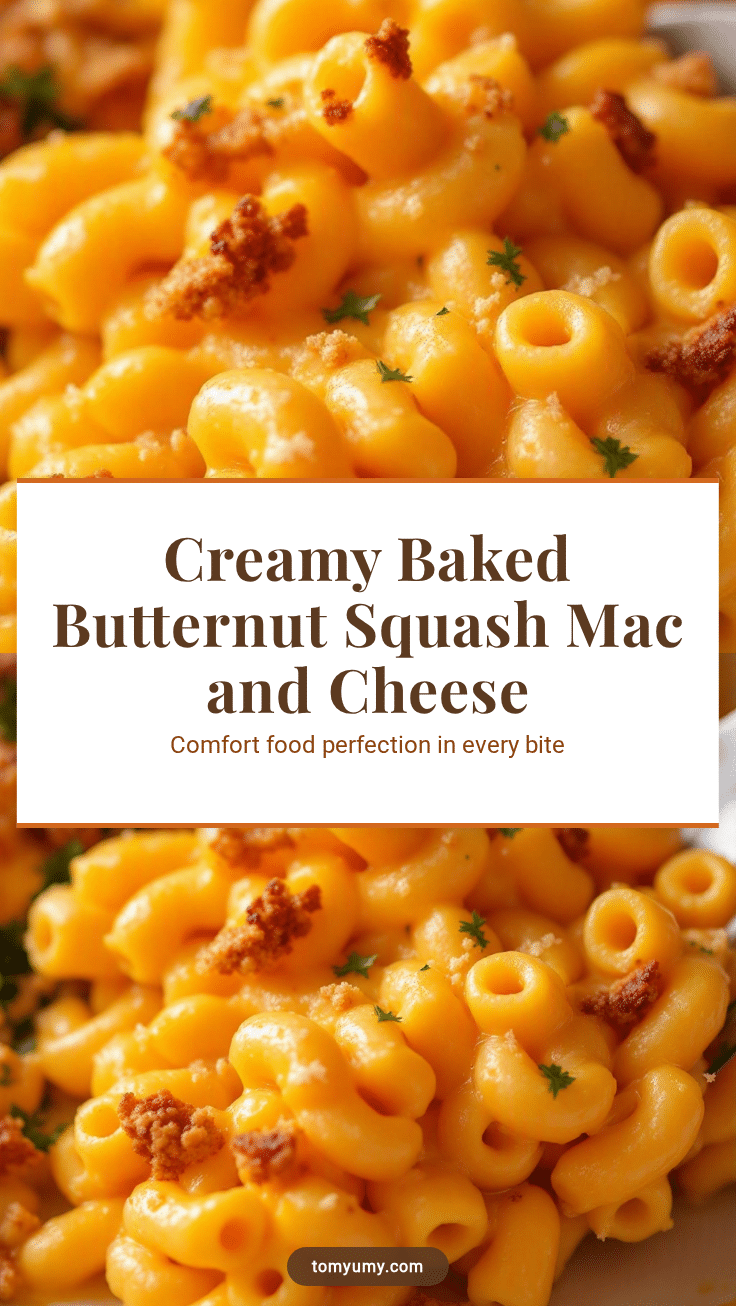
Creamy Baked Butternut Squash Mac and Cheese

A velvety, comforting weeknight dinner that blends roasted butternut squash with sharp cheddar cheese for a creamy sauce without heavy cream. This easy 30-minute recipe is a crowd-pleaser that balances savory and sweet flavors.
- Prep Time: 15 minutes
- Cook Time: 30 minutes
- Total Time: 45 minutes
- Yield: 6 servings 1x
- Category: Main Course
- Cuisine: American
Ingredients
- 1 medium butternut squash, peeled, seeded, and cubed
- 8 ounces elbow macaroni
- 1.5 cups sharp cheddar cheese, freshly grated
- 1/2 cup whole milk or unsweetened almond milk
- 2 cloves garlic, minced
- 2 tablespoons unsalted butter
- 1 pinch nutmeg
- Salt and black pepper to taste
- 1/4 cup panko or regular breadcrumbs (optional)
- 1 tablespoon olive oil (for roasting squash)
- 1 cup reserved pasta water
Instructions
- Preheat oven to 400°F (200°C). Toss squash cubes with olive oil, salt, and pepper. Roast on a baking sheet for 20-25 minutes until tender and caramelized. Let cool slightly.
- While squash roasts, bring a large pot of salted water to a boil. Cook macaroni until al dente. Reserve 1 cup of pasta water before draining.
- In a food processor or blender, combine roasted squash, butter, garlic, nutmeg, salt, and pepper. Blend until smooth, adding a splash of pasta water if needed.
- In a large saucepan, warm milk over low heat. Add the squash puree and stir to combine.
- Slowly add the grated cheddar cheese, stirring constantly until melted and smooth. Do not let the sauce boil vigorously.
- Add the drained pasta to the sauce and toss to coat. Adjust consistency with reserved pasta water if necessary.
- Transfer to a greased 9×13 baking dish. Top with buttered breadcrumbs if using.
- Bake at 350°F (175°C) for 15-20 minutes until golden and bubbly.
- Let cool for 5 minutes before serving.
Notes
Roasting the squash is essential for flavor concentration; boiling makes it watery. Always grate your own cheese to ensure smooth melting. Reserve pasta water to help the sauce cling to the noodles. Let the dish rest for 5 minutes before serving to allow the sauce to thicken.
Nutrition
- Serving Size: 1 cup
- Calories: 450
- Sugar: 8
- Sodium: 600
- Fat: 18
- Saturated Fat: 9
- Carbohydrates: 55
- Fiber: 5
- Protein: 16
Keywords: butternut squash mac and cheese, healthy mac and cheese, baked mac and cheese, vegetarian dinner, comfort food, easy weeknight meals, gluten-free option