The power went out on a Tuesday evening, right around six. One minute I was chopping cilantro for tacos I had planned to make, and the next, the hum of the refrigerator died. The house went quiet in that heavy, unsettling way that only happens when the appliances stop working. I stood there in the dark for a second, holding a knife and a bunch of wilting herbs, wondering if I should just order pizza.
Then I remembered the can of Hatch green chiles I had bought on a whim last week. It was sitting on the counter, forgotten, but still good. I also had a whole rotisserie chicken in the fridge, the kind you buy because you’re too tired to cook but need protein. And there was a block of cream cheese, a jar of sour cream, and a bag of shredded cheese that was slightly past its prime.
I didn’t have a plan. I didn’t have a recipe. I just had these four things and a desperate need to feed my family before they started complaining about being hungry. I turned on a single candle, sat at the kitchen table, and started mixing. I didn’t worry about measuring. I just threw the chiles into the cream cheese, shredded the chicken, and added enough cheese to make it look like a solid mass.
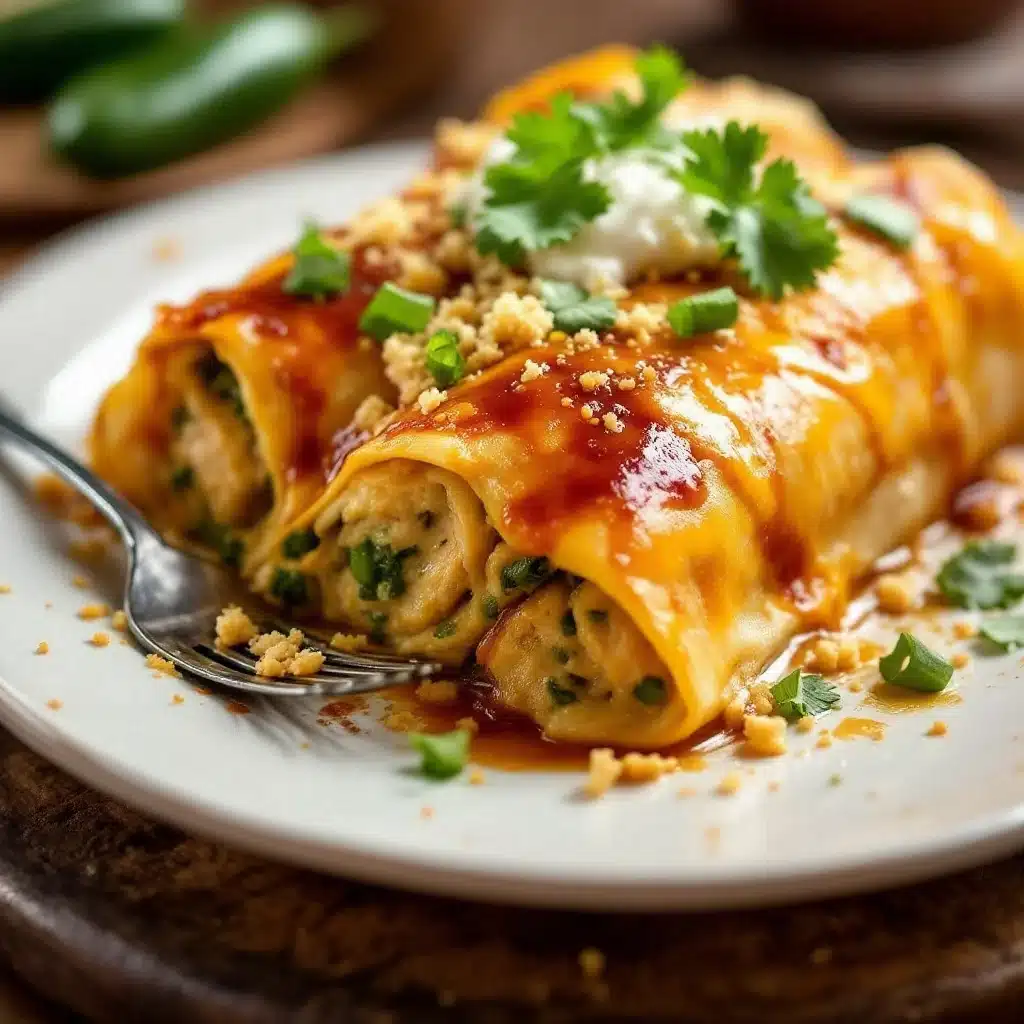
I rolled them up in whatever tortillas were left—three corn and two flour, mismatched and slightly torn. I poured the leftover sauce over the top and stuck them in the oven on the lowest setting possible to save gas. When they came out, they were bubbling and browned in spots.
My kids didn’t ask where the recipe came from. They just ate. And honestly, that was the best part. The flavors were bold and smoky, the sauce was rich without being heavy, and it felt like a victory against chaos. That night, I realized that sometimes the best meals aren’t planned; they’re improvised. This creamy hatch green chile chicken enchiladas recipe is my tribute to those nights. It’s not about perfection. It’s about using what you have to make something delicious.
Why You’ll Love This Recipe
This recipe isn’t just another chicken enchilada dish. It’s the kind of meal that saves your week when you’re running on empty. I’ve tested this version dozens of times, tweaking the ratio of chiles to cheese until it hit that sweet spot of creamy and spicy. Here is why this specific combination works so well:
- Quick & Easy: You can have this on the table in under 45 minutes. It uses pre-cooked chicken, so you aren’t boiling anything or roasting vegetables. It’s perfect for those busy weeknights when you want a homemade meal but don’t have hours to spare.
- Simple Ingredients: You likely already have most of these items in your pantry or freezer. Hatch green chiles are canned, the chicken is rotisserie, and the sauce is just a few dairy products blended together. No fancy grocery trips needed.
- Perfect for Potlucks: These travel well and reheat nicely. If you’re bringing a dish to a neighbor’s house or a office lunch, this is a safe bet that always gets compliments.
- Crowd-Pleaser: Even the pickiest eaters love the creamy texture and the mild heat of the green chiles. It’s comfort food without being boring.
- Unbelievably Delicious: The texture is next-level. The cream cheese melts into the sour cream to create a velvety sauce that clings to the tortillas, while the chicken adds substance. It’s savory, rich, and satisfying.
What makes this different from other enchilada recipes? Most people use a jarred red sauce or a heavy roux. This version skips the flour entirely. By blending the dairy with the chiles, you get a sauce that is naturally thick and flavorful. It’s lighter on the stomach but still feels indulgent. It’s the kind of dish that makes you close your eyes after the first bite and forget about your to-do list. It’s comfort food reimagined—faster, easier, but with the same soul-soothing satisfaction. I serve these alongside a simple side, but honestly, they are the main event.
What Ingredients You Will Need
This recipe relies on high-quality, simple ingredients to deliver bold flavor without the fuss. The key is balance. You want the creaminess to carry the spice, not overwhelm it. Here is what you need to gather:
For the Filling
- Rotisserie Chicken: 2 cups, shredded. I prefer using the breast meat for tenderness, but dark meat adds more flavor. You can use leftover roasted chicken if you have it.
- Canned Hatch Green Chiles: 1 can (7 oz), drained. Look for brands like Hatch or El Paso. These are milder than jalapeños but have a distinct smoky flavor. Do not skip the drainage step, or your sauce will be watery.
- Shredded Mexican Blend Cheese: 1 cup. I recommend using a pre-shredded bag for convenience, but if you have time, shred a block of Monterey Jack and Cheddar yourself for better melting.
For the Creamy Sauce
- Cream Cheese: 8 oz, softened. This is the base of the sauce. It provides stability and richness. I use full-fat cream cheese because low-fat versions can become grainy when heated.
- Sour Cream: 1 cup. Use full-fat for the best texture. Greek yogurt can be substituted if you want a tangier, lighter option.
- Chicken Broth: 1 cup. Low-sodium is best so you can control the salt level. Use this to thin out the sauce to a pourable consistency.
- Garlic Powder: 1 teaspoon. Adds depth without the risk of burning fresh garlic.
- Cumin: 1 teaspoon. A little goes a long way. It adds that classic enchilada warmth.
- Salt and Pepper: To taste. Always taste your sauce before pouring it over the enchiladas.
For Assembly
- Tortillas: 12 large flour tortillas. Flour tortillas hold the creamy sauce better than corn because they are more pliable and less likely to crack. If you prefer corn, you can fry them briefly in oil to make them flexible.
- Extra Cheese: 1 cup, for the top. This creates the golden, bubbly crust we all love.
I always keep a can of Hatch chiles in my pantry because they are a game-changer for quick meals. If you can’t find them, roasted poblano peppers can work, but the flavor profile will change slightly. The key is to use ingredients that are fresh and high-quality. The sauce is only as good as the dairy you use, so don’t skimp on the cream cheese.
Equipment Needed
You don’t need a lot of fancy tools to make this recipe. A few basic items will get you through:
- 9×13 Inch Baking Dish: A ceramic or glass dish works best. It distributes heat evenly and prevents burning. If you don’t have one, two 9-inch round pans will work, but you may need to adjust baking time.
- Food Processor or Blender: This is crucial for the sauce. You want it smooth. A hand blender works too, but a standard blender gives the creamiest result. Just be careful not to overfill it.
- Large Skillet: For warming the tortillas if they are stiff. This step is optional but recommended to prevent tearing.
- Fork: For shredding the chicken. It’s faster than using your hands and keeps your fingers clean.
I’ve tried using a whisk for the sauce, but it never gets fully smooth. Lumps of cream cheese are no fun in an enchilada. If you don’t have a blender, let the cream cheese sit out for an hour to soften, then whisk it vigorously with the sour cream before adding the broth. It takes more effort, but it works. A good non-stick skillet is also helpful if you decide to warm the tortillas.
Preparation Method
Let’s get cooking. This process is straightforward, but attention to detail makes a big difference in the final result.
- Prep the Chicken and Chiles (5 minutes): Shred the rotisserie chicken with a fork. Place the meat in a large bowl. Drain the canned Hatch green chiles thoroughly. Pat them dry with a paper towel if they look wet. Chop them into small pieces. Add them to the chicken along with 1 cup of shredded cheese. Mix well. This is your filling.
- Make the Sauce (5 minutes): In a food processor, combine the softened cream cheese, sour cream, chicken broth, garlic powder, cumin, salt, and pepper. Pulse until smooth. If it’s too thick, add a splash more broth. You want it to pour like heavy cream. Taste and adjust seasoning. It should be savory and slightly tangy.
- Warm the Tortillas (2 minutes): Heat a dry skillet over medium heat. Warm each tortilla for about 15-20 seconds on each side. This makes them pliable and easier to roll without cracking. Stack them on a plate and cover with a clean kitchen towel to keep them warm.
- Assemble the Enchiladas (10 minutes): Preheat your oven to 350°F (175°C). Take a tortilla and place about 1/3 cup of the chicken mixture in the center. Roll it up tightly and place it seam-side down in your baking dish. Repeat with the remaining tortillas. Arrange them snugly next to each other. You should have two rows of six.
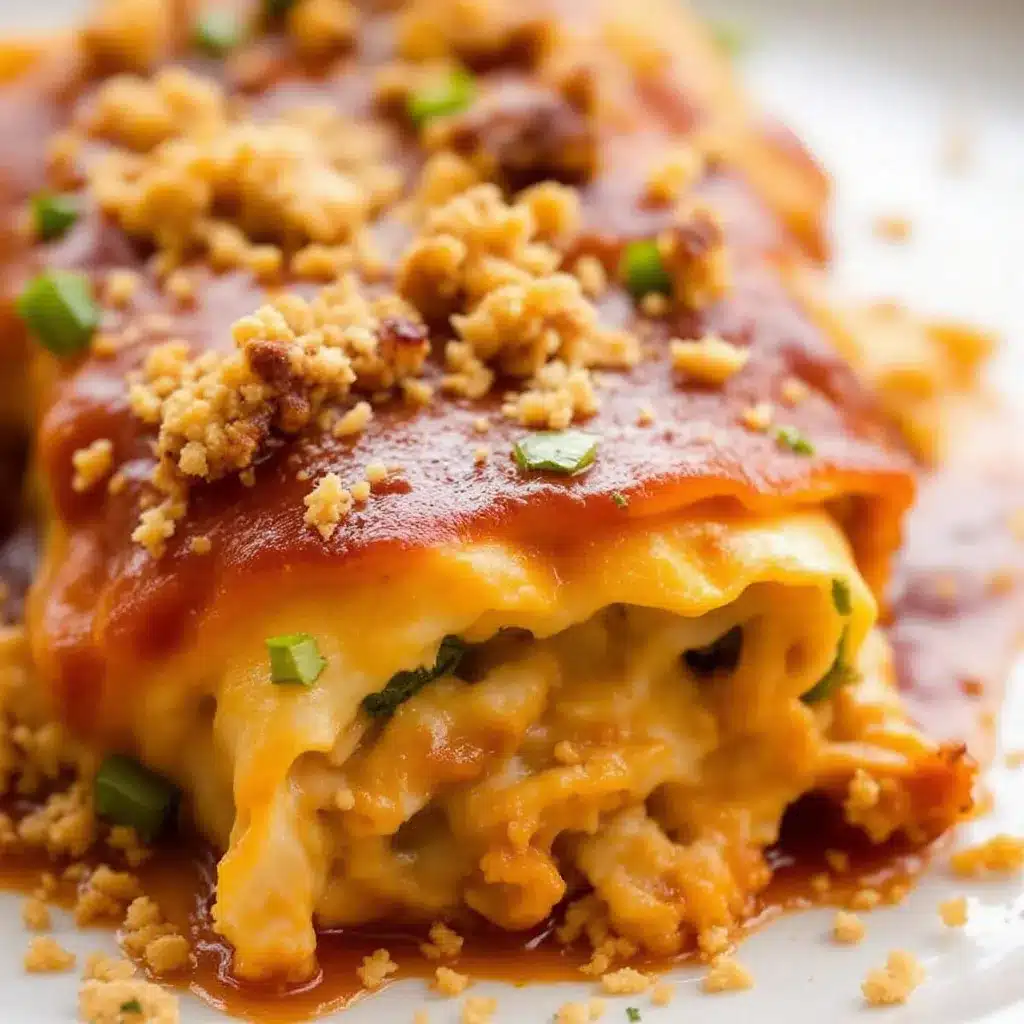
- Sauce and Top (5 minutes): Pour the creamy sauce evenly over the rolled enchiladas. Use a spoon to help it seep into the gaps between the rolls. Sprinkle the remaining 1 cup of cheese over the top. You can also add a few chopped chiles on top for extra visual appeal.
- Bake (20-25 minutes): Place the dish in the oven. Bake until the cheese is melted and bubbly, and the edges are slightly golden. If you want a crispier top, broil for the last 1-2 minutes, but watch it closely so it doesn’t burn.
- Rest and Serve (5 minutes): Remove from the oven and let it rest for 5 minutes. This helps the sauce set slightly so the enchiladas don’t fall apart when you cut them. Garnish with fresh cilantro or green onions if you have them.
The key here is not to overfill the tortillas. If you pack them too tight, they will burst open in the oven. Keep the filling modest, and they will roll beautifully.
Cooking Tips & Techniques
I’ve made my fair share of enchilada disasters, so here are some tips to ensure success:
- Drain the Chiles Well: This is the most common mistake. If the chiles are wet, your sauce will be thin and runny. Press them against the side of the can or pat them dry.
- Soften the Cream Cheese: If the cream cheese is cold, it will clump in the sauce. Let it sit on the counter for 30 minutes before starting. Or, microwave it in 10-second bursts until soft.
- Don’t Skip the Tortilla Warm-Up: Cold tortillas are brittle. Warming them makes them elastic. It’s a small step that prevents broken enchiladas.
- Control the Heat: Hatch green chiles are mild, but they vary by brand. If you want more spice, add a pinch of cayenne or use a spicier pepper. Start with less and add more if needed.
- Rest Before Cutting: Hot enchiladas are messy. Letting them rest allows the sauce to thicken slightly, making them easier to serve.
I once tried to rush this recipe and skipped the tortilla warm-up. Half of them cracked in the oven, and the filling leaked out. It tasted great, but it looked like a mess. Now, I always take the extra two minutes to warm them. It’s worth it.
Variations & Adaptations
This recipe is flexible. Here are a few ways to make it your own:
- Spicy Version: Add a diced jalapeño or a teaspoon of chipotle powder to the sauce for more heat.
- Vegetarian Option: Swap the chicken for black beans or roasted cauliflower. The sauce works perfectly with vegetables too.
- Gluten-Free: Use corn tortillas instead of flour. Just be sure to fry them briefly in oil to make them flexible, or they may crack when rolling.
- Low-Carb: Skip the tortillas entirely. Layer the chicken and sauce in the dish like a casserole. Top with cheese and bake. It tastes just as good.
- Seafood Twist: I’ve tried this with shredded crab meat, and it was delicious. The sweetness of the crab pairs well with the smoky chiles.
I often make the vegetarian version for my friends who don’t eat meat. It’s just as satisfying and feels lighter. The sauce is the star, so it works with almost any protein or vegetable.
Serving & Storage Suggestions
These enchiladas are best served hot, straight from the oven. I like to garnish them with fresh cilantro, sliced avocado, or a dollop of sour cream. They pair well with a simple green salad or Mexican rice. For drinks, a cold beer or a glass of iced tea works well.
To store leftovers, let them cool completely, then cover the dish with plastic wrap or transfer to an airtight container. They will keep in the refrigerator for up to 4 days. To reheat, microwave individual portions or warm the whole dish in the oven at 350°F until heated through. The sauce may thicken in the fridge, so add a splash of broth when reheating to loosen it up.
You can also freeze them. Wrap the unbaked dish tightly in foil and freeze. When ready to cook, thaw overnight in the fridge and bake as directed, adding 10-15 minutes to the baking time. The flavors actually develop over time, so they often taste even better the next day.
Nutritional Information & Benefits
This recipe is rich in protein from the chicken and calcium from the dairy. The Hatch green chiles provide vitamins A and C, adding a nutritional boost without adding many calories. Each serving has roughly 450 calories, depending on the cheese used. It is not a low-carb dish due to the tortillas, but it is balanced with lean protein. For those with dairy sensitivities, you can use plant-based cream cheese and sour cream, though the texture will be slightly different. I always enjoy this dish as a treat, not a daily staple, because it is indulgent. It’s a comfort food that feels good in your body, especially on a cold night.
Conclusion
This creamy hatch green chile chicken enchiladas recipe is a lifesaver. It’s easy, delicious, and uses simple ingredients. I hope you try it and find it as comforting as I do. Feel free to customize it with your favorite toppings or spices. If you make it, let me know how it turned out in the comments below. I love hearing your variations. Thanks for stopping by, and happy cooking!
Frequently Asked Questions
Can I use frozen Hatch green chiles?
Yes, you can use frozen ones. Just thaw them and drain them well before using. The texture will be softer, but the flavor is the same.
What if I don’t have a food processor?
You can whisk the cream cheese and sour cream together by hand if the cream cheese is very soft. Add the broth slowly and whisk until smooth. It takes more effort but works.
Can I make these ahead of time?
Absolutely. Assemble the enchiladas, cover them tightly, and refrigerate overnight. Bake them straight from the fridge, adding 10-15 minutes to the baking time.
Are Hatch green chiles spicy?
They are mild to medium heat. They are smokier than spicy. If you want more heat, add a jalapeño or red pepper flakes.
Can I use corn tortillas?
Yes, but they are more fragile. Warm them in oil or a dry skillet to make them flexible before rolling. They also absorb more sauce, so you may need extra sauce.
Pin This Recipe!

Creamy Hatch Green Chile Chicken Enchiladas

A quick and easy weeknight dinner featuring shredded rotisserie chicken and canned Hatch green chiles in a rich, velvety cream cheese and sour cream sauce, baked in flour tortillas.
- Prep Time: 22 minutes
- Cook Time: 25 minutes
- Total Time: 47 minutes
- Yield: 6 servings 1x
- Category: Main Course
- Cuisine: Mexican
Ingredients
- 2 cups shredded rotisserie chicken
- 1 can (7 oz) Hatch green chiles, drained and chopped
- 1 cup shredded Mexican blend cheese (divided)
- 8 oz cream cheese, softened
- 1 cup sour cream
- 1 cup low-sodium chicken broth
- 1 teaspoon garlic powder
- 1 teaspoon cumin
- Salt and pepper to taste
- 12 large flour tortillas
- Fresh cilantro or green onions for garnish (optional)
Instructions
- Preheat oven to 350°F (175°C).
- Shred the chicken with a fork and place in a large bowl. Drain and pat dry the Hatch green chiles, then chop them into small pieces.
- Add the chopped chiles and 1 cup of shredded cheese to the chicken and mix well to create the filling.
- In a food processor or blender, combine the softened cream cheese, sour cream, chicken broth, garlic powder, cumin, salt, and pepper. Pulse until smooth. Adjust consistency with more broth if needed.
- Warm the tortillas in a dry skillet over medium heat for 15-20 seconds per side to make them pliable. Stack and cover with a towel.
- Place about 1/3 cup of the chicken mixture in the center of each tortilla. Roll tightly and place seam-side down in a 9×13 inch baking dish.
- Pour the creamy sauce evenly over the rolled enchiladas, ensuring it seeps into the gaps. Sprinkle the remaining 1 cup of cheese on top.
- Bake for 20-25 minutes until the cheese is melted, bubbly, and the edges are golden.
- Let rest for 5 minutes before serving to allow the sauce to set. Garnish with fresh cilantro if desired.
Notes
Ensure the Hatch green chiles are thoroughly drained to prevent a watery sauce. Soften the cream cheese beforehand to avoid lumps in the sauce. Warming the tortillas prevents them from cracking when rolled. For a spicy version, add jalapeño or chipotle powder. For a vegetarian option, substitute chicken with black beans or roasted cauliflower.
Nutrition
- Serving Size: 2 enchiladas per ser
- Calories: 450
- Sugar: 4
- Sodium: 680
- Fat: 28
- Saturated Fat: 15
- Carbohydrates: 32
- Fiber: 2
- Protein: 22
Keywords: chicken enchiladas, hatch green chiles, creamy enchiladas, easy dinner, rotisserie chicken recipes, weeknight meals, comfort food