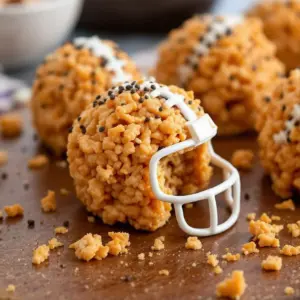
I was nine years old, sitting cross-legged in front of the TV, but my eyes were glued to the cookie sheet on the coffee table. My dad had decided to make those little football-shaped treats he’d seen on a TV commercial. They weren’t just snacks; they were part of the game. We had a rule: you couldn’t eat one until the first quarter was over. Honestly, it was torture waiting, but the anticipation made the first bite so much better.
Those mini helmet treats were always a little messy. The chocolate icing would smear on our fingers, and the white stripes would sometimes look more like abstract art than the actual logo of our team. But nobody cared. They were crispy, chewy, and perfectly sweet. We’d argue over who got the ones with the most chocolate and who got the ones that were slightly burnt on the edges (which, let’s be real, were the best ones).
I haven’t made them in years, not really. Life gets busy, and I usually default to store-bought cookies when the game is on. But lately, I’ve been craving that specific feeling. Not just the sugar rush, but the simplicity of it. The way a simple box of cereal and a bag of marshmallows can turn a chaotic Sunday afternoon into something nostalgic and warm.
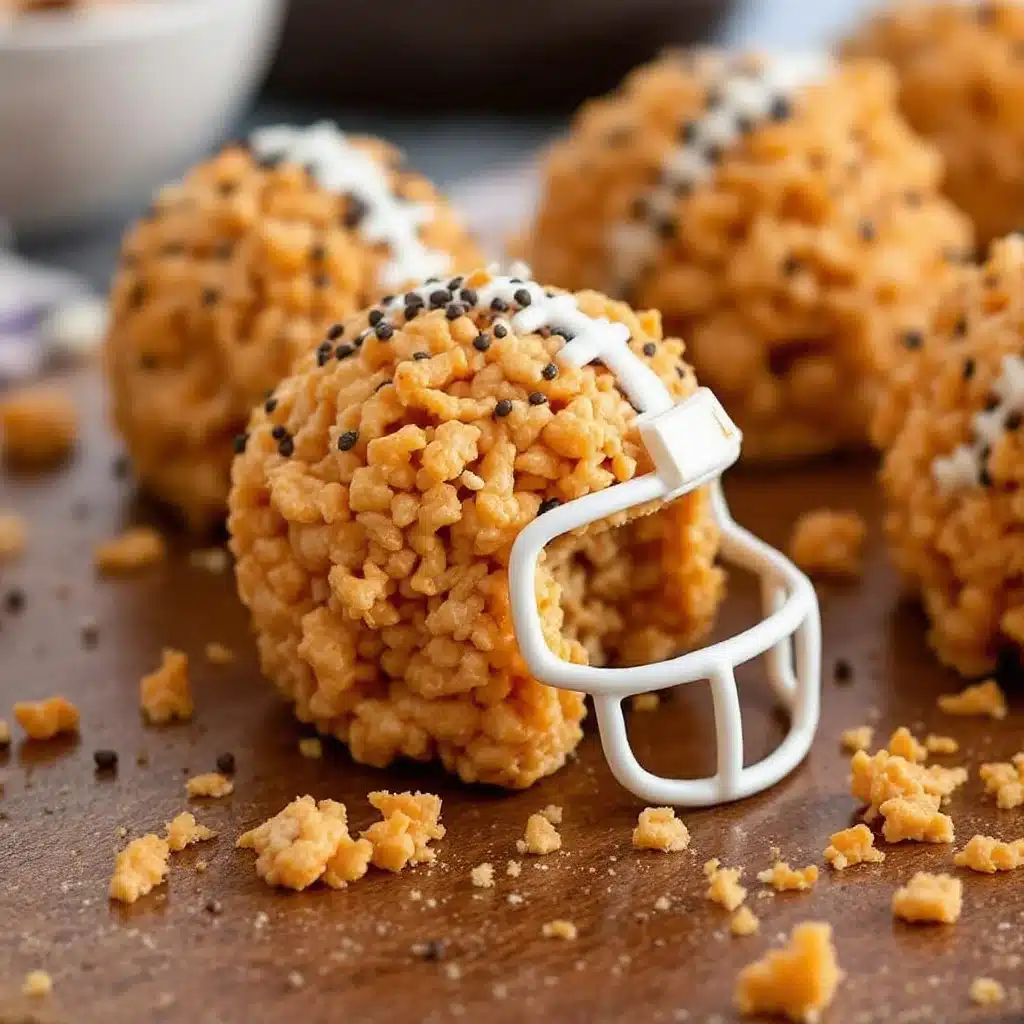
Making these crispy mini football helmet rice krispie treats is my way of bringing that memory back. It’s not about perfection. It’s about the mess, the laughter, and the shared enjoyment of something easy and fun. Whether you’re a football fan or just a fan of good snacks, these treats capture that spirit perfectly. They are quick to make, forgiving for beginners, and always a hit with kids and adults alike. Let’s get into it.
Why You’ll Love This Recipe
There is a reason why rice krispie treats have survived decades of culinary trends. They are the ultimate comfort food, and when you shape them into mini football helmets, you add a layer of fun that elevates them from a simple snack to an event. I have tested this recipe dozens of times, tweaking the ratio of cereal to marshmallow to get that perfect balance of chewiness and crunch. Here is why this version stands out:
- Quick & Easy: You can go from box to finished product in under 30 minutes. This is perfect for last-minute game day prep or when you need to whip up something fast without turning on the oven.
- Simple Ingredients: You likely already have everything in your pantry. Marshmallows, butter, cereal, and chocolate. No fancy grocery trips needed.
- Perfect for Game Day: Whether it’s the Super Bowl, playoffs, or just a casual watch party, these treats fit the theme perfectly. They are easy to grab and eat while cheering.
- Crowd-Pleaser: Kids love the shape, and adults love the nostalgia. They always get rave reviews because they look complicated but are actually very simple to make.
- Unbelievably Delicious: The texture combo is next-level. Crispy cereal meets gooey marshmallow, topped with smooth chocolate. It is comfort food reimagined for the big game.
What makes this recipe different is the attention to detail in the shaping. Many recipes just press the mixture into a pan and cut squares. But shaping them into helmets gives them character. It requires a bit of hand-on work, but that’s where the fun is. You get to mold them yourself, and no two are exactly alike. That imperfection is what makes them special. Plus, the chocolate detailing adds a professional touch that makes them look like they came from a bakery, even though you made them in your own kitchen.
This isn’t just a snack; it’s a way to engage with your guests. Watching people shape these treats can be a activity in itself. It’s the kind of recipe that makes you close your eyes after the first bite and remember simpler times. It’s healthier in the sense that it’s not baked with heavy creams, but it still has that soul-soothing satisfaction we all crave on a Sunday afternoon.
What Ingredients You Will Need
This recipe relies on a few key components to create that signature texture and flavor. The beauty of these treats is that they use pantry staples, but the quality of those staples matters more than you might think. Here is what you need to gather:
- Marshmallows: You will need a standard 10-ounce bag of mini marshmallows. Mini marshmallows melt faster and more evenly than large ones, which helps prevent burning. I recommend using a brand like Jet-Puffed or a generic store brand, but make sure they are fresh. Old marshmallows can become hard and difficult to melt.
- Unsalted Butter: You need about 3 tablespoons of unsalted butter. Using unsalted allows you to control the saltiness, especially since we will add salt to the chocolate. Soften the butter slightly before adding it to the pot for quicker melting.
- Rice Krispies Cereal: You will need 6 cups of crispy rice cereal. This is the structural backbone of the treat. Do not use puffed rice or other similar cereals unless you want a different texture. The hollow shape of the rice cereal is what gives the treat its light, airy crunch. If you are looking for a gluten-free option, you can substitute with a certified gluten-free crispy rice cereal, though the texture might be slightly denser.
- Vanilla Extract: A teaspoon of pure vanilla extract adds depth. It balances the sweetness of the marshmallows. Avoid using artificial vanilla if you can help it; it can taste a bit chemical.
- Chocolate Chips: For the helmet detailing, you need chocolate chips. Semi-sweet or milk chocolate work best. Milk chocolate is sweeter and more traditional for kids, while semi-sweet offers a richer flavor that adults often prefer. You will need about 1 cup of chips.
- White Candy Melts or White Chocolate Chips: These are for the laces and stripes. White candy melts are easier to work with because they are designed for dipping and setting hard. White chocolate chips can be temperamental and may require adding a bit of vegetable oil to thin them out.
- Edible Markers or Gel Food Coloring: To draw the faces or logos on the helmets, you need edible markers. If you don’t have those, you can use a toothpick dipped in gel food coloring mixed with a tiny bit of vodka or clear extract. Liquid food coloring will make the chocolate runny, so avoid it.
A quick tip on sourcing: if you are making these for a large crowd, buy the marshmallows in bulk. The 10-ounce bags can be pricey if you need multiple batches. Also, check the expiration date on your cereal. Stale cereal won’t bind as well with the marshmallow mixture.
Equipment Needed
You don’t need a lot of fancy gear to make these, but having the right tools will make the process smoother. Here is what you’ll need:
- Large Saucepan: A heavy-bottomed 4-quart saucepan is ideal. It distributes heat evenly and prevents the marshmallows from scorching at the bottom. I have ruined batches in thin pans before, so don’t skip this step.
- Silicone Spatula: You need a sturdy silicone spatula for stirring. Metal spoons can scratch the pan and don’t scrape the sides as effectively. The spatula helps you get every last bit of marshmallow out of the pot.
- Large Mixing Bowl: A bowl big enough to hold all 6 cups of cereal and the marshmallow mixture. A stainless steel or glass bowl works well. Avoid plastic if it’s very cold, as the marshmallow might stick.
- Parchment Paper: Line your work surface or a baking sheet with parchment paper. The marshmallow mixture is sticky, and parchment paper makes cleanup a breeze. You can also grease your hands with butter to handle the mixture.
- Microwave-Safe Bowl: For melting the chocolate. A small glass or ceramic bowl works best. If you don’t have one, you can use a heatproof glass measuring cup.
- Ziplock Bags: For piping the chocolate. You don’t need a professional piping bag for this. A small ziplock bag with the corner snipped off works perfectly for drawing the laces and stripes.
- Toothpicks: Essential for drawing the details on the helmets. Have a box ready.
If you don’t have a large saucepan, you can use a double boiler method, but it takes longer. The direct heat method is faster and gives you more control. Just keep the heat low and stir constantly.
Preparation Method
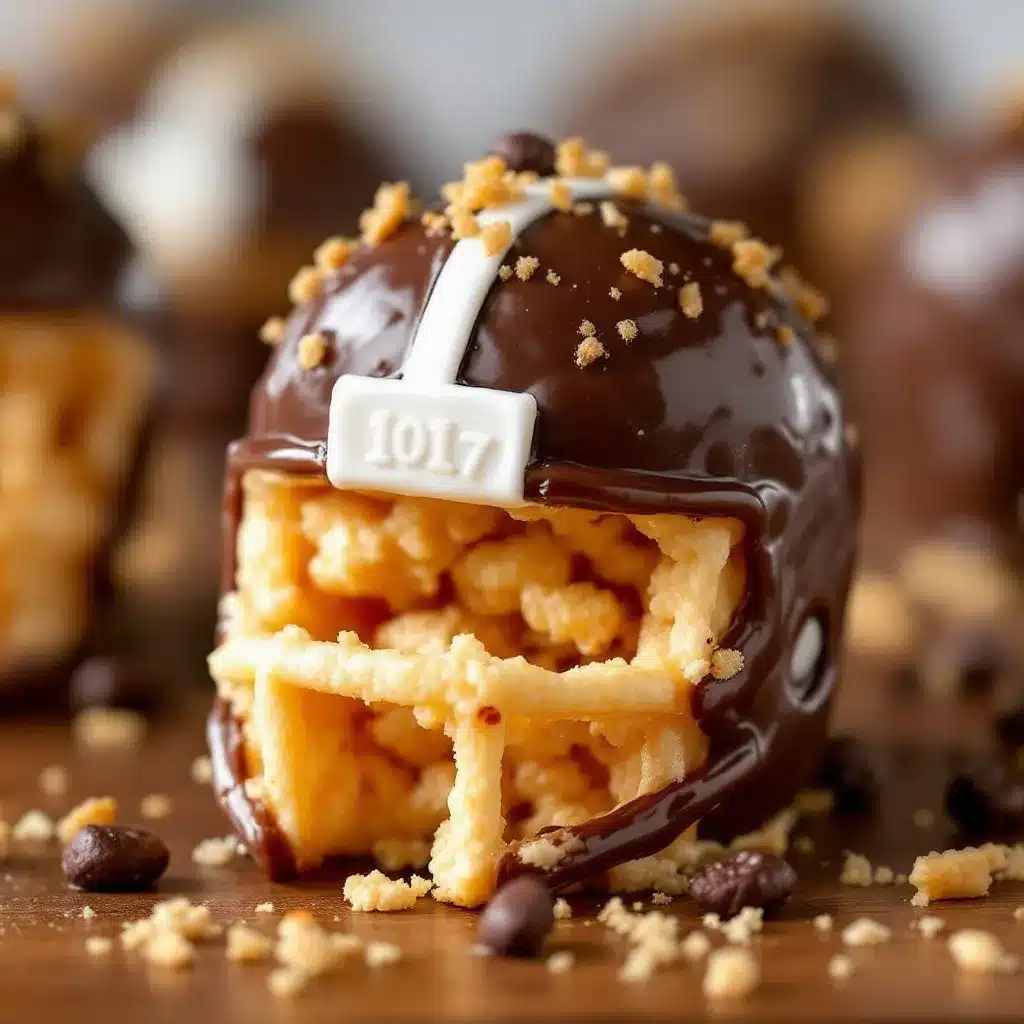
Let’s get to the fun part. Making these treats is straightforward, but timing is everything. Here is how to do it step-by-step.
- Prep Your Station (5 minutes): Before you start melting anything, get everything ready. Line a baking sheet with parchment paper. Have your spatula, bowl, and cereal within reach. If you are shaping the helmets, have your hands lightly greased with butter or wear food-safe gloves. This step saves you from scrambling later.
- Melt the Butter (2 minutes): Place your large saucepan over low heat. Add the 3 tablespoons of butter. Let it melt slowly. Do not let it brown or burn. Once it is fully liquid, proceed to the next step.
- Melt the Marshmallows (3-5 minutes): Add the entire bag of mini marshmallows to the melted butter. Stir constantly with your silicone spatula. The marshmallows will start to melt and clump together. Keep stirring until the mixture is smooth and glossy. This usually takes about 3-4 minutes. If you see any dry bits, keep stirring. The goal is a uniform, sticky mass. Remove from heat immediately once melted to prevent burning.
- Add Vanilla (30 seconds): Stir in the teaspoon of vanilla extract. It will steam a bit, so be careful. Mix it in until fully incorporated.
- Combine with Cereal (2 minutes): Pour the 6 cups of Rice Krispies into the marshmallow mixture. Use your spatula to fold the cereal in. You want every piece coated. It will look like a sticky mess at first, but keep folding. If it’s too sticky to handle, you can use greased hands to press it together, but the spatula is usually enough. Be gentle so you don’t crush the cereal.
- Shape the Helmets (10-15 minutes): This is the creative part. Take a small handful of the mixture (about the size of a golf ball) and roll it into a ball. Then, gently press it into a football shape. It doesn’t need to be perfect. Place them on the parchment-lined sheet. You can make them as big or small as you like. Mini helmets are easier to eat in one bite, so aim for that size. Continue until all the mixture is used.
- Melt the Chocolate (2 minutes): In your microwave-safe bowl, combine the chocolate chips and white candy melts. Microwave in 30-second intervals, stirring in between, until smooth. If the chocolate is too thick, add a tiny drop of vegetable oil. Stir until it is fluid enough to pipe.
- Decorate the Helmets (15 minutes): Transfer the melted chocolate into ziplock bags and snip off a tiny corner. Pipe the white stripes across the top of each helmet. Then, pipe the laces down the center. Use a toothpick to drag the chocolate for a more realistic look. If you are adding faces or logos, use edible markers now. Let the chocolate set for about 10 minutes at room temperature, or put them in the fridge for 5 minutes to speed it up.
Pro tip: If the chocolate starts to harden in the bag, just microwave it for 10 seconds. It’s easier to work with warm chocolate.
Cooking Tips & Techniques
I’ve made these treats enough times to know where things can go wrong. Here are some professional tips to ensure success:
- Don’t Overheat the Marshmallows: The biggest mistake people make is burning the marshmallows. Low and slow is the key. If you see the marshmallows starting to brown, take them off the heat immediately. Burnt marshmallows taste bitter and ruin the whole batch.
- Work Quickly: The marshmallow mixture hardens as it cools. Once you add the cereal, you need to mix it in quickly. If it starts to get tough to stir, add a tiny bit of warm water or microwave the pot for 10 seconds to soften it up again.
- Grease Your Hands: If you prefer to shape the helmets by hand, grease your hands with butter or cooking spray. This prevents the sticky mixture from sticking to your skin. It’s messier but gives you better control over the shape.
- Chocolate Consistency: If your chocolate is too thick to pipe, it will break the surface of the treat and look messy. Thin it out with a drop of oil until it flows like honey. Test it on a piece of parchment paper first.
- Uniform Sizing: Try to make the marshmallow balls roughly the same size. This ensures that the chocolate coating looks consistent and that they bake (well, set) evenly. Use a small cookie scoop if you want uniformity.
Also, don’t rush the setting time. If you touch the chocolate before it’s set, you’ll smudge it. Patience is a virtue here.
Variations & Adaptations
While the classic version is great, you can customize these treats to fit your theme or dietary needs. Here are a few ideas:
- Team Colors: Instead of just white chocolate, use colored candy melts to match your favorite team’s colors. Pipe the stripes and laces in those colors. It’s a fun way to show team spirit.
- Gluten-Free: As mentioned, use a certified gluten-free crispy rice cereal. The rest of the ingredients are naturally gluten-free, so this is an easy swap. Just check the chocolate labels to ensure they are processed in a gluten-free facility.
- Vegan: Use vegan marshmallows (like Dandies) and vegan butter. For the chocolate, use dairy-free chocolate chips. The texture might be slightly less chewy, but the flavor will be similar.
- Flavor Variations: Add a teaspoon of peppermint extract for a holiday version, or swap the vanilla for almond extract. You can also mix in some crushed pretzels for a salty-sweet twist.
- Mini vs. Regular: If you are feeding a crowd, you can make larger football-shaped treats. Just adjust the piping time for the chocolate, as larger surfaces will need more decoration.
I once made a batch with peanut butter chips instead of chocolate, and it was delicious. The salty-sweet combo was a hit with the adults. Don’t be afraid to experiment.
Serving & Storage Suggestions
These treats are best served at room temperature. The chocolate sets nicely, and the texture is perfect. Here is how to store and serve them:
- Serving: Arrange them on a platter with other game day snacks. They pair well with salty foods like chips and dip. You can also serve them with cold milk or a festive drink.
- Storage: Store the treats in an airtight container at room temperature. They will keep for up to 5 days. Layer them with parchment paper to prevent sticking. Do not refrigerate them, as the cold can make the marshmallows hard and the chocolate chalky.
- Freezing: You can freeze these treats for up to 2 months. Place them in a single layer on a baking sheet to freeze, then transfer to a freezer bag. Thaw at room temperature before serving. The texture might be slightly softer after thawing, but they will still be tasty.
- Reheating: You don’t need to reheat them. If the chocolate has bloomed (turned white), it’s still safe to eat, just not pretty. You can gently warm them in the microwave for 5 seconds to smooth out the chocolate if needed.
Flavors develop over time, so they actually taste better on day two when the marshmallow has fully set and hardened slightly.
Nutritional Information & Benefits
While these treats are a dessert, they are relatively simple in ingredients. Here is a general overview:
- Calories: Each mini helmet is approximately 80-100 calories, depending on size.
- Carbs: High in carbohydrates due to the sugar and cereal.
- Fat: Moderate fat content from the butter and chocolate.
- Protein: Low protein content.
They are not a health food, but they are a fun treat for special occasions. If you are watching your sugar intake, consider making them smaller or sharing. They are naturally nut-free, which is great for schools or events with nut restrictions. Just double-check your chocolate labels for nut processing warnings.
From a wellness perspective, these treats are about balance. Enjoy them as a special treat, not a daily staple. The joy they bring is worth the occasional sugar spike.
Conclusion
These crispy mini football helmet rice krispie treats are more than just a snack. They are a way to connect with memories, share joy with friends, and enjoy the simple pleasures of cooking. Whether you are a seasoned baker or a beginner, this recipe is forgiving and fun. I love them because they bring out the kid in all of us. So grab your ingredients, put on the game, and start shaping. I can’t wait to see your creations. Share your photos on social media and tag me! Let’s make this game day memorable.
FAQs
Can I use large marshmallows instead of mini?
Yes, but you will need to chop them up first or melt them more slowly. Mini marshmallows melt faster and more evenly, which is why I recommend them. If you use large ones, keep a close eye on the pot to prevent burning.
How do I prevent the chocolate from smudging?
Make sure the chocolate is fully set before touching the treats. You can speed up the process by placing them in the fridge for 5-10 minutes. Also, handle them by the edges or use a spatula to move them.
Can I make these ahead of time?
Yes, you can make them up to 2 days in advance. Store them in an airtight container at room temperature. They will stay fresh and tasty.
What if I don’t have edible markers?
You can use a toothpick dipped in gel food coloring mixed with a tiny bit of vodka or clear extract. Liquid food coloring will make the chocolate runny, so avoid it. You can also use white chocolate for details if you prefer.
Are these treats gluten-free?
Only if you use a certified gluten-free crispy rice cereal. Standard Rice Krispies contain malt flavoring derived from barley, which contains gluten. All other ingredients are naturally gluten-free.
Pin This Recipe!
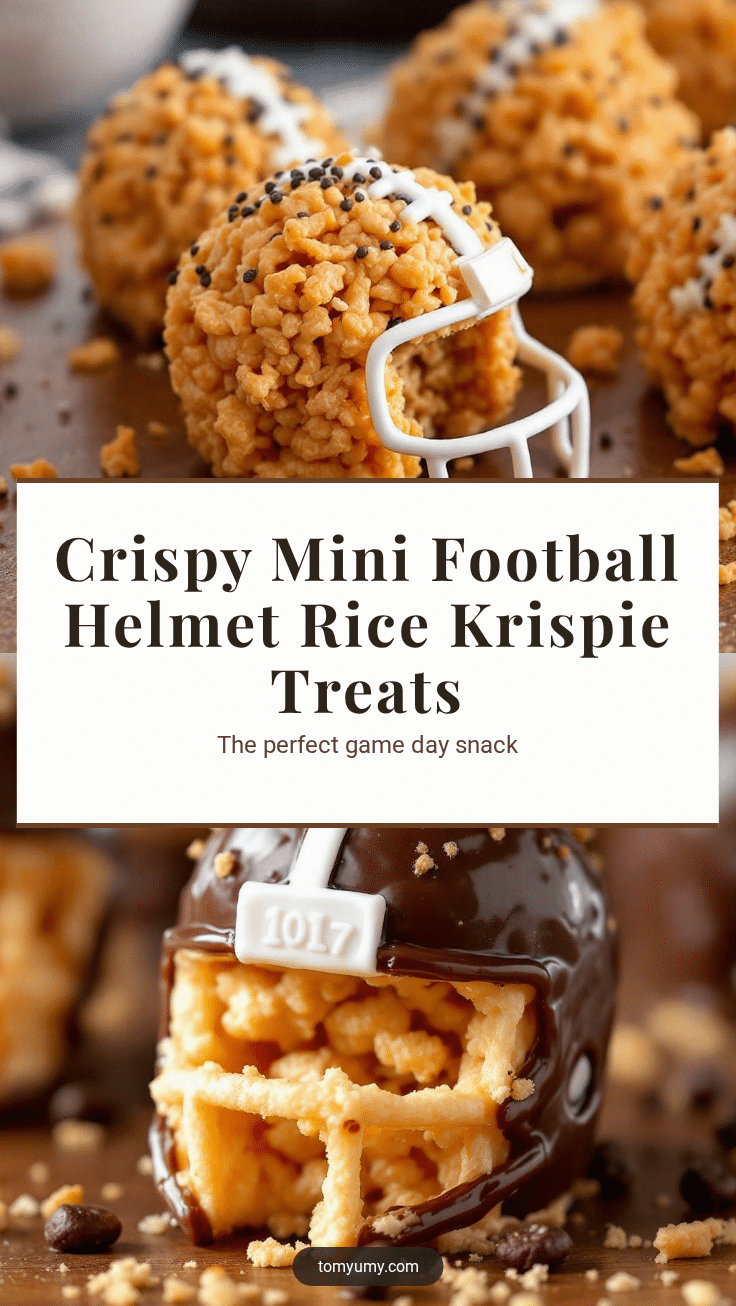
Crispy Mini Football Helmet Rice Krispie Treats
These nostalgic mini football helmet Rice Krispie treats are a fun, easy, and delicious game day snack. Shaped by hand and decorated with chocolate, they capture the spirit of the big game with a perfect balance of crispy cereal and gooey marshmallow.
- Prep Time: 15 minutes
- Cook Time: 15 minutes
- Total Time: 30 minutes
- Yield: Approximately 20-24 mini helmets 1x
- Category: Dessert
- Cuisine: American
Ingredients
- 10-ounce bag mini marshmallows
- 3 tablespoons unsalted butter
- 6 cups crispy rice cereal (e.g., Rice Krispies)
- 1 teaspoon pure vanilla extract
- 1 cup semi-sweet or milk chocolate chips
- White candy melts or white chocolate chips (for laces and stripes)
- Edible markers or gel food coloring mixed with vodka (for detailing)
Instructions
- Line a baking sheet with parchment paper and have spatula, bowl, and cereal ready.
- Melt 3 tablespoons of butter in a large saucepan over low heat.
- Add mini marshmallows to the melted butter and stir constantly until smooth and glossy (3-5 minutes). Remove from heat immediately.
- Stir in 1 teaspoon of vanilla extract.
- Pour in 6 cups of crispy rice cereal and fold until every piece is coated.
- Grease hands with butter or wear gloves. Take small handfuls of mixture (golf ball size), roll into balls, and press into football/helmet shapes. Place on the prepared baking sheet.
- Melt chocolate chips and white candy melts in a microwave-safe bowl in 30-second intervals, stirring until smooth. Thin with a drop of vegetable oil if necessary.
- Transfer melted chocolate to ziplock bags with snipped corners. Pipe white stripes and laces onto the helmets. Use a toothpick to drag chocolate for realistic details.
- Let chocolate set at room temperature for 10 minutes or in the fridge for 5 minutes.
Notes
Use mini marshmallows for faster, more even melting. Do not overheat marshmallows or they will burn and taste bitter. Work quickly as the mixture hardens as it cools. If chocolate is too thick, add a tiny drop of vegetable oil. Store in an airtight container at room temperature for up to 5 days. Do not refrigerate as it makes marshmallows hard.
Nutrition
- Serving Size: 1 mini helmet
- Calories: 90
- Sugar: 9
- Sodium: 45
- Fat: 4
- Saturated Fat: 2.5
- Carbohydrates: 12
- Protein: 1
Keywords: Rice Krispie Treats, Game Day Snacks, Football Treats, Easy Dessert, Kids Snacks, Super Bowl Food, No Bake Treats