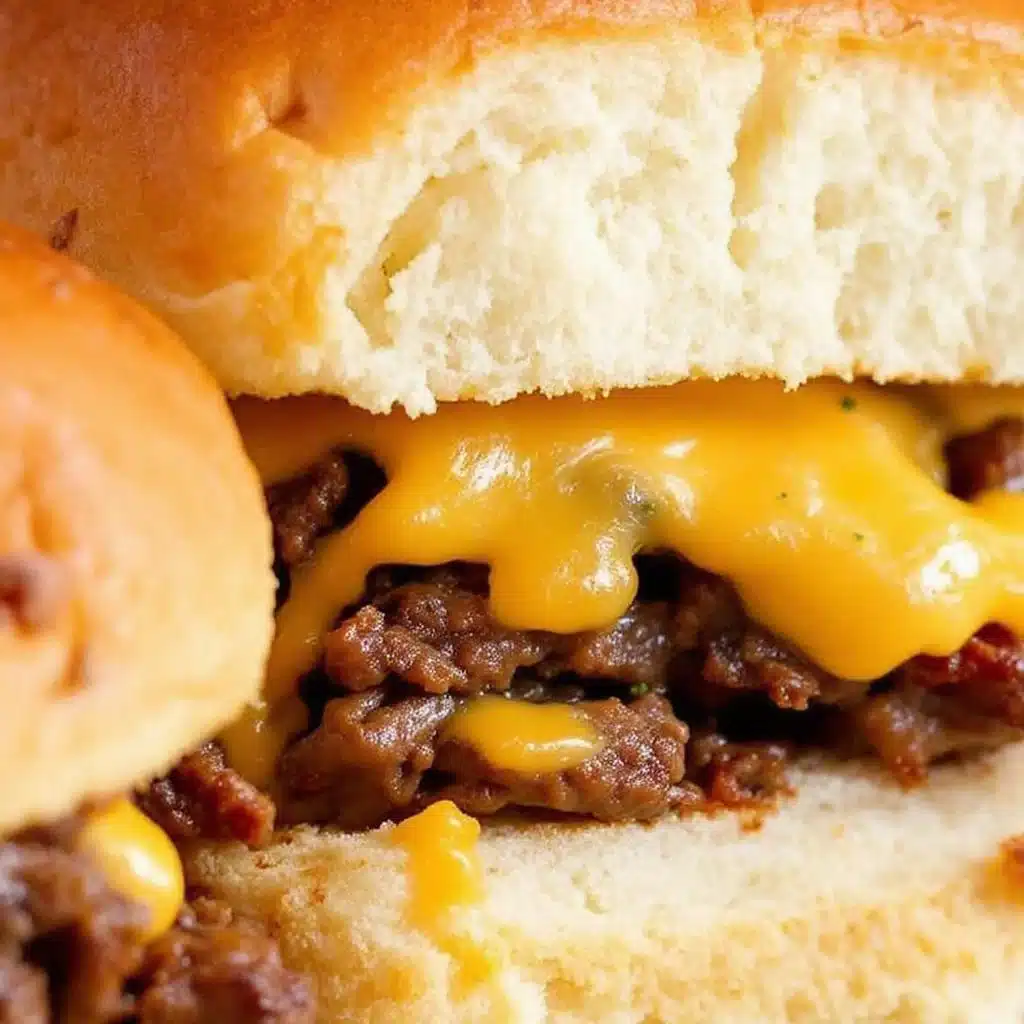
My son stared at the empty plate for a full minute before asking if we could order more. He didn’t even say please. He just looked at me with that specific, wide-eyed hope that usually precedes a negotiation over bedtime or screen time. I had just pulled the baking sheet out of the oven, the smell of toasted hoagie rolls and melted provolone filling the kitchen, and he had devoured two of the Crispy Philly Cheesesteak Sliders in under five minutes. It wasn’t just that he liked them. It was that he cleared the plate so thoroughly that I felt like I needed to check the trash can to make sure he hadn’t eaten the paper liner too.
Honestly, I wasn’t surprised. These sliders hit a sweet spot between a late-night snack and a proper dinner that I didn’t know was missing until I made them. The texture is everything here. You get that shatteringly crisp exterior from the buttered, toasted rolls, followed by the soft, cheesy, meaty interior. It’s a mouthfeel combo that just works. I remember watching him pick up the third slider, careful not to burn his fingers, and nodding at the table like he was conducting a very serious taste test. That nod was all the approval I needed.
We’ve tried a lot of quick weeknight meals lately. Some work, most don’t. But this one stuck. It’s become the go-to when I need something fast but doesn’t feel like “just” chicken nuggets or pasta. The recipe comes together in about 15 minutes, which is rare for something that tastes like it took hours of simmering. I’m not saying this is a gourmet meal, but it’s the kind of comfort food that makes you forget to check the time.
The best part is how versatile they are. You can tweak the cheese, swap the meat, or add extra veggies. But honestly, the classic version with ribeye, onions, and provolone is hard to beat. My husband came home from work, saw the sheet pan, and didn’t even ask what was for dinner. He just grabbed a napkin. That silence is the highest compliment in our house.
It’s funny how a simple slider can turn a chaotic Tuesday evening into something manageable. You don’t need to be a chef to make them. You just need a sharp knife, a hot oven, and some good quality beef. I keep a package of ribeye in the freezer for nights like this. It’s a small luxury that pays off every single time.
I started making these because I wanted to replicate the flavor of my favorite local cheesesteak shop but in a handheld format. The result is something that feels indulgent but actually cooks up fast. It’s not heavy in a way that makes you want to nap immediately after eating. It’s just satisfying. That’s why my son asked for more. And honestly, I wouldn’t blame him.
Why You’ll Love This Recipe
These sliders are the kind of dish that solves multiple problems at once. You want dinner on the table fast, you want something that tastes like a treat, and you want it to be easy enough to make when you’re tired. This Crispy Philly Cheesesteak Sliders recipe checks every single box. It’s not just another sandwich recipe; it’s a tested, tried, and true method that delivers consistent results every time. I’ve made this version so many times that I can do it in my sleep, and it still turns out perfect.
Here is why this recipe stands out from the rest:
- Quick & Easy: From start to finish, you’re looking at about 15 minutes. That is incredibly fast for a meal that feels this substantial. It’s perfect for busy weeknights when you don’t have hours to spend chopping and stirring.
- Simple Ingredients: You don’t need a specialty grocery store for this. You likely have most of these items in your kitchen already. Bread, butter, cheese, and beef. That’s it. No obscure sauces or hard-to-find spices.
- Perfect for Game Day: These are the ultimate finger food. They are easy to hold, not too messy if you use the right bread, and they disappear fast. Great for parties, tailgating, or just a cozy night in.
- Crowd-Pleaser: Kids love them because they are cheesy and savory. Adults love them because they feel like a mini version of a classic Philly cheesesteak. It’s a win-win for picky eaters and foodies alike.
- Unbelievably Delicious: The combination of the crispy, buttery roll and the tender, seasoned beef is next-level comfort food. The texture contrast is what keeps you coming back for more.
What makes these different from a regular slider is the technique. You aren’t just stacking cold meat on bread. You are cooking the beef and onions until they are caramelized and sweet. Then, you’re melting the cheese directly on the warm meat. Finally, you’re brushing the rolls with garlic butter and broiling them until golden brown. This layering of flavors and textures creates a depth of taste that simple assembly can’t match.
I tested many variations before settling on this one. I tried using ground beef, but it just didn’t have the same chew or flavor as sliced steak. I tried using American cheese, but it melted too quickly and lacked that tangy bite. Provolone is the key. It melts beautifully but holds its structure, giving you that stretchy, gooey goodness without being greasy.
This recipe isn’t just about feeding people; it’s about creating a moment. It’s the kind of meal that brings everyone to the kitchen. You’ll find yourself standing over the oven, waiting for that golden brown color, trying not to eat them all before they come out. It’s comfort food reimagined for the modern, busy home cook.
What Ingredients You Will Need
To make the best Crispy Philly Cheesesteak Sliders, you need quality ingredients that speak for themselves. Since the flavor profile is simple, every component matters. You don’t need fancy gadgets or hard-to-find items, just good basics prepared correctly. The goal is bold flavor and satisfying texture without the fuss. Most of these items are pantry staples or easy finds at any local grocery store.
Here is what you’ll need to get started:
- Mini Hoagie Rolls (12-18 count): This is the foundation. Look for rolls that are soft but have a bit of structure. Kinnickinnic brand is a reliable choice if you can find them. They hold the filling well without falling apart. Avoid rolls that are too dense, or they won’t crisp up nicely.
- Unsalted Butter (1/2 cup): You’ll use this to brush the rolls. Softened butter works best because it spreads easily. If you use salted butter, reduce the added salt in the beef seasoning. The butter is what creates that crispy, golden crust.
- Garlic Powder (1 tsp): Adds a savory depth to the butter wash. Fresh garlic can burn under the broiler, so powder is safer and gives a consistent flavor.
- Onion Powder (1/2 tsp): Complements the fresh onions in the filling. It adds a subtle sweetness that rounds out the savory notes.
- Lean Ribeye Steak (1 lb), thinly sliced: This is the star. Ribeye has the right amount of fat for flavor. You can also use sirloin if you want something leaner, but ribeye is tastier. Ask your butcher to slice it paper-thin for authentic cheesesteak texture.
- Yellow Onion (1 large), thinly sliced: Adds sweetness and crunch. Yellow onions are standard, but sweet onions like Vidalia work well too if you want less sharpness.
- Provolone Cheese (8-10 slices): The classic choice. It melts smoothly and has a mild, slightly tangy flavor. Don’t use pre-shredded cheese if you can avoid it, as the anti-caking agents can prevent smooth melting. Buy a block and slice it yourself for the best results.
- Yellow Mustard (1 tsp): A secret weapon. Just a small amount adds a tangy kick that cuts through the richness of the cheese and meat. It’s traditional in many Philly shops.
- Worcestershire Sauce (1 tsp): Adds umami and depth. It’s a liquid seasoning that enhances the beef flavor without overpowering it.
- Salt and Black Pepper (to taste): Essential for seasoning the beef. Use kosher salt if you have it, as it adheres better to the meat.
- Optional: Green Peppers: Some people like to add sliced green peppers. If you do, add them with the onions. They add a nice crunch and bitterness.
If you are looking for substitutions, you can use chicken breast sliced thin for a lighter option, though it won’t have the same richness. For a gluten-free version, use gluten-free slider buns, but keep in mind they might not crisp up as nicely. You can also swap provolone for Cheez Whiz if you want that classic diner style, though the texture is very different.
I always recommend buying a block of cheese and slicing it yourself. Pre-shredded cheese has cornstarch added to keep it from clumping, which means it doesn’t melt as smoothly. For these sliders, you want that gooey, stretchy melt. It makes a huge difference in the final texture.
Equipment Needed
You don’t need a lot of fancy gear to make these sliders, but having the right tools helps. A large skillet is essential for cooking the beef and onions. I prefer a cast-iron skillet because it holds heat well and gives the beef a nice sear. If you don’t have cast iron, a stainless steel or heavy-bottomed non-stick pan works fine too. Just make sure it’s big enough to hold the meat in a single layer.
You will also need a large baking sheet. A rimmed baking sheet is best so the butter doesn’t spill over into the oven. I use a half-sheet pan, which fits most home ovens. If you have a smaller oven, you might need to use two pans.
A pastry brush is helpful for applying the garlic butter evenly. You don’t strictly need one; you can use a spoon, but a brush gives better coverage. I have a silicone brush that is easy to clean and doesn’t hold onto flavors, which is nice.
A sharp knife is important for slicing the steak. If your steak isn’t already sliced thin, you’ll need a good chef’s knife. Slicing beef against the grain is crucial for tenderness. A dull knife will tear the meat and make it harder to cook evenly.
For maintenance, make sure your skillet is well-seasoned if it’s cast iron. This prevents sticking and adds flavor. If you use a non-stick pan, avoid metal utensils that can scratch the coating. Keep your baking sheet clean to ensure even browning. A dirty sheet can cause hot spots and uneven cooking.
Budget-friendly options: You don’t need expensive equipment. A standard skillet and baking sheet from any hardware store will work. The most important investment is in the quality of the beef and cheese. Save money on the gadgets and spend it on the food.
Preparation Method
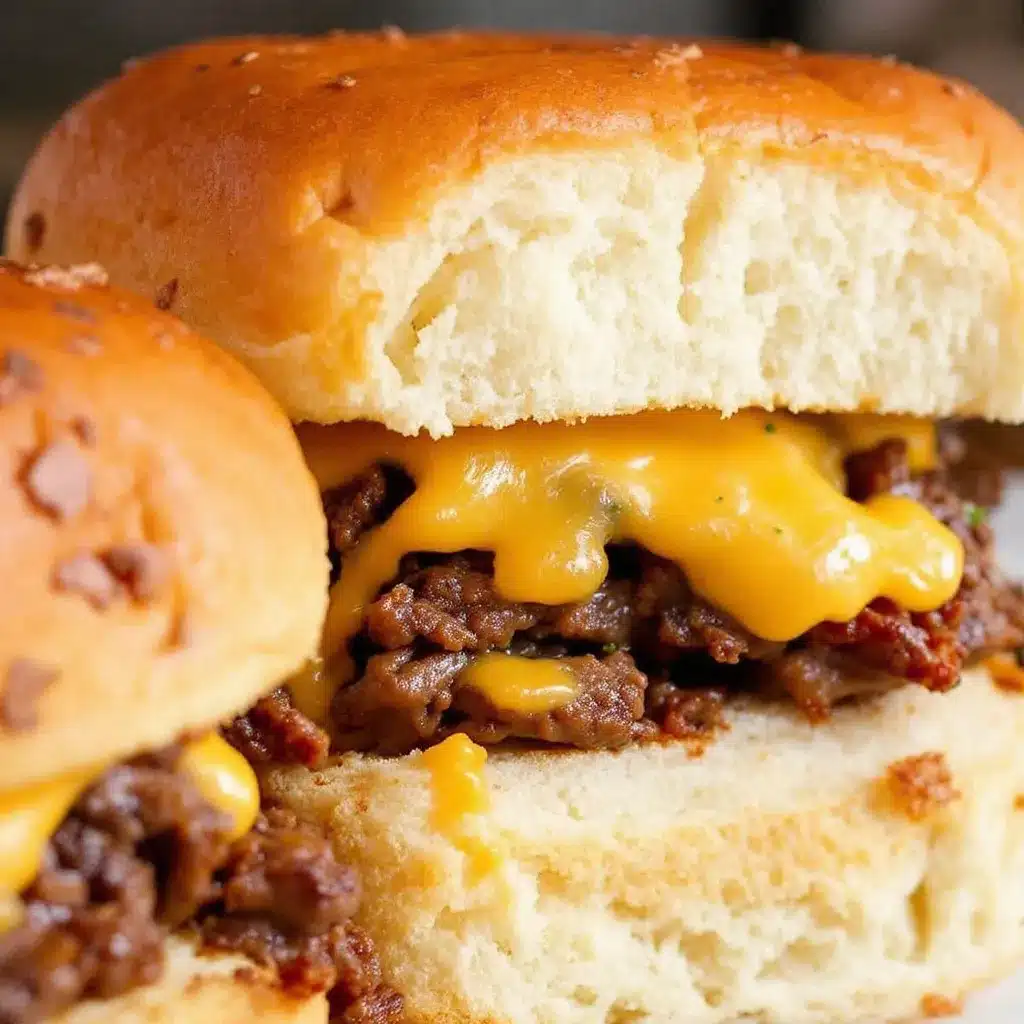
Making these Crispy Philly Cheesesteak Sliders is straightforward, but timing is key. You want everything to come together so the sliders are hot and melty when they hit the table. Here is how to do it step-by-step.
Step 1: Prep the Rolls and Butter Wash (5 minutes)
Preheat your oven to 400°F (200°C). Line a large baking sheet with parchment paper or aluminum foil for easy cleanup. Take your mini hoagie rolls and slice them in half horizontally. You want to create a top and bottom layer for all the rolls. Be careful not to cut all the way through if you want them to stay connected, but for sliders, separate halves are easier to handle.
In a small bowl, mix the softened butter with the garlic powder, onion powder, and a pinch of salt. Whisk it until it’s smooth. This is your garlic butter wash. You want to use enough to coat the rolls generously but not so much that they get soggy. The goal is a crisp, golden exterior.
Step 2: Cook the Beef and Onions (7 minutes)
Heat a large skillet over medium-high heat. Add a tablespoon of oil if your steak is very lean. Add the sliced beef and onions to the pan. Spread them out in a single layer. Let them cook undisturbed for about 2 minutes to get a good sear. Then, stir and continue cooking for another 3-4 minutes until the beef is browned and the onions are soft and translucent.
Season the meat with salt, pepper, Worcestershire sauce, and mustard. Stir to combine. The beef should be cooked through but still tender. If you overcook it, it will become tough. Remove the pan from the heat. The residual heat will finish cooking the meat.
Step 3: Assemble the Sliders (3 minutes)
Place the bottom halves of the rolls on the prepared baking sheet. Spoon the beef and onion mixture evenly over the rolls. Be careful not to overload them, or the sliders will fall apart. Top each slider with a slice of provolone cheese. If you like extra cheese, you can use two slices.
Step 4: Broil for Crispiness (2-3 minutes)
Brush the top halves of the rolls generously with the garlic butter mixture. Place these on top of the cheese-topped sliders. Put the baking sheet in the oven under the broiler. Watch them closely! Broilers vary in intensity. You want the cheese to melt and the bread to turn golden brown and crispy. This usually takes 2-3 minutes. Do not walk away. You can burn the butter quickly.
Remove from the oven and let them cool for 1-2 minutes. This helps the cheese set slightly so they are easier to eat. Serve warm.
Troubleshooting Tips
- Bread is too soft: Make sure your rolls are fresh. Old rolls will crumble. If they are too dense, toast them lightly before adding toppings.
- Cheese isn’t melting: If your broiler is weak, you can bake them at 400°F for 5 minutes before broiling. This helps melt the cheese without burning the bread.
- Sliders are too wet: Drain any excess liquid from the beef pan before assembling. Too much moisture will make the bread soggy.
Cooking Tips & Techniques
To get the best Crispy Philly Cheesesteak Sliders, there are a few techniques that make a big difference. First, slice the steak against the grain. This is crucial for tenderness. If you slice with the grain, the meat will be chewy and tough. Look for the lines of muscle fiber and cut perpendicular to them. If you buy pre-sliced steak, check the direction. If it’s wrong, you can re-slice it.
Second, don’t crowd the pan when cooking the beef. If you put too much meat in the skillet at once, it will steam instead of sear. You want that Maillard reaction, which gives the beef its deep, savory flavor. Cook in batches if necessary. It takes an extra minute, but it’s worth it for the better texture.
Third, use room temperature butter for the wash. Cold butter is hard to spread and might not coat the rolls evenly. Softened butter spreads like a dream and ensures every bite is flavorful. If you’re in a hurry, you can microwave it for 10 seconds, but don’t melt it completely.
I learned this the hard way after burning a batch of sliders because I walked away to check my phone. Broilers are intense. They can go from golden to black in seconds. Always keep an eye on them. If your oven runs hot, check them after 1 minute. If it runs cool, it might take 3 minutes.
Another tip is to let the sliders rest for a minute after broiling. This allows the cheese to set slightly. If you try to eat them immediately, the cheese will slide off, and you’ll lose half your dinner. A short rest makes them easier to handle and keeps the filling inside.
Multitasking is key here. While the beef is cooking, get your rolls prepped and the butter mixed. This way, everything is ready to go when the meat is done. It makes the whole process feel seamless and less stressful.
Variations & Adaptations
One of the best things about this recipe is how easy it is to adapt. You can change the ingredients based on what you have or what your family likes. Here are a few variations I’ve tried:
Chicken Cheesesteak Sliders
Swap the ribeye for chicken breast. Slice it thin and cook it with the onions. You might need to add a little more seasoning, as chicken is milder than beef. Use mozzarella cheese instead of provolone for a milder flavor. It’s a lighter option that still feels indulgent.
Vegetarian Option
Use portobello mushrooms sliced thin instead of beef. Sauté them with the onions until they are browned and tender. They have a meaty texture that works well in sliders. Use a vegan cheese if needed, though provolone melts better. Add some caramelized onions for extra sweetness.
Spicy Kick
Add sliced jalapeños to the beef mixture. You can use fresh or pickled jalapeños depending on your heat preference. Swap the provolone for pepper jack cheese. This adds a nice kick that balances the richness of the cheese and butter. It’s great for those who like a little fire.
Breakfast Sliders
Add a fried egg on top of each slider after broiling. The runny yolk acts as a sauce. Use hash browns instead of onions if you want a breakfast twist. It’s a fun way to use leftover beef.
I’ve also tried using different types of cheese. Swiss cheese adds a nutty flavor that is delicious. American cheese is classic but can be greasy. I stick with provolone for the best balance of melt and flavor.
For gluten-free diets, use gluten-free slider buns. They can be fragile, so handle them gently. You might need to toast them lightly before adding toppings to give them more structure.
Serving & Storage Suggestions
These sliders are best served immediately after broiling. The contrast between the hot, melty interior and the crisp, buttery exterior is at its peak. Serve them with a side of pickles, which is traditional for cheesesteaks. The acidity of the pickles cuts through the richness of the cheese and meat. A simple green salad or some potato chips also works well.
For drinks, a cold soda or a light beer pairs nicely. If you want something non-alcoholic, iced tea or lemonade is a great choice. The sweetness balances the savory flavors.
If you have leftovers (which is rare), store them in an airtight container in the refrigerator for up to 2 days. The bread might get a bit soft, so reheat them in the oven or toaster oven at 350°F for 5-10 minutes. This helps crisp up the bread again. Avoid the microwave, as it will make the bread chewy and the cheese rubbery.
You can also freeze the assembled sliders before broiling. Place them on a baking sheet and freeze until solid. Then transfer them to a freezer bag. When ready to eat, bake them at 375°F for 15-20 minutes, then broil for the last 2 minutes. This is a great option for meal prep.
The flavors develop over time as the cheese melds with the meat. Leftovers taste great cold too, though the texture is different. Some people prefer them cold for a quick snack.
Nutritional Information & Benefits
These sliders are indulgent, but they also provide substantial nutrition. Beef is a great source of protein and iron, which helps with energy levels. Provolone cheese provides calcium and protein, supporting bone health. The bread offers carbohydrates for quick energy.
However, they are also high in calories and sodium due to the cheese, butter, and processed bread. Enjoy them in moderation as part of a balanced diet. If you are watching your sodium, use low-sodium beef broth or skip the added salt in the seasoning.
For a lighter option, use whole wheat rolls and leaner cuts of beef. You can also reduce the amount of butter used for the wash. These adjustments can lower the calorie count without sacrificing too much flavor.
I enjoy these sliders as a treat, not a daily meal. They are perfect for special occasions or when you need a quick, satisfying dinner. Balance them with plenty of vegetables throughout the day.
Conclusion
These Crispy Philly Cheesesteak Sliders are a game-changer for weeknight dinners. They are fast, delicious, and easy to customize. I hope you try this recipe and enjoy it as much as my family does. Don’t be afraid to experiment with different cheeses or add-ins to make it your own.
If you make these, I’d love to hear how they turn out. Leave a comment below with your thoughts or any variations you tried. Share your photos on social media and tag me. It’s always fun to see how others interpret the recipe.
Thanks for reading. Happy cooking!
FAQs
Can I use ground beef instead of sliced steak?
Yes, you can use ground beef, but it will have a different texture. Brown the beef thoroughly and drain any excess fat before assembling. It won’t have the same chew as sliced steak, but it will still be tasty.
How do I keep the sliders from getting soggy?
Make sure to drain the beef and onion mixture well before assembling. Also, brush the rolls with butter just before broiling, not before storing. If you make them ahead, add the butter right before baking.
Can I make these in an air fryer?
Yes, you can. Place the assembled sliders in the air fryer basket. Cook at 350°F for 3-4 minutes. Watch them closely to avoid burning. The butter might drip, so use a liner or basket that catches drips.
What is the best cheese to use?
Provolone is the classic choice, but you can also use mozzarella, Swiss, or Cheez Whiz. Each has a different melt and flavor profile. Provolone offers the best balance of melt and tang.
Can I freeze the cooked sliders?
It’s better to freeze them before cooking. If you freeze cooked sliders, the bread might become tough when reheated. For best results, freeze the assembled, unbaked sliders and bake from frozen.
Pin This Recipe!
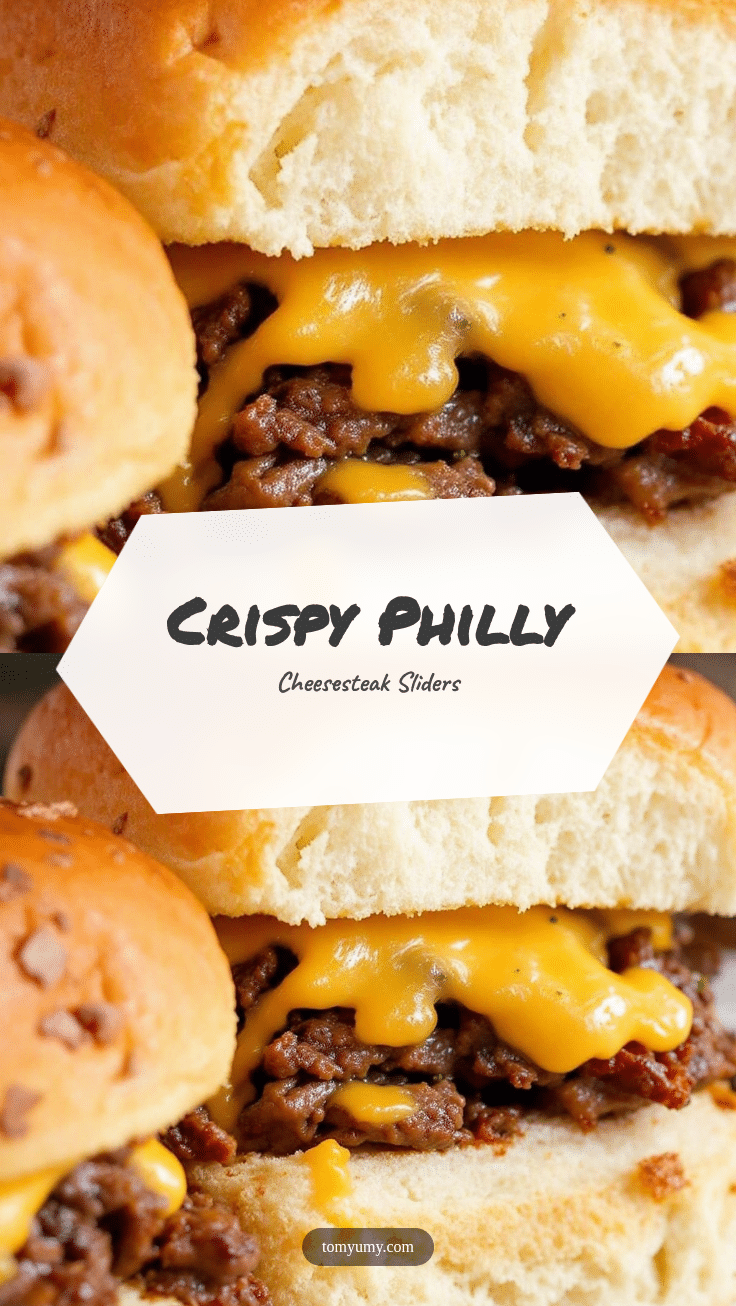
Crispy Philly Cheesesteak Sliders
Quick and easy weeknight dinner featuring thinly sliced ribeye steak, caramelized onions, and melted provolone cheese on butter-toasted mini hoagie rolls.
- Prep Time: 5 minutes
- Cook Time: 10 minutes
- Total Time: 15 minutes
- Yield: 12-18 servings 1x
- Category: Main Course
- Cuisine: American
Ingredients
- 12–18 mini hoagie rolls
- 1/2 cup unsalted butter, softened
- 1 tsp garlic powder
- 1/2 tsp onion powder
- 1 lb lean ribeye steak, thinly sliced
- 1 large yellow onion, thinly sliced
- 8–10 slices provolone cheese
- 1 tsp yellow mustard
- 1 tsp Worcestershire sauce
- Salt and black pepper to taste
- Optional: Green peppers, sliced
Instructions
- Preheat oven to 400°F (200°C). Line a large rimmed baking sheet with parchment paper or foil.
- Slice mini hoagie rolls in half horizontally.
- In a small bowl, mix softened butter with garlic powder, onion powder, and a pinch of salt to create a garlic butter wash.
- Heat a large skillet over medium-high heat. Add sliced beef and onions to the pan in a single layer.
- Cook undisturbed for 2 minutes to sear, then stir and cook for 3-4 minutes until beef is browned and onions are soft.
- Season the meat with salt, pepper, Worcestershire sauce, and mustard. Stir to combine and remove from heat.
- Place bottom halves of rolls on the baking sheet. Spoon the beef and onion mixture evenly over the rolls.
- Top each slider with a slice of provolone cheese.
- Brush the top halves of the rolls generously with the garlic butter mixture and place on top of the sliders.
- Broil for 2-3 minutes, watching closely, until cheese is melted and bread is golden brown and crispy.
- Remove from oven and let cool for 1-2 minutes before serving.
Notes
Slice steak against the grain for tenderness. Do not crowd the pan when cooking beef to ensure proper searing. Use fresh rolls for best texture. Avoid pre-shredded cheese as anti-caking agents prevent smooth melting. Let sliders rest briefly after broiling to allow cheese to set.
Nutrition
- Serving Size: 1-2 sliders per pers
- Calories: 350
- Sugar: 2
- Sodium: 600
- Fat: 22
- Saturated Fat: 10
- Carbohydrates: 20
- Fiber: 1
- Protein: 18
Keywords: Philly cheesesteak, sliders, quick dinner, weeknight meals, comfort food, beef sliders, cheesy sliders, easy recipes