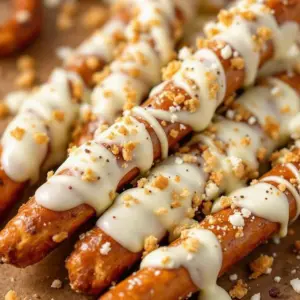
The box was empty before the movie even started. Fourth time that week.
My kids didn’t just eat these; they hunted them down. I saw little hands snatching them from the counter with the urgency of someone stealing gold bars. The silence in the kitchen was loud, broken only by the crunching sounds coming from the living room couch.
I honestly didn’t expect this kind of reaction. Pretzel rods are just pretzel rods, right? They’re salty, they’re crunchy, they’re boring. But these witch fingers? They’re different.
It started because I needed something that looked scary but tasted safe for the little ones. The neighbors’ kids were coming over for a pre-Halloween hangout. I needed something that wouldn’t cause a dairy disaster or a gluten meltdown, but still looked like it came from a witch’s cauldron.
So I twisted some dough, added a little almond for a nail, and baked them until they were golden. What happened next surprised me.
The adults loved them more than the kids. They kept asking for the recipe. Not the kids—the adults. You know how it goes. The kids eat it for the fun of it, but the adults come back for the texture and the weirdly satisfying crunch.
I’m not usually proud of my baking. I’m more of a “let’s order pizza” kind of cook. But these witch fingers stuck. They’re simple, they’re spooky, and they disappear fast.
Now, when October hits, I make them. Not because I have to, but because I know the box won’t stay full for long. It’s a small win, really. But in a house with three kids, a full box is a luxury.
Why You’ll Love This Recipe
Let’s be real for a second. Halloween baking can be a lot of work. You want something that looks impressive but doesn’t require a degree in pastry arts or three hours of your time. These crispy spooky witch finger pretzel rods hit that sweet spot.
Here is why this recipe has become a staple in my kitchen:
- Quick & Easy: We are talking about under 30 minutes from start to finish. You likely already have the ingredients. No fancy grocery trips needed. This is perfect for busy weeknights or last-minute cravings when the trick-or-treaters arrive unexpectedly.
- Simple Ingredients: Just pretzels, icing, and maybe a touch of food coloring. No weird chemicals or hard-to-find spices. You can make this with pantry staples. It’s wholesome enough to feel good about, but fun enough to feel like a treat.
- Perfect for Parties: Great for Halloween mixers, classroom parties, or cozy dinners. They are easy to hold and eat while standing up. No plates required. This makes them ideal for potlucks or when you are hosting a crowd.
- Crowd-Pleaser: Always gets rave reviews from kids and adults alike. The salty crunch of the pretzel contrasts perfectly with the sweet, thick icing. It’s a flavor combo that just works.
- Unbelievably Delicious: The texture is next-level comfort food. It’s not just sweet; it’s savory-sweet. And that almond nail? It adds a tiny bit of crunch that makes the whole thing feel intentional and crafted.
What makes these different from the rest? It’s the technique. Most people just drizzle icing over a pretzel. That’s messy and it slides off. I use a thicker royal icing consistency that sets hard. It stays put. It doesn’t drip on your hands. It looks professional but tastes homemade.
This isn’t just another version. It’s my best version. I’ve tested this dozens of times to get the icing thickness just right. It’s the kind of recipe that makes you close your eyes after the first bite. It’s comfort food reimagined—spooky, fun, but with the same soul-soothing satisfaction as a warm cookie.
Perfect for impressing guests without stress, or turning a simple snack into something memorable. And if you are looking for other easy treats, you might enjoy my creamy pumpkin spice ghost Oreo truffles for a softer option.
What Ingredients You Will Need
This recipe uses simple, wholesome ingredients to deliver bold flavor and satisfying texture without the fuss. You don’t need a specialty store to make these. Just head to your local grocery store and grab a few basics.
Here is what you will need to create your batch of spooky fingers:
- Pretzel Rods: Long, thin pretzel rods are key. Look for brands like Snyder’s or store-brand long twists. They need to be sturdy enough to hold the icing but thin enough to look like fingers. Avoid thick pretzel knots; they are too bulky.
- White Candy Melts or White Icing: This is your “flesh.” White candy melts are great because they set hard and stay white. If you want a softer icing, use a thick royal icing made from powdered sugar and egg whites. I recommend Wilton white candy melts for the best texture and ease of use.
- Orange or Red Food Coloring: Just a tiny drop is needed. You want a tint, not a bright orange blob. Gel food coloring works best because it doesn’t add extra liquid to your icing. Liquid coloring can make the icing too thin and runny.
- Almonds or Almond Slivers: For the fingernails. Almond slivers are perfect because they are naturally shaped like nails. If you can’t find slivers, you can cut regular almonds in half. Just make sure they are clean and dry.
- Powdered Sugar: If you are making your own icing instead of using candy melts, you’ll need high-quality powdered sugar. Confectioners’ sugar is fine, but check for lumps and sift it if needed.
- Milk or Water: Only if you are making homemade icing. Use milk for a richer flavor, or water to keep it neutral. Add it one teaspoon at a time.
- Vegetable Oil: A tiny bit of oil helps thin out the candy melts if they are too thick. It makes the icing smoother and easier to pipe or dip.
You can substitute almond slivers with small pieces of white chocolate or even a dab of black icing for the nail if you want a softer look. For a gluten-free option, look for gluten-free pretzel rods. They are widely available now and work just as well. Just check the packaging to ensure they are made in a facility that doesn’t cross-contaminate if that is a concern.
Equipment Needed
You don’t need much to make these, but having the right tools makes the process smoother.
- Baking Sheet: Line it with parchment paper or a silicone mat. This prevents sticking and makes cleanup a breeze. I always use parchment paper because it’s cheap and reliable.
- Small Microwave-Safe Bowls: You’ll need one or two small bowls for melting the candy melts. A 1-cup measuring cup works well. Avoid glass if you can, as it gets very hot. Plastic or ceramic is better.
- Microplane or Grater: Optional, but useful if you want to grate the almond slivers for a “dirt” effect. It adds a nice texture.
- Piping Bags or Ziploc Bags: If you are using royal icing, a piping bag helps control the flow. If you are using candy melts, you can just snip the corner of a Ziploc bag. It’s a budget-friendly hack that works great.
- Tweezers: Helpful for placing the almond nails precisely. It’s easier than using your fingers, which might leave fingerprints on the icing.
If you don’t have a microwave, you can use a double boiler on the stove. Just be careful not to let steam get into the chocolate, or it will seize up. For the almond nails, tweezers are a game-changer. They give you precision. But if you don’t have them, just use your fingers and wipe them clean often.
Preparation Method

Making these crispy spooky witch finger pretzel rods is straightforward. The key is patience and temperature control. Let’s break it down step by step.
Step 1: Prep Your Workspace
Line a baking sheet with parchment paper. This is non-negotiable. The icing will stick to everything else. Place your pretzel rods on the counter nearby. Have your almond slivers ready in a small bowl. Keep everything within arm’s reach so you don’t have to hunt for things while the icing is melting.
Step 2: Melt the White Candy
Place the white candy melts in a microwave-safe bowl. Microwave on high for 30 seconds. Stir well. If it’s not fully melted, microwave in 15-second intervals, stirring in between. Do not overheat! If the candy gets too hot, it will become grainy and thick. You want it smooth and glossy. Add a tiny drop of vegetable oil if it’s too thick. Stir it in until it flows like heavy cream.
Step 3: Add the Color
This is where the magic happens. Add a tiny amount of orange or red food coloring gel to the melted white candy. Use a toothpick to dip into the gel and swirl it into the candy. Start small. You want a pale, fleshy tone, not a bright orange. If it’s too bright, add a little more white candy to dilute it. If it’s too pale, add a tiny bit more color. Stir until the color is uniform.
Step 4: Dip the Pretzels
Take one pretzel rod and dip it into the colored candy. Use a fork or your fingers to coat it evenly. Lift it out and let the excess drip off. Tap the fork gently on the side of the bowl to remove drips. Place the coated pretzel onto the prepared baking sheet. Do this quickly, as the candy starts to set fast. Work in batches if you have a lot of pretzels.
Step 5: Add the Nails
While the icing is still wet, place an almond sliver at one end of the pretzel. Press it down gently so it sticks. You want it to look like a fingernail growing out of the skin. If the icing sets before you can place the almond, you can add a tiny dot of fresh icing to glue it on. But timing is everything here.
Step 6: Set and Serve
Let the witch fingers sit at room temperature for about 15-20 minutes until the candy is completely hard. Do not put them in the fridge unless you are in a hurry, as condensation can make them sticky. Once set, they are ready to eat or store.
Cooking Tips & Techniques
Here are some pro tips I’ve learned after making these dozens of times. These little tricks will save you from frustration.
- Temperature Control: The biggest mistake people make is overheating the candy melts. They think higher heat melts faster. It doesn’t. It breaks the chocolate structure. Always use low heat and stir often. If it looks separated, it’s too hot. Let it cool down before using.
- Consistency is Key: Your icing needs to be thick enough to hold its shape but thin enough to coat the pretzel. Think of the consistency of warm honey. If it’s too thick, it will clump on the pretzel. If it’s too thin, it will run off. Adjust with oil or extra candy as needed.
- Work Quickly: Candy melts set fast. Once you dip the pretzel, place it on the sheet immediately. Don’t dawdle. If you are making a large batch, work in groups of 5-6 pretzels at a time.
- Almond Placement: If you are left-handed or right-handed, practice the almond placement first. You want the pointed end of the almond facing away from the tip of the pretzel. It looks more natural that way.
- Humidity Warning: If you live in a humid area, the candy might not set hard. It might stay slightly tacky. In this case, use a bit more powdered sugar if making homemade icing, or add a tiny bit of shortening to the candy melts to help them harden.
I once made these on a rainy day and they never set properly. The humidity was too high. I had to put them in the fridge for 10 minutes to harden them. Next time, I just waited for a dry day. Or I added a bit more oil to help them snap.
Variations & Adaptations
Once you master the basic recipe, you can get creative. Here are a few variations I’ve tried:
- Green Witch Fingers: Use green food coloring instead of orange. It gives a more alien or monster vibe. Great for kids who are afraid of the color orange.
- Blackened Fingers: Use black food coloring to make them look like burnt fingers. Dip them in black candy melts. It’s dramatic and spooky. Add white icing drizzles to look like bone.
- Chocolate Dipped: Instead of white candy, use dark chocolate. It’s richer and less sweet. Add a gold dust sprinkle for a fancy touch. This is great for adult parties.
- Gluten-Free: Use gluten-free pretzel rods. Make sure your candy melts are certified gluten-free if cross-contamination is a concern. Most major brands are, but check the label.
- Vegan Option: Use vegan white chocolate chips or vegan candy melts. They melt similarly to regular chocolate. The almond nails are naturally vegan, so no changes needed there.
I tried making them with peanut butter cups inside the pretzel once. It was too messy and the peanut butter melted into the pretzel. Stick to the simple dip for best results. But the green variation is a hit with the younger kids.
Serving & Storage Suggestions
These witch fingers are best served at room temperature. Cold candy can be hard on the teeth. Arrange them on a platter with some fake spiderwebs or orange M&Ms for decoration. They look great in a glass jar too.
For storage, keep them in an airtight container at room temperature. They will stay fresh for up to 2 weeks. Do not refrigerate them, as the condensation will make the icing sticky and dull. If you need to store them for longer, you can freeze them. Place them in a single layer in the freezer, then transfer to a freezer bag. Thaw at room temperature before serving.
These pairs well with a glass of milk or a cup of hot cocoa. The salty pretzel and sweet icing balance out the bitterness of the cocoa. I also like to serve them with my creamy pumpkin spice ghost Oreo truffles for a double Halloween treat.
The flavors develop slightly over time, becoming more cohesive. The pretzel absorbs a tiny bit of the moisture from the icing, making it slightly softer. This is actually desirable. It makes the texture more pleasant.
Nutritional Information & Benefits
These treats are indulgent, so enjoy them in moderation. Each witch finger is approximately 80-100 calories, depending on the size of the pretzel and the amount of icing.
The pretzels provide carbohydrates for energy. The almond nail adds a small amount of healthy fat and protein. The white candy is mostly sugar, so it’s not nutritious. However, it’s fun food. Halloween is about fun, not nutrition.
If you are watching your sugar intake, you can use sugar-free candy melts. They are widely available now. They taste slightly different but work well for the coating. For a lower-calorie option, use mini pretzels instead of rods. You can make more of them for fewer calories per serving.
Always check labels for allergens. Wheat, almonds, and dairy are common allergens in this recipe. Make sure to inform guests if you are serving these at a party.
Conclusion
These crispy spooky witch finger pretzel rods are a Halloween staple for a reason. They are easy, fun, and delicious. They bring a smile to kids’ faces and a crunch to adults’ mouths.
I love this recipe because it’s simple. You don’t need to be a baker to make it. You just need a little creativity and some patience. It’s a great way to get the kids involved in the kitchen. They love placing the almond nails. It’s a fun activity.
I encourage you to try this recipe. Customize it with different colors or flavors. Make it your own. And don’t forget to share your creations. Post a photo online and tag me. I’d love to see your spooky snacks.
Happy Halloween!
FAQs
Can I make these ahead of time?
Yes, you can make them up to two weeks in advance. Store them in an airtight container at room temperature. They will stay fresh and crunchy.
What if I don’t have almond slivers?
You can use small pieces of white chocolate, chopped nuts, or even a dab of black icing for the nail. The almond sliver is just for aesthetics, so any small piece will work.
Why did my candy melt clump up?
This usually happens if water gets into the melted candy. Make sure your bowl and utensils are completely dry. Also, avoid overheating the candy. Use low heat and stir frequently.
Can I use homemade royal icing instead?
Yes, you can use royal icing. It takes longer to set than candy melts, so you’ll need to wait a bit longer. Royal icing is softer and chewier, while candy melts are hard and crunchy.
Are these gluten-free?
Standard pretzels are not gluten-free. However, you can use gluten-free pretzel rods to make this recipe gluten-free. Check the labels of all ingredients to ensure they are safe for your needs.
Pin This Recipe!
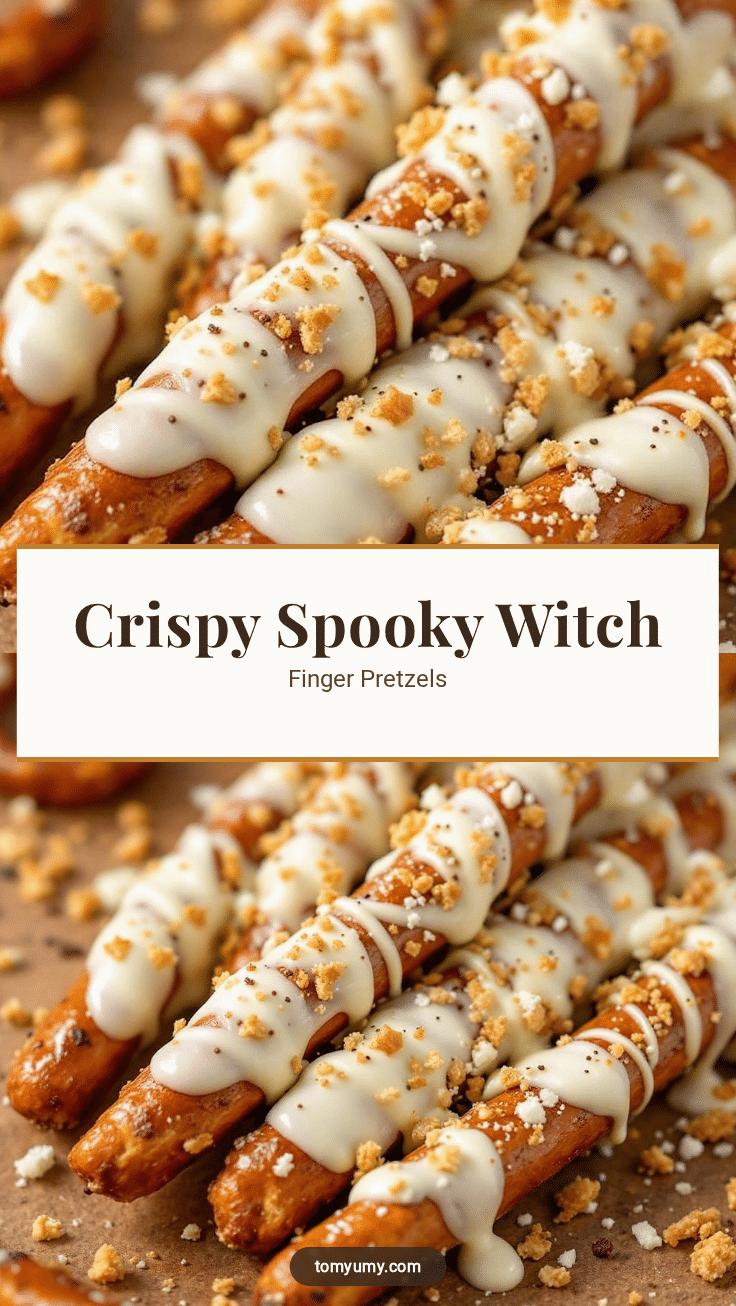
Crispy Spooky Witch Finger Pretzel Rods

A fun and easy Halloween snack made by dipping pretzel rods in colored white candy melts and adding almond slivers for fingernails. These spooky treats are quick to make, crowd-pleasing, and perfect for parties.
- Prep Time: 10 minutes
- Cook Time: 20 minutes
- Total Time: 30 minutes
- Yield: Approximately 12-15 servings (depending on pretzel size)
- Category: Snack
- Cuisine: American
Ingredients
- Pretzel rods (long, thin variety like Snyder’s or store-brand)
- White candy melts or white icing (e.g., Wilton)
- Orange or red gel food coloring
- Almond slivers or sliced almonds (for fingernails)
- Powdered sugar (if making homemade royal icing)
- Milk or water (if making homemade royal icing)
- Vegetable oil (to thin candy melts if needed)
Instructions
- Line a baking sheet with parchment paper and have pretzel rods and almond slivers ready nearby.
- Place white candy melts in a microwave-safe bowl and microwave on high for 30 seconds. Stir well. Continue microwaving in 15-second intervals, stirring between each, until smooth and glossy. Do not overheat.
- If the melted candy is too thick, stir in a tiny drop of vegetable oil until it flows like heavy cream.
- Add a tiny amount of orange or red gel food coloring to the melted candy using a toothpick. Stir until the color is uniform and pale/fleshy.
- Dip one pretzel rod into the colored candy, coating it evenly. Lift it out and let excess drip off, tapping gently on the bowl side.
- Place the coated pretzel onto the prepared baking sheet immediately.
- While the icing is still wet, place an almond sliver at one end of the pretzel and press gently to adhere.
- Let the witch fingers sit at room temperature for 15-20 minutes until the candy is completely hard.
- Serve at room temperature or store in an airtight container.
Notes
Ensure all equipment is completely dry to prevent candy melts from seizing. Work quickly as candy melts set fast. If in a humid environment, candy may not set hard; consider adding a bit more shortening or powdered sugar. Do not refrigerate as condensation can make icing sticky.
Nutrition
- Serving Size: 1 pretzel rod
- Calories: 90
- Sugar: 8
- Sodium: 120
- Fat: 3
- Saturated Fat: 2
- Carbohydrates: 14
- Fiber: 1
- Protein: 2
Keywords: Halloween snacks, witch fingers, pretzel rods, easy Halloween treats, spooky snacks, kid-friendly recipes, party food