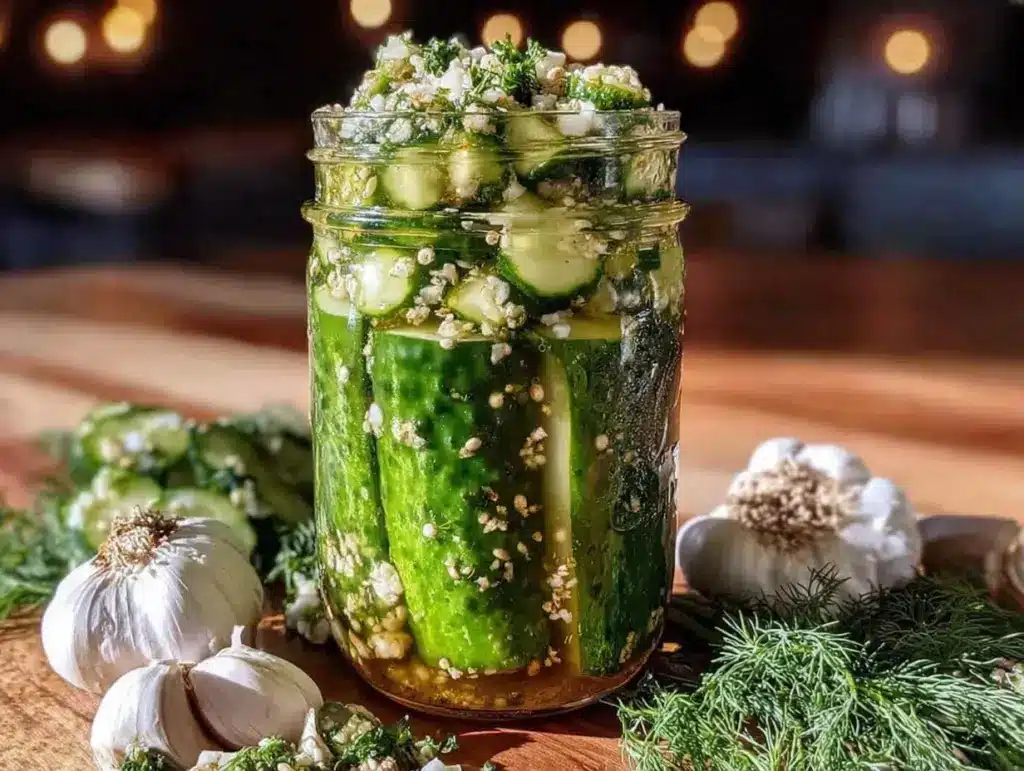
“You seriously have to try these pickles,” my neighbor whispered over the fence one humid summer evening, holding up a Mason jar filled with glistening green spears. I was skeptical—fermented pickles? I’d always thought of pickling as a vinegar-soaked, quick fix, not a slow-cooked flavor journey. But the smell wafting from her jar—sharp garlic, fresh dill, and that unmistakable tang—was hard to ignore. I grabbed a spear, expecting something odd, maybe too sour or weirdly slimy. Instead, it was crisp, vibrant, and bursting with that sour-salty punch you just can’t fake.
That first bite kicked off a minor obsession. I found myself making batch after batch, adjusting the garlic cloves just right, fiddling with the dill quantities, and even experimenting with spices I never thought would work. Honestly, fermentation felt like a tiny science project in my kitchen, but one that rewarded me with crunchy, probiotic-rich pickles that felt as good as they tasted.
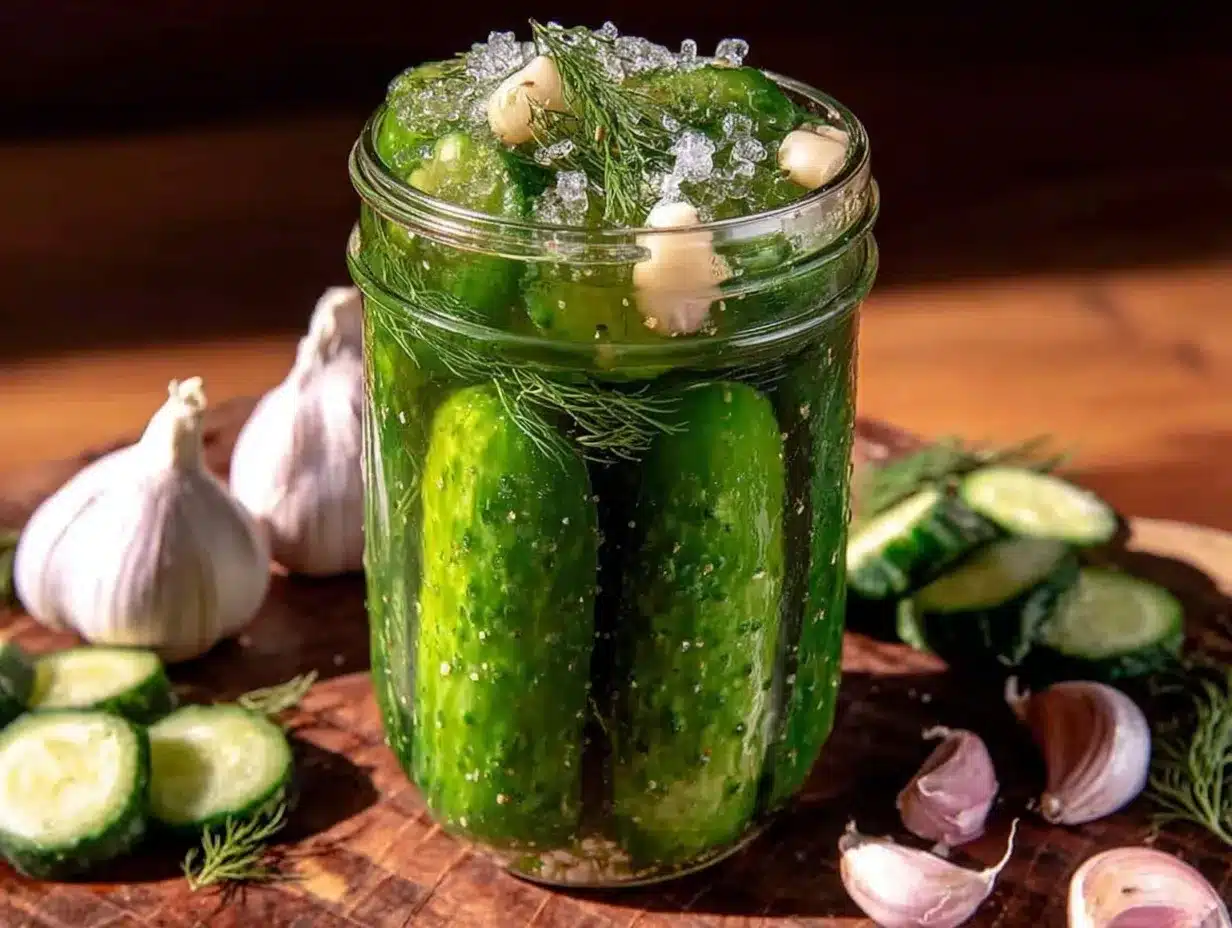
There’s something quietly satisfying about watching cucumbers slowly transform in a Mason jar on your windowsill, bubbles dancing as the natural fermentation takes hold. It’s a mix of patience, simple ingredients, and a little kitchen magic. And the best part? You don’t need any fancy equipment or obscure ingredients—just a handful of staples and a few days of waiting.
Fresh fermented pickles with garlic and dill have stuck around in my routine because they’re not just a condiment; they’re a little ritual—a crunchy, tangy reminder that good things take time, and sometimes the best flavors come from the simplest beginnings.
Why You’ll Love This Recipe
After perfecting this fresh fermented pickles recipe with garlic and dill in a Mason jar, I can tell you it hits a sweet spot between tradition and ease. Whether you’re a fermentation newbie or a seasoned pro, this recipe offers a straightforward, rewarding experience. Here’s why it might just become your new favorite:
- Quick & Easy: The hands-on prep takes just 15 minutes, and then the pickles do their magic—perfect for busy weeknights when you want something homemade but fuss-free.
- Simple Ingredients: No crazy herbs or exotic seasonings. Just fresh cucumbers, garlic, dill, kosher salt, and filtered water—ingredients you likely already have or can easily grab.
- Perfect for Snacking or Gifts: These tangy pickles are a hit at summer barbecues, casual get-togethers, or tucked into sandwiches for a punch of flavor. They also make thoughtful homemade gifts in their cute Mason jars.
- Crowd-Pleaser: Kids and adults alike love the crunch and subtle garlicky zing. Even my pickiest eaters ask for seconds!
- Unbelievably Delicious: The natural fermentation brings a complexity and depth you just can’t get from vinegar pickles. Plus, the garlic and dill combo feels classic but fresh.
This recipe isn’t just about pickling cucumbers—it’s about capturing a crisp, probiotic-rich bite that feels like a little celebration in every mouthful. The Mason jar method keeps things tidy and accessible, so you can join in on the fun without needing specialized gear. It’s a humble kitchen project with seriously tasty results.
What Ingredients You Will Need
This recipe uses simple, wholesome ingredients to deliver bold flavor and satisfying texture without the fuss. Most of these are pantry staples, and the fresh produce is easy to find at any grocery store or farmers market. Here’s what you’ll need:
- Fresh Cucumbers: About 2 pounds (900 g) of pickling cucumbers, preferably firm and small to medium in size for the best crunch.
- Garlic Cloves: 4-6 large cloves, peeled and smashed to release their flavor.
- Fresh Dill: 3-4 sprigs, including stems (the stems add extra dill aroma). If fresh isn’t an option, dried dill can be used but fresh is best.
- Kosher Salt: 3 tablespoons (use pickling or kosher salt without additives to avoid cloudy brine).
- Filtered Water: 4 cups (1 liter), chlorine-free to not interfere with fermentation.
- Optional Spices: 1 teaspoon black peppercorns or mustard seeds for a subtle spice layer.
Pro tip: I prefer Diamond Crystal kosher salt for a reliable salinity level, which helps keep the pickles crunchy. If you want to experiment, you can try swapping some garlic for shallots or add a few slices of fresh jalapeño for a spicy kick.
Equipment Needed
Thankfully, this recipe calls for minimal kitchen tools—perfect if you’re not big on clutter. Here’s what you’ll want:
- Mason Jar: A 1-quart (1-liter) wide-mouth jar works great. The wide mouth makes packing the cucumbers and garlic easier.
- Weight or Fermentation Lid: A fermentation weight or a small glass jar can keep the cucumbers submerged under the brine. If you don’t have a fermentation lid, a regular lid with a loose seal works too.
- Measuring Spoons and Cups: For salt and water measurements.
- Knife and Cutting Board: To trim and prep cucumbers and garlic.
- Bowl: To mix the salt and water into brine before pouring it into the jar.
If you don’t have a fermentation weight, a clean small zip-lock bag filled with water can act as a good substitute to keep the veggies submerged. I’ve tried fancy airlock lids but honestly, a simple jar lid with a little venting works just fine for this small batch.
Preparation Method
- Prepare the Brine (5 minutes): In a bowl, dissolve 3 tablespoons (45 g) of kosher salt in 4 cups (1 liter) of filtered water. Stir well until fully dissolved. This salty brine is the heart of your fermentation, so getting this right is key.
- Clean and Trim Cucumbers (10 minutes): Rinse your cucumbers thoroughly. Cut off the blossom ends (the opposite end from the stem), as they contain enzymes that can soften pickles. Leave them whole or slice lengthwise if you prefer spears.
- Pack the Jar (10 minutes): Place 4-6 smashed garlic cloves and 3-4 fresh dill sprigs into the Mason jar first. Then pack cucumbers tightly but without squishing. Add optional peppercorns or mustard seeds now if using.
- Pour the Brine (2 minutes): Pour the brine over cucumbers, leaving about 1-inch (2.5 cm) headspace at the top of the jar. Tap the jar gently on the counter to release air bubbles.
- Weight Down the Cucumbers (2 minutes): Use a fermentation weight or a small glass insert to keep cucumbers submerged below the brine. This prevents mold and helps good bacteria thrive.
- Cover and Store (2 minutes): Cover the jar loosely with its lid or a cloth secured with a rubber band to allow gases to escape. Store in a cool, dark place (65-75°F / 18-24°C) for 5-7 days.
- Check Daily: Press down cucumbers if they float, and skim any white residue (kahm yeast) gently with a clean spoon if it appears—it’s harmless but better removed.
- Taste Test (starting day 5): After about 5 days, taste a pickle. When it reaches your preferred tanginess and crunch, seal the jar tightly and move it to the fridge to slow fermentation.
Note: Fermentation time varies with temperature and cucumber size. Cooler temps slow the process; warmer speeds it up. Don’t rush it, but don’t forget it either!
Cooking Tips & Techniques
Fermenting pickles can feel a bit mysterious at first, but a few tips make it a breeze and keep your pickles crisp and flavorful:
- Salt Matters: Too little salt means soft or spoiled pickles; too much can stall fermentation. Stick to the 3 tablespoons per quart ratio for a reliable result.
- Keep Cucumbers Submerged: Air exposure invites mold. Use weights or water-filled bags to keep everything underwater.
- Use Fresh, Firm Cucumbers: Older or soft cucumbers won’t hold up well. If you love crunchy pickles, fresh is non-negotiable.
- Be Patient: Let the natural bacteria do their thing. It’s tempting to open the jar early, but giving it time develops that signature tang.
- Watch for Kahm Yeast: This white film is harmless but can alter flavor. Skim it off gently when seen.
- Don’t Tighten the Lid Too Soon: Fermentation produces gases, so loosen the lid or use a cloth cover until ready to refrigerate.
- Experiment Slowly: I once threw in way too much garlic at the start—who knew pickles could taste like a vampire repellent? Dial back if you’re unsure.
Variations & Adaptations
One of the joys of fermenting is how easily you can tweak the recipe to suit your mood or pantry. Here are a few ideas to personalize your Mason jar pickles:
- Spicy Kick: Add sliced jalapeños or a pinch of red pepper flakes for some heat.
- Herb Swap: Try fresh thyme or oregano instead of dill for a different herbal note.
- Garlic-Free: If you’re not a fan or have a garlic sensitivity, swap garlic for sliced onions or leeks.
- Smaller Batch: Use a pint jar (500 ml) for a smaller batch—just halve the ingredients.
- Different Veggies: Extend the brine to carrots, green beans, or radishes for a quick fermented veggie medley.
Personally, I once made a batch with fresh horseradish root for a sharp bite—surprisingly addictive. And if you’re curious, pairing these pickles with the smoky notes in a crispy bacon jalapeño baked mac and cheese is something I highly recommend.
Serving & Storage Suggestions
These fresh fermented pickles are best enjoyed cold and crunchy, straight from the fridge. Their tangy zip makes a great sidekick to sandwiches, burgers, or even as a zesty snack with a cold beer.
To serve, slice them into spears or rounds, depending on your preference. They add a beautiful pop to platters and are surprisingly good nestled alongside creamy dips or cheese boards.
Store pickles in the refrigerator once fermentation reaches your desired taste, ideally in their original Mason jar with the lid tightly sealed. They keep well for up to 2 months, and the flavors continue to mellow and deepen over time.
When reheating or repurposing in cooked dishes, keep in mind that heat will soften their crunch and alter the brightness of the flavor, so fresh is almost always best.
For a tangy twist on a summer picnic, I like pairing these pickles with a slice of the creamy peanut butter French silk pie—the contrast between savory and sweet is oddly satisfying.
Nutritional Information & Benefits
Fresh fermented pickles are more than just tasty—they bring some health perks too. A 1-ounce (28 g) serving typically contains:
| Nutrition | Amount |
|---|---|
| Calories | 5-10 |
| Sodium | 200-300 mg (varies by recipe) |
| Carbohydrates | 1-2 g |
| Fiber | 0.5 g |
| Probiotics | Present (from fermentation) |
The natural fermentation process promotes beneficial bacteria, which can support gut health and digestion. Using fresh garlic and dill adds antioxidants and anti-inflammatory properties. Plus, these pickles are gluten-free, low in calories, and free from artificial preservatives.
Just watch the sodium, especially if you’re on a salt-restricted diet. You can adjust the salt content slightly, but remember it’s crucial for safe fermentation and crispness.
Conclusion
Making fresh fermented pickles with garlic and dill in a Mason jar is a small but rewarding kitchen adventure. This recipe offers an easy way to enjoy crunchy, tangy pickles that taste like time and care went into every bite — because they did. The balance of garlic’s punch and dill’s fresh aroma keeps things lively, and the fermentation adds a probiotic boost you just don’t get from store-bought jars.
Feel free to tweak the garlic, add your favorite spices, or try different veggies alongside cucumbers. That’s the beauty of fermentation: it’s forgiving and flexible, just like your taste buds.
For me, these pickles became a staple not only because they taste great but because they remind me that sometimes patience in the kitchen pays off in ways a quick recipe never can. If you try this recipe, I’d love to hear how your batch turns out or what creative twists you add!
Enjoy the crunchy goodness and the little moments of kitchen magic it brings.
FAQs About Fresh Fermented Pickles with Garlic and Dill
How long does it take for the pickles to ferment?
Fermentation usually takes 5 to 7 days at room temperature (65-75°F / 18-24°C), but you can adjust based on taste. Cooler temps slow the process; warmer temps speed it up.
Can I use regular table salt instead of kosher salt?
It’s best to avoid table salt as it often contains additives that can cloud the brine or affect fermentation. Kosher or pickling salt works best.
What if my pickles get slimy or moldy?
If you notice sliminess or fuzzy mold, discard the batch. White film (kahm yeast) is harmless and can be skimmed off, but fuzzy or colored mold means spoilage.
Do I need a special fermentation lid?
Nope! You can use a regular Mason jar lid loosely screwed on or cover with a cloth secured by a rubber band. Just allow gases to escape during fermentation.
Can I eat the pickles right after making them?
Fresh cucumbers won’t taste like pickles until after fermenting for several days. The longer they ferment, the tangier and more flavorful they become.
Pin This Recipe!
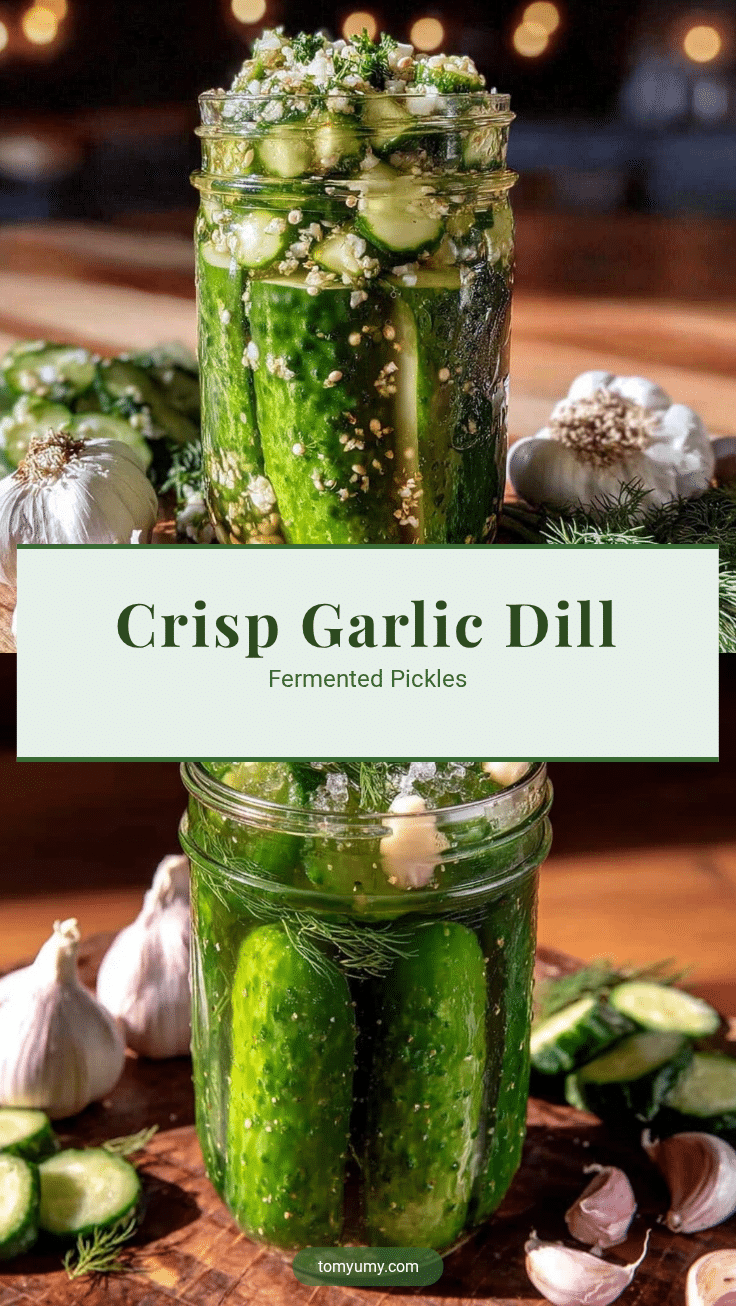
Fresh Fermented Pickles Recipe with Garlic and Dill Easy Homemade Mason Jar Method

This recipe offers a simple and rewarding way to make crunchy, tangy fermented pickles with garlic and dill using a Mason jar. The natural fermentation process creates probiotic-rich pickles with a classic flavor and satisfying crunch.
- Prep Time: 15 minutes
- Cook Time: 5-7 days fermentation
- Total Time: 5-7 days and 15 minutes
- Yield: Approximately 1 quart (4 servings) 1x
- Category: Condiment
- Cuisine: American
Ingredients
- 2 pounds pickling cucumbers (preferably firm and small to medium size)
- 4–6 large garlic cloves, peeled and smashed
- 3–4 sprigs fresh dill, including stems
- 3 tablespoons kosher salt (preferably Diamond Crystal kosher salt)
- 4 cups filtered water (chlorine-free)
- Optional: 1 teaspoon black peppercorns or mustard seeds
Instructions
- Prepare the brine by dissolving 3 tablespoons kosher salt in 4 cups filtered water. Stir until fully dissolved.
- Rinse cucumbers thoroughly and cut off the blossom ends. Leave whole or slice lengthwise into spears as preferred.
- Place 4-6 smashed garlic cloves and 3-4 fresh dill sprigs into a 1-quart wide-mouth Mason jar.
- Pack cucumbers tightly into the jar without squishing. Add optional peppercorns or mustard seeds if using.
- Pour the brine over the cucumbers, leaving about 1-inch headspace at the top of the jar. Tap gently to release air bubbles.
- Use a fermentation weight or small glass insert to keep cucumbers submerged under the brine.
- Cover the jar loosely with its lid or a cloth secured with a rubber band to allow gases to escape.
- Store the jar in a cool, dark place (65-75°F) for 5-7 days.
- Check daily to press down cucumbers if they float and skim off any white residue (kahm yeast) gently with a clean spoon.
- After about 5 days, taste a pickle. When it reaches desired tanginess and crunch, seal the jar tightly and refrigerate to slow fermentation.
Notes
Use kosher or pickling salt without additives to avoid cloudy brine. Keep cucumbers fully submerged to prevent mold. Skim off harmless kahm yeast if it appears. Fermentation time varies with temperature; cooler slows it down, warmer speeds it up. Do not tighten lid too soon to allow gases to escape.
Nutrition
- Serving Size: 1 ounce (28 g)
- Calories: 510
- Sodium: 200300
- Carbohydrates: 12
- Fiber: 0.5
Keywords: fermented pickles, garlic pickles, dill pickles, Mason jar pickles, probiotic pickles, homemade pickles, easy pickles, fermentation