
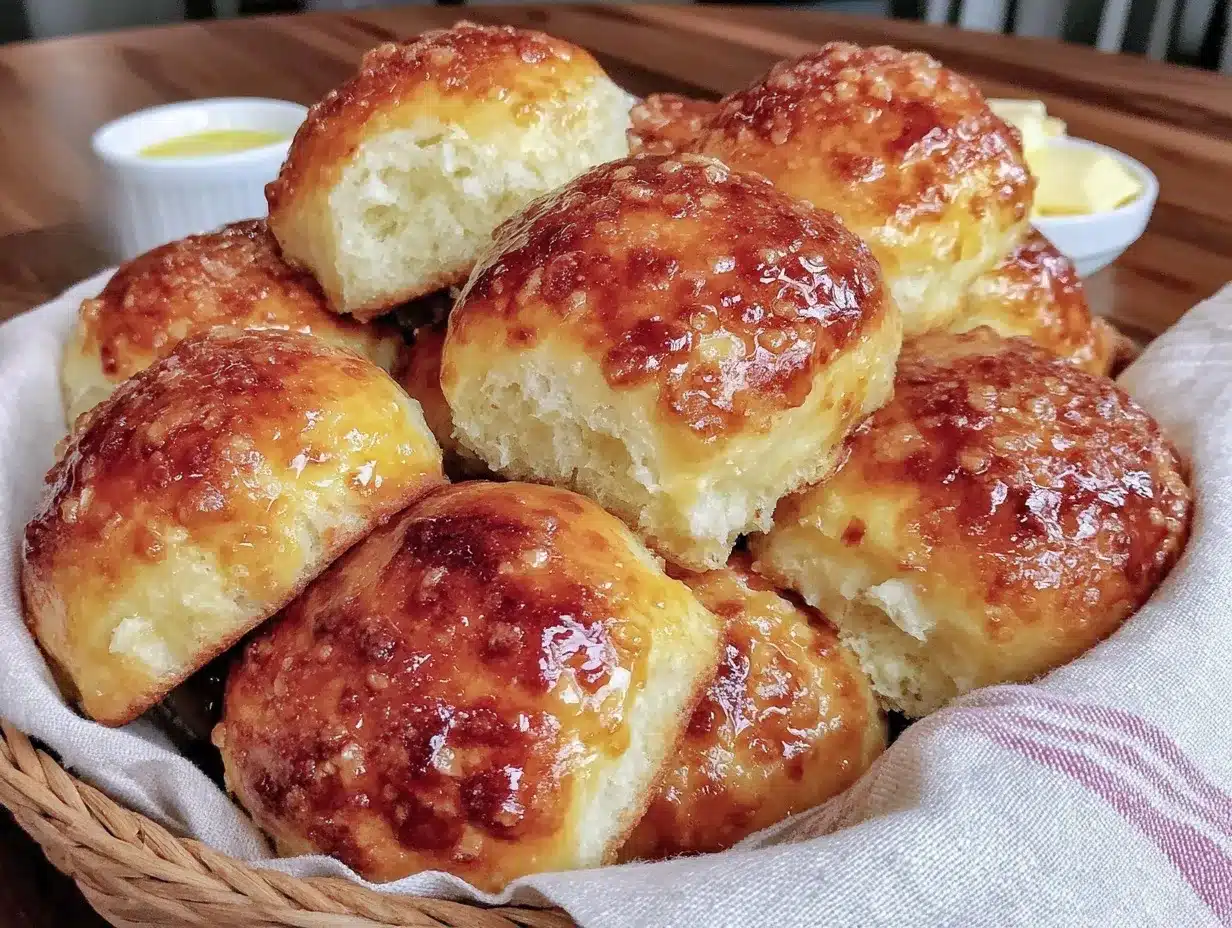
“Are you sure these only take an hour?” my neighbor asked, eyes wide as I pulled a tray of warm, golden rolls from the oven. Honestly, I was just as surprised. One night, after a long day running errands and cooking meals for the family, I realized I’d forgotten to buy bread for dinner. Panic set in, but then I remembered a quick dough recipe I’d been tinkering with. Skeptical but desperate, I threw together what I had on hand, and before I knew it, the whole house smelled like a cozy bakery.
These soft and buttery one-hour dinner rolls from scratch weren’t just a last-minute save—they became a staple. The rolls were pillowy, tender, and buttery without feeling heavy or dense. They paired beautifully with everything from stew to salad, and honestly, they made me wish I had a reason to bake bread every day. There’s something comforting about pulling fresh rolls from the oven, especially when they come together so quickly.
I’ve made these rolls multiple times a week, sometimes switching up the herbs or adding a touch of garlic butter on top. It’s the kind of recipe you trust to come through when you want fresh bread but don’t have hours to spend kneading or waiting for dough to rise. And the best part? No fancy equipment or weird ingredients required.
So if you’re someone who loves the idea of homemade bread but usually shies away from the time commitment, this recipe might just become your new best friend. It’s reliable, buttery, and soft—and it’s proof that baking bread from scratch doesn’t have to be complicated or time-consuming.
There’s a quiet joy in serving these rolls alongside a meal, watching them disappear bite by bite, and knowing you made them yourself. That’s why I keep coming back to this recipe—it’s simple, satisfying, and surprisingly quick.
Why You’ll Love This Recipe
After testing multiple bread recipes, these one-hour dinner rolls stood out for so many reasons. I’ve lost count of how many batches I’ve made, and still, they keep stealing the show at family dinners and casual get-togethers. Here’s why this recipe will quickly become a favorite in your kitchen:
- Quick & Easy: You get soft, buttery rolls in under 60 minutes—perfect when time is short but you want fresh bread.
- Simple Ingredients: No need for specialty flours or fancy add-ins. Most of these staples (like all-purpose flour, yeast, and butter) are probably already sitting in your pantry and fridge.
- Perfect for Any Occasion: Whether it’s a cozy weeknight dinner or a holiday feast, these rolls fit right in—and they’re especially great with soups and hearty mains.
- Crowd-Pleaser: Kids, adults, picky eaters—you name it. The combination of soft texture and rich buttery flavor tends to win everyone over.
- Unbelievably Delicious: The secret is in the buttery dough and the quick rise that keeps the crumb tender and fluffy, making each bite melt in your mouth.
What sets these rolls apart is the balance between speed and texture. Instead of a long, slow rise, the recipe uses a warm water base and a pinch of sugar to give the yeast a fast start, while the butter folded into the dough ensures softness. It’s not just another dinner roll—it’s the one you’ll remember when you want that fresh-from-the-oven feeling without the fuss.
Honestly, after the first try, I found myself dreaming of buttery rolls at all hours and even started pairing them with dishes like a creamy chicken pot pie or the savory jalapeño popper cheesy cornbread casserole for a little Tex-Mex twist. This recipe isn’t just bread; it’s comfort food in roll form.
What Ingredients You Will Need
This recipe relies on straightforward, pantry-friendly ingredients that come together to create rich, tender dinner rolls. Here’s what you’ll need and why each plays its part:
- All-purpose flour (3 ½ cups / 420g): The backbone of the dough, providing structure.
- Active dry yeast (2 ¼ teaspoons / one packet): Gives the rolls their lift and airy crumb.
- Warm water (1 cup / 240ml, about 110°F / 43°C): Activates the yeast—too hot and it kills it, too cold and it won’t wake up.
- Granulated sugar (2 tablespoons): Feeds the yeast, helping it rise quickly and adding subtle sweetness.
- Unsalted butter (4 tablespoons / 56g, melted plus extra for brushing): Adds richness and keeps the rolls tender.
- Salt (1 ½ teaspoons): Balances flavor and strengthens gluten.
- Milk (½ cup / 120ml, warmed): Softens the dough and improves crumb texture. Use whole or 2% for best results.
- Large egg (1, room temperature): Adds richness and helps with browning.
Feel free to substitute with plant-based milk or vegan butter if you want a dairy-free version, although the texture might shift slightly. For a gluten-free option, swapping out the flour requires more adjustments, but you can experiment with a blend designed for yeast breads.
I usually reach for trusted brands like King Arthur flour for consistent results and use Fleischmann’s active dry yeast—it wakes up quickly every time. If you’re ever unsure about your yeast’s freshness, proof it by mixing it with sugar and warm water first; it should bubble and foam in a few minutes.
For a seasonal twist, I sometimes mix in a tablespoon of fresh herbs like rosemary or thyme into the dough. It adds a subtle flavor that turns these rolls into a perfect side for winter meals or even alongside a pumpkin spice molasses crinkle scones brunch spread.
Equipment Needed
Making these soft and buttery dinner rolls from scratch doesn’t require fancy gadgets. Here’s what I use and recommend:
- Mixing bowl: A large one for combining ingredients and letting the dough rise. Glass or stainless steel works well.
- Measuring cups and spoons: For accurate ingredient amounts—especially important with yeast and flour.
- Wooden spoon or silicone spatula: Handy for initial mixing before kneading.
- Baking sheet or round cake pan: A 9×13-inch baking sheet or an 8-inch round pan works great to shape rolls close together so they rise up soft and pull-apart style.
- Kitchen towel or plastic wrap: To cover the dough while it rises and keep it warm.
- Pastry brush: For brushing melted butter on top of the rolls after baking.
- Optional – Stand mixer with dough hook: If you have one, it can make kneading easier and less messy, but hand kneading works perfectly here too.
When I first made these, I didn’t have a stand mixer and just used my hands and a wooden spoon. It took a few minutes more, but kneading the dough is oddly satisfying (and a good arm workout!). If you want a budget-friendly option, a silicone spatula and a sturdy bowl are all you really need.
Preparation Method
- Activate the yeast (5 minutes): In a small bowl, combine warm water (110°F / 43°C), sugar, and active dry yeast. Stir gently and let it sit until foamy and bubbly. This confirms the yeast is alive and ready to work.
- Mix the wet ingredients (3 minutes): In a large mixing bowl, whisk together the warm milk, melted butter, and the egg until combined. Pour in the yeast mixture once it’s foamy.
- Combine dry ingredients (2 minutes): Add the salt and about 3 cups (360g) of the all-purpose flour to the wet ingredients. Stir with a wooden spoon or spatula until a shaggy dough begins to form.
- Knead the dough (8-10 minutes): Turn the dough onto a lightly floured surface. Knead by hand, adding the remaining flour a little at a time, until the dough is smooth, elastic, and slightly tacky but not sticky. You’ll know it’s ready when it springs back slowly after pressing with your finger.
- First rise (20 minutes): Lightly oil the bowl, place the dough inside, and cover with a kitchen towel or plastic wrap. Set in a warm spot and let it rise until doubled in size. It should look puffy and feel airy to the touch.
- Shape the rolls (10 minutes): Punch down the dough gently to release air. Divide into 12 equal pieces (about 2 ounces / 55g each). Roll each piece into a smooth ball by tucking edges underneath. Place them close together on a greased baking sheet or round pan.
- Second rise (10 minutes): Cover loosely and let the rolls rise again until puffy and nearly doubled. This step keeps the rolls soft and fluffy.
- Bake the rolls (15 minutes): Preheat oven to 375°F (190°C). Bake the rolls in the middle rack until golden brown on top, about 15 minutes. They should sound hollow when tapped gently.
- Butter finish (2 minutes): As soon as the rolls come out of the oven, brush generously with melted butter. This gives them a glossy, irresistible finish and extra flavor.
Pro tip: If the dough feels too sticky, add flour sparingly—too much can make the rolls dense. Also, I like to rotate the pan halfway through baking for even browning. The smell when these rolls bake? Honestly, it’s the best kind of kitchen therapy.
Cooking Tips & Techniques
Making soft, buttery dinner rolls in an hour requires a few tricks I’ve picked up over time. Here’s the lowdown:
- Yeast temperature matters: Too hot water will kill the yeast, too cold won’t activate it. Aim for around 110°F (43°C). A quick test with your finger should feel warm but not hot.
- Kneading is key: Knead until the dough is elastic but still slightly tacky. This develops gluten, which traps air and gives the rolls their structure without toughness.
- Don’t skip the second rise: It might seem quick, but that extra proofing step ensures the rolls stay soft and pillowy rather than dense.
- Brush with butter immediately: Right out of the oven, butter soaks into the crust, keeping it tender and adding flavor.
- Use room temperature eggs and milk: This helps the dough come together smoothly and yeast to activate faster.
- Resting dough in a warm spot: If your kitchen is cold, I often place the covered dough near a warm stove or inside an off oven with the light on to speed up rising.
- Common mistake: Adding too much flour when kneading out of fear of stickiness. Remember, a slightly sticky dough leads to softer rolls.
Once, I tried rushing the rise and baked the rolls too early—resulting in dense, tough buns. Lesson learned: patience pays off, even within a tight hour window. Also, multitask by prepping your dinner salad or soup while the dough rises. It saves time and keeps the kitchen buzzing.
Variations & Adaptations
This recipe is a great base for customizing to fit your mood or dietary needs. Some of my favorite variations include:
- Herb butter rolls: Mix 1 tablespoon of finely chopped rosemary or thyme into the melted butter before brushing. Adds an aromatic twist that pairs well with roasted meats or stews.
- Garlic Parmesan rolls: Add 2 cloves minced garlic to the dough and sprinkle grated Parmesan on top before baking. Perfect for garlic lovers and a great side for pasta dishes.
- Whole wheat swap: Replace half the all-purpose flour with whole wheat flour for a nuttier flavor and more fiber. The texture will be slightly denser but still tender.
- Dairy-free version: Use almond milk or oat milk warmed in place of regular milk and vegan butter or coconut oil instead of butter for a plant-based option.
- Sweet rolls: Add 2 tablespoons of honey into the wet ingredients and brush the tops with cinnamon sugar before baking for a lightly sweetened treat.
I once made a batch with fresh herbs and paired them with a warm bowl of the creamy bacon jalapeño popper mac and cheese for a seriously indulgent dinner. The soft rolls helped balance the spice and richness perfectly.
Serving & Storage Suggestions
These dinner rolls are best served warm, ideally fresh out of the oven with a generous pat of butter melting on top. They make a fantastic accompaniment to soups, stews, or roasted meats. For a casual meal, try serving them alongside a mixed green salad or alongside the white chocolate cranberry lemon muffins for a brunch spread that’s both savory and sweet.
To store, place cooled rolls in an airtight container or resealable bag. They keep well at room temperature for up to 2 days. For longer storage, freeze the rolls individually wrapped in plastic wrap and placed in a freezer-safe bag for up to 3 months.
When reheating, wrap the rolls in foil and warm in a 300°F (150°C) oven for 10-12 minutes or microwave briefly wrapped in a damp paper towel to restore softness. You’ll find the flavor and texture improve slightly after reheating, bringing back that fresh-baked feeling.
Nutritional Information & Benefits
Each buttery dinner roll (about 55g) contains approximately:
| Calories | 140 kcal |
|---|---|
| Carbohydrates | 20g |
| Fat | 5g |
| Protein | 3g |
| Sodium | 180mg |
These rolls offer a comforting source of quick energy thanks to the carbs, while the butter and egg provide a touch of protein and healthy fats. Using unsalted butter lets you control sodium levels, and swapping in whole wheat flour boosts fiber.
For those watching gluten, this recipe isn’t gluten-free as-is, but you can experiment with gluten-free flour blends designed for yeast breads. The recipe also contains dairy and eggs, so dairy-free or vegan substitutions are recommended for allergies or dietary preferences.
From a wellness perspective, homemade rolls mean you’re avoiding preservatives and additives found in many store-bought breads. Plus, the joy of baking and sharing fresh bread adds an emotional comfort that’s hard to beat.
Conclusion
Soft and buttery one-hour dinner rolls from scratch bring that warm, homemade feel to your table without hours of waiting or complicated steps. Whether you’re feeding a hungry family or just craving fresh bread on a cozy night, this recipe delivers every time.
Feel free to tweak the flavors or try out the variations to suit your taste. I love how versatile these rolls are—sometimes plain and simple, other times infused with herbs or garlic to complement a meal.
For me, this recipe is a reminder that great homemade bread doesn’t have to be intimidating. It’s about warmth, flavor, and those small moments of satisfaction when you pull a golden roll apart and taste that buttery softness inside.
If you give these rolls a try, I’d love to hear how you make them your own. Share your twists or questions below—because there’s nothing better than swapping notes on bread that feels like a hug from the oven.
Frequently Asked Questions
Can I make these rolls ahead of time?
You can prepare the dough and refrigerate it overnight for a slower rise, then shape and bake the rolls the next day. Just allow them to come to room temperature before baking.
What if I don’t have active dry yeast?
Instant yeast can be used in the same amount but add it directly to the flour instead of proofing it first with water and sugar.
How do I know when the rolls are done baking?
The rolls should be golden brown on top and sound hollow when you tap the bottom gently. Internal temperature of 190°F (88°C) also indicates doneness.
Can I freeze the dough before baking?
Yes, after the first rise, shape the rolls and freeze them on a baking sheet. Once frozen, transfer to a sealed container. Bake from frozen by adding a few extra minutes to the baking time.
What’s the best way to reheat leftover rolls?
Wrap in foil and warm in a 300°F (150°C) oven for 10-12 minutes or microwave wrapped in a damp paper towel for 20-30 seconds to revive softness.
Pin This Recipe!

Soft and Buttery One-Hour Dinner Rolls from Scratch

These soft and buttery dinner rolls come together in under an hour, offering a tender, pillowy texture and rich flavor perfect for any meal.
- Prep Time: 15 minutes
- Cook Time: 15 minutes
- Total Time: 1 hour
- Yield: 12 rolls 1x
- Category: Bread
- Cuisine: American
Ingredients
- 3 ½ cups (420g) all-purpose flour
- 2 ¼ teaspoons (1 packet) active dry yeast
- 1 cup (240ml) warm water (about 110°F / 43°C)
- 2 tablespoons granulated sugar
- 4 tablespoons (56g) unsalted butter, melted plus extra for brushing
- 1 ½ teaspoons salt
- ½ cup (120ml) warm milk (whole or 2%)
- 1 large egg, room temperature
Instructions
- Activate the yeast: In a small bowl, combine warm water (110°F / 43°C), sugar, and active dry yeast. Stir gently and let it sit until foamy and bubbly, about 5 minutes.
- Mix the wet ingredients: In a large mixing bowl, whisk together warm milk, melted butter, and the egg until combined. Pour in the yeast mixture once it’s foamy.
- Combine dry ingredients: Add salt and about 3 cups (360g) of the all-purpose flour to the wet ingredients. Stir with a wooden spoon or spatula until a shaggy dough forms.
- Knead the dough: Turn dough onto a lightly floured surface. Knead by hand, adding remaining flour a little at a time, until dough is smooth, elastic, and slightly tacky but not sticky, about 8-10 minutes.
- First rise: Lightly oil a bowl, place dough inside, cover with kitchen towel or plastic wrap, and let rise in a warm spot until doubled in size, about 20 minutes.
- Shape the rolls: Punch down dough gently to release air. Divide into 12 equal pieces (about 2 ounces / 55g each). Roll each piece into a smooth ball and place close together on a greased baking sheet or round pan.
- Second rise: Cover loosely and let rolls rise again until puffy and nearly doubled, about 10 minutes.
- Bake the rolls: Preheat oven to 375°F (190°C). Bake rolls on middle rack until golden brown, about 15 minutes. Rolls should sound hollow when tapped.
- Butter finish: Brush rolls generously with melted butter immediately after baking for a glossy finish and extra flavor.
Notes
Use water at about 110°F to activate yeast properly. Knead until dough is elastic but slightly tacky for best texture. Don’t skip the second rise to keep rolls soft and fluffy. Brush with butter immediately after baking for a tender crust. If dough is too sticky, add flour sparingly to avoid dense rolls. Rotate pan halfway through baking for even browning.
Nutrition
- Serving Size: 1 roll (about 55g)
- Calories: 140
- Sodium: 180
- Fat: 5
- Carbohydrates: 20
- Protein: 3
Keywords: dinner rolls, quick bread, buttery rolls, soft rolls, homemade bread, easy bread recipe, yeast rolls


