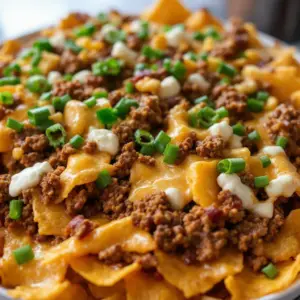
Third time in a season and the cheese sauce is still splitting. Honestly, I don’t know if I’m proud of that or horrified. I stood over the double boiler, whisking furiously while the clock on the microwave ticked closer to kickoff. The first batch was too thin. The second one seized up into a weird, rubbery lump that I had to scrape into the trash bin with a spatula that felt like it was judging me. Now, here I am, staring at a pot of cheddar and cream cheese that looks suspiciously like it’s about to curdle again. But this time, I added a pinch of sodium citrate. It’s that weird, salty powder you order online because you refuse to accept mediocrity in your game day spread. And you know what? It held. It held perfectly.
People think a tailgate is just about throwing meat on a grill and hoping for the best. They’re wrong. It’s about the architecture of comfort. It’s about creating a station where people can build their own little edible worlds before the first kickoff whistle blows. I’ve spent years perfecting this setup, not because I’m a professional caterer, but because I once watched my friend try to balance a hot dog, a beer, and a plate of cold, congealed chips while standing next to a generator. It was tragic. It was also the moment I decided that our nachos would never be cold, never be soggy, and always be hot enough to melt your face off.
The obsession with the perfect nacho bar isn’t just about the food. It’s about the chaos. It’s about the way the smell of cumin and toasted corn drifts through the parking lot, cutting through the exhaust fumes and the distant roar of the stadium. It’s the quiet realization that no matter how the team plays, if the nachos are good, everyone wins. That’s the secret. It’s not about the score. It’s about the shared experience of digging in with your hands, ignoring the mess, and knowing that you made something that brings people together. And if you’re lucky, you might even have enough cheese sauce left over for the drive home.
Why You’ll Love This Recipe
Let’s be real for a second. Most nacho recipes are just an excuse to dump a bag of chips on a tray and throw some pre-shredded cheese on top. We’ve all been there. It’s fast, sure, but it’s also a texture nightmare. The cheese clumps. The chips get soggy within minutes. You end up eating lukewarm dairy and regret. This Ultimate Loaded Tailgate Nacho Bar is different because it treats nachos like a serious culinary event, not an afterthought. I’ve tested this method in freezing parking lots, humid garages, and crowded living rooms, and it consistently delivers that perfect balance of crunch, cream, and heat.
- Quick & Easy Assembly: While the components take a little prep, the actual assembly is a breeze. You can have a massive spread ready in under 30 minutes, which is perfect for busy weeknights or last-minute cravings when guests show up unexpectedly.
- Simple Ingredients: No fancy grocery trips needed. You likely already have the chips, beans, and basic spices in your pantry. The magic comes from the technique, not exotic imports.
- Perfect for Game Day: This is the ultimate crowd-pleaser for tailgates, Super Bowl parties, or just a cozy night in with a blanket and a remote. It feeds a crowd without stressing you out.
- Crowd-Pleaser Status: Whether you have picky eaters or adventurous foodies, this bar has something for everyone. The DIY element lets people customize their bites, which always gets rave reviews from kids and adults alike.
- Unbelievably Delicious: The texture and flavor combo is next-level comfort food. The warm, spicy beef contrasts with the cool, creamy guacamole and the sharp, melted cheese. It’s the kind of dish that makes you close your eyes after the first bite.
What makes this recipe stand out from the rest is the separation of components. Instead of baking everything together into a soggy mess, we keep the toppings distinct until the last moment. This ensures every chip stays crunchy until it hits your mouth. It’s a small detail, but it changes everything. This isn’t just another version of nachos; it’s the best version because it respects the integrity of each ingredient.
What Ingredients You Will Need
This recipe uses simple, wholesome ingredients to deliver bold flavor and satisfying texture without the fuss. The key is quality. Since there aren’t many components, each one needs to shine. You don’t need gourmet supplies, but you do need to pay attention to freshness, especially with your produce and dairy. Here is what you need to build the ultimate foundation for your game day feast.
For the Base
- Restaurant-style tortilla chips: You want thick, sturdy chips that can hold weight. Look for brands like Mission or Tostitos Restaurant Style. Avoid the thin, delicate ones unless you plan to eat immediately.
For the Warm Layers
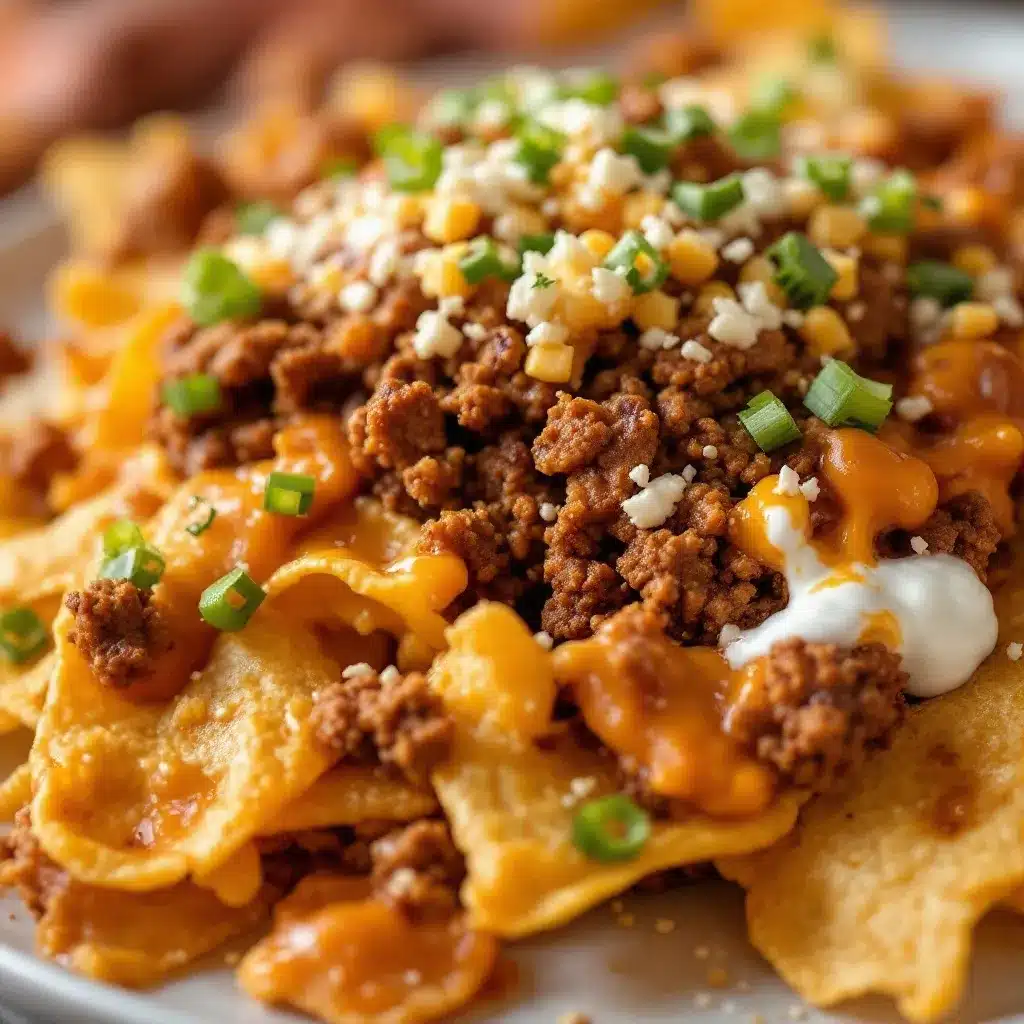
- Ground beef: 1 pound of 80/20 ground chuck. The fat content is crucial for flavor. Lean beef will be dry and bland.
- Onion: 1 medium yellow onion, finely diced. Sweetness balances the spice.
- Garlic: 3 cloves, minced. Fresh is non-negotiable here.
- Taco seasoning: 1 packet (1 oz) of your favorite brand, or homemade mix (see tips below).
- Black beans: 1 can (15 oz), drained and rinsed. Adds protein and bulk.
- Chili sauce: ½ cup. This adds moisture and depth to the meat mixture.
For the Cheese Sauce
- Cheddar cheese: 2 cups, freshly shredded. Block cheese is a must. Pre-shredded cheese contains anti-caking agents that prevent smooth melting.
- Cream cheese: 4 oz, softened. This adds creaminess and stability.
- Heavy cream: ½ cup. Adjust as needed for consistency.
- Jalapeño powder: 1 teaspoon. For a gentle heat without chunks.
- Garlic powder: ½ teaspoon. To round out the flavor.
For the Cool Toppings
- Avocados: 2 ripe avocados. They should yield slightly to pressure but not feel mushy.
- Tomatoes: 2 medium Roma tomatoes, diced. Remove seeds to prevent sogginess.
- Cilantro: ½ cup, chopped. Fresh leaves only.
- Sour cream: 1 cup. Full fat for the best texture.
- Green onions: 4 stalks, sliced thinly. For a sharp, fresh bite.
I personally recommend using a sharp white cheddar for the sauce. It has a stronger flavor that cuts through the richness of the cream cheese. If you can’t find it, a mix of sharp cheddar and Monterey Jack works well too. Also, don’t skip the jalapeño powder in the cheese sauce. It adds a subtle heat that permeates the entire dish, rather than just hitting you in one spot.
Equipment Needed
You don’t need a professional kitchen to make this, but having the right tools makes the difference between a disaster and a delight. A large skillet is essential for browning the beef evenly. I use a cast-iron skillet because it holds heat well, but a non-stick pan works fine too. For the cheese sauce, a small saucepan over low heat is your best friend. High heat will burn the dairy, and nobody wants burnt cheese sauce. A whisk is crucial for keeping the sauce smooth. If you don’t have one, a fork will do in a pinch, but you’ll work harder.
For serving, think about logistics. Large baking sheets or platters are ideal. If you’re tailgating, consider using a slow cooker or a chafing dish to keep the warm components hot. I’ve used a standard slow cooker for the meat and beans, and it keeps everything at the perfect temperature for hours. For the cheese sauce, a small thermos or a insulated container works surprisingly well. Just make sure you stir it occasionally to prevent a skin from forming. Budget-friendly options include using disposable aluminum trays for the toppings if you’re worried about cleanup. It’s not elegant, but it’s effective.
Preparation Method
Getting started is the hardest part, but once you’re in the rhythm, it flows. First, preheat your oven to 350°F (175°C) if you plan to warm the chips slightly, though this is optional. The real work begins with the meat. In a large skillet over medium-high heat, add the ground beef. Break it up with a wooden spoon as it cooks. You want to see the meat change from pink to brown. This should take about 8-10 minutes. If there’s excess grease, drain it, but leave a little bit for flavor.
Once the meat is browned, add the diced onion and minced garlic. Cook for another 3-4 minutes until the onion is translucent and fragrant. This step builds the flavor base. Do not rush this. If the onion is raw, the whole dish will taste sharp and unbalanced. Next, stir in the taco seasoning, black beans, and chili sauce. Mix everything well. Let this simmer on low heat for about 10 minutes. The flavors need time to meld. The sauce should thicken slightly, coating the beans and meat. Taste it now. Add salt if needed, but remember the cheese will be salty too.
While the meat simmers, make the cheese sauce. In a small saucepan over low heat, combine the softened cream cheese, heavy cream, jalapeño powder, and garlic powder. Whisk constantly until the cream cheese is melted and the mixture is smooth. This takes about 5 minutes. Do not let it boil. Then, gradually add the shredded cheddar cheese, a handful at a time, whisking until fully melted before adding more. This gradual process is key to a smooth sauce. If you dump it all in at once, it will clump. The sauce is ready when it’s glossy and coats the back of a spoon. Remove from heat immediately.
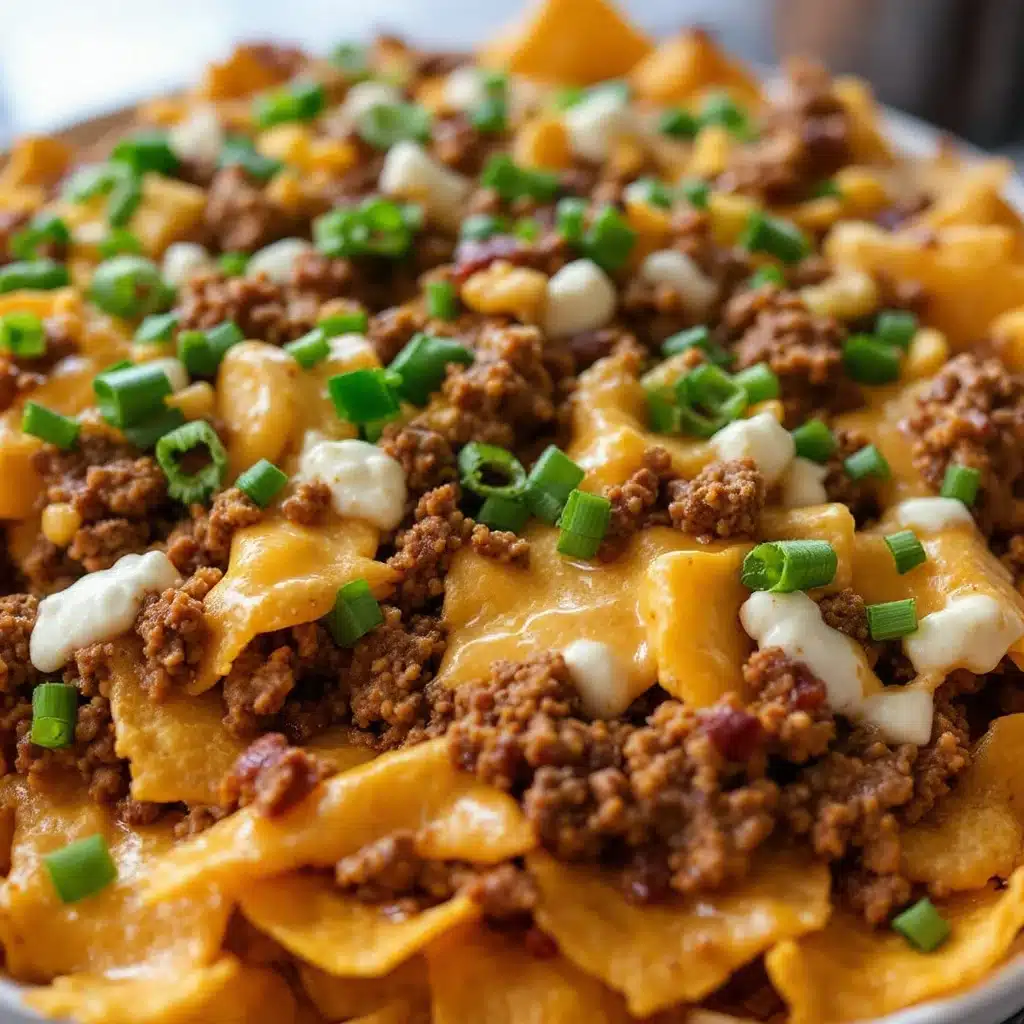
Now, assemble. If you’re serving immediately, spread a layer of chips on a large platter. Spoon a generous amount of the meat mixture over the chips. Sprinkle with half of the cheese sauce. Repeat the layers. If you’re tailgating or baking, you can spread everything in a single layer on baking sheets. Bake for 10-12 minutes until the cheese is bubbly. Remove from oven and top with the remaining cheese sauce. Let it sit for 2 minutes to set slightly.
Finally, add the cold toppings. Arrange the guacamole, sour cream, diced tomatoes, cilantro, and green onions in separate bowls around the nachos, or dollop them directly on top. Serve immediately. The contrast between the hot, cheesy chips and the cool, fresh toppings is what makes this recipe sing. Eat with your hands. It’s the law.
How do I keep the nachos from getting soggy?
The key is layering and timing. Avoid putting wet toppings like salsa or guacamole on the chips before baking. Add them after. If you’re making a large batch, consider making two smaller batches rather than one huge one, so the bottom chips don’t get weighed down.
Can I make the cheese sauce ahead of time?
Yes, but it will thicken as it cools. Reheat it gently over low heat, adding a splash of milk or cream to loosen it back up. Stir frequently to prevent scorching.
What kind of chips work best?
Restaurant-style tortilla chips are the gold standard. They are thick, sturdy, and have a good corn flavor. Avoid thin chips or kettle chips unless you want a very different texture. The goal is a chip that can support the toppings without breaking.
Cooking Tips & Techniques
I’ve learned a lot of these lessons the hard way, usually involving a ruined dinner and a very disappointed spouse. The biggest mistake people make with cheese sauce is using high heat. Dairy is delicate. It separates if you push it too hard. Keep your heat low and steady. If your sauce breaks (looks oily and curdled), don’t panic. Add a tablespoon of ice water and whisk vigorously. It often comes back together.
Another pro tip is to toast your spices. If you’re making your own taco seasoning, toast the cumin and chili powder in a dry pan for 30 seconds before grinding them. It wakes up the oils and adds a depth of flavor that store-bought packets just can’t match. It’s a small step, but it elevates the entire dish.
When browning the beef, don’t stir it constantly. Let it sear. You want some crispy bits at the bottom of the pan. Those browned bits are pure flavor. Scrape them up when you add the onions. Also, drain the grease, but not all of it. A little fat carries flavor. If you drain it completely, the meat will be dry.
Multitasking is your friend here. While the meat is browning, start chopping your veggies. While the cheese sauce is melting, assemble your serving bowls. The goal is to have everything ready to go at the same time. There is nothing worse than cold nachos. If you’re serving a large crowd, consider using a slow cooker for the meat and beans, and a separate insulated container for the cheese sauce. This keeps everything hot without overcooking.
Finally, taste as you go. Adjust the seasoning at every stage. The meat needs salt. The cheese sauce needs salt. The guacamole needs lime. Don’t assume the final dish will be balanced. Tweaking each component ensures the final result is cohesive.
Variations & Adaptations
One of the best things about a nacho bar is its flexibility. You can adapt this recipe to fit any diet or preference. For a vegetarian version, swap the ground beef for a plant-based crumble or extra black beans and corn. I’ve used Beyond Meat with great success, but simply doubling the beans and adding some diced mushrooms works well too. The mushrooms add a meaty texture that many people miss.
For a lighter option, use baked tortilla chips and Greek yogurt instead of sour cream. You can also skip the cheese sauce entirely and opt for a drizzle of ranch or a light sprinkle of cotija cheese. It’s not traditional, but it’s delicious. If you’re watching your sodium, use low-sodium beans and skip the added salt in the seasoning. Fresh herbs and citrus juice can compensate for the lack of salt.
For a spicy kick, add diced jalapeños to the meat mixture, or use a spicy pepper jack cheese in the sauce. I once tried adding chorizo to the beef, and it was a game-changer. The paprika and garlic in the chorizo added a smoky depth that paired perfectly with the cheese. If you’re feeling adventurous, try adding pulled pork or shredded chicken for a different protein profile.
Allergen-wise, this recipe is easily adaptable. Use gluten-free chips for a gluten-free option. Swap dairy for vegan cheese alternatives, though be aware that melting properties vary. I’ve tested Daiyo and Follow Your Heart with decent results, but they don’t melt quite the same way. Add them at the very end and let residual heat melt them. For a nut-free option, ensure your chips are certified nut-free, as cross-contamination is possible in some factories.
Serving & Storage Suggestions
Serving these nachos is half the fun. Arrange the components in a way that encourages interaction. Place the hot platters in the center and surround them with bowls of cold toppings. This creates a visual contrast and makes the spread look abundant. Use tongs or large spoons for the toppings to keep hands clean. A small plate for each guest is helpful, but let them build their own masterpiece.
Pair these with a cold beverage. Beer is the obvious choice, but a crisp lager or a light ale works best. For non-drinkers, iced tea with lemon or a sparkling water with lime cuts through the richness of the cheese. If you’re serving these as part of a larger meal, consider lighter sides like a green salad or fresh fruit. The nachos are heavy, so balance is key.
If you have leftovers, store them in an airtight container in the refrigerator for up to 3 days. The chips will lose their crunch, but the flavors remain good. To reheat, spread them on a baking sheet and warm in a 350°F oven for 10 minutes. Avoid the microwave, as it makes the chips soggy. The cheese sauce can be reheated gently on the stove or in the microwave, stirring frequently.
Flavors actually develop over time. The spices in the meat mixture continue to infuse the beans and chips, making the leftovers taste even more like the original. It’s not the same texture, but it’s still delicious. Don’t waste them. Reheat and enjoy.
Nutritional Information & Benefits
While nachos are indulgent, they can be part of a balanced meal if you pay attention to portions. The ground beef provides protein and iron, while the black beans add fiber and plant-based protein. The cheese offers calcium, though it is also high in saturated fat. Using lean beef and reducing the cheese amount can lower the calorie count. The fresh toppings like tomatoes, cilantro, and avocados add vitamins and healthy fats.
Avocados are a great source of monounsaturated fats, which are good for heart health. Tomatoes provide lycopene, an antioxidant linked to reduced risk of chronic diseases. Cilantro adds a fresh, detoxifying element. While this recipe is not low-carb or keto-friendly due to the chips and beans, it can be modified for those diets. For keto, use pork rinds or cheese chips instead of tortilla chips. For low-carb, increase the vegetable content and reduce the beans.
From a wellness perspective, this recipe is about enjoyment. Food is meant to be shared and savored. Don’t stress over every calorie. Focus on the quality of ingredients and the joy of eating. Moderation is key, and this recipe is perfect for special occasions or occasional treats. If you’re watching your sodium, opt for low-sodium versions of canned goods and seasonings.
Conclusion
This Ultimate Loaded Tailgate Nacho Bar is more than just a snack. It’s a centerpiece. It’s a way to bring people together, to share laughter and food and memories. I hope you try this recipe and make it your own. Experiment with the toppings, adjust the spice level, and find what works for your family. The beauty of this dish is its adaptability.
Don’t be afraid to make mistakes. The first time I made this, I burned the cheese sauce. The second time, I forgot the salt. But by the third time, I found my rhythm. And now, it’s a staple. I love this recipe because it’s forgiving. It’s messy. It’s fun. It’s perfect for game day, for parties, or for a quiet night in. So grab your chips, melt your cheese, and get ready to eat.
Let me know how it turns out for you. Share your variations in the comments below. Did you add chorizo? Did you use a different cheese? I want to hear about it. And if you make this, tag me on social media. I love seeing your creations. Happy eating!
Frequently Asked Questions
Can I use pre-shredded cheese for the sauce?
It’s not recommended. Pre-shredded cheese contains cellulose, which prevents clumping but also prevents smooth melting. Your sauce will be grainy and likely separate. Always shred cheese from a block for the best results.
How do I make the cheese sauce spicier?
Add diced fresh jalapeños to the cheese sauce, or use a spicy pepper jack cheese. You can also add a dash of cayenne pepper or hot sauce. Start with a small amount and taste as you go.
Can I freeze the nachos?
Freezing nachos is not ideal. The chips will become soggy when thawed and reheated. It’s best to freeze the meat and cheese sauce separately, then assemble and bake when ready to eat.
What can I use instead of ground beef?
You can use ground turkey, ground chicken, or a plant-based alternative. For a vegetarian option, use black beans, corn, and mushrooms. Adjust the cooking time and seasoning as needed.
How long do the toppings stay fresh?
The guacamole and sour cream should be used immediately to prevent browning or separation. The diced tomatoes and onions can be prepped a few hours ahead and stored in the refrigerator. The cilantro should be chopped just before serving.
Pin This Recipe!
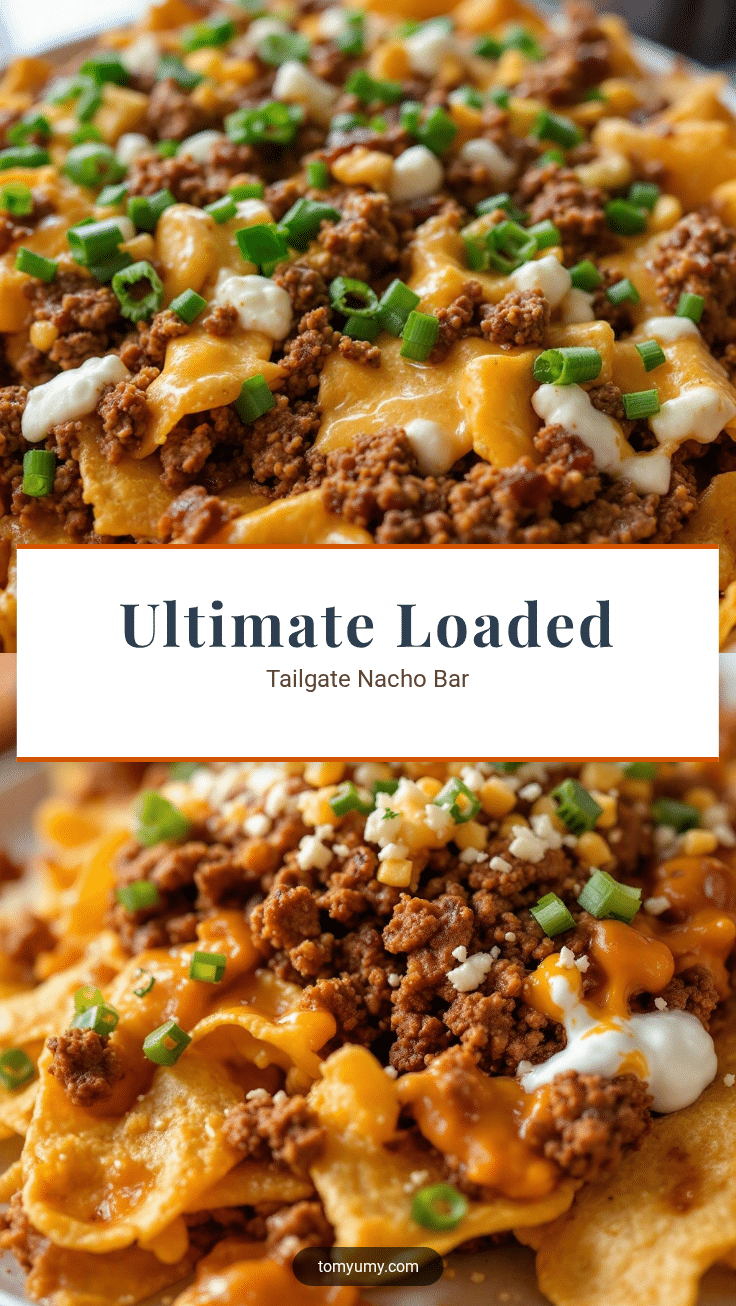
Ultimate Loaded Tailgate Nacho Bar: Best Game Day Snack
A crowd-pleasing, layered nacho bar featuring homemade cheese sauce, seasoned beef, and fresh toppings, designed to stay crunchy and hot for game day gatherings.
- Prep Time: 20 minutes
- Cook Time: 25 minutes
- Total Time: 45 minutes
- Yield: 8 servings 1x
- Category: Appetizer
- Cuisine: American
Ingredients
- 1 pound 80/20 ground chuck
- 1 medium yellow onion, finely diced
- 3 cloves garlic, minced
- 1 packet (1 oz) taco seasoning
- 1 can (15 oz) black beans, drained and rinsed
- ½ cup chili sauce
- 2 cups freshly shredded cheddar cheese
- 4 oz cream cheese, softened
- ½ cup heavy cream
- 1 teaspoon jalapeño powder
- ½ teaspoon garlic powder
- 2 ripe avocados
- 2 medium Roma tomatoes, diced
- ½ cup fresh cilantro, chopped
- 1 cup full-fat sour cream
- 4 stalks green onions, sliced thinly
- Restaurant-style tortilla chips
Instructions
- Preheat oven to 350°F (175°C) if warming chips.
- In a large skillet over medium-high heat, brown the ground beef, breaking it up with a wooden spoon (8-10 minutes). Drain excess grease, leaving a little for flavor.
- Add diced onion and minced garlic to the beef; cook until translucent and fragrant (3-4 minutes).
- Stir in taco seasoning, black beans, and chili sauce. Simmer on low heat for 10 minutes until thickened. Taste and adjust salt.
- In a small saucepan over low heat, whisk cream cheese, heavy cream, jalapeño powder, and garlic powder until smooth (5 minutes).
- Gradually add shredded cheddar cheese, a handful at a time, whisking until fully melted and glossy. Remove from heat.
- Assemble by spreading chips on a platter or baking sheet. Layer with meat mixture and half the cheese sauce.
- If baking, bake for 10-12 minutes until cheese is bubbly. Remove and top with remaining cheese sauce.
- Serve immediately with cold toppings (guacamole, sour cream, tomatoes, cilantro, green onions) on the side or dolloped on top.
Notes
Use block cheese and shred it yourself to avoid anti-caking agents that prevent smooth melting. Keep heat low when making cheese sauce to prevent separation. Add cold toppings after baking to maintain chip crunchiness.
Nutrition
- Serving Size: 1 plate
- Calories: 650
- Sugar: 4
- Sodium: 980
- Fat: 42
- Saturated Fat: 18
- Carbohydrates: 45
- Fiber: 6
- Protein: 22
Keywords: tailgate nachos, game day snack, loaded nachos, cheese sauce recipe, party food, crowd pleaser, easy nachos