I assumed that melting candy corn into marshmallow fluff was a culinary crime against everything I knew about dessert. It looked like a neon orange sludge waiting to happen, and honestly, I almost threw the whole pot in the trash before it even hit the pan. It took about five minutes for that assumption to shatter completely when the smell of toasted sugar and vanilla finally cut through the visual chaos.
You know how some recipes just feel like they were invented by a committee? This one didn’t. This one feels like it was invented by someone who had too much sugar in their pantry and not enough patience for a proper bake. I was standing in my kitchen, staring at a bag of Halloween candy that had survived the trick-or-treaters only to be abandoned in a bowl, wondering if I could salvage it without looking like a total hack.
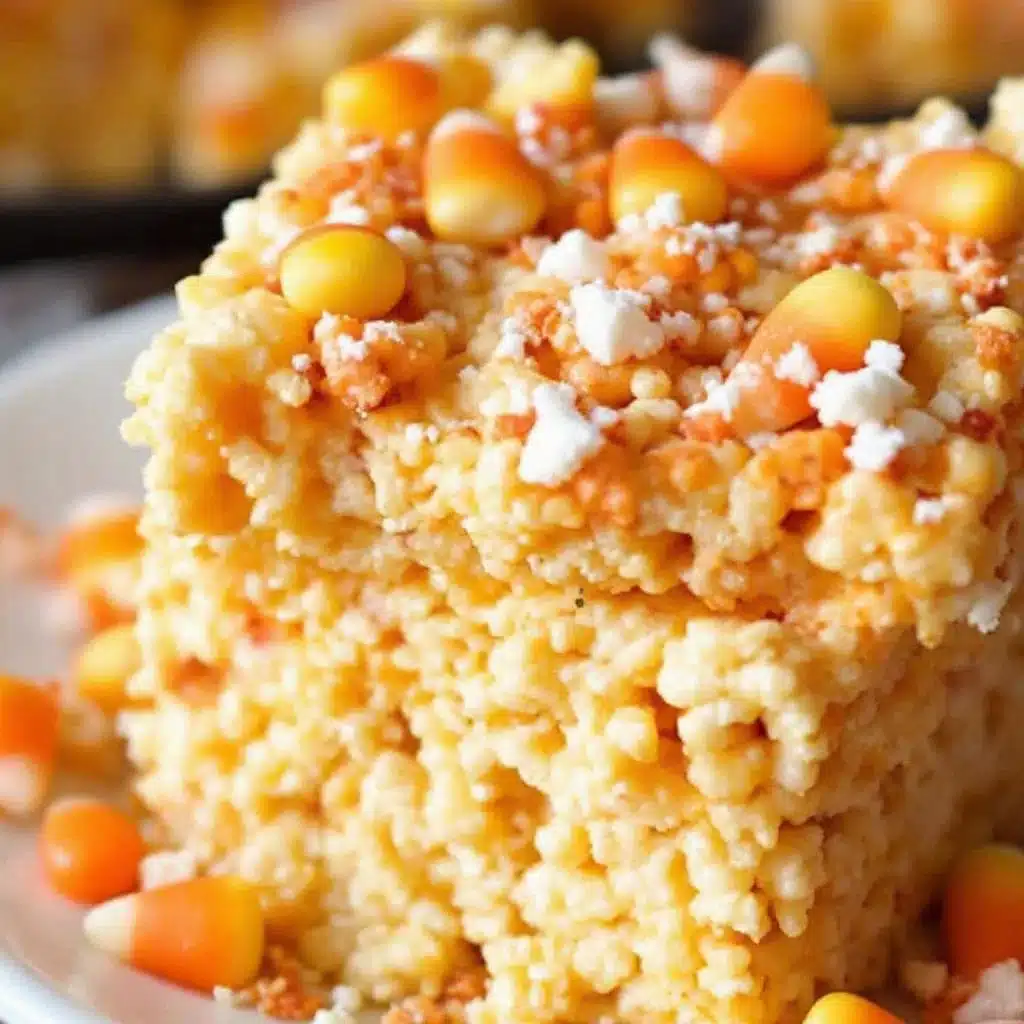
The contrast between the expected disaster and the actual result is what keeps me coming back to this. I expected a sticky, sweet mess that would stick to my teeth and my soul. Instead, I got these crispy, golden squares that somehow balance the tangy orange, the creamy white, and the tart yellow into something that actually tastes like autumn.
It’s weird how a little bit of panic can lead to the best snacks. I was trying to avoid the usual pumpkin spice overload that takes over every grocery store in October. I wanted something crunchy. Something that didn’t require an oven or a mixer. Just simple, chaotic magic.
Now, every year when I see that bag of candy corn, I don’t throw it away. I melt it down. It’s not just about using up leftovers; it’s about that first bite where the crunch gives way to the gooey center, and you realize you’ve accidentally created the perfect party snack. It’s messy, it’s loud, and it’s undeniably good.
Why You’ll Love This Recipe
This isn’t just another marshmallow treat. It’s a texture explosion that hits all the right notes for fall gatherings. Here is why this recipe has earned a permanent spot in my recipe rotation:
- Quick & Easy: You can have these ready in under 15 minutes. No baking required, no preheating the oven, and no dirty dishes pile higher than your sink. It’s perfect for those last-minute weeknight cravings or when you need a sweet treat for a school party.
- Simple Ingredients: You likely already have everything in your kitchen. Butter, marshmallows, cereal, and candy corn. No fancy grocery trips needed. If you have a pantry, you have the ingredients for this.
- Perfect for Fall Parties: Whether it’s a Halloween gathering, a Thanksgiving tailgate, or just a cozy movie night, these treats fit right in. They look festive without trying too hard.
- Crowd-Pleaser: Kids love the colors, and adults love the nostalgia. It’s one of those rare dishes where the pickiest eaters and the food critics will both reach for a second piece.
- Unbelievably Delicious: The texture is next-level. The candy corn adds a slight chewiness that contrasts with the crispy rice cereal. It’s comfort food reimagined—simpler, faster, but with that same soul-soothing satisfaction.
What makes this recipe different from the rest is the layering of flavors. Most rice krispie treats are one-note sweet. This version has a bit of tang from the orange candies and a creamy depth from the buttery marshmallow. It’s not just a recipe; it’s a experience. It’s the kind of treat that makes you close your eyes after the first bite. It’s perfect for impressing guests without stress, or turning a simple afternoon snack into something memorable.
What Ingredients You Will Need
This recipe uses simple, wholesome ingredients to deliver bold flavor and satisfying texture without the fuss. The beauty of this snack lies in its accessibility. You don’t need specialty stores or hard-to-find items. Just standard pantry staples and a bag of seasonal candy.
Here is what you need to gather before you start:
- Unsalted Butter: 1/2 cup (1 stick or 113 grams). I prefer using unsalted so I can control the saltiness. If you only have salted, reduce any added salt in the recipe. Room temperature butter melts faster and more evenly.
- Marshmallows: 10 ounces (about 3 cups). Standard large marshmallows work best. You can use a mix of white and vanilla for a richer flavor, but plain white is classic. Avoid the toasted ones for this, as they can change the color.
- Rice Krispies Cereal: 6 cups (approx. 170 grams). Fresh cereal is key. If your cereal is a few months old, it might lose its crunch. Make sure it’s crispy and dry before adding it to the mix.
- Candy Corn: 1 cup (approx. 100 grams). This is the star of the show. You can use standard candy corn or mini candy corn. Mini pieces distribute more evenly, but standard pieces give you those big, colorful chunks.
- Vanilla Extract: 1 teaspoon. Just a little bit to enhance the sweetness without overpowering the candy flavors.
- Salt: A pinch. This is crucial. It cuts through the sugar and brings out the buttery notes. Don’t skip it.
For the best texture, I recommend using a high-quality butter. Brands like Kerrygold or Plugra add a nice richness. If you are dairy-free, you can use a plant-based butter stick, but avoid spreads that are high in water content, as they can make the treats greasy.
If you want to add a twist, you can toss in some white chocolate chips. They melt into the marshmallow mix and add another layer of creaminess. But honestly, the simpler it is, the better it tastes. The focus should always be on that crispy-to-chewy ratio.
Equipment Needed
You don’t need a lot of fancy gear for this. Just the basics you probably already own.
- Large Saucepan: A 3-quart or 4-quart heavy-bottomed saucepan is ideal. It needs to be large enough to hold the melting marshmallows without bubbling over. Non-stick is helpful for easy cleanup.
- Silicone Spatula: This is your best friend. You need a sturdy spatula that can scrape the sides of the pan and fold the cereal in without breaking it. Silicone handles the heat well and doesn’t scratch your pan.
- 9×13 Inch Baking Pan: Standard size. Grease it lightly with butter or non-stick spray to prevent sticking.
- Measuring Cups and Spoons: For accuracy. Especially for the cereal. Too much cereal makes dry treats; too little makes a gooey mess.
- Parchment Paper: Line your pan with parchment paper for easy removal. This makes cutting the squares much cleaner.
If you don’t have a large saucepan, you can use a microwave-safe bowl, but you’ll need to melt the butter and marshmallows in short intervals, stirring frequently. This method gives you more control but takes a bit longer.
Preparation Method
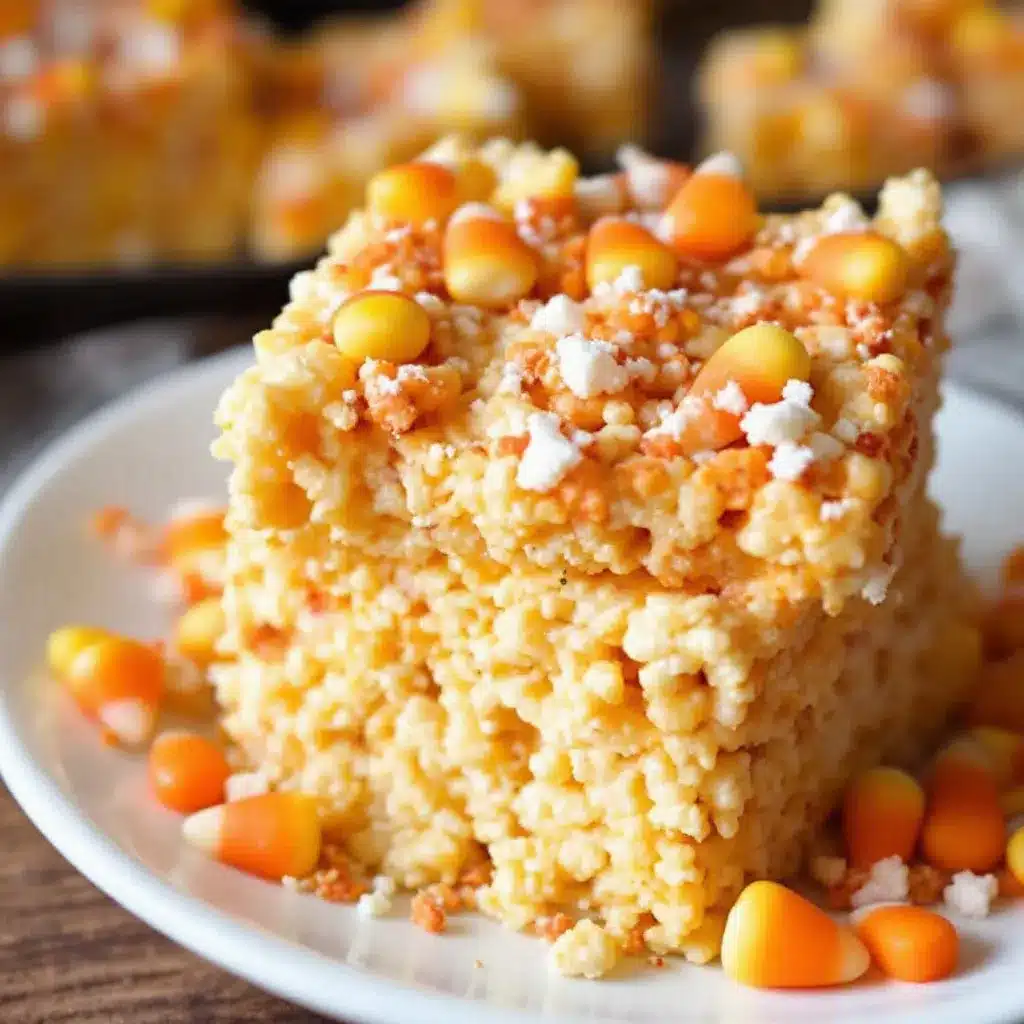
Follow these steps carefully to get the perfect texture.
- Prep the Pan: Line a 9×13 inch baking pan with parchment paper, leaving an overhang on the sides. Lightly grease the parchment with butter or non-stick spray. This ensures your treats release easily later. (Time: 2 minutes)
- Melt the Butter: In your large saucepan, melt the butter over medium-low heat. Do not let it brown. You just want it fully liquid and foamy. (Time: 2 minutes)
- Add Marshmallows: Pour in the marshmallows and stir constantly. Keep the heat low. If the heat is too high, the marshmallows will seize up or burn. You want them to melt into a smooth, glossy pool. (Time: 3-4 minutes)
- Remove from Heat: Once the marshmallows are mostly melted, remove the pan from the heat. Stir in the vanilla extract and the pinch of salt. The residual heat will finish melting any remaining marshmallow bits. (Time: 1 minute)
- Combine Cereal and Candy: Add the Rice Krispies cereal and the candy corn to the marshmallow mixture. Use your spatula to fold everything together. Be gentle. You want to coat the cereal evenly without crushing it. The candy corn will start to soften slightly from the heat of the marshmallow. (Time: 2 minutes)
- Transfer to Pan: Pour the mixture into your prepared pan. Use a lightly buttered spatula or your hands (butter them first!) to press the mixture down firmly. Pack it tight. This is the secret to clean-cut squares. If it’s too loose, it will crumble. (Time: 2 minutes)
- Cool and Set: Let the pan sit at room temperature for at least 30 minutes. Do not rush this step. The treats need to set completely before you cut them. (Time: 30 minutes)
- Cut and Serve: Use a sharp knife to cut the treats into squares. Clean the blade between cuts for neat edges. Enjoy immediately or store in an airtight container. (Time: 5 minutes)
Cooking Tips & Techniques
Getting the texture right is all about heat management. The most common mistake people make is using too high heat when melting the marshmallows. This causes the sugar to crystallize, resulting in grainy, hard treats instead of chewy, soft ones. Keep that burner on low and stir, stir, stir.
Another tip is to work quickly once you remove the pan from the heat. The marshmallow mixture starts to cool and thicken within minutes. If you wait too long to add the cereal, it will be nearly impossible to mix without breaking the cereal pieces. Have your cereal measured and ready next to the stove.
If you find the mixture is too sticky to handle, butter your hands thoroughly. A thin layer of butter prevents the goo from sticking to your skin. This also helps you press the mixture into the pan more evenly.
Don’t overmix the cereal. Once it’s coated, stop folding. Overmixing can crush the cereal, leading to a dense, gummy texture rather than a light, crispy one.
Timing is everything. If you cut the treats while they are still warm, they will be messy and uneven. Patience is the most important ingredient here. Let them cool completely for clean, professional-looking squares.
Variations & Adaptations
This recipe is a great base for customization. Here are a few ways to tweak it:
- Chocolate Drizzle: Melt some white chocolate or milk chocolate and drizzle it over the top of the cooled treats. This adds a nice contrast and makes them look fancy.
- Mini M&Ms: Add a handful of mini M&Ms along with the candy corn for extra color and chocolate flavor. This works well for Halloween themes.
- Gluten-Free: Use certified gluten-free rice cereal. Most major brands offer this option. The rest of the ingredients are naturally gluten-free, so just double-check your labels.
- Dairy-Free: Swap the butter for a dairy-free alternative and use vegan marshmallows. There are several brands that make great vegan marshmallows that melt similarly to dairy-based ones.
- Pumpkin Spice: Add a teaspoon of pumpkin pie spice to the melted marshmallow mixture for a seasonal twist. This pairs well with the orange candy corn.
I once tried adding crushed pretzels to this mix. It was a hit with my family who loved the sweet-and-salty combination. It added a nice crunch and broke up the sweetness of the candy.
Serving & Storage Suggestions
These treats are best served at room temperature. They don’t need to be warmed up, and chilling them can make the marshmallow too hard.
For storage, keep them in an airtight container at room temperature. They will stay fresh for up to a week. If you live in a humid climate, add a paper towel to the container to absorb excess moisture.
They can also be frozen. Layer the treats between parchment paper in a freezer-safe container. They will last for up to three months. Thaw them at room temperature before serving.
These treats go well with a cold glass of milk or a hot cup of coffee. They are also great for packing in lunchboxes or taking to picnics.
The flavors develop over time, becoming slightly more cohesive as the marshmallow sets. However, they are best enjoyed fresh, while the cereal is still crisp.
Nutritional Information & Benefits
These treats are a high-carb, high-sugar snack. They are not a health food, but they are a fun indulgence.
Each serving (one square) contains approximately:
- Calories: 150
- Carbohydrates: 25g
- Sugar: 18g
- Fat: 5g
- Protein: 2g
They are naturally gluten-free if you use gluten-free cereal. They do contain dairy.
While they aren’t packed with nutrients, they provide quick energy. They are best enjoyed in moderation as part of a balanced diet.
Conclusion
Crispy Candy Corn Rice Krispie Treats are a simple, fun, and delicious way to celebrate the fall season. They require minimal effort but deliver maximum satisfaction.
I love this recipe because it turns something often overlooked into something special. It’s a reminder that good food doesn’t always have to be complicated.
I encourage you to try this recipe and customize it to your liking. Add your favorite candies or drizzle with chocolate.
Please share your results in the comments below. I love seeing how you adapt this recipe.
Enjoy the crunch, the chew, and the nostalgia.
FAQs
Can I use mini marshmallows instead of large ones?
Yes, you can use mini marshmallows. They melt faster, so keep an eye on the heat. You will need about 10 ounces by weight, which is roughly 4-5 cups of mini marshmallows.
Why are my treats hard?
This usually happens if the marshmallows are overheated or if you press the mixture too firmly into the pan. Make sure to melt on low heat and press gently but firmly.
Can I make these ahead of time?
Yes, you can make them up to a week in advance. Store them in an airtight container at room temperature.
Do I have to use candy corn?
No, you can use any small candy you like. Mini M&Ms, chopped candy bars, or even sprinkles work well.
How do I cut the treats cleanly?
Use a sharp knife and wipe the blade between cuts. For extra clean lines, you can dip the knife in hot water and dry it before each cut.
Pin This Recipe!
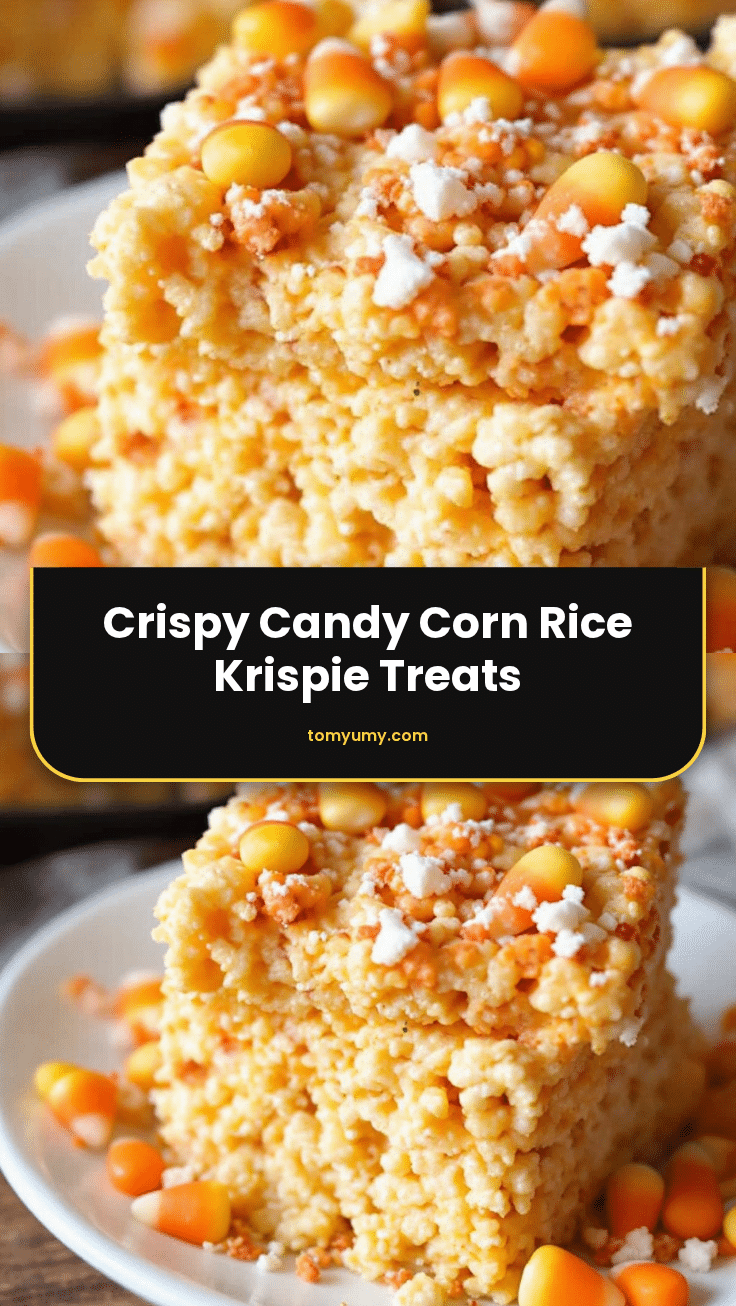
Crispy Candy Corn Rice Krispie Treats: Easy Fall Party Snack
A quick, no-bake fall party snack that combines crispy rice cereal with melted marshmallows and candy corn for a sweet, crunchy, and nostalgic treat.
- Prep Time: 10 minutes
- Cook Time: 5 minutes
- Total Time: 45 minutes
- Yield: 16 servings 1x
- Category: Dessert
- Cuisine: American
Ingredients
- 1/2 cup (1 stick or 113 grams) unsalted butter
- 10 ounces (about 3 cups) marshmallows
- 6 cups (approx. 170 grams) Rice Krispies cereal
- 1 cup (approx. 100 grams) candy corn
- 1 teaspoon vanilla extract
- A pinch of salt
Instructions
- Line a 9×13 inch baking pan with parchment paper, leaving an overhang on the sides, and lightly grease with butter or non-stick spray.
- In a large saucepan, melt the butter over medium-low heat until fully liquid and foamy, ensuring it does not brown.
- Add the marshmallows to the melted butter and stir constantly over low heat until they form a smooth, glossy pool.
- Remove the pan from the heat and stir in the vanilla extract and pinch of salt; residual heat will finish melting any remaining marshmallows.
- Add the Rice Krispies cereal and candy corn to the marshmallow mixture and gently fold until evenly coated, being careful not to crush the cereal.
- Transfer the mixture to the prepared pan and press down firmly using a buttered spatula or hands to pack it tight.
- Let the treats cool at room temperature for at least 30 minutes until completely set.
- Cut into squares using a sharp knife, wiping the blade between cuts for clean edges, and serve.
Notes
Keep heat low when melting marshmallows to prevent burning or crystallization. Work quickly once off the heat as the mixture thickens. Butter your hands if the mixture is too sticky to press into the pan. For clean cuts, use a sharp knife and wipe it between slices. Treats can be stored in an airtight container at room temperature for up to a week or frozen for up to three months.
Nutrition
- Serving Size: 1 square
- Calories: 150
- Sugar: 18
- Sodium: 50
- Fat: 5
- Saturated Fat: 3
- Carbohydrates: 25
- Protein: 2
Keywords: candy corn, rice krispie treats, fall snack, halloween dessert, no bake, easy recipe, party snack