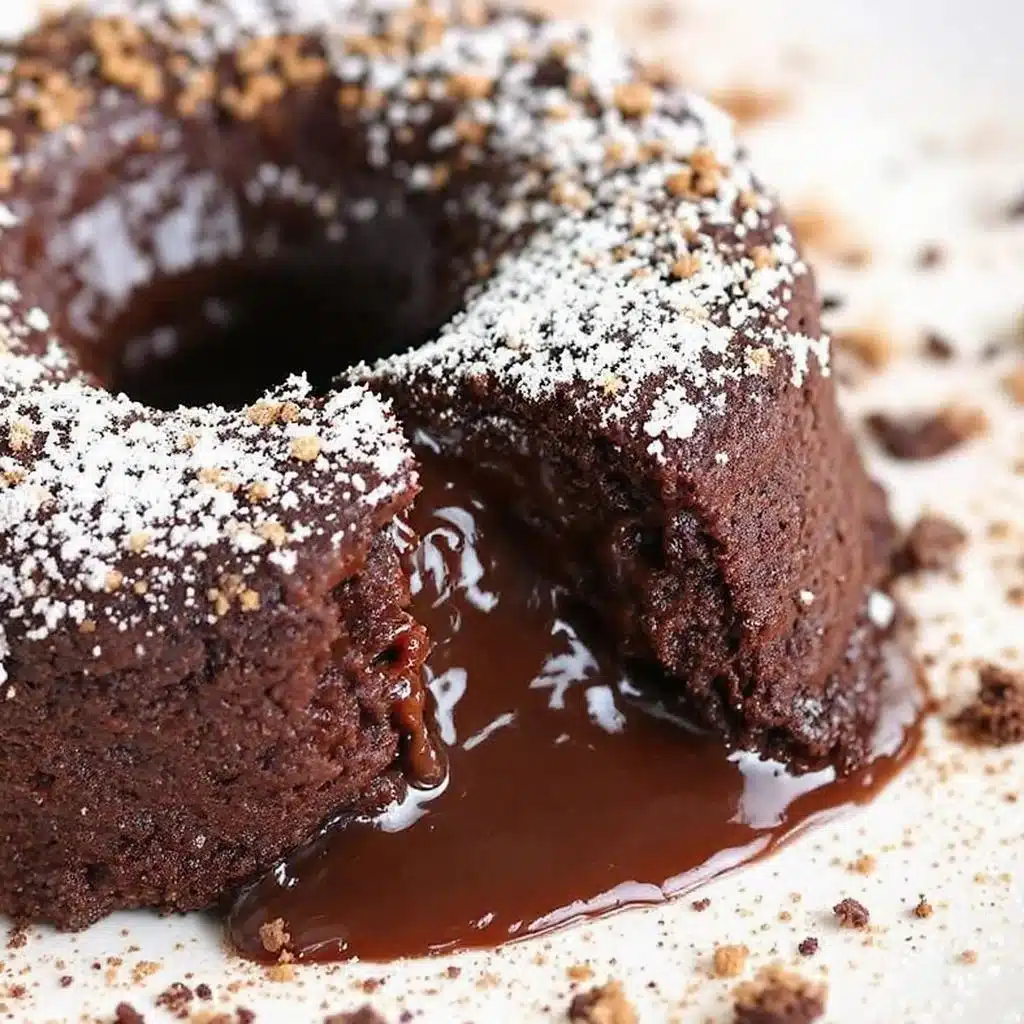
I had been looking for a dessert that actually felt indulgent without requiring a whole bakery of equipment or three days of prep time. For a while, I just accepted that chocolate lava cakes were going to stay in the realm of fancy restaurant menus and intimidating soufflé dishes. You know how it is. You see them on menus, all glossy and dark, with that perfect runny center, and you think, “I could never do that at home.” It feels like one of those culinary magic tricks that only chefs with steady hands and expensive ovens can pull off.
But honestly, the craving didn’t go away. I wanted that rich, bitter-sweet chocolate hit that melts on your tongue, paired with a warm, soft cake exterior. I didn’t want a dry brownie or a solid pudding. I wanted the surprise. The risk. The slight anxiety of pulling it out of the oven at the exact right second. That tension is part of the fun, really.
So I stopped waiting for the perfect moment and just started experimenting. I tested ratios. I burned a few ramekins. I ate too much raw batter (don’t judge me). And eventually, I found the sweet spot. It’s not complicated. It’s just about understanding how chocolate and butter behave when they get hot. This Best Molten Chocolate Lava Cakes for Two recipe is the result of that persistence. It’s reliable. It’s quick. And it tastes like you actually tried.
Why You’ll Love This Recipe
Let’s be real for a second. There is a specific kind of joy in making something that looks incredibly difficult but is actually quite simple. This recipe hits that sweet spot every single time. I’ve tested this version dozens of times, tweaking the chocolate-to-butter ratio until it was just right. The result is a cake that is deeply chocolatey without being heavy, and gooey without being raw batter. It’s the kind of dessert that makes you close your eyes after the first bite because the flavor is just that satisfying.
Here is why this version stands out from the crowd:
- Quick & Easy: You can have this on the table in under 20 minutes. It’s perfect for those weeknights when you want something special but don’t have hours to spare. If you’re looking for other fast treats, you might also enjoy these no-bake chocolate peanut butter cup cheesecake bites, though nothing beats the warmth of a fresh bake.
- Simple Ingredients: You likely already have everything in your pantry. High-quality chocolate, butter, eggs, sugar, and a little flour. No fancy gadgets or obscure ingredients required.
- Perfect for Intimacy: Designed specifically for two people, this recipe eliminates waste. It’s ideal for date nights, quiet evenings, or just treating yourself without guilt over leftovers.
- Crowd-Pleaser: Even picky eaters love this. The contrast between the firm cake and the liquid center is universally appealing. It feels like a restaurant experience at home.
- Unbelievably Delicious: The texture is next-level comfort food. It’s rich, decadent, and deeply satisfying. It reminds me a bit of the gooey texture in a caramel apple pie bomb, but in a pure chocolate form that is just as addictive.
What makes this recipe different is the precision. Many lava cake recipes fail because the center stays too solid or the outside burns before the inside melts. This version uses a specific cooling step that helps set the structure just enough to hold the liquid center. It’s a small trick, but it makes all the difference. It’s not just a chocolate cake; it’s an experience.
What Ingredients You Will Need
This recipe relies on the quality of a few key components. Because there are so few ingredients, each one plays a massive role in the final flavor and texture. You don’t need fancy, hard-to-find items, but you do need good basics. I recommend using a high-quality semi-sweet chocolate bar rather than chips, as it melts more smoothly and has a cleaner chocolate flavor. Chips often contain stabilizers that can make the lava center grainy instead of silky.
- Semi-Sweet Chocolate: Use about 4 ounces (113 grams) of good quality chocolate. Chop it roughly before melting. Brands like Ghirardelli or Lindt work well because they have a high cocoa butter content, which gives that luxurious mouthfeel. Avoid baking squares with added waxes.
- Unsalted Butter: You’ll need half a cup (113 grams). Unsalted allows you to control the saltiness of the final cake. Make sure it’s softened but not melted before you mix it with the eggs. This helps incorporate air into the batter, which gives the cake its slight rise.
- Eggs: Two large eggs are crucial. They provide the structure and the richness. Room temperature eggs blend more easily with the butter and sugar, creating a smoother emulsion. This is important for that uniform texture.
- Granulated Sugar: Half a cup (100 grams) of white sugar. Don’t substitute with brown sugar unless you want a molasses flavor, which can overpower the pure chocolate taste. White sugar keeps the flavor clean and bright.
- All-Purpose Flour: Just two tablespoons (15 grams). This is the binder. Too much flour, and you’ll get a dense brownie. Too little, and the cake might collapse. Precision matters here. Sift it to avoid lumps.
- Cocoa Powder: One tablespoon of unsweetened cocoa powder. This deepens the chocolate flavor without adding more sweetness. It adds a bit of dryness to balance the wet ingredients, helping create that gooey center.
- Salt: A quarter teaspoon of fine sea salt. Salt enhances the chocolate flavor, making it taste more like chocolate. It’s a secret weapon in baking that you shouldn’t skip.
- Vanilla Extract: One teaspoon of pure vanilla. It adds a subtle floral note that rounds out the sharp edges of the chocolate. Avoid imitation vanilla; it tastes chemical and harsh.
If you want to get fancy, you can add a pinch of espresso powder. It won’t make the cake taste like coffee, but it will make the chocolate flavor pop. It’s a trick I learned from a pastry chef years ago. Also, consider adding a few chocolate chips on top of the batter before baking for extra gooey pockets. It’s a small variation that I personally love.
Equipment Needed
You don’t need a lot of fancy gear to make this, but having the right tools makes the process smoother. The most important item is your ramekins. You’ll need two 6-ounce ramekins. Ceramic or porcelain ramekins are best because they distribute heat evenly. Glass ramekins work too, but they might take slightly longer to bake, so keep an eye on them. Avoid metal ramekins if you can, as they conduct heat too quickly and can burn the edges.
You’ll also need a microwave-safe bowl or a small saucepan for melting the chocolate and butter. A double boiler is ideal if you have one, as it prevents scorching, but a microwave works fine if you heat in short bursts. A whisk is essential for blending the eggs and sugar until they are pale and fluffy. This step incorporates air, which helps the cake rise. A rubber spatula is needed for folding in the flour gently. You don’t want to deflate the batter.
For greasing the ramekins, butter and cocoa powder are your best friends. Butter alone can slide off when the cake expands. Dusting with cocoa powder ensures the cake releases easily and adds a nice dusting of chocolate to the top. A small offset spatula can help spread the batter evenly into the ramekins. If you don’t have one, a regular spoon works, but it’s harder to get the edges clean. Finally, a cooling rack is useful if you want to let the ramekins sit for a minute before serving, though it’s not strictly necessary.
Preparation Method
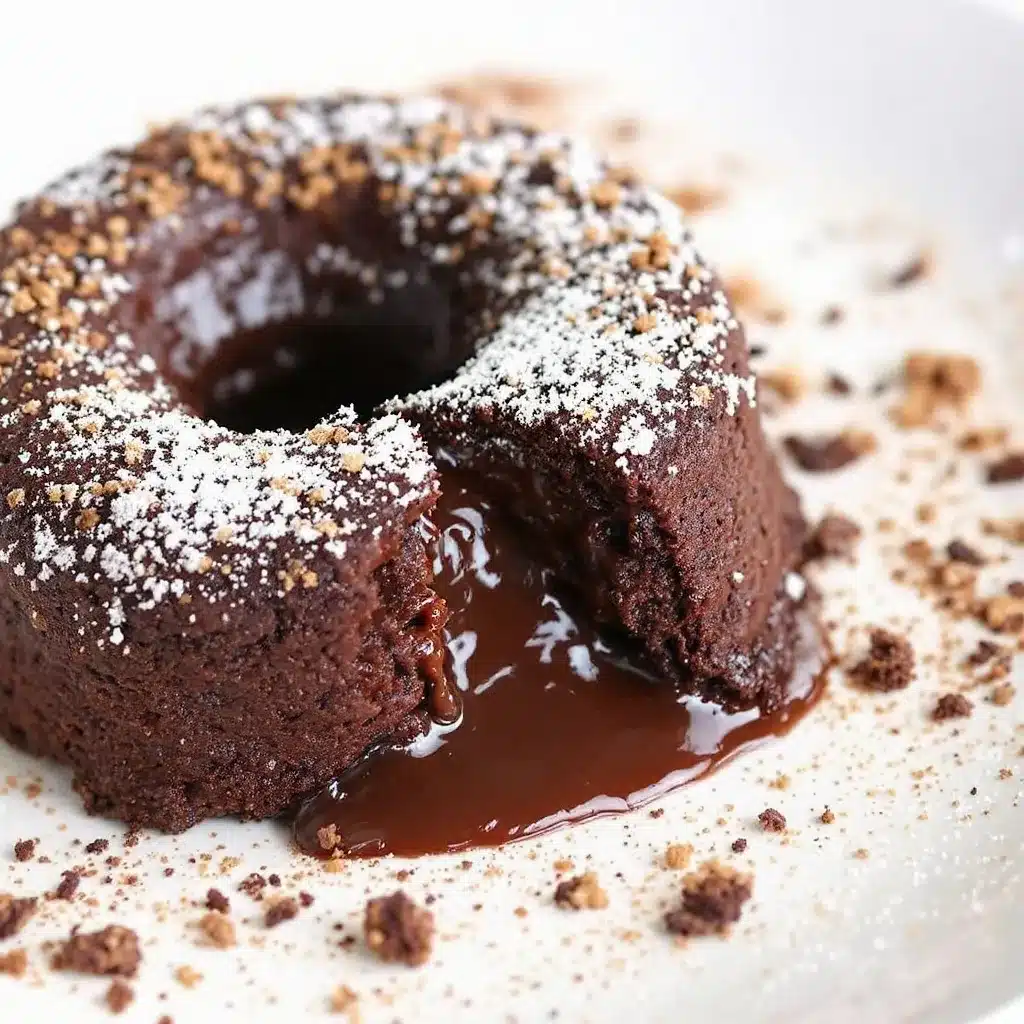
Making these cakes is straightforward, but timing is everything. Here is how to do it step by step.
- Prep the Ramekins (2 minutes): Start by buttering the inside of your two 6-ounce ramekins thoroughly. Use your fingers or a pastry brush to coat every crevice. Then, add a tablespoon of cocoa powder to each. Tap and rotate the ramekins to coat the buttered sides evenly. Tap out any excess powder. This prevents sticking and adds flavor. Warning: If you skip this step, the cakes will stick, and you’ll have a mess to clean up.
- Melt Chocolate and Butter (2 minutes): Chop your 4 ounces of semi-sweet chocolate into small pieces. Place them in a microwave-safe bowl with the half cup of unsalted butter. Microwave on high for 30 seconds. Stir. If not fully melted, microwave in 15-second bursts, stirring between each, until smooth. The mixture should be glossy and fluid. Let it cool slightly for a minute so it doesn’t cook the eggs when you add them. Sensory cue: It should smell rich and chocolatey.
- Whisk Eggs and Sugar (3 minutes): In a separate medium bowl, crack the two large eggs. Add the half cup of granulated sugar. Whisk vigorously for about 2-3 minutes. You want the mixture to become pale yellow and slightly thickened. This is called the ribbon stage. It takes a bit of arm effort, but it’s crucial for the cake’s texture. The eggs should hold a trail for a second when you lift the whisk. Tip: Don’t rush this step. Proper aeration makes the cake fluffy.
- Combine Wet Ingredients (1 minute): Pour the melted chocolate and butter mixture into the egg and sugar mixture. Whisk gently but thoroughly until combined. The batter should be dark, glossy, and smooth. Scrape down the sides of the bowl to ensure everything is mixed. Sensory cue: The batter should look like thick chocolate syrup.
- Add Dry Ingredients (1 minute): Sift the two tablespoons of all-purpose flour, the one tablespoon of cocoa powder, and the quarter teaspoon of salt into the bowl. Use a rubber spatula to gently fold these into the wet mixture. Fold until just combined. Do not overmix. Overmixing develops gluten, which makes the cake tough. Stop as soon as you see no more streaks of flour. Warning: Overmixing leads to a dense, bread-like texture instead of a tender cake.
- Fill the Ramekins (2 minutes): Divide the batter evenly between the two prepared ramekins. Use the spatula to smooth the tops. If you want, press a few chocolate chips into the center of each for extra goo. Tip: Fill them about 3/4 full to allow room for rising.
- Bake (12-14 minutes): Preheat your oven to 425°F (220°C). Place the ramekins on a baking sheet for stability. Bake for 12 to 14 minutes. This is the critical step. The edges should be firm and set, but the center should still look soft and slightly jiggly. If the center looks dry or cracked, you’ve baked too long. If it looks completely liquid, you need 1-2 more minutes. Sensory cue: The kitchen will smell amazing. The tops will have a thin, crinkly crust.
- Cool and Serve (1-2 minutes): Remove the ramekins from the oven. Let them sit for exactly 1 minute. This allows the structure to set slightly so they don’t collapse when inverted. Run a knife around the edge if needed. Place a small dessert plate over each ramekin. Using oven mitts, hold the plate and ramekin together and flip them over quickly. Lift the ramekin off. The cake should slide out with a perfect molten center exposed. Serve immediately.
Cooking Tips & Techniques
There are a few tricks I’ve picked up along the way to ensure your lava cakes turn out perfectly every time. First, temperature control is key. Your oven needs to be fully preheated. If you put the cakes in a cold oven, they will rise too slowly and turn into dense puddings. Use an oven thermometer if you suspect your oven is inaccurate; many home ovens run hot or cold.
Another common mistake is overmixing the batter after adding the flour. Remember, you’re making a cake, not bread. Gentle folds are your friend. Also, don’t skip the resting time after baking. That one minute of cooling is what saves the cake from collapsing. If you invert it immediately, the heat hasn’t had time to set the structure, and you’ll end up with a chocolate soup on your plate. It’s delicious soup, but not what you aimed for.
If you’re baking these for a dinner party, you can prep the batter ahead of time. Fill the ramekins, cover them tightly with plastic wrap, and refrigerate for up to 24 hours. When you’re ready to serve, take them out and let them sit at room temperature for 10-15 minutes before baking. You might need to add 1-2 minutes to the baking time since they’ll be cold. This is a lifesaver for hosting. I’ve done this many times, and it works perfectly.
Finally, trust your eyes, not just the clock. Ovens vary. The first time you make this, start checking at 11 minutes. Look for the set edges and the jiggly center. That visual cue is more reliable than the timer. Once you get the hang of it, you’ll know exactly when to pull them out. It becomes intuitive.
Variations & Adaptations
While the classic chocolate version is my favorite, there are fun ways to twist this recipe. One of my personal favorites is adding a layer of peanut butter in the center. Before pouring the batter, place a teaspoon of peanut butter in the middle of each ramekin, then cover with batter. It creates a salty-sweet contrast that is incredible. It reminds me of the flavor profile in brown butter salted caramel chocolate chip cookies, but in a molten form.
For a lighter option, you can swap half the chocolate for unsweetened cocoa powder and reduce the butter slightly, though the texture will be less gooey. If you want a fruity twist, add a few fresh raspberries or blackberries into the batter before baking. The berries burst and create pockets of tartness that cut through the richness of the chocolate. It’s a refreshing change.
You can also experiment with different types of chocolate. Dark chocolate (70% or higher) will give a more intense, bitter flavor. Milk chocolate will be sweeter and creamier. White chocolate doesn’t work well on its own because it lacks cocoa solids, but you can mix it with dark chocolate for a unique taste. For a nutty flavor, stir in some toasted hazelnuts or pecans. Just be careful not to add too many solids, as they can disrupt the molten center.
Another variation is adding a splash of liqueur. Grand Marnier or amaretto pairs beautifully with chocolate. Add a tablespoon to the batter for an adult-only treat. It adds depth and complexity that simple sugar can’t achieve. These variations allow you to keep the recipe fresh and exciting, even if you make it often.
Serving & Storage Suggestions
Serving these cakes is all about presentation. The contrast of the dark chocolate cake against a white plate is visually striking. Dust the top with powdered sugar or cocoa powder right before serving for a professional look. A dollop of vanilla bean ice cream or a scoop of whipped cream is classic. The cold cream against the hot cake is the ultimate comfort food experience. I also like to garnish with a few fresh berries or mint leaves for a pop of color.
If you have leftovers, which is rare, you can store them in the refrigerator for up to 2 days. Reheat them in the microwave for 10-15 seconds. Be careful not to overheat, or the center will become solid. They are best eaten fresh, but reheating works in a pinch. You can also freeze the unbaked batter in the ramekins. Wrap them tightly in plastic and foil. Bake from frozen, adding 2-3 minutes to the cooking time. This is great for meal prepping.
Pair these cakes with a strong cup of coffee or a glass of red wine. The bitterness of coffee complements the chocolate, while the tannins in red wine cut through the richness. Avoid sweet beverages, as they will make the dessert too heavy. A dry red like Cabernet Sauvignon or a bold Merlot works well. It turns a simple dessert into a sophisticated evening treat.
Nutritional Information & Benefits
While these cakes are definitely a treat, they are made with relatively simple ingredients. Each serving (one cake) contains approximately 450-500 calories, depending on the chocolate and butter used. The primary source of calories is fat from the chocolate and butter, along with carbohydrates from the sugar. They are not low-carb or gluten-free unless you make specific substitutions, such as using almond flour instead of all-purpose flour.
Dark chocolate, in particular, has some health benefits. It is rich in antioxidants called flavonoids, which can help improve heart health and brain function. It also contains small amounts of iron and magnesium. Of course, the sugar and saturated fat offset some of these benefits, so moderation is key. I view this as an occasional indulgence rather than a daily staple. Enjoy it as a special reward, not a routine snack. The satisfaction it provides is worth the calories.
Conclusion
Making the Best Molten Chocolate Lava Cakes for Two is a small victory in the kitchen. It’s a recipe that feels luxurious but is accessible to anyone. The process is meditative, and the result is pure joy. I hope you try this recipe and find the same quiet satisfaction I did. It’s the kind of dessert that reminds you why you love cooking. It’s simple, it’s delicious, and it’s perfect for sharing—or not. So go ahead, melt some chocolate, and treat yourself. You deserve it. And if you make it, let me know how it turned out in the comments below. I love hearing about your baking adventures.
FAQs
Can I make lava cakes ahead of time?
Yes, you can prepare the batter and fill the ramekins up to 24 hours in advance. Cover them tightly with plastic wrap and refrigerate. When ready to bake, let them sit at room temperature for 10-15 minutes and add 1-2 minutes to the baking time.
Why did my lava cakes collapse?
This usually happens if you invert them immediately after baking. Let them rest for exactly one minute to allow the structure to set. Also, avoid overmixing the batter, which can weaken the cake’s structure.
Can I use milk chocolate instead of semi-sweet?
You can, but the cakes will be sweeter and the center may be less gooey. Milk chocolate has more milk solids and sugar, which can affect the texture. Semi-sweet or dark chocolate is recommended for the best molten effect.
How do I know when they are done baking?
The edges should be firm and set, but the center should still look soft and slightly jiggly. If the center looks dry or cracked, they are overbaked. Start checking at 12 minutes.
What can I serve with lava cakes?
Classic pairings include vanilla ice cream, whipped cream, fresh berries, or a dusting of powdered sugar. A strong coffee or dry red wine also complements the rich chocolate flavor beautifully.
Pin This Recipe!
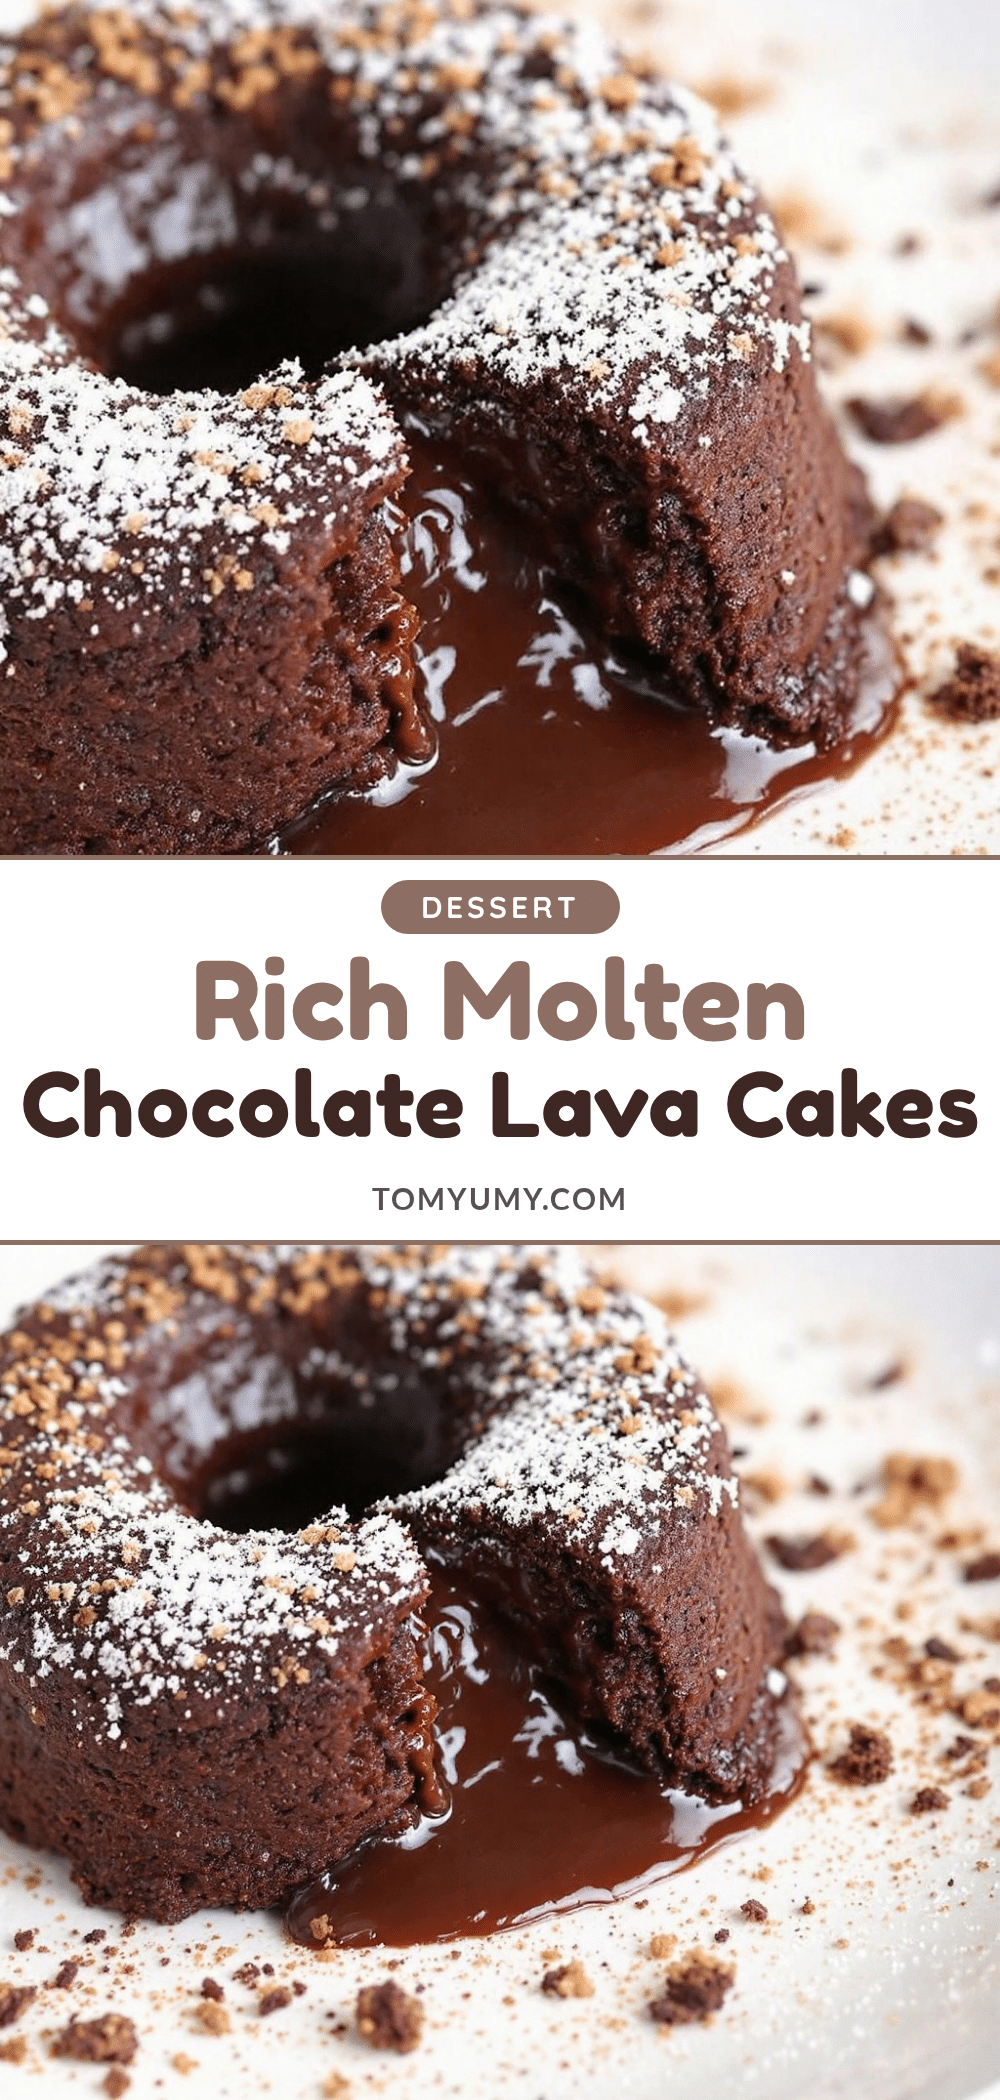
Best Molten Chocolate Lava Cakes for Two: Easy Dessert
Rich, indulgent chocolate lava cakes with a gooey molten center and soft cake exterior. This easy recipe serves two and takes under 20 minutes to prepare and bake.
- Prep Time: 10 minutes
- Cook Time: 12-14 minutes
- Total Time: 20 minutes
- Yield: 2 servings 1x
- Category: Dessert
- Cuisine: American
Ingredients
- 4 ounces (113 grams) high-quality semi-sweet chocolate, chopped
- 1/2 cup (113 grams) unsalted butter, softened
- 2 large eggs, room temperature
- 1/2 cup (100 grams) granulated sugar
- 2 tablespoons (15 grams) all-purpose flour, sifted
- 1 tablespoon unsweetened cocoa powder
- 1/4 teaspoon fine sea salt
- 1 teaspoon pure vanilla extract
- Butter and cocoa powder for greasing ramekins
Instructions
- Preheat oven to 425°F (220°C). Thoroughly butter the inside of two 6-ounce ramekins, then dust with cocoa powder, tapping out excess.
- Chop chocolate and place in a microwave-safe bowl with butter. Microwave in 30-second bursts, stirring until smooth. Let cool slightly.
- In a separate bowl, whisk eggs and sugar vigorously for 2-3 minutes until pale and thick (ribbon stage).
- Whisk the melted chocolate and butter mixture into the egg mixture until combined.
- Sift in flour, cocoa powder, and salt. Gently fold with a spatula until just combined; do not overmix.
- Divide batter evenly between prepared ramekins, filling about 3/4 full.
- Place ramekins on a baking sheet and bake for 12-14 minutes until edges are firm but centers are soft and jiggly.
- Remove from oven and let rest for exactly 1 minute. Invert onto plates and serve immediately.
Notes
Ensure oven is fully preheated. Do not overmix the batter after adding flour to avoid a dense texture. Let cakes rest for 1 minute before inverting to prevent collapsing. Can be made ahead: fill ramekins, cover, and refrigerate up to 24 hours; add 1-2 minutes to baking time if baking from cold.
Nutrition
- Serving Size: 1 cake per serving
- Calories: 475
- Sugar: 32
- Sodium: 120
- Fat: 35
- Saturated Fat: 21
- Carbohydrates: 38
- Fiber: 2
- Protein: 6
Keywords: molten chocolate lava cake, chocolate dessert, easy baking, date night dessert, chocolate lava cake for two, rich chocolate cake